

During my time as a college student, I may have developed a slight addiction to Pokémon cards. Collecting these cards was something I did when I was younger. Coming to college led me to start collecting again. After realizing I have no easy or organized way of storing my Pokémon cards, I decided to pursue making a box to store more of my ever growing collection.
Most products that exist to store Pokémon cards aren’t exactly what I am looking for. For example, Pokémon’s own storage boxes are thin cardboard, as shown in the image below. While the box does work, it wears down so easily over time and is not as sturdy. With the amount of money I have spent on these cards, I want something a little more durable, and something really nice to protect the cards. With this goal in mind and the idea behind upcycling, I decided to design and build a card deck box similar to the image below.
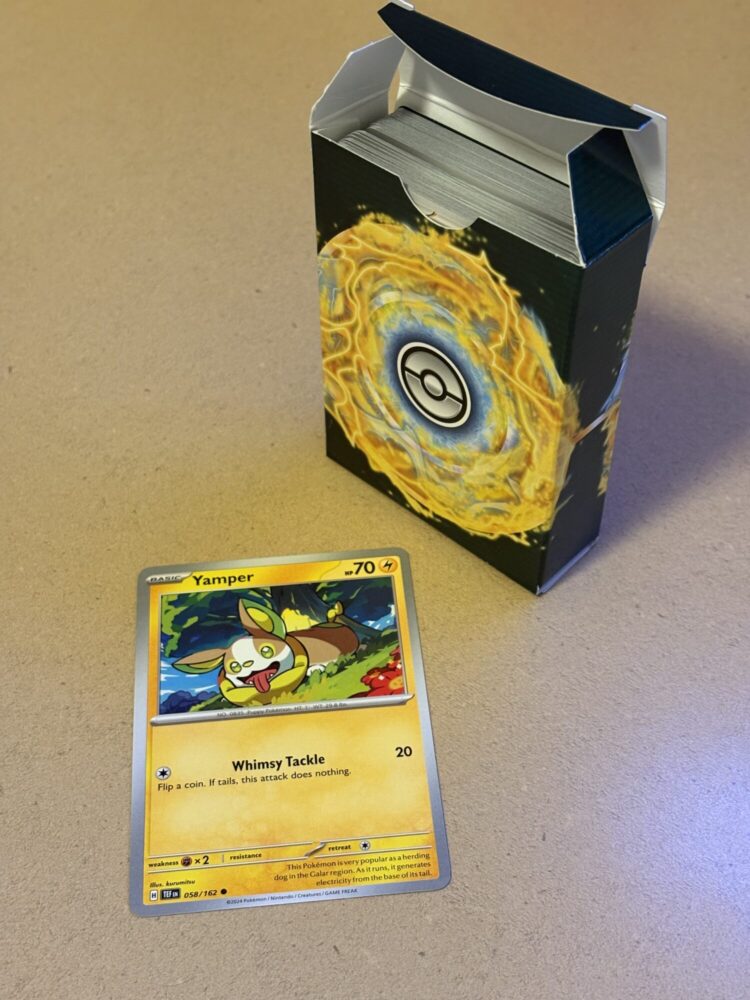
Pokémon TCG Deck Box, Electric themed
While a deck box is what I wanted to pursue, the aesthetic is where it became a lot more interesting. My initial findings led me to two different stylings and aesthetics that I took inspiration from. The first source of inspiration was a playing card deck box that is styled behind Marvel’s Black Panther. This deck box comes from Theory11, a premium/luxury playing card designer. Most of their designs feature very ornate patterns, mixed with rich colors. The sharp geometric shapes along with the gold and metallic purple accents really capture the opulent aesthetic I wanted to achieve. Additionally, the subtle changed between the texture of the matte and gloss blacks elevate the sophistication of these cards. The aesthetic behind this deck box follows the tribal, futuristic aesthetic from the Black Panther character in the 2018 film. The sharp geometry and eloquent coloring design elements give this box the premium, or opulent aesthetic.

Black Panther Playing Cards By Theory11
The second source of inspiration for my design was the Special Set 01 card sleeve design from the Pokémon TCG Pocket mobile game. This design really captures the Pokémon aesthetic itself, while also being a little more deluxe. The design focuses on geometric shapes with a hint of Pokémon itself. The coloring matches that of the holographic Pokémon cards. When I first saw this design, I immediately searched the Pokémon website itself to see if they sold it. Sadly, they do not. Even if Pokémon did sell this as a design, I would not be happy to have a cardstock box.

Pokémon TCG Pocket Special Set 01 Card Sleeve
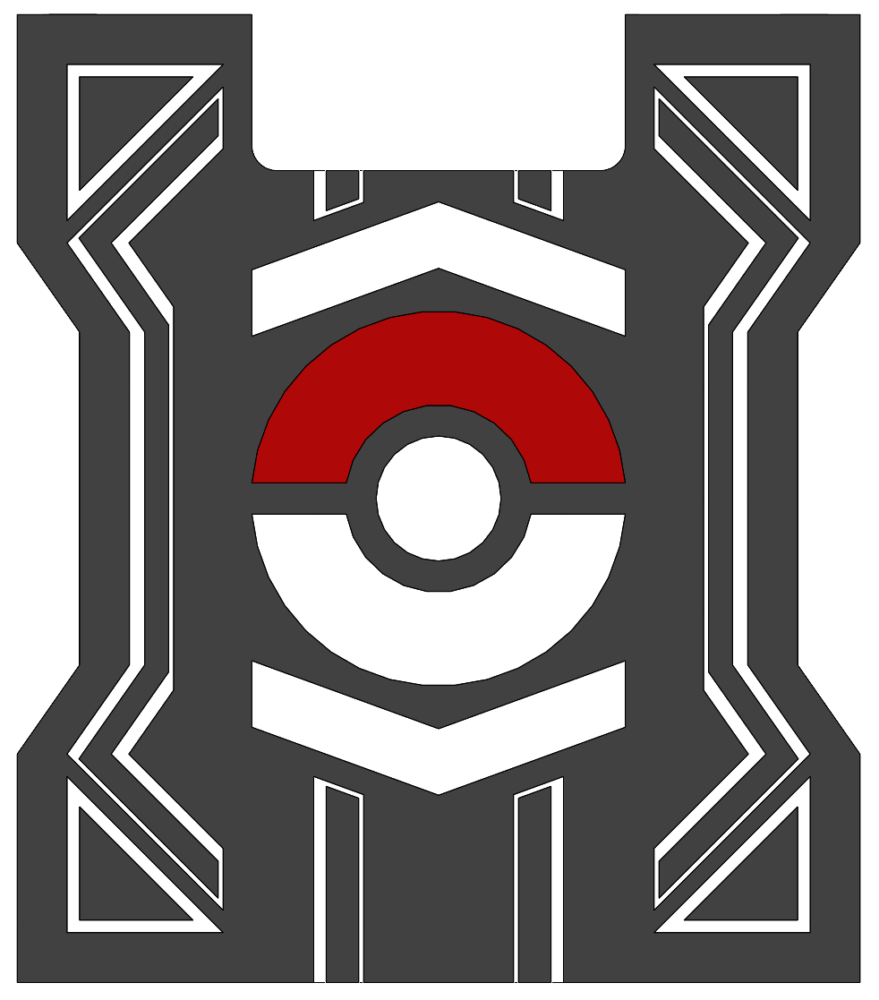
Taking the design elements I liked from both sources led me to my vision. I wanted the sharper geometric shapes from the Black Panther box, but mixed with the modern adventure aesthetic that Pokémon has. For coloring, getting material that can be fully black as the background would have the same aesthetic feeling from the Black Panther box. The center Poke ball is a must, with similar coloring there. Instead of holographic accent coloring like the Special Set 01, I decided to go with more of a pearly white. Messing around with the design elements led me to the initial design in the sketch below.
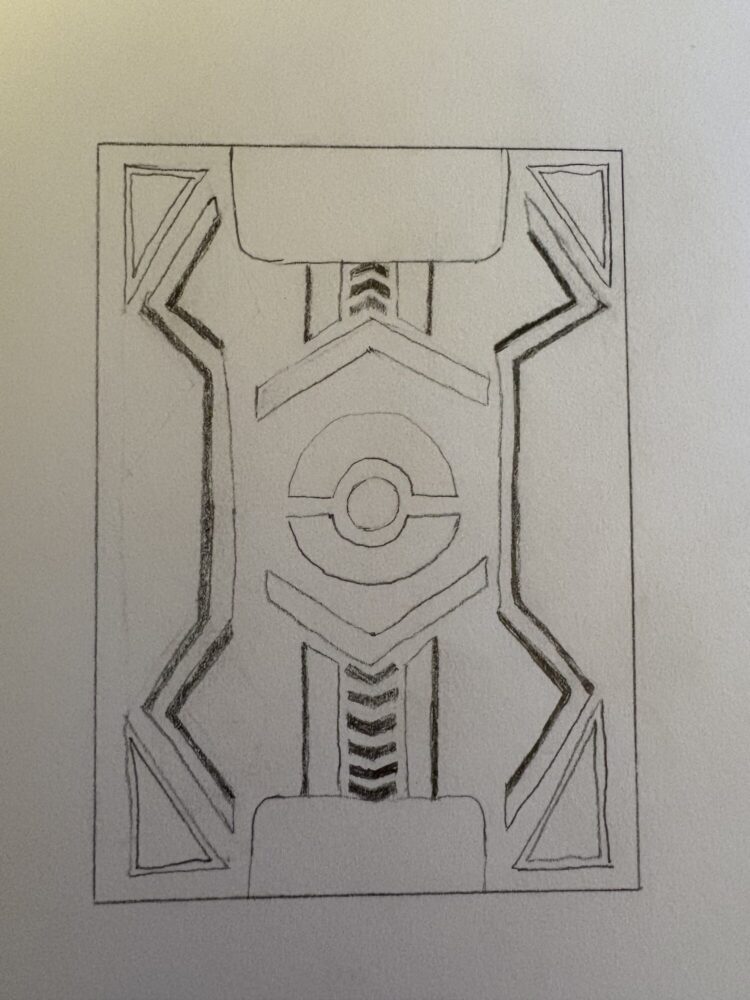
Initial sketch of box design
Once I had an initial idea of what to do, I had to figure out how to actually make this box. While I originally was considering using wood and laser cutting to make the box, I remembered that I had scrap acrylic from a previous project collecting dust. While the sheet wasn’t completely new with some parts already cut out from it, there was still useable material on it. The limited amount of material only allowed me to have a small box. The acrylic was a 1/8 black sheet, which was perfect for the aesthetic I was trying to achieve. I cut off the unusable parts and had a clean sheet ready to be laser cut.
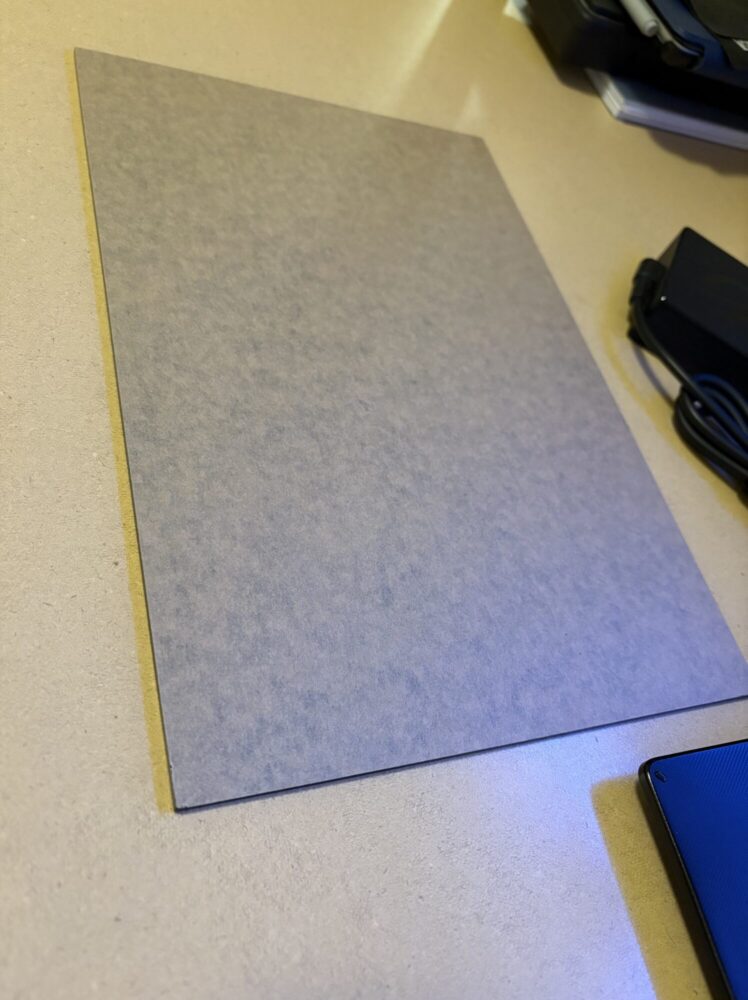 Clean sheet of 1/8″ black acrylic ready to be laser cut
The next two materials I had to figure out was the design and the lid mechanism. For the design, I had originally thought about using vinyl stickers and cutting out the patterns. While this would be the most ideal case, finding scrap vinyl was a challenge. Ultimately, I decided to engrave the surface of the acrylic with the design pattern, and fill in the pattern with some paint. The lid was another challenge. Most lids for small deck boxes like these are hinged. Incorporating a hinged lid and keeping the same simple footprint would have been difficult. That is when the mechanism used to hold a hinged lid in place came to mind. I could use magnets to hold the lid in place, and just remove it entirely whenever I wanted to access the box. So, with the help of some donated small bar magnets, I was ready to come up with a design.
The first step was creating the overall box. This proved trivial, and allowed me to take some liberties with the overall shape to better match the sketched design. The next step was adding the actual design to the side of the box. While some of the sketched pattern did easily translate to CAD, some shapes had to be thickened a little to be more feasible in the final design. Other aspects of the sketch also proved to be too much for the Pokémon side of the aesthetic and were omitted.
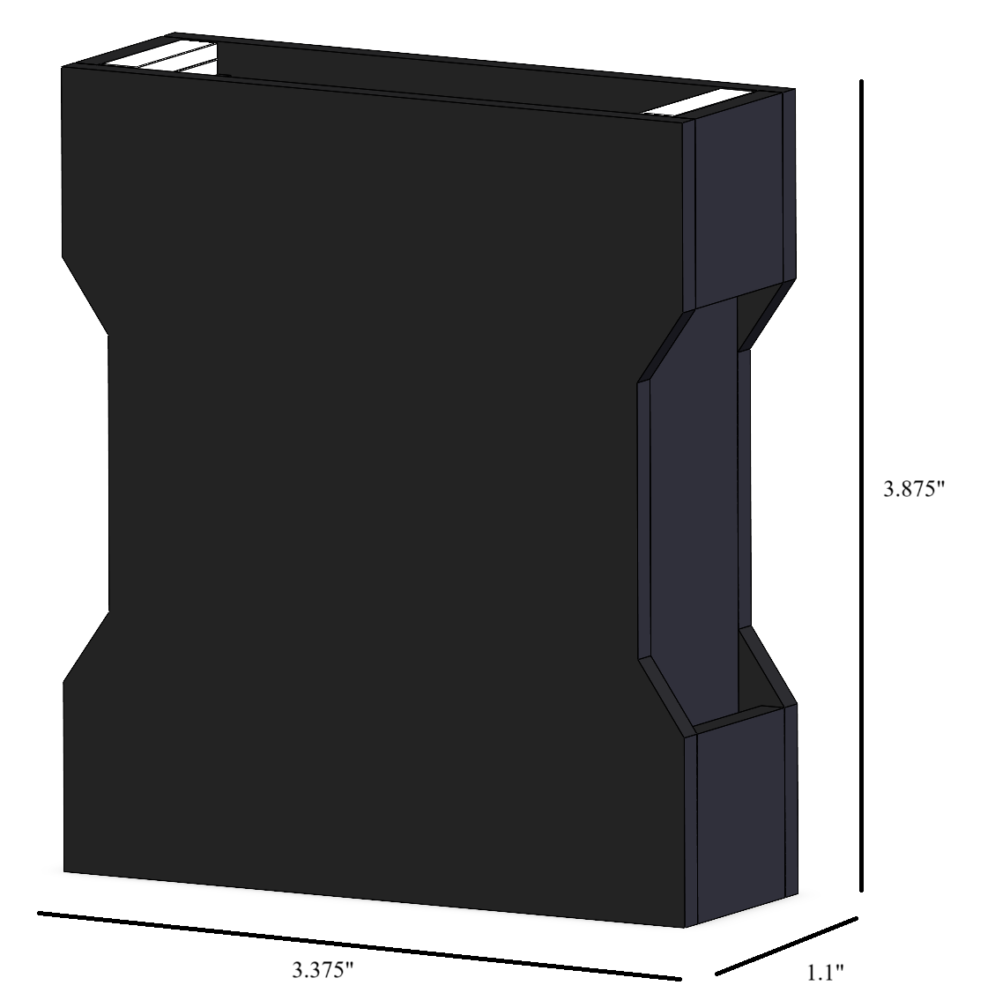
Barebones box with dimensions
Final design on side of box
The final challenge in design came with the integration of the lid. With the small magnets I had, I removed some material on the inside for the magnets to fit. This then lets the lid fit flush on the top of the box. I also added some cutouts to the box itself for any cards on the inside to be easily removable. Consequently, I added a cover for the cutouts on the lid to fully protect any card on the inside.
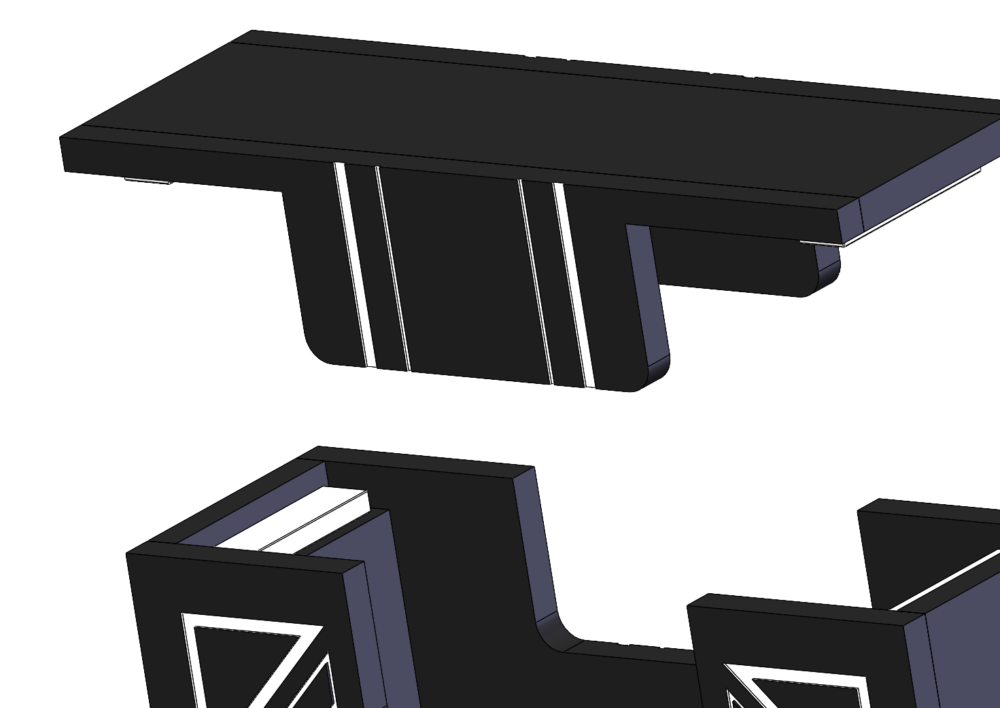
Lid implemented onto the box
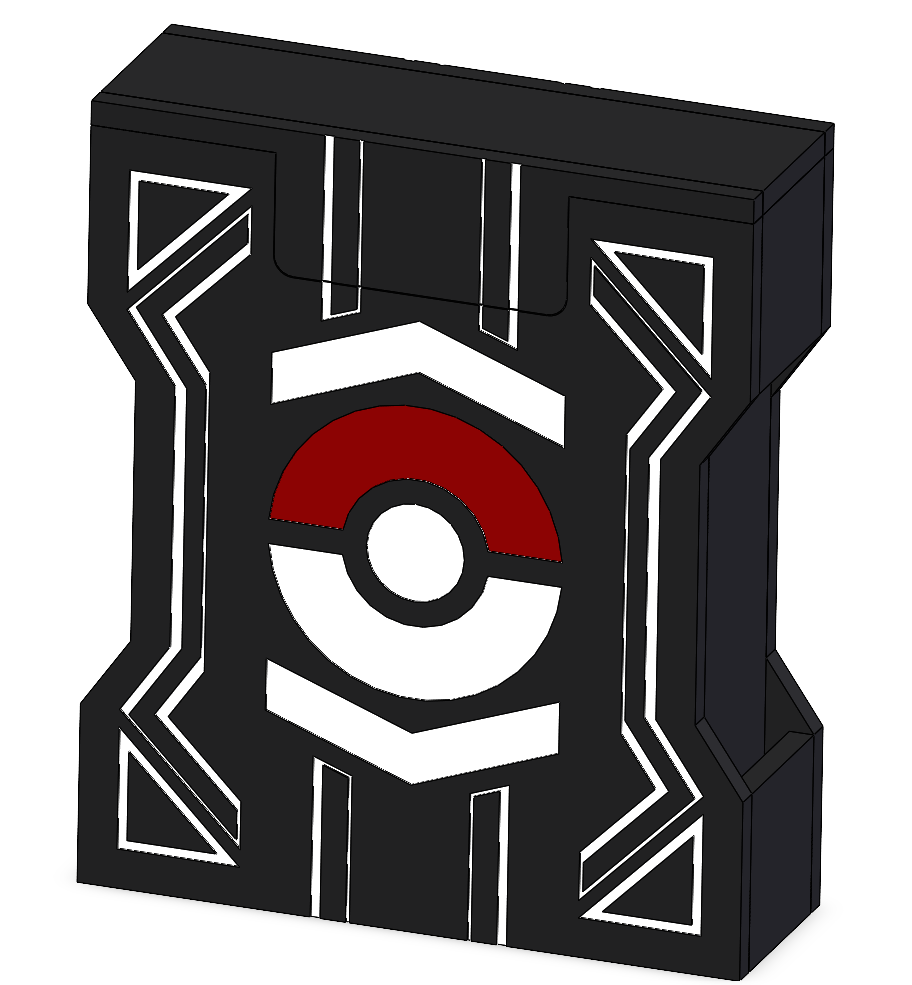
Final version of box in CAD
Having the full box all ready to go, I exported each piece into a .dxf file for laser cutting. I arranged all the components in the laser cutter software, and used the recommended settings of 6% speed, 100% power, and 100% frequency to cut the acrylic. I also engraved the decorative design pattern while I was using the laser cutter.
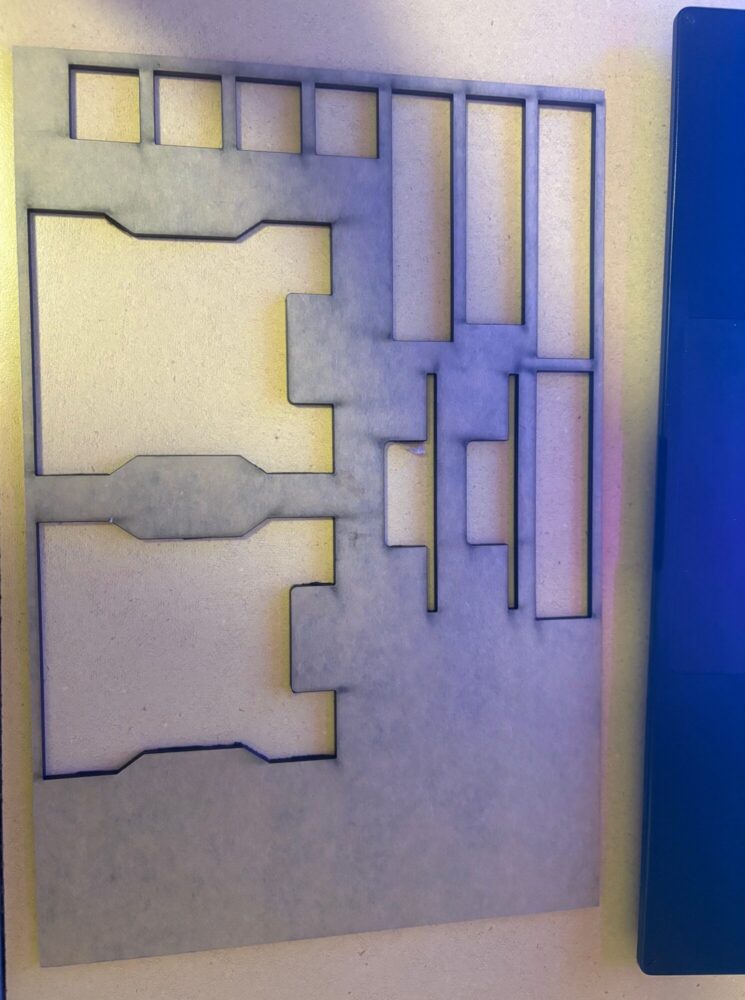
All pieces cut from sheet of acrylic.
With the pieces cut, I went ahead and started painting the side panel with the decorative pattern I had modeled. I used metallic red and pearl white acrylic paint to add in the color. I did struggle with the application of the paint, but approaching it slowly allowed me to get the pattern finished.
 Painted side of the box
To put the box together, I used clear tape to hold each panel together. With a dab of CA glue, the shape held together enough to remove the tape and glue the rest of the box together.
 Clear tape holding together box
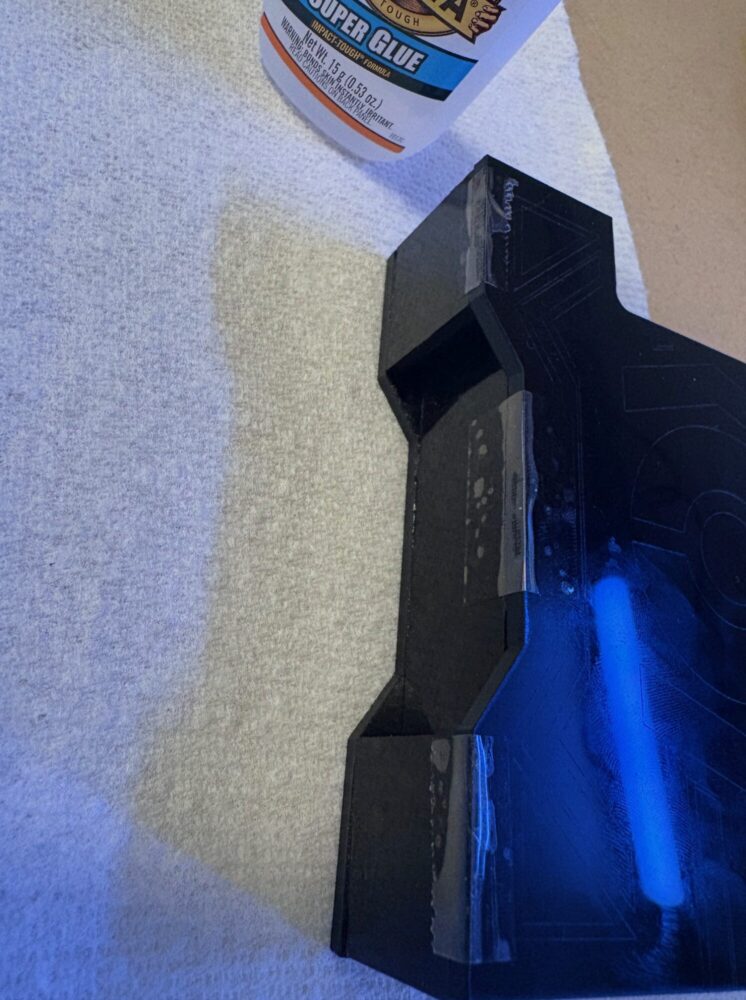
Finally, to add the magnets, I stuck them in pairs, and glued one of them inside the box. To glue the pair of magnets to the lid, the box was designed for the pair to already be flush with the lid. However, this was not the case. With the tolerance stacking up from the acrylic pieces being laser cut, there was still a gap between the top magnets and the top of the box. Adding some shims made sure the top magnet was flush with the top box. Finally, adding glue to the magnets and setting the lid on top of it finished off the lid and the box.
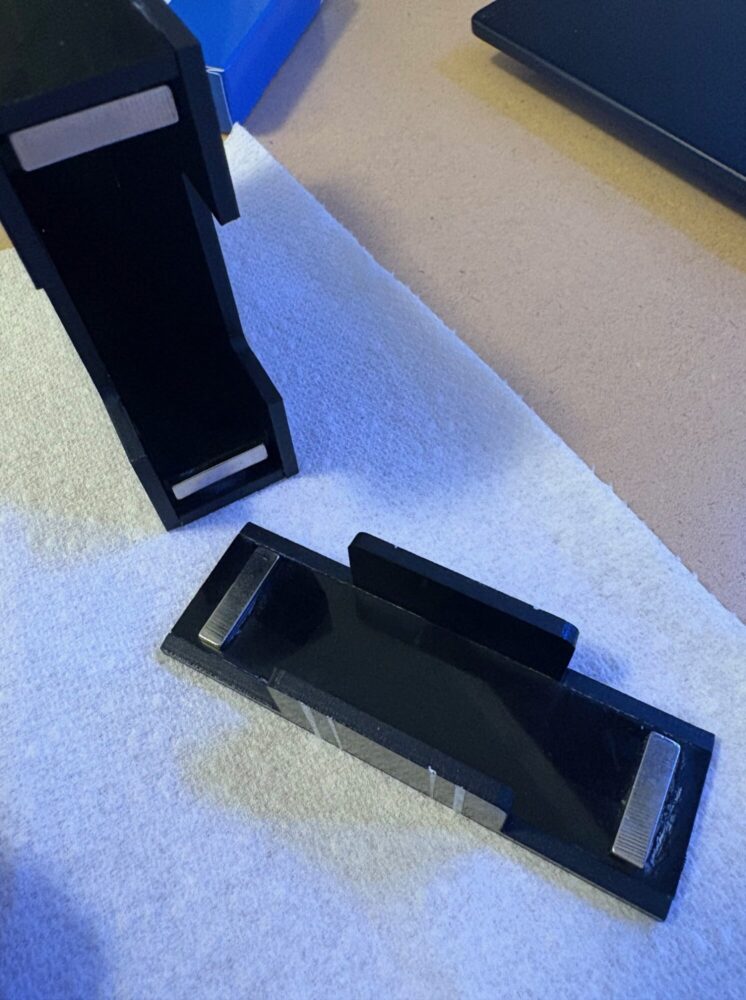 Magnet assembly after being glued

Final assembly
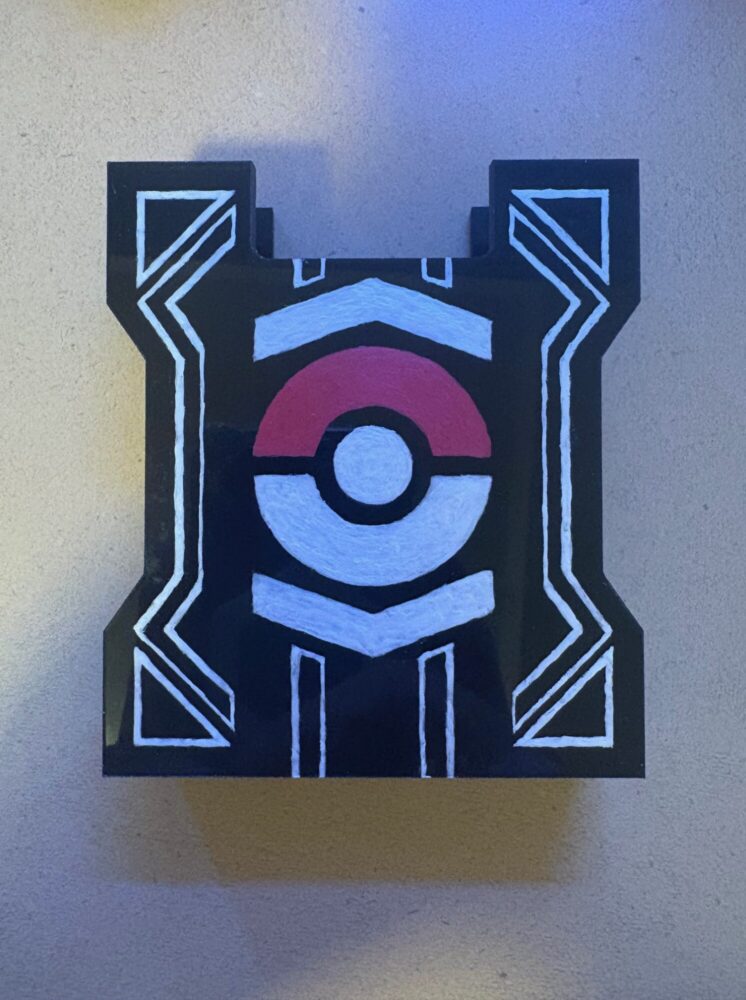
The complete box can hold about 90 cards, perfect for any TCG deck of 60 with extras. The lid attaches using magnets, and can be lifted off to reveal the inside. The design on the side exudes opulence with the glossy black material along with the accent of pearly white patterns. The center poke ball defines the functionality and aesthetic.
The box is exactly what I was looking for. It holds all the extra cards I have been getting from booster packs. The box is durable and gives me peace of mind knowing the cards inside are safe. Also, the pattern on the front is the right balance of premium and Pokémon, in an aesthetic befitting in the fancy category. It is not too much like the Special Set reference, but is not minimalistic. The hues similar to the Black Panther playing cards are present with the black and white, alongside a little red.
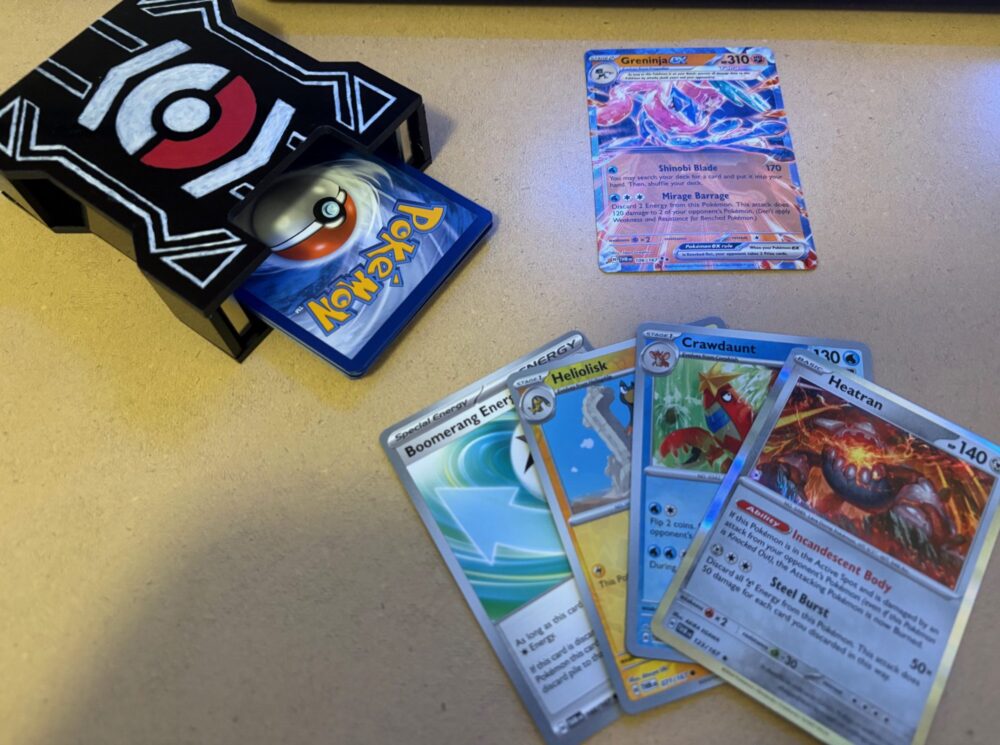
Pokémon deck box showing off utility
One thing I wish I had the time to do was finish the other side. Since I hand painted the decorative pattern with a small brush, it took a lot of time. However, I am sure I will be able to slowly get that side finished throughout the next few days. Also, I would love to buy more acrylic and make bigger boxes for the bulk storage of these cards as I may have too many at this point.
References:
- Black Panther Playing Cards, Theory 11, https://store.theory11.com/products/black-panther-playing-cards?variant=39879851573342&gad_source=1&gclid=CjwKCAiAk8G9BhA0EiwAOQxmfkNSoskWQGAiwcoesusbTPCxPwlXrfTdCvktrLVAwZqZWe_vWt2enxoC6pYQAvD_BwE
- Pokémon TCGP Special Set 01, Pokémon TCG Pocket Game
4 Comments. Leave new
As a loyal fan who has been following this project from the start I am so happy to see how it has come together! I really like how the painted design on the front face turned out especially, while sure some vinyl stickers could have been much faster to apply I think the final product came out super nicely. One question I have is that because normally one deck boxes kind of ‘grip’ the cards because they are flexible carboard, do you worry about the deck rattling around in side the 50% over sized box? And if so do you plan on filling that void with extra/swap out cards or maybe something else. Great work!!
Glad to hear you think the box came out nicely. Regarding the rattling, I used the inside dimensions of the pre-existing deck box that comes with a prebuilt deck. This box already has some play inside, but the play is to allow for the cards to be sleeved to further protect them. So, in theory the void will be filled with the extra thickness from card sleeves if I use sleeves. Even so, there is only about 5mm of play without the sleeves, which isn’t a concern, and if it was, I would be putting the cards in sleeves to further protect them.
This is such a cool project, I think the end result turned out amazing and really encapsulates the two main designs you were inspired by. The functionality is also really impressive to me, keeping cards stored in a safe manner is always tricky but you figured out a great solution. I’m really interested to see how you might scale up this design for bulk storage of cards, as the box gets bigger the harder it is to keep cards safe and organized so maybe you could incorporate compartments or something like that. Thanks for sharing about your project, this is something I would like to try to recreate with my own design.
Finding the right balance between the two inspirations but still making it something I wanted was my main goal, and I’m glad to hear I accomplished it in someone’s perspective. Scaling to a larger design for bulk storage does bring some more design considerations. If you search storage boxes for TCG cards on Amazon, you can find most have card sized (by width) compartments that hold the cards like an Oreo container. This is what I would aim for for a bulk storage box. I also think having a small box like this is convenient, especially if you open a booster pack every so often.