
Chosen Aesthetic – Naturalism
For my upcycle project, I focused on the naturalism aesthetic and applied it to stained glass, which typically falls into the gothic aesthetic. Naturalism as an aesthetic incorporates elements from nature into artwork, architecture, and design as a whole. This can be seen through depictions of natural elements like trees, flowers, clouds, and nature scenes. Another key aspect of the aesthetic is the color palette. Naturalism has a color palette that could be found in nature, including an array of blues, greens, and browns. It can also include yellow, orange, purple, red, and more, as long as they are natural versions of the color. The image below depicts this palette very well.
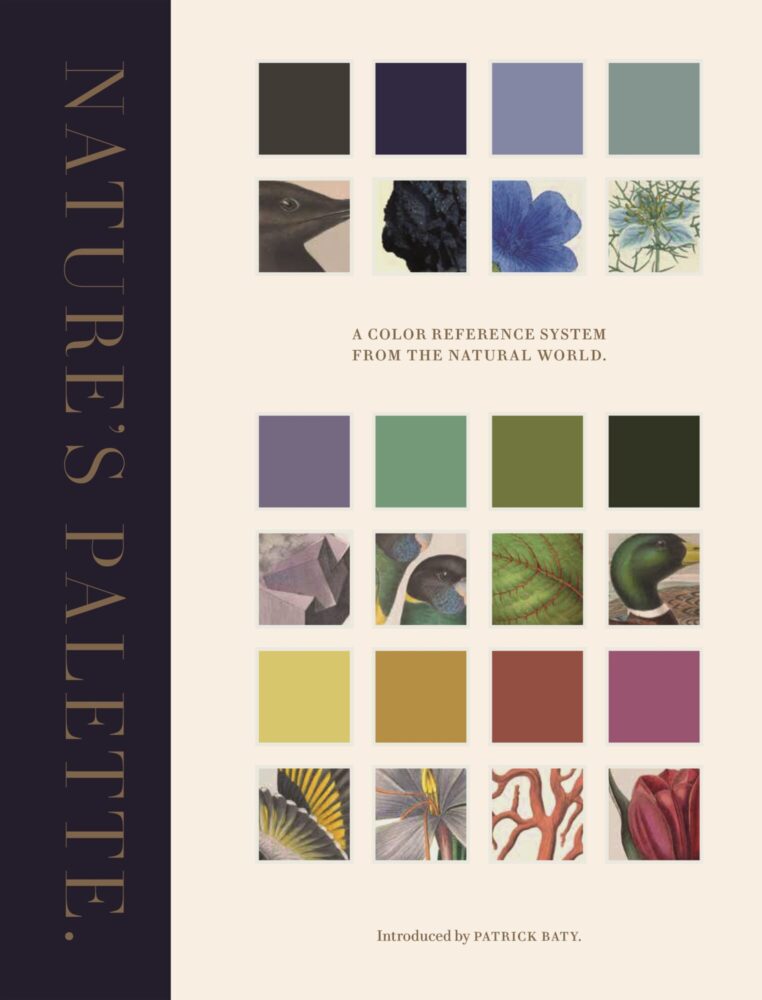
Figure 1: Naturalism Color Palette
Stained glass typically falls into the gothic aesthetic due to its historical background. Stained glass was prevalent in historical churches, frequently depicting biblical scenes. It typically contained a variety of colors and was formed into images of people, animals, and landscapes.
Modern stained glass, as an art form, was popularized by Louis C. Tiffany (1848-1933). He was the inventor of a patent for a unique opalescent glass, a new method of glass manufacturing that began in 1885. Tiffany revolutionized the art form with this new type of glass as it gave more depth and dimension to typical stained glass. This was not accepted by others at the time who preferred the traditional gothic methods using uniform, clear glass and enamel paint.
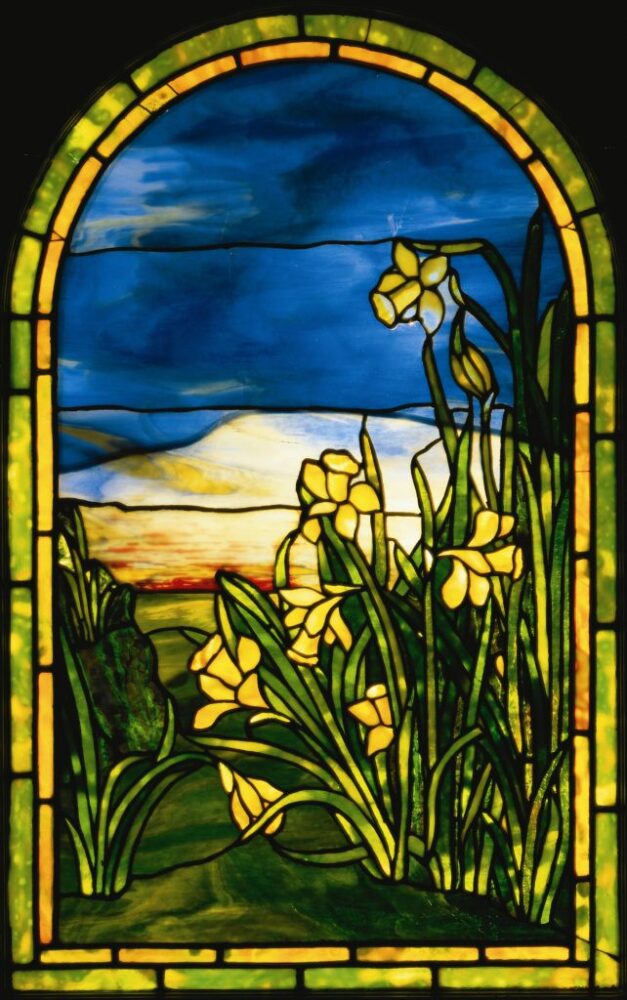
Figure 2: Tiffany’s Stained Glass Window (c. 1916)
I wanted to follow a similar aesthetic to Tiffany and make a nature-inspired stained glass piece. For the brainstorming portion of the project, I researched and found some ideas and inspiration. The goal was to keep the project realistic for my very beginner skillset, in the form of a small window display (around 6″x6″). The image below was one of my inspiration photos as it followed the naturalism aesthetic and was relatively simple. My initial idea was to design a mountain scene that would incorporate naturalism and also work well with the colors of glass I already had.
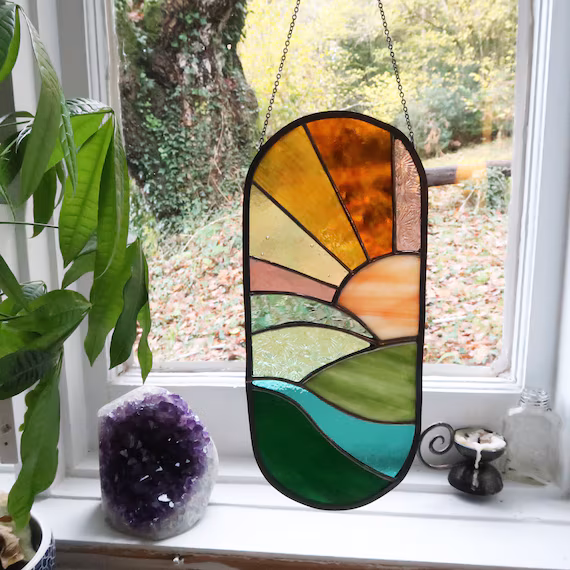
Figures 3: Inspiration Pictures for Upcycle Project
Functional Goals
My main functional goal was to have a window decoration made of stained glass. I wanted to display it in a window to embody the original aesthetic from gothic churches but also to cast colorful light into the chosen room. The sunlight will also make the piece more visually appealing when the sun illuminates each piece of glass.
For the design, I also wanted to use mostly straight lines to make the project more suited for my skillset as this is my first time working with stained glass. The original pattern still had 31 pieces with large size variations to make it a bit more challenging.
Aesthetics/Artistic Goals
The main goal was to conform to the chosen aesthetic, naturalism. To follow this aesthetic, I designed a mountain scene with a few mountains, the sky, a few clouds, and the sun in the upper corner. Another major part of natrualism is the color palette which was relatively easy to follow with this pattern. I stuck with mostly green and blue glass, with clear, white, and orange for the sky and sun, respectively.
Fabrication Process
I decided to go with an original pattern to have maximum flexibility to fit the project to my skillset. This did cause some issues down the road but I was able to work around them. I drew out a rough pattern on some thick watercolor paper so it would retain its integrity as I traced around it and measured it throughout the grinding process. I did have to change a few pieces to make it possible to create with stained glass. The pieces I changed were 8 and 10 as they both had internal corners which are very difficult to achieve with stained glass.
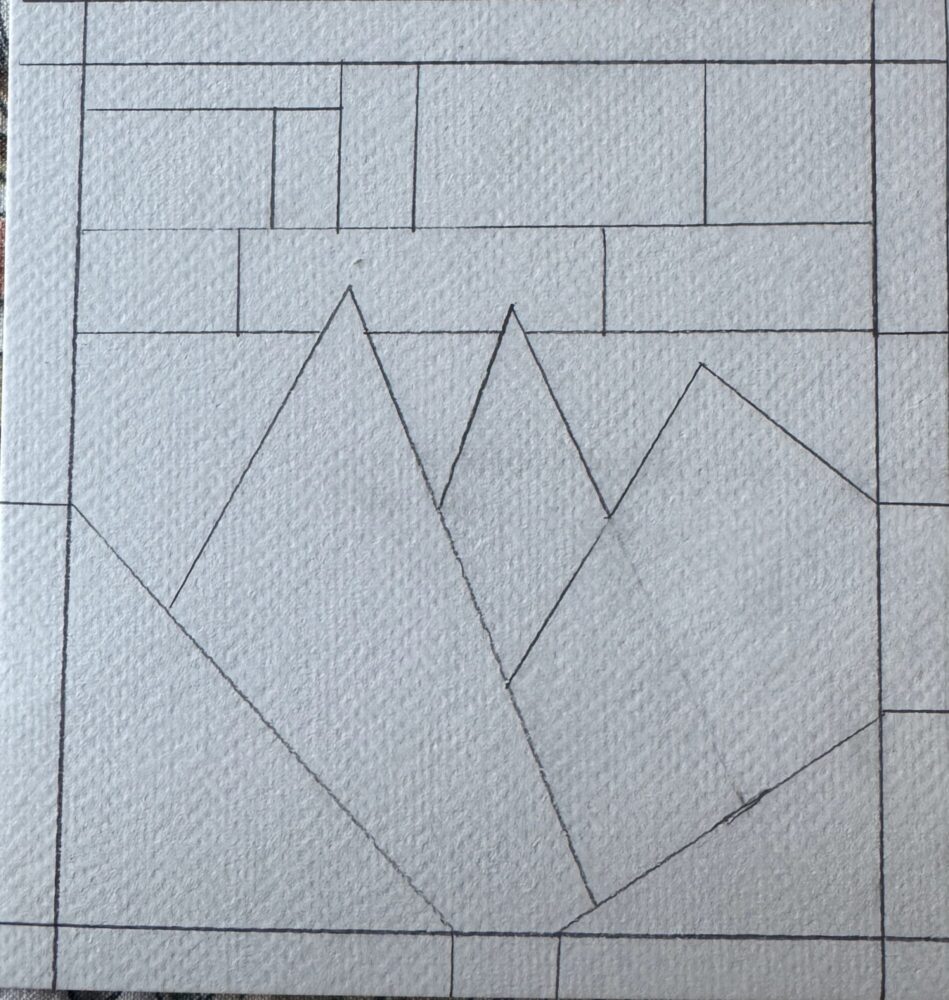
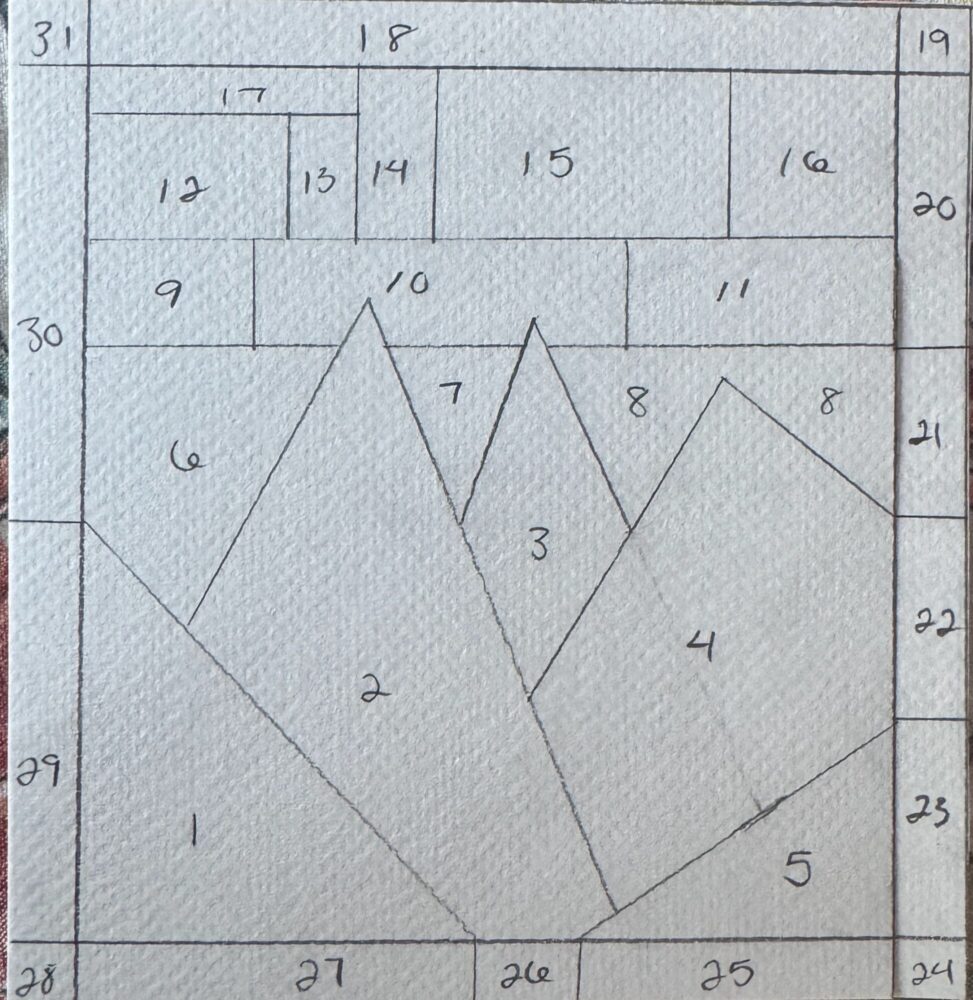
Figure 4 & 5: Pattern Before and After Numbering Pieces
I traced the patterns onto my chosen pieces of glass and then cut and broke them into the desired shapes. I got my pieces as close as possible to the shapes I desired. This was a bit difficult as the cutting process is new to me, so I left a bit more on each piece than ideal, but I was able to grind it all off in the next step.
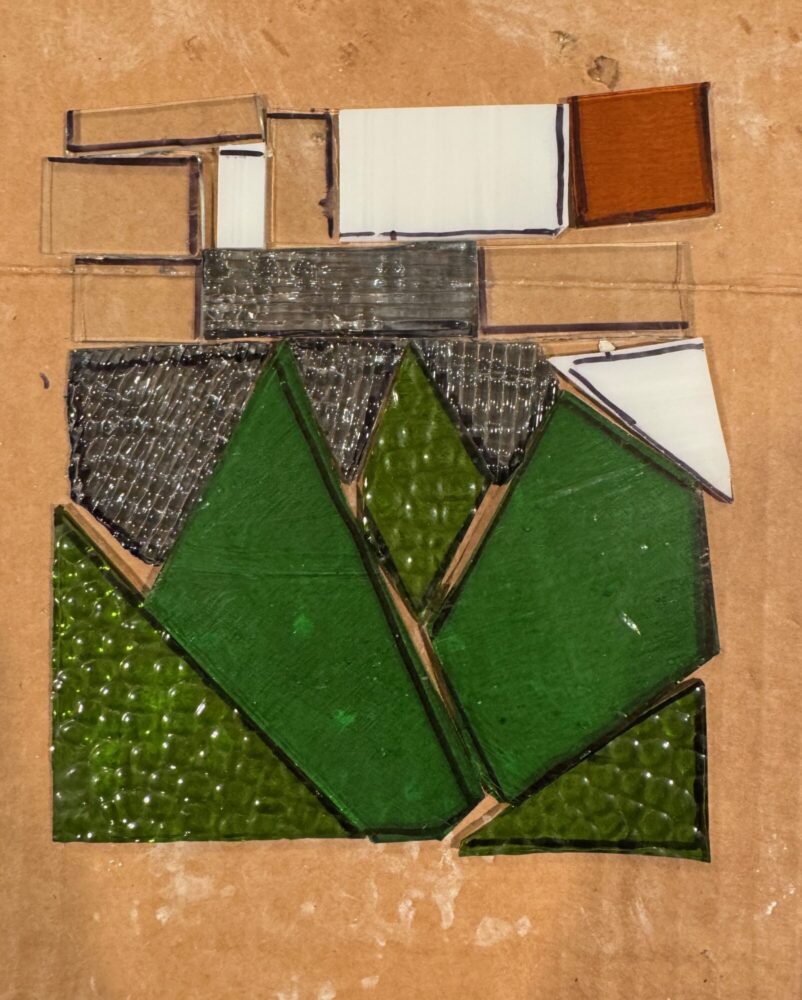
Figure 6: Initial Stained Glass Cut, Arranged in Pattern
I then used the glass grinder to further shape the pieces. I first used a Sharpie to trace the pattern, which then allowed me to grind until I could not see any more Sharpie. This is a bit difficult as the water in the grinder, combined with the vibration can wash away the sharpie but I will repeat the process as necessary.
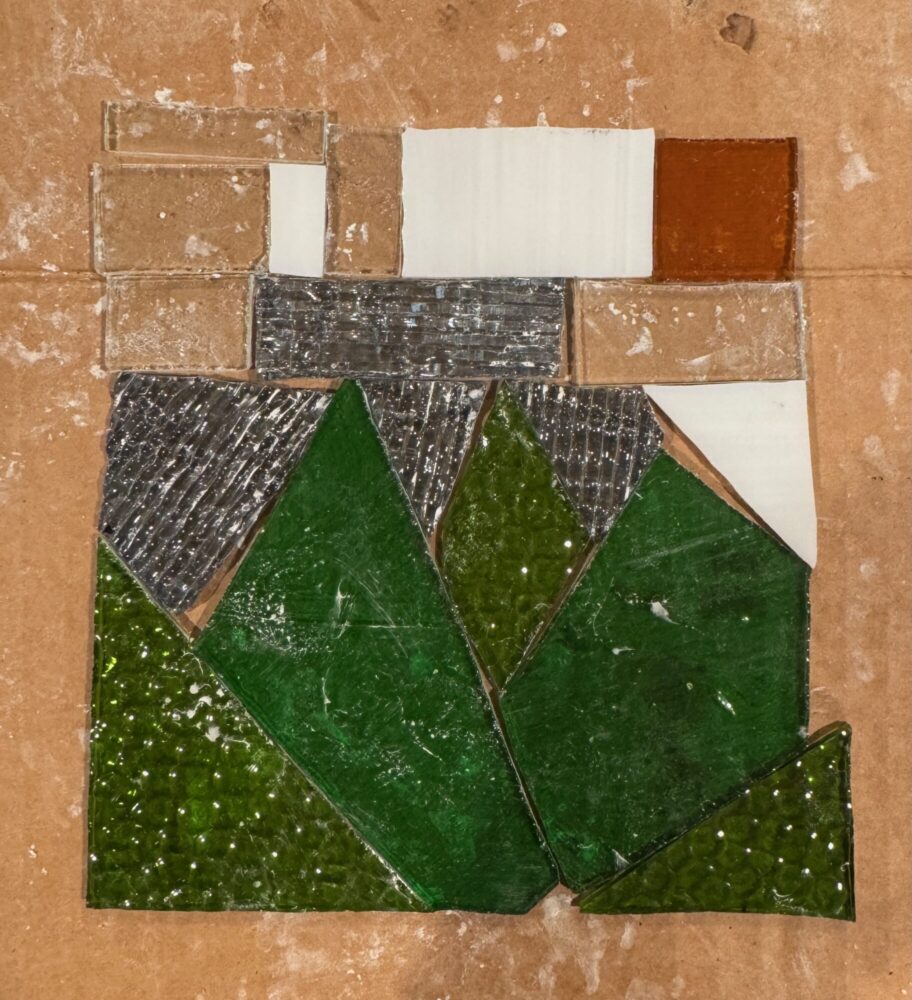
Figure 7: Stained Glass After First Round of Grinding (2/3/25)
This first round of cutting and grinding was completed but I did another round to further perfect some of the details, shown below.
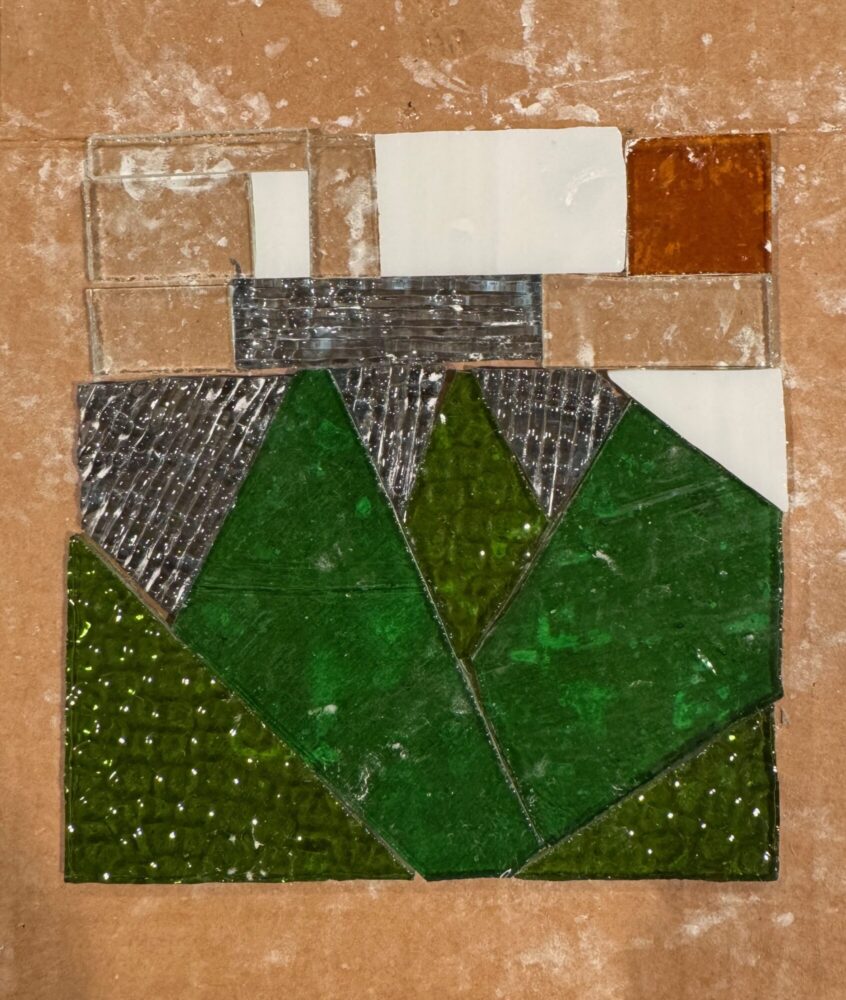
Figure 8: Stained Glass After Second Round of Grinding (2/4/2025)
I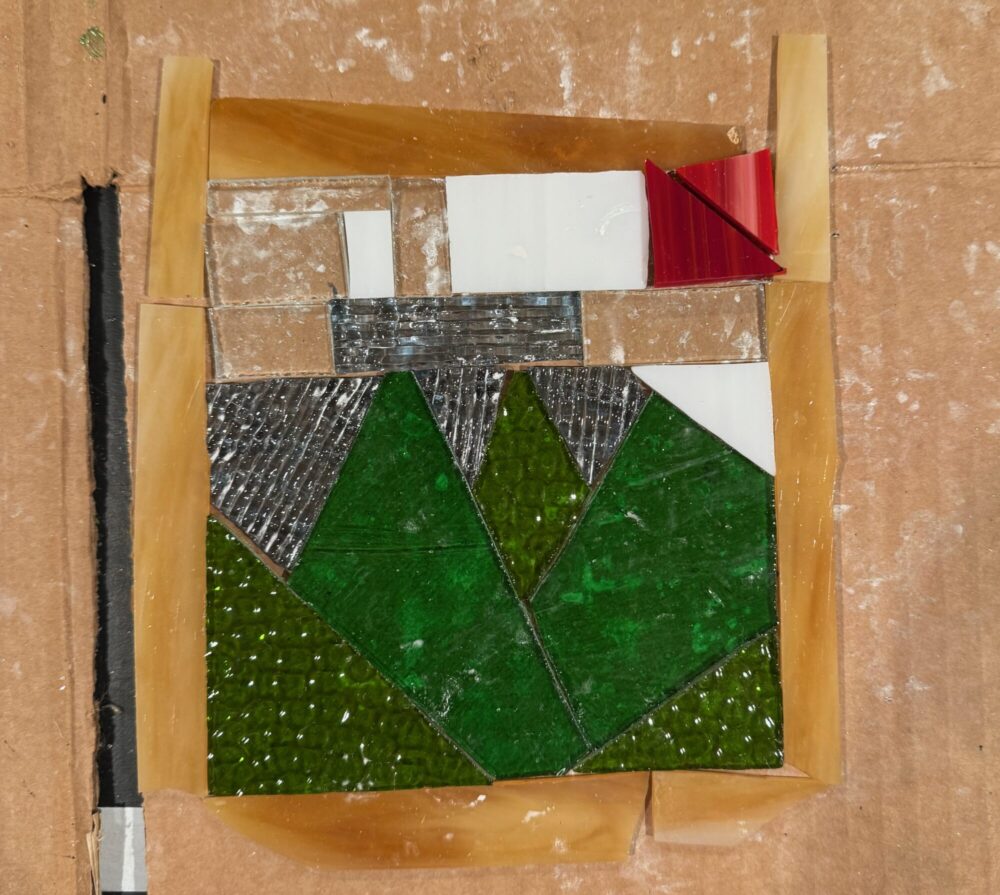
Figure 9: Stained Glass Design with Rough Border
I initially wanted to add a border but in the interest of time, I decided to save that for another project and focus on the mountain scene in the middle. If I decided to work on this project further, the addition of a border would still be possible.
Foiling

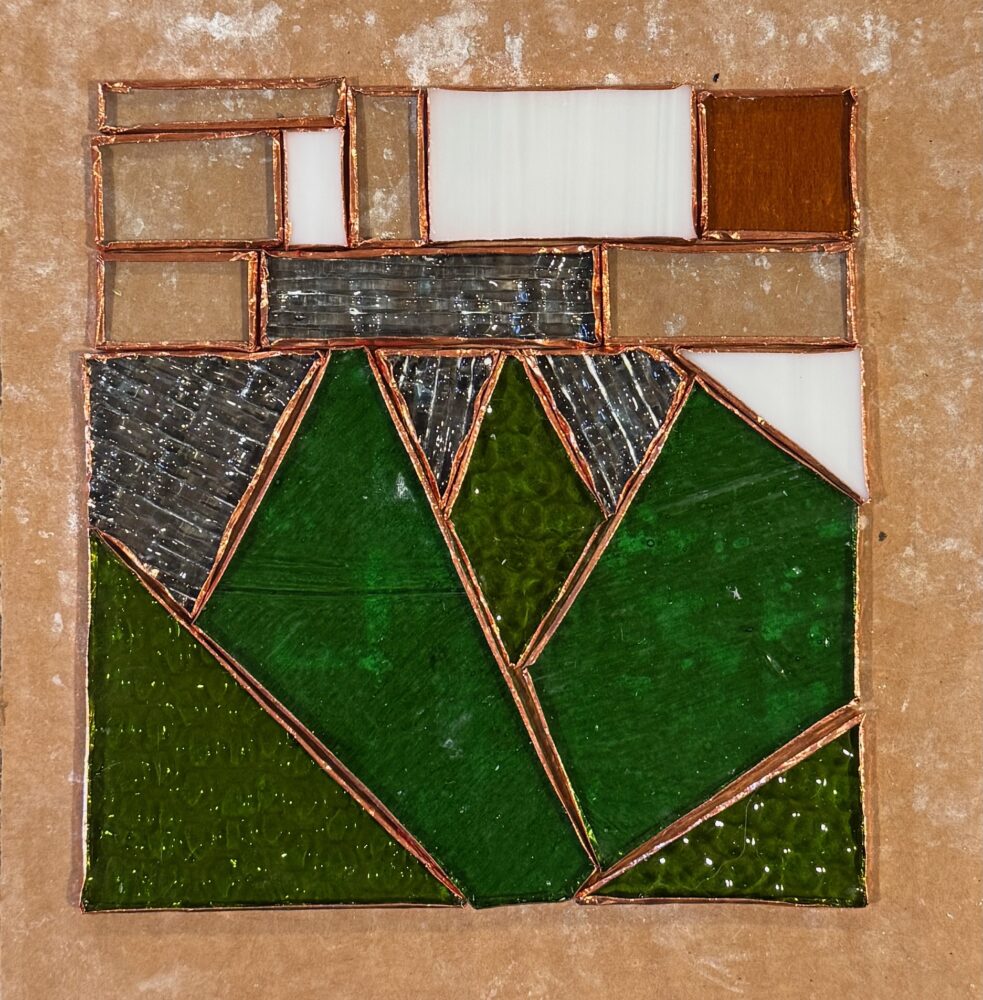
Figures 10 & 11: Pieces After Final Round of Grinding (left) & After Foiling Each Piece (right)
The foiling was a tricky part of this project. With stained glass, you have to cut all the pieces to size but then take off an extra small amount to account for the thickness of the added copper foil. I mostly eyeballed this part and it worked quite well. I then cleaned and dried off all the pieces because they were very gritty from the glass grinder. Once they were prepped, I took the roll of copper foil and adhered it to the edges of each piece of glass. I also pressed down the edges of each piece so they curved over the shape of the glass. Above is the final result after foiling. There were some gaps but ultimately I was able to fill those with solder effectively.
Soldering

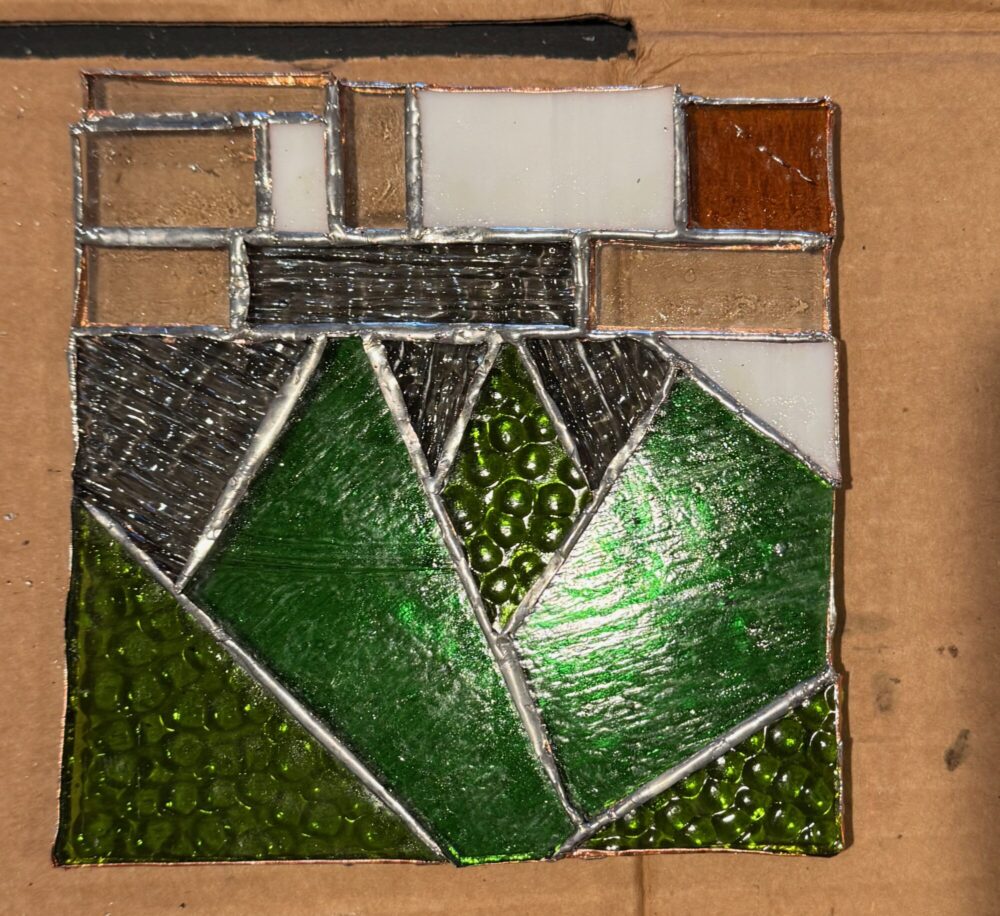
Figures 12 & 13: Final Stained Glass Piece After Soldering (2/15/2025)
Soldering was a very tough portion of this project because I have never soldered stained glass before. Also, as this was my first project, some of the gaps could have been smaller (with more precise cutting/grinding) and the foiling could have been neater. I also did not purchase new flux for soldering and older flux is harder to work with, and does not allow the solder to flow as well. The soldering iron I used was also one I found within the box of all the other materials, so it was also 25 years old. It did not have any sort of temperature control so the solder was even more difficult to work with. I was patient and eventually, I got a technique down. In a future project, I would purchase a new, temperature-controlled soldering iron for more control.
During my upcycle presentation, two of the bottom solder joints came a bit loose. I got home after the presentation and realized that it was not an issue with the solder but the copper foil. With the copper foil being so old, the adhesive must have deteriorated and no longer sticks to the glass very well. I will order some new foil and reattach those pieces.
Functional & Aesthetic Goal Update
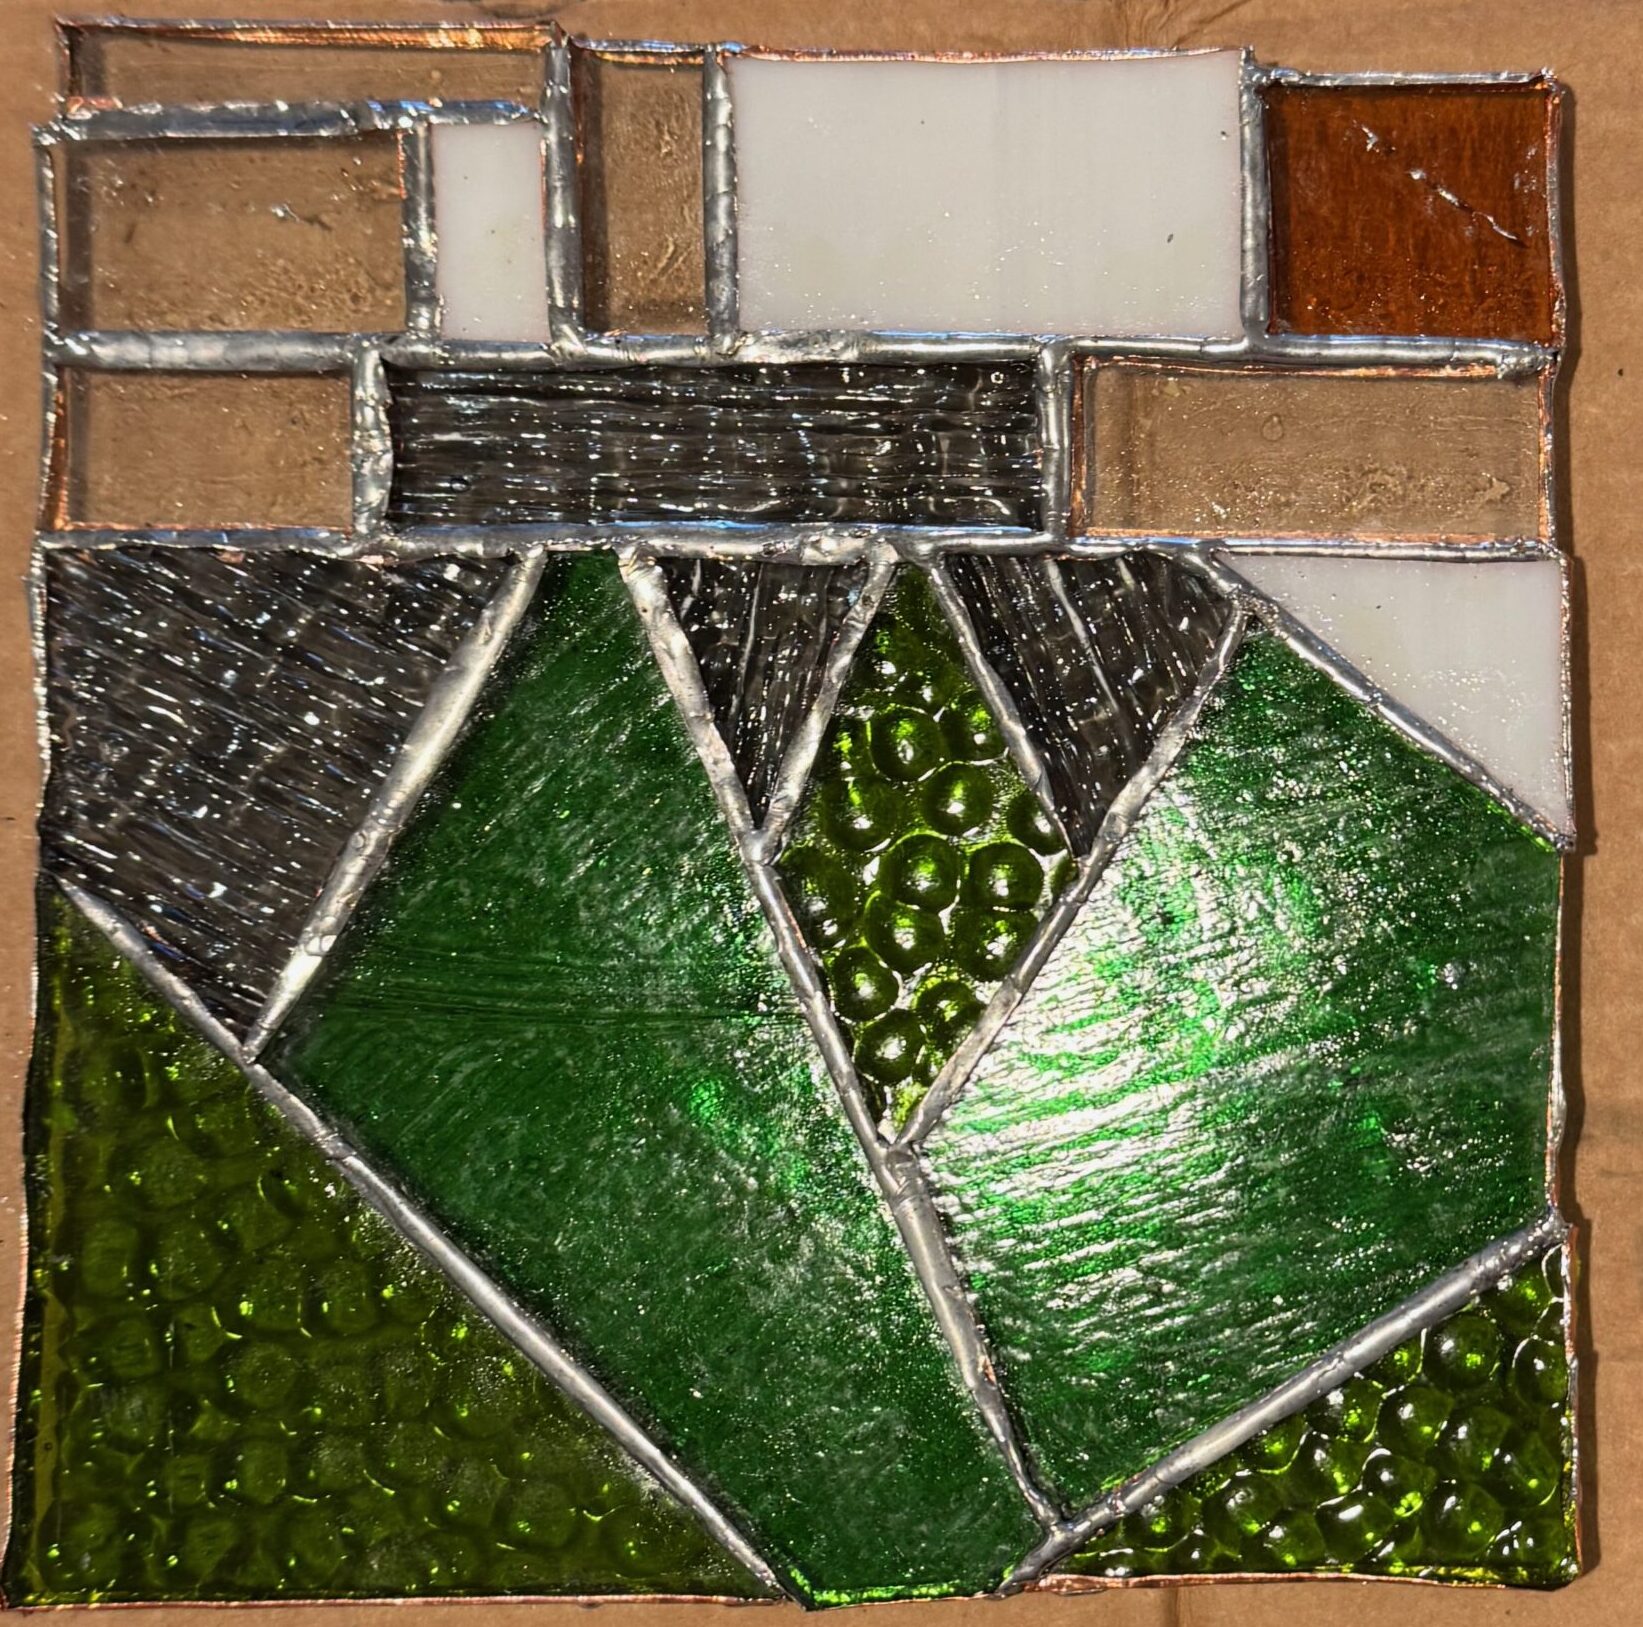
The cutting and grinding went well and my skills improved exponentially throughout this project. My soldering skills could use some work and would improve the details of the piece if I were to do another project. I did not order any edging material for the piece so it cannot be hung or displayed yet. This is something I would like to do in the future to finalize this project. During my final presentation, I asked my pod if they thought a picture frame style stand or a window hanging display would look better, the unanimous opinion was that window hanging would look best so I will attempt to make that happen.
The project came together into the scene I had designed and created a very clear mountain design. The scene also effectively depicts the naturalism aesthetic. Some of the blue and green glass is also textured which added a good, natural element to the piece.
Future Plans
This was a very fun project that allowed me to learn a new skill, learn how to follow an aesthetic, and create a unique piece of art. I will keep my project and I hope to fix some of the soldering/foiling to make it more structurally sound. I also will order some edge material to add a border and a mechanism to allow it to be hung in a window. Having this project as an assignment was also very motivating for me as I sometimes have trouble taking a hobby project from start to finish. Now that I know how to make stained glass, I hope to incorporate it into my aesthetics final project or another personal project in the future.
Sources
[1] https://press.princeton.edu/books/hardcover/9780691217048/natures-palette[2] https://morsemuseum.org/louis-comfort-tiffany/
[3] https://www.etsy.com/in-en/listing/1334216778/valley-landscape-stained-glass-pattern
[4-13] Original photos
2 Comments. Leave new
I really like how the final product turned out! The colors you chose fit well together and the spacing between each piece worked out nicely with the thickness of the solder lines. I am excited to see what it looks like hung in a window! It will be cool to see how natural light interacts with your window panel.
Thank you, Arjun! I appreciate the positive feedback! I am also very excited to incorporate the hanging aspect of the project at some point. I will post more pictures when that is complete!