
The aesthetic that inspired my upcycle project was the Baroque aesthetic. Arguably one of the most famous classical aesthetics, Baroque is a famous music and art style that grew popular in Western Europe from 1600 -1750. Baroque has many defining characteristics, often depicting dramatic and tense scenes. Baroque art is commonly described as a mixture of classicism and naturalism. Annibale Carracci and Caravaggio are among some of the first artists to popularize this aesthetic. Other artists explored the Baroque aesthetic through different forms of art. Gian Lorenzo Bernini was a famous sculptor who designed the Baldachin, an altar used in Vatican City. Antonio Vivaldi was a famous baroque music composer, born in 1678 in Venice, Italy. During his lifetime, Vivaldi wrote 500 concertos, and 73 sonatas, cementing his music as a staple of the Baroque aesthetic. His most famous piece, The Four Seasons, is one of the most famous classical pieces to come out of the Baroque period.
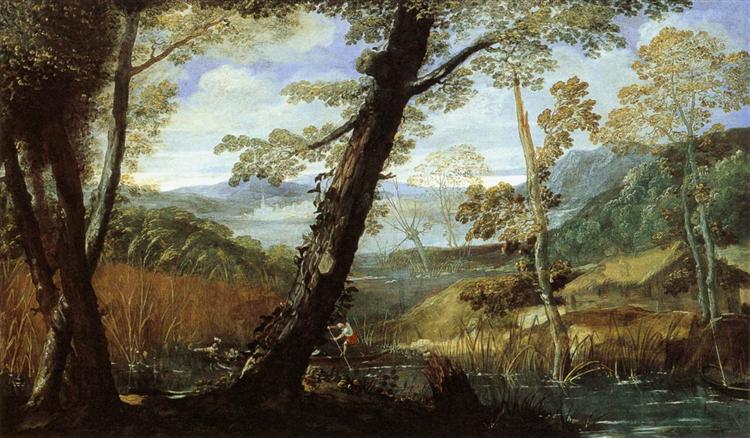
Annibale Carracci – River Landscape
I grew up learning how to play several classical instruments, and Baroque music has been a significant part of my life. For my upcycle project, I have decided to turn a broken violin into a fully functional lamp, as I feel that it would be a very fulfilling and interesting project.
![]()
Project Goals:
I gave myself several artistic and functional goals before beginning this project. My functional goals were as follows:
- The fixture must allow the bulb and the lampshade to rest on top of violin without any additional supports
- The violin shouldn’t take up too much space on my desk, and it should light up the room. I didn’t want it to be too dim.
- The violin lampshould have a stand that allows it to rest on a desk
Artistic Goals:
- The lamp should match the Baroque aesthetic
- There should be a unique feature on the lamp that draws attention to it
- I want to keep all parts of the lamp intact
I will discuss near the end of this post which of these goals I was able to meet on my project.
First, lets discuss exactly which components I had to buy for this project. The first component was the violin itself, which I got for free from a music shop down the street from my house. Next, I repurposed an old lampshade from my parents’ house that had a very Baroque looking aesthetic. This lampshade had small glass beads dangling from the bottom which really helped put together the aesthetic that I was looking for. Next, I bought a light bulb, and a connecting cord that I could slot the lightbulb in to. Finally, I purchased LED lights to put on the violin in place of the strings. Originally, I wasn’t going to do this, but someone left a comment on one of my previous blog posts suggesting that idea, and I thought it would be a fun aspect to add.
If you read my “Violin Lamp Progress Update” post, you will notice that I had discussed 3D printing or laser cutting a bridge for this violin. One of the reasons that I was able to obtain this instrument for free was because it didn’t have a bridge, an important piece for tensioning the strings. This piece also improves the overall look of the instrument. I decided not to continue manufacturing a bridge of my own, as I believed it would inhibit me from adding the LED lights to the instrument.
Fabrication:
Once I had all of the parts that I needed, I began the fabrication process:
- Lamp fixture fabrication
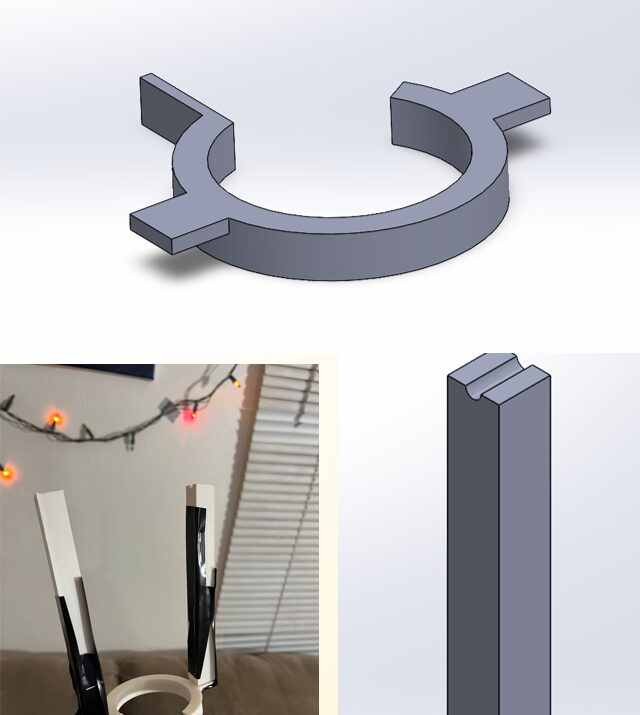
When designing this lamp fixture, I had to keep several things in mind. I had to ensure the fixture could hold the lightbulb in place, while allowing the wiring to pass through. I had to ensure the fixture had some way to secure the lampshade, and I had verify that the material was strong enough to not melt around the hot light bulb. In the images above, you can see my design in SolidWorks, as well as the finished product. I 3D printed this fixture using a filament that was a combination of PLA and ABS. Both of these had melting temperatures well above the maximum temperature of the light bulb, which was 180 degrees Fahrenheit. Unfortunately, I decided to glue the tall posts on the side to the bottom piece instead of screwing them in, and the glue was not very stable. This led me to reinforce it with electrical tape just to ensure it didn’t collapse.
2. Replacing the strings with LED strips
As mentioned earlier in this post, I decided to replace the strings on the violin with LED lights. This was an idea that was commented on one of my other blog posts, and I thought that it was a really unique idea that would make the violin stand out more and be more unique. Fortunately, I was able to take the strings off without damaging them by removing the tuning pegs at the top of the instrument. The strings are currently being stored in the case, and I’m trying to come up with ways to upcycle them as well.
The LEDs came with their own adhesive, and I was very happy with how they were able to replicate the shape of the strings. They were also cuttable, so I could make them the perfect length for what I wanted. Unfortunately, these LEDs didn’t come with their own power source, or a dimmer. I ordered the power source separately, but the dimmer is likely a piece that I will order later on to improve the project on my own time.
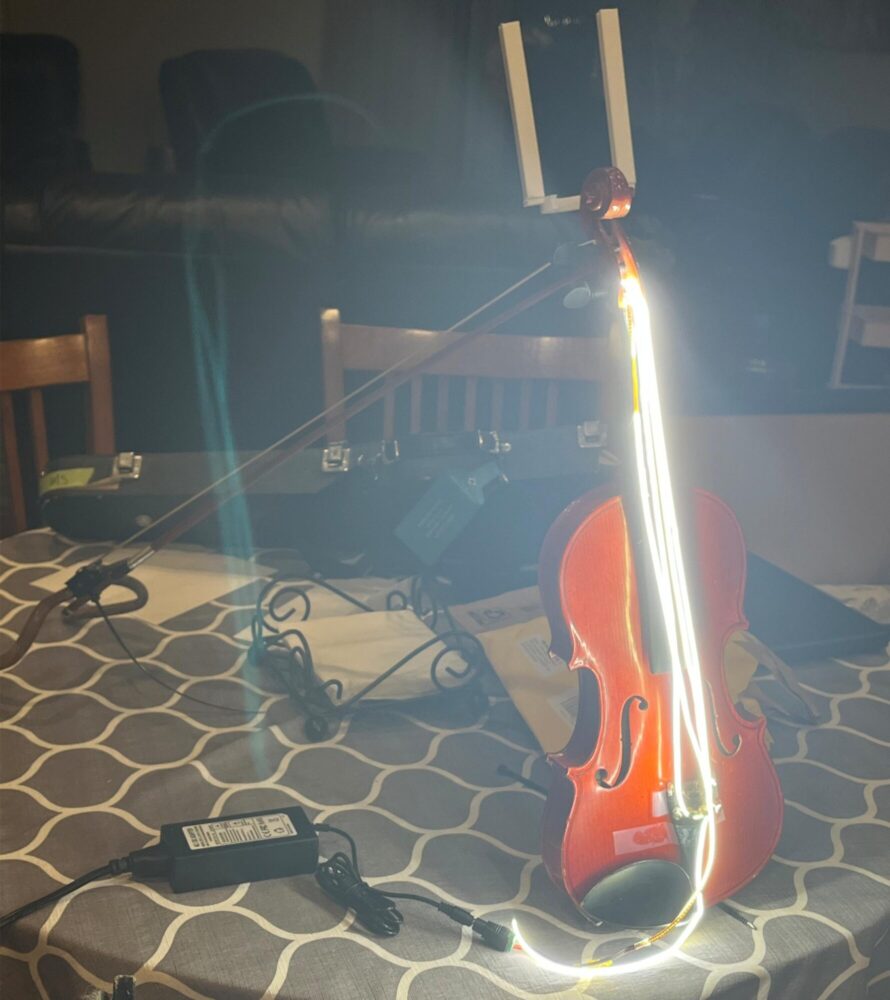
3. Building a lamp stand:
I was originally going to design a stand for this violin lamp using SolidWorks, but I decided that it would be interesting to make a stand using the violin bow itself. I went to my parents house, and found the base of an old guitar stand, and then taped this to the bow. The stand didn’t end up being a very technical design, but it is able to support the the weight of the violin lamp, and it matches the aesthetic of the lamp.
![]()
The only problem that I had with this stand, was that it took up a lot of room. I had to clear off half of my desk in order to have space for it. This is definitely a design that I will be improving in the future.
Final Artifact:
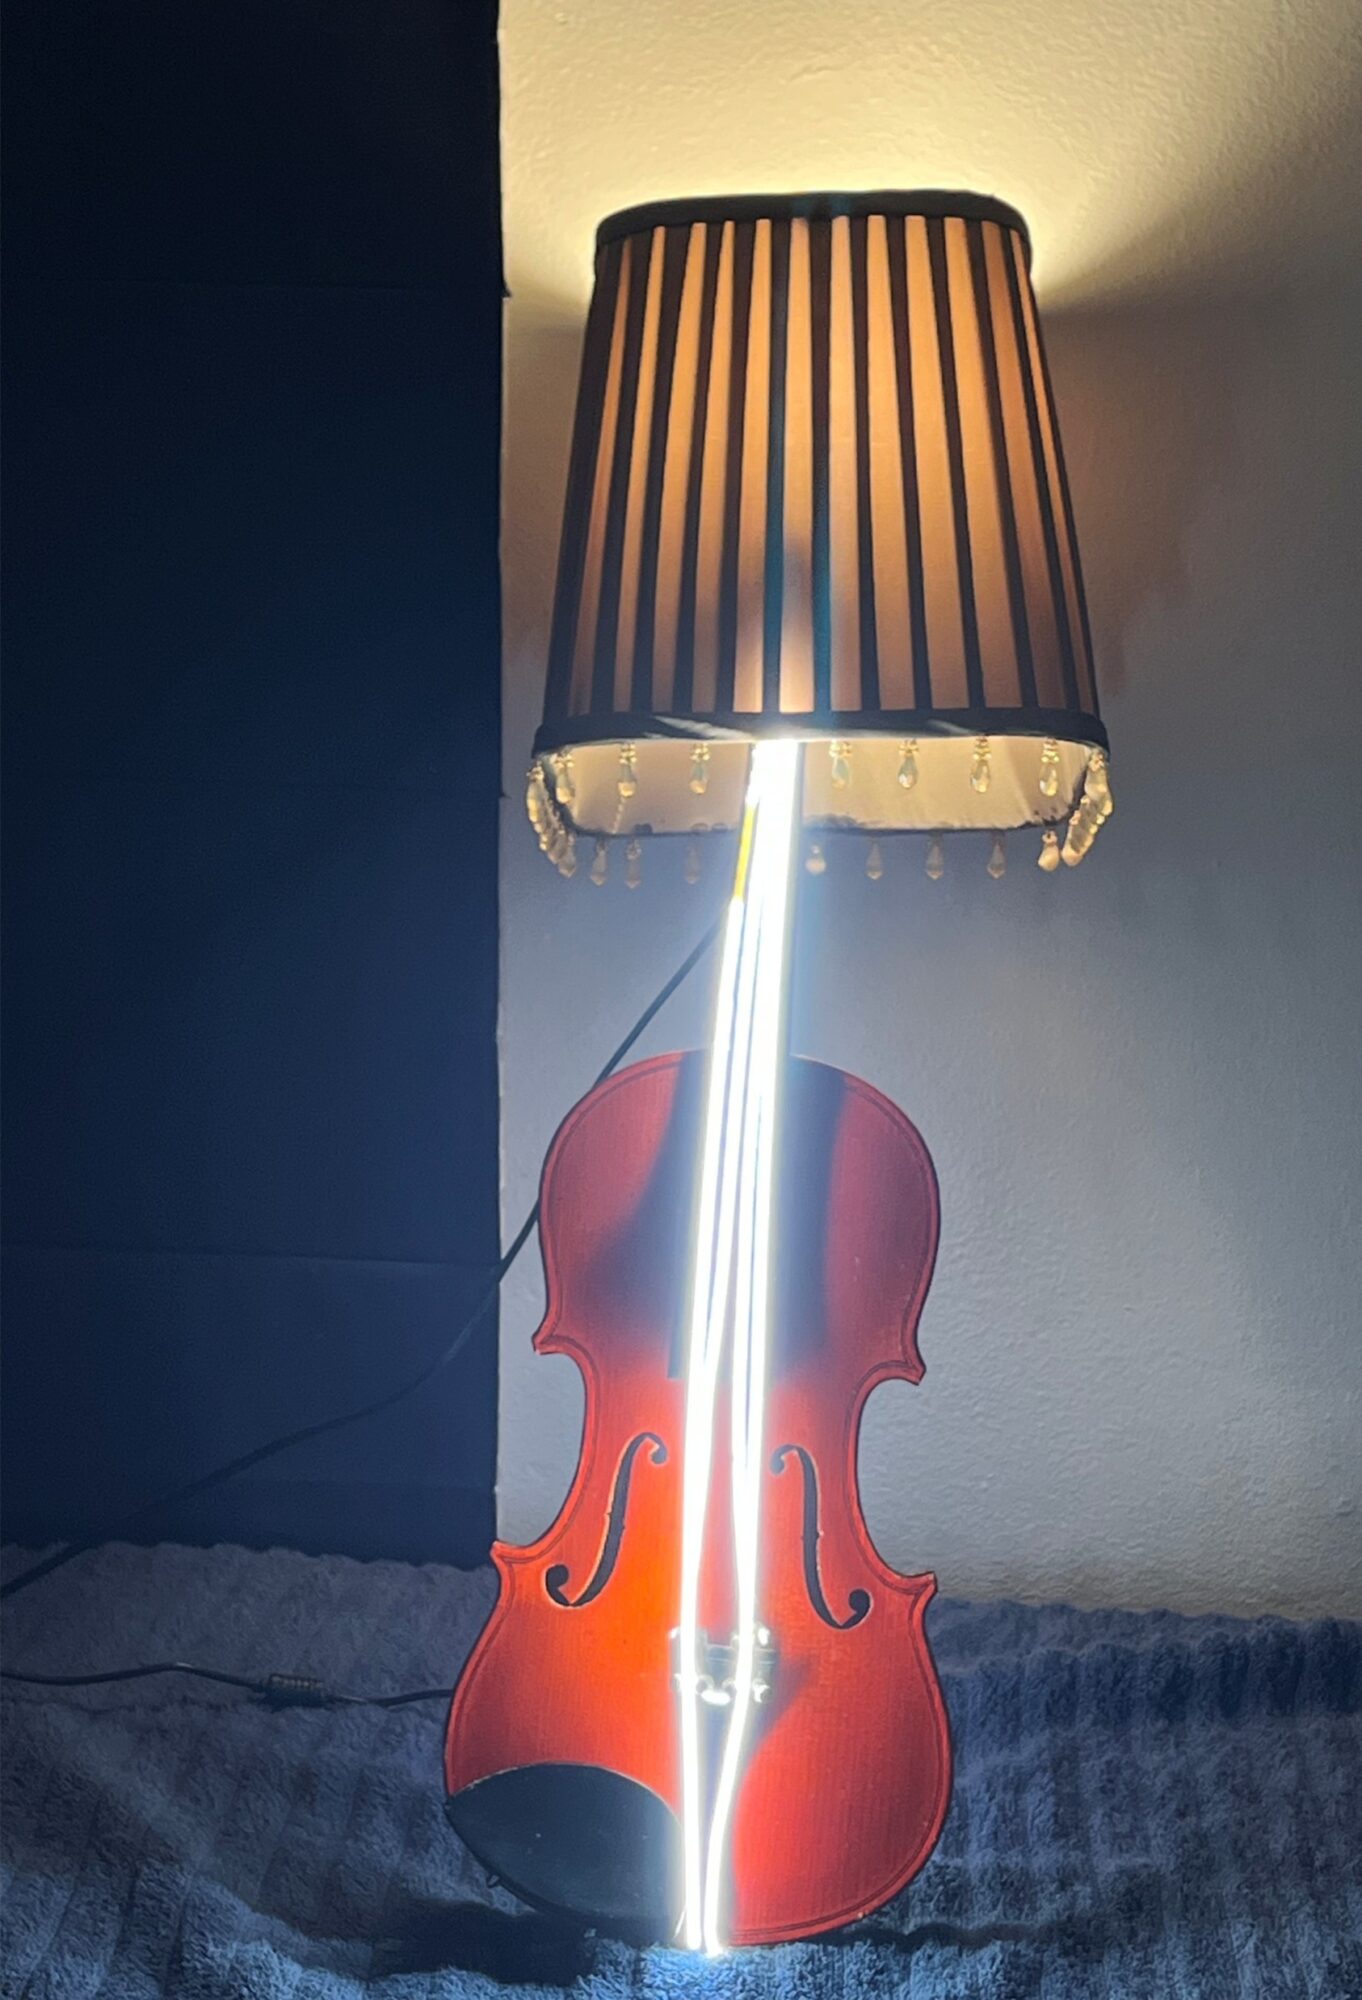
![]()
Overall, I am very happy with the final artifact. I especially like the LED lights in place of the strings, and how they still have the same form as the original strings. I was worried about the “natural white” color of the LEDs conflicting with the “warm white” light coming from the lampshade, but once it was all put together, the contrast really makes it look more interesting and draws the eye of the viewer. I feel as though this project ended up meeting my functional goals of lighting up a room, and reliably holding the bulb and lampshade in place. Without the stand, it doesn’t take up that much space either.
As for my artistic goals, I feel as though this artifact still fits with the Baroque aesthetic. The lampshade and the way the wood finish glows under the LEDs provides a very beautiful and Baroque feeling. The violin also didn’t sustain much damage during the fabrication process. The strings are still intact if they need to be put back on. The only damage caused was when I drilled the bulb fixture into the side of the scroll.
In the future, there are a few things that I hope to improve on with this project. The first one, I hope to order a dimmer for the LED lights. By default, they are at 100% illumination, and it is extremely bright. The current bulb fixture is also mounted on the back of the violin, causing a moment force backwards on the instrument. The fixture will likely not hold up for a very long time, so I want to design something more practical. Lastly, I want to make a stand that takes up less space. Unfortunately, I think this means I will have to scrap the idea of using the bow as stand, but I’m sure I will find another way to incorporate it into the design. If I end up buying the dimmer for the LED lights, I may also consider outlining the shape of the violin with them. I believe this would really tie the whole design together.
Sources:
Information:
“About the Baroque Period.” About the Baroque Period – Music of the Baroque, www.baroque.org/baroque/#:~:text=Derived%20from%20the%20Portuguese%20barroco,from%20about%201600%20to%201750. Accessed 26 Jan. 2025.
“Baroque Art and Architecture.” Encyclopædia Britannica, Encyclopædia Britannica, inc., www.britannica.com/art/Baroque-art-and-architecture. Accessed 29 Jan. 2025.
Images:
Carracci, Annibale. “River Landscape, 1589 – 1590 – Annibale Carracci.” Www.Wikiart.Org, 1 Jan. 1590, www.wikiart.org/en/annibale-carracci/river-landscape-1590.
Sources;
Amazon.Com: Topai 12V Thin 3mm Cob Led Strip 6000K Daylight 16.4ft Bright White CRI>90 Uniform Dotless 384LEDs/M Adhesive Flexible Cuttable Led Tape Light for DIY, Bedroom, under Cabinet Lighting : Tools & Home Improvement, www.amazon.com/TOPAI-COB-3mm-Cuttable-Flexible/dp/B0C14C77F9. Accessed 5 Feb. 2025.
Lousyplayer. “About Violin Bridge Detail Measurement.” Maestronet Forums, 2 Oct. 2018, maestronet.com/forum/index.php?%2Ftopic%2F341142-about-violin-bridge-detail-measurement%2F.
4 Comments. Leave new
This turned out great! I love the way you incorporated something significant in size that was going to be thrown away. The way you chose to replace the guitar strings with LED strips along with the top also really helped to enhance your project. I think one improvement you could make is throttling the power to the LED strips on the front so they are not so bright, which might help the piece fit your aesthetic better. Overall, well done!
Hi Bryce, that sounds like a great idea! I will definitely look into incorporating this into my design.
I think this is one of the best projects I have seen! I think the string lights really made it! is this lamp portable? I also would love to see your initial design sketches. Again I think it cam back really well!
Thanks Xander! The lamp is portable, I have some initial sketches of the lamp fixture.