
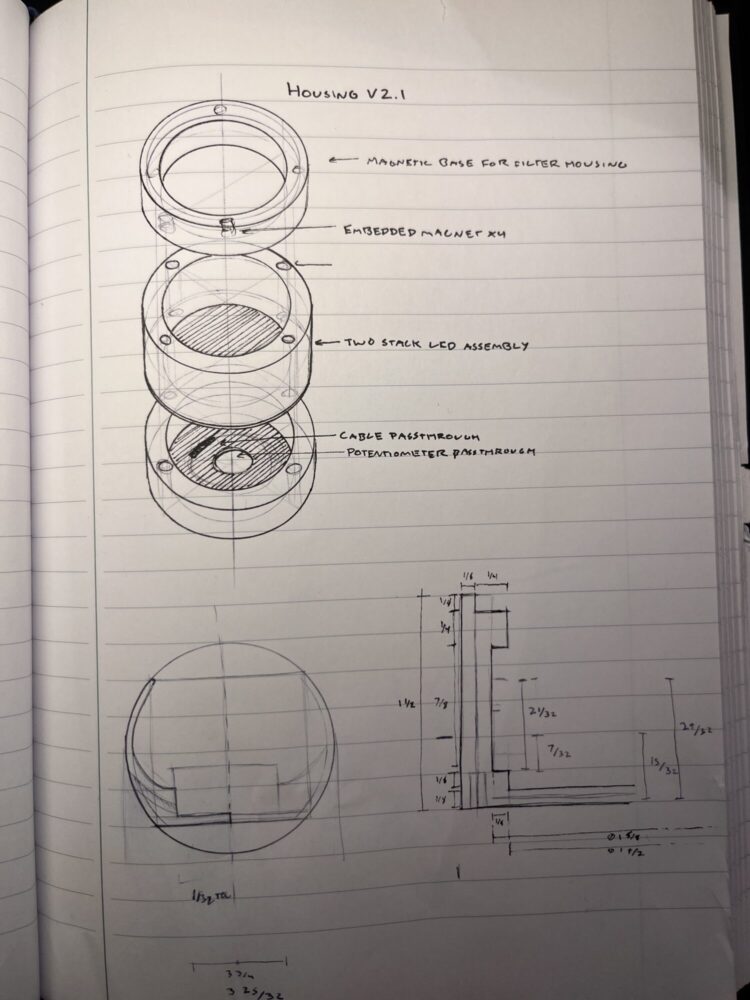
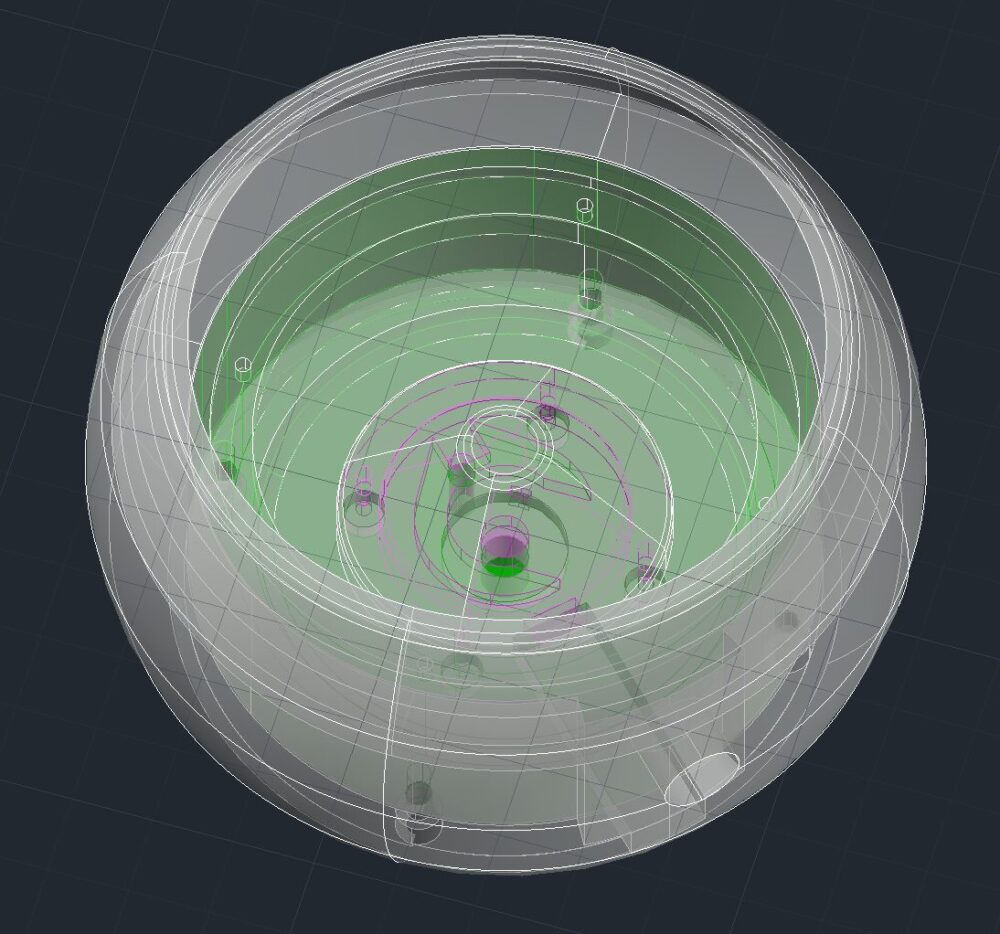
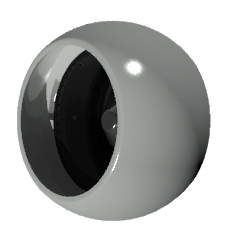
Overall Design
I have made some progress in the last week. I have settled on a spherical design, 5 inches in diameter. The lamp will sit on a pedestal, large enough to conceal the control board and power input. In order to preserve the streamlined space age aesthetic, I designed internal cavities in the main assembly for the control potentiometer and mode button to sit. The control knob is hidden in the back of the main lamp sphere, and depressing this knob will cycle through modes allowing the single potentiometer to control three inputs: hue, saturation and brightness.
Coding
The first step was to connect the “upcycled” led strip to the arduino to test out the concept.
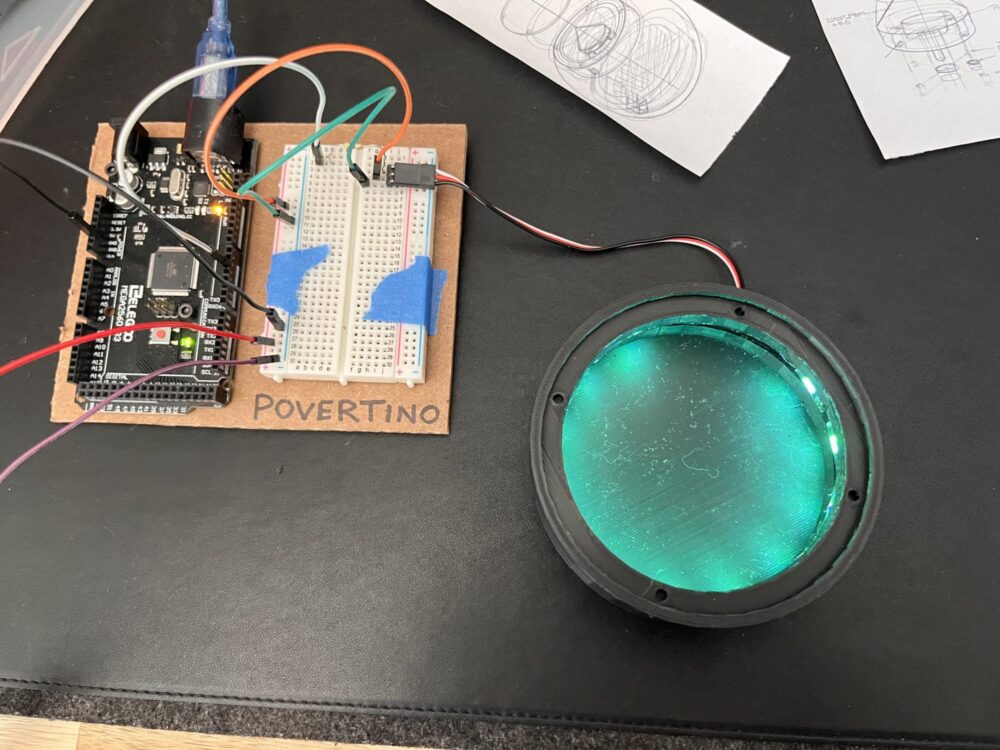
After some attempts, I was able to use the FASTLED arduino library to get the led strip to work. After running some default commands, I was able to modify the code to proportionally map rgb output to potentiometer input. I then realized that this input could only control one parameter of the led strip at a time. Initially, I added a second and third potentiometer, each corresponding to a parameter (hue, saturation and brightness). Although this allowed for the most efficient adjustment, having three separate input knobs would not fit the streamlined space age aesthetic.
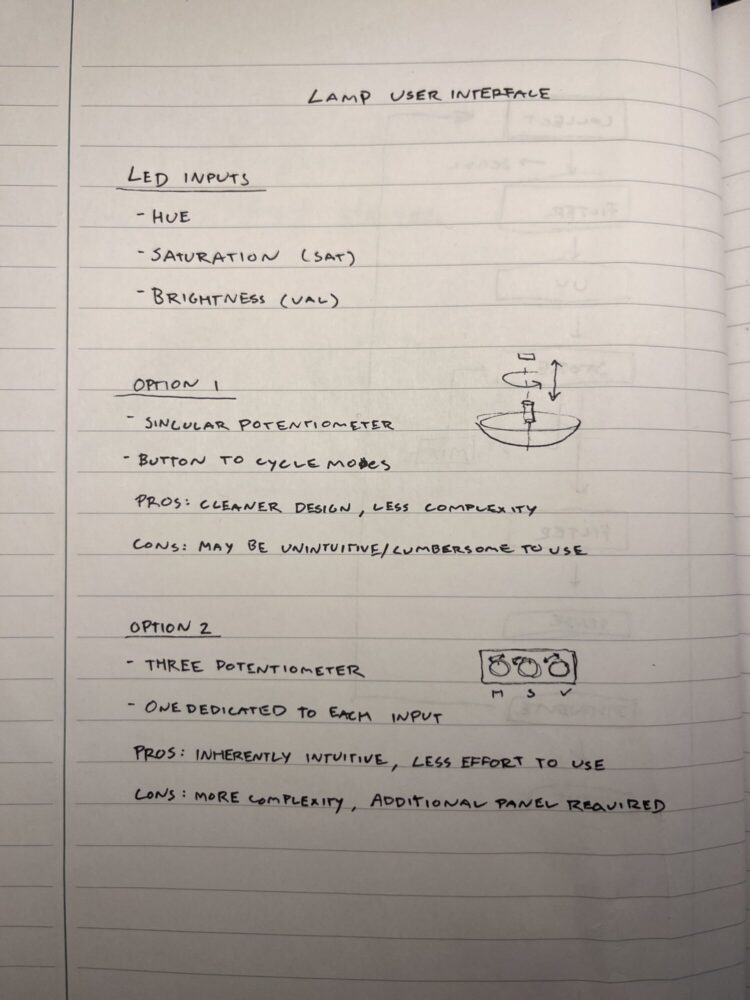
I decided to stick to one potentiometer to control one channel at a time. To switch between modes, I added a button to the circuit. Each click of the button cycles the function of the main knob. I will embed this button in such a way that it will be triggered while depressing the back knob.
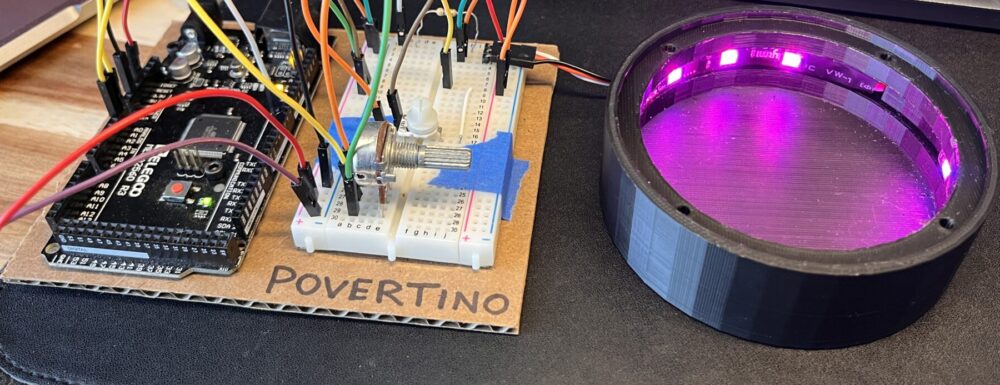
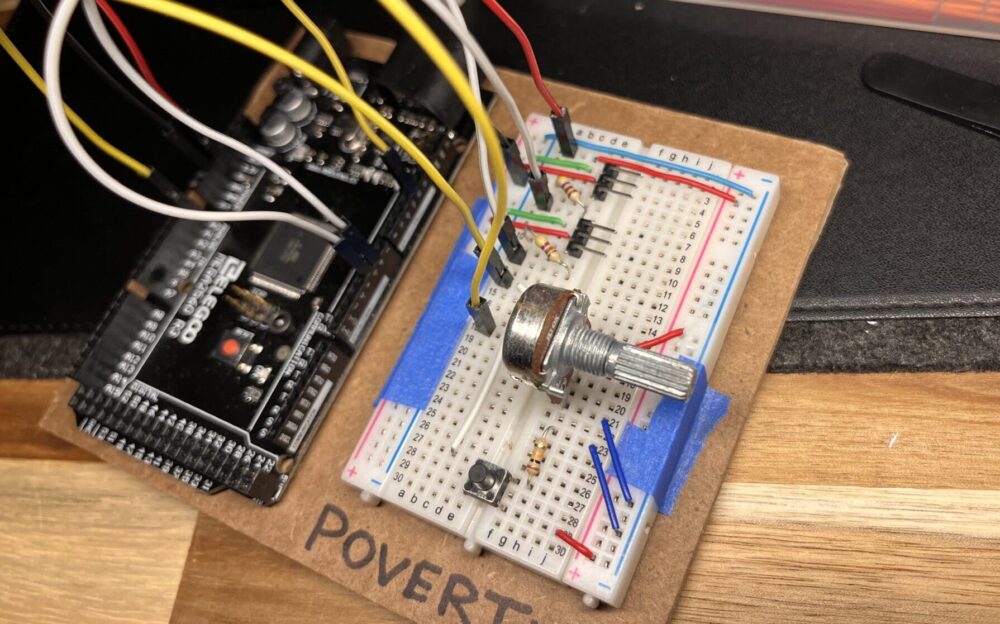
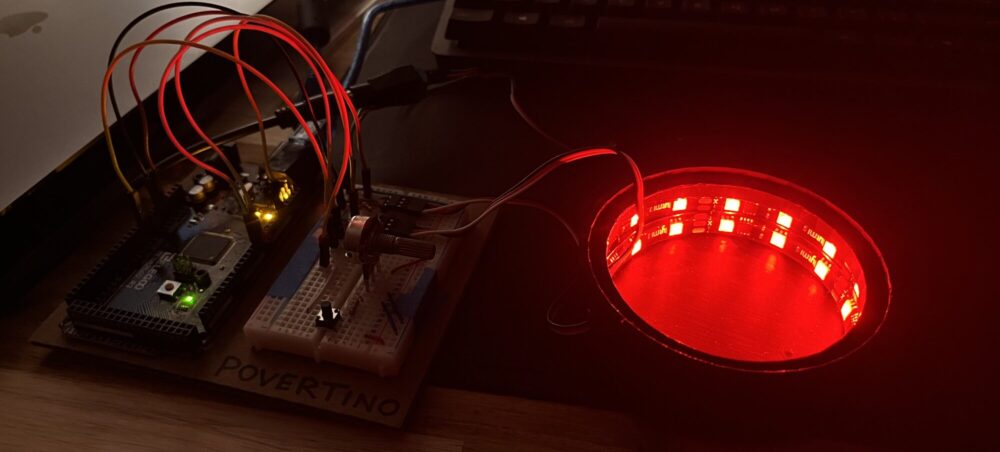
At this stage, I have gotten this program and circuit to function adequately. There are some bugs that I will fix in the coming week.
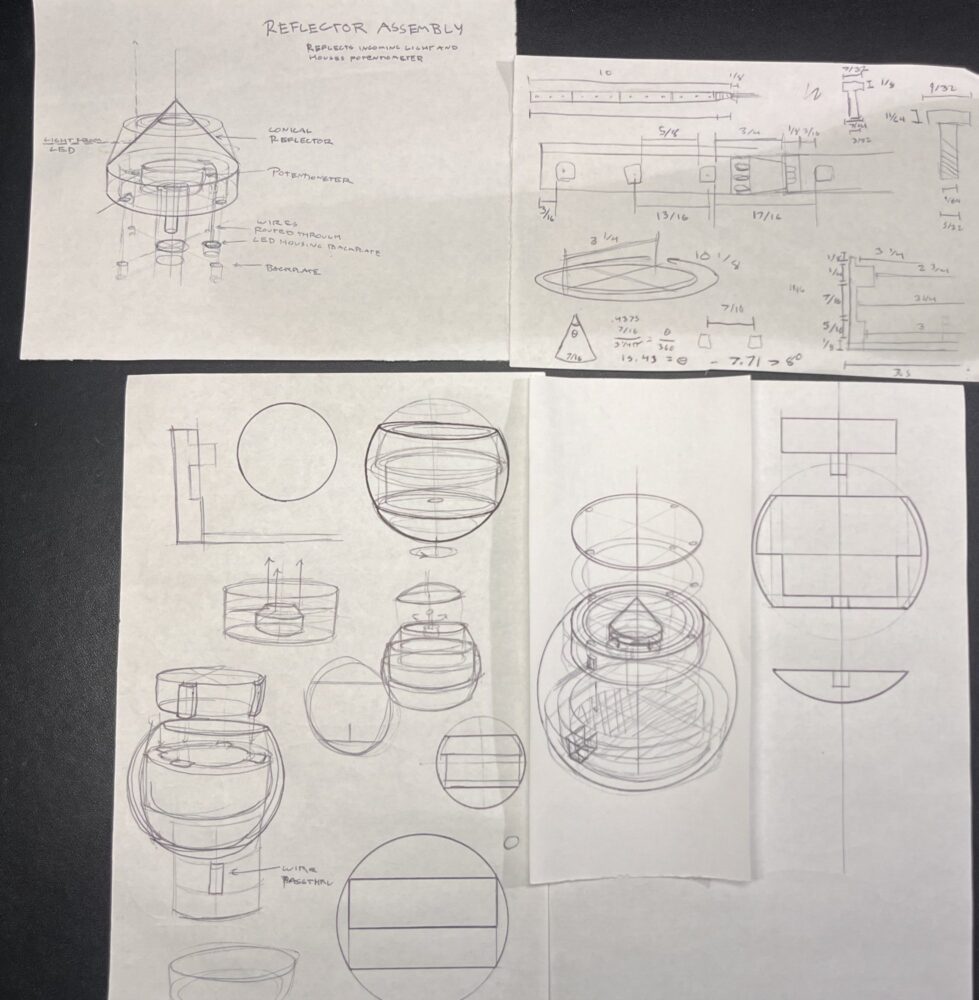
Physical Production
I have designed and 3d modeled the interior lamp assembly, interior reflector and the outer lamp “shade”. I will print these components this week and process/paint them this weekend.
Next Steps
My immediate next step is to print out the components and mount the electronic components.
In the meantime, I will design a pedestal for the sphere to rest on.
2 Comments. Leave new
I’m super excited to see the result of this project, Arjun! I am impressed with your sketching and your willingness to dive into multi-faceted electronic components. You noted in your user interface sketches that the singular potentiometer option may be less intuitive for users – do you have any plans to print “knob” details or subtle usability notes on your final 3D model? Looking forward to the fully assembled result!
Thanks Eli! I plan to include three indents on the knobs surface to hopefully convey its function without a label. As for the mode button, I may have to include some marking or usability notes to denote its function since the button itself is hidden and can only be activated by pushing the main knob towards the main lamp housing.