
Fabrication Progress
So far I have made a decent bit of progress. I already had all of my materials which was a helpful head start with this project. It took me a while to set everything up along with cleaning off the glass which was quite dusty from sitting in boxes for almost 30 years. Once I had cleaned all my materials and laid them out, I took some time to get inspired and decide on a design I would like to follow. I picked out the pieces of glass I would like to use forming a sort of color palette. With the chosen naturalism aesthetic, I tried to stick with natural blues, greens, browns, and a bit of white/clear for accent pieces.
I decided to go with an original pattern which would allow it to be unique. This did cause some issues down the road but I was able to work around them. I drew out a rough pattern on some thick watercolor paper so it would retain its integrity as I traced around it and measured it throughout the grinding process. The pieces I changed were 8 and 8 as they both had internal corners which are very difficult to achieve with stained glass.
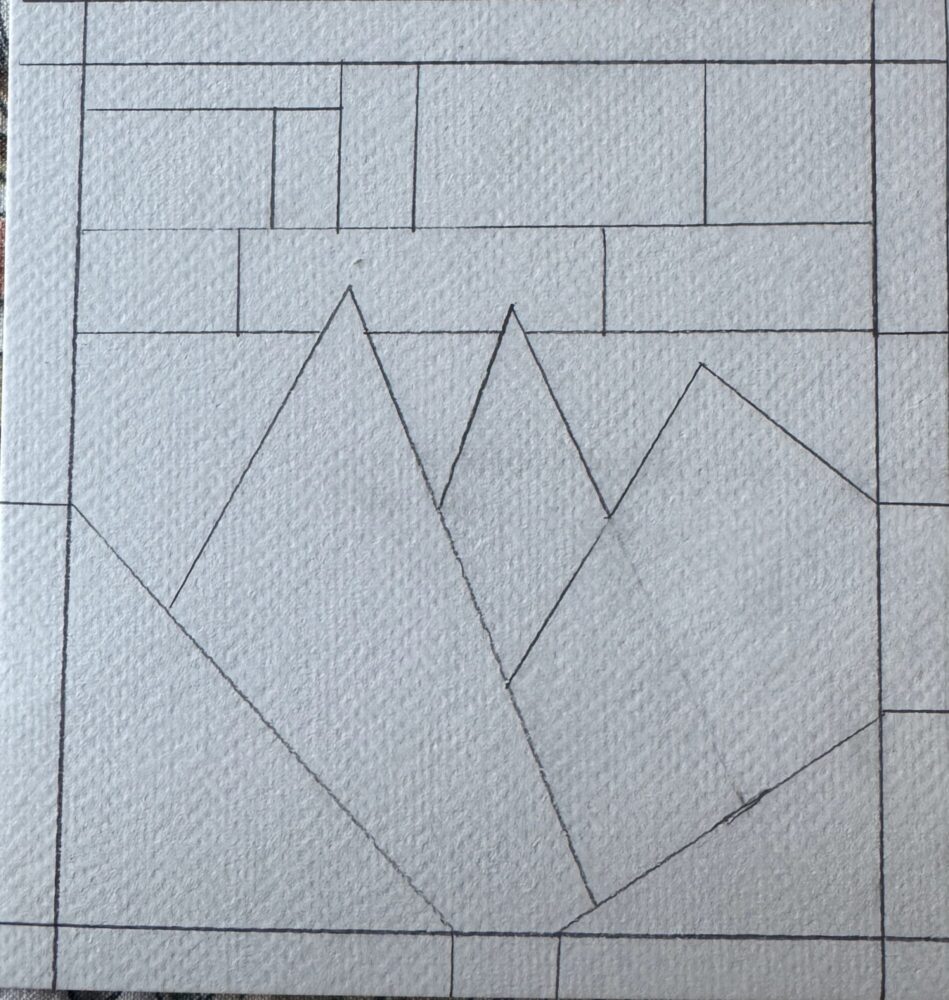
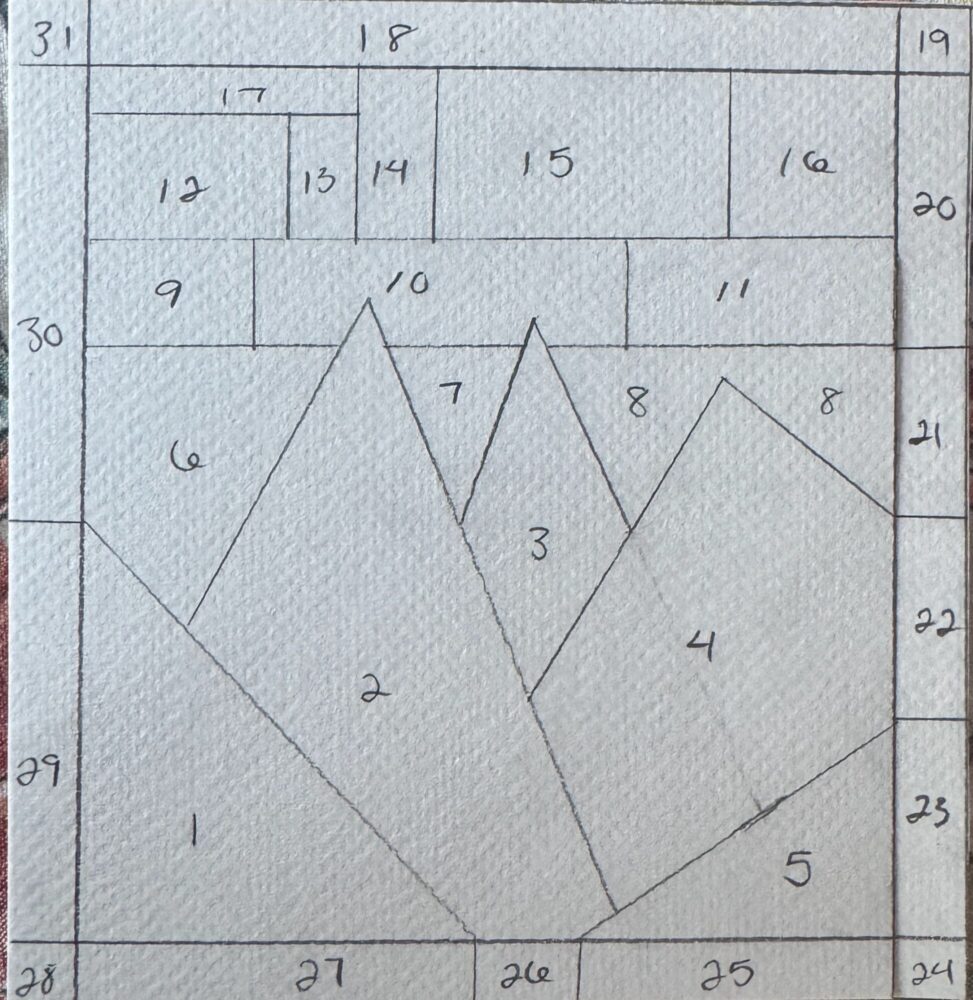
Figure 1 & 2: Pattern Before and After Numbering Pieces
I then decided to just color the pattern digitally to get a sense of the colors I wanted to use. This would allow the original paper to keep the exact shape and not warp due to liquid in markers or pressure from shading. I also used purple to denote white pieces. For piece 16, I marked it yellow but I think I will go with orange or red instead to maintain a more natural color scheme.

Figure 3: Pattern with Digital Overlay of Colors
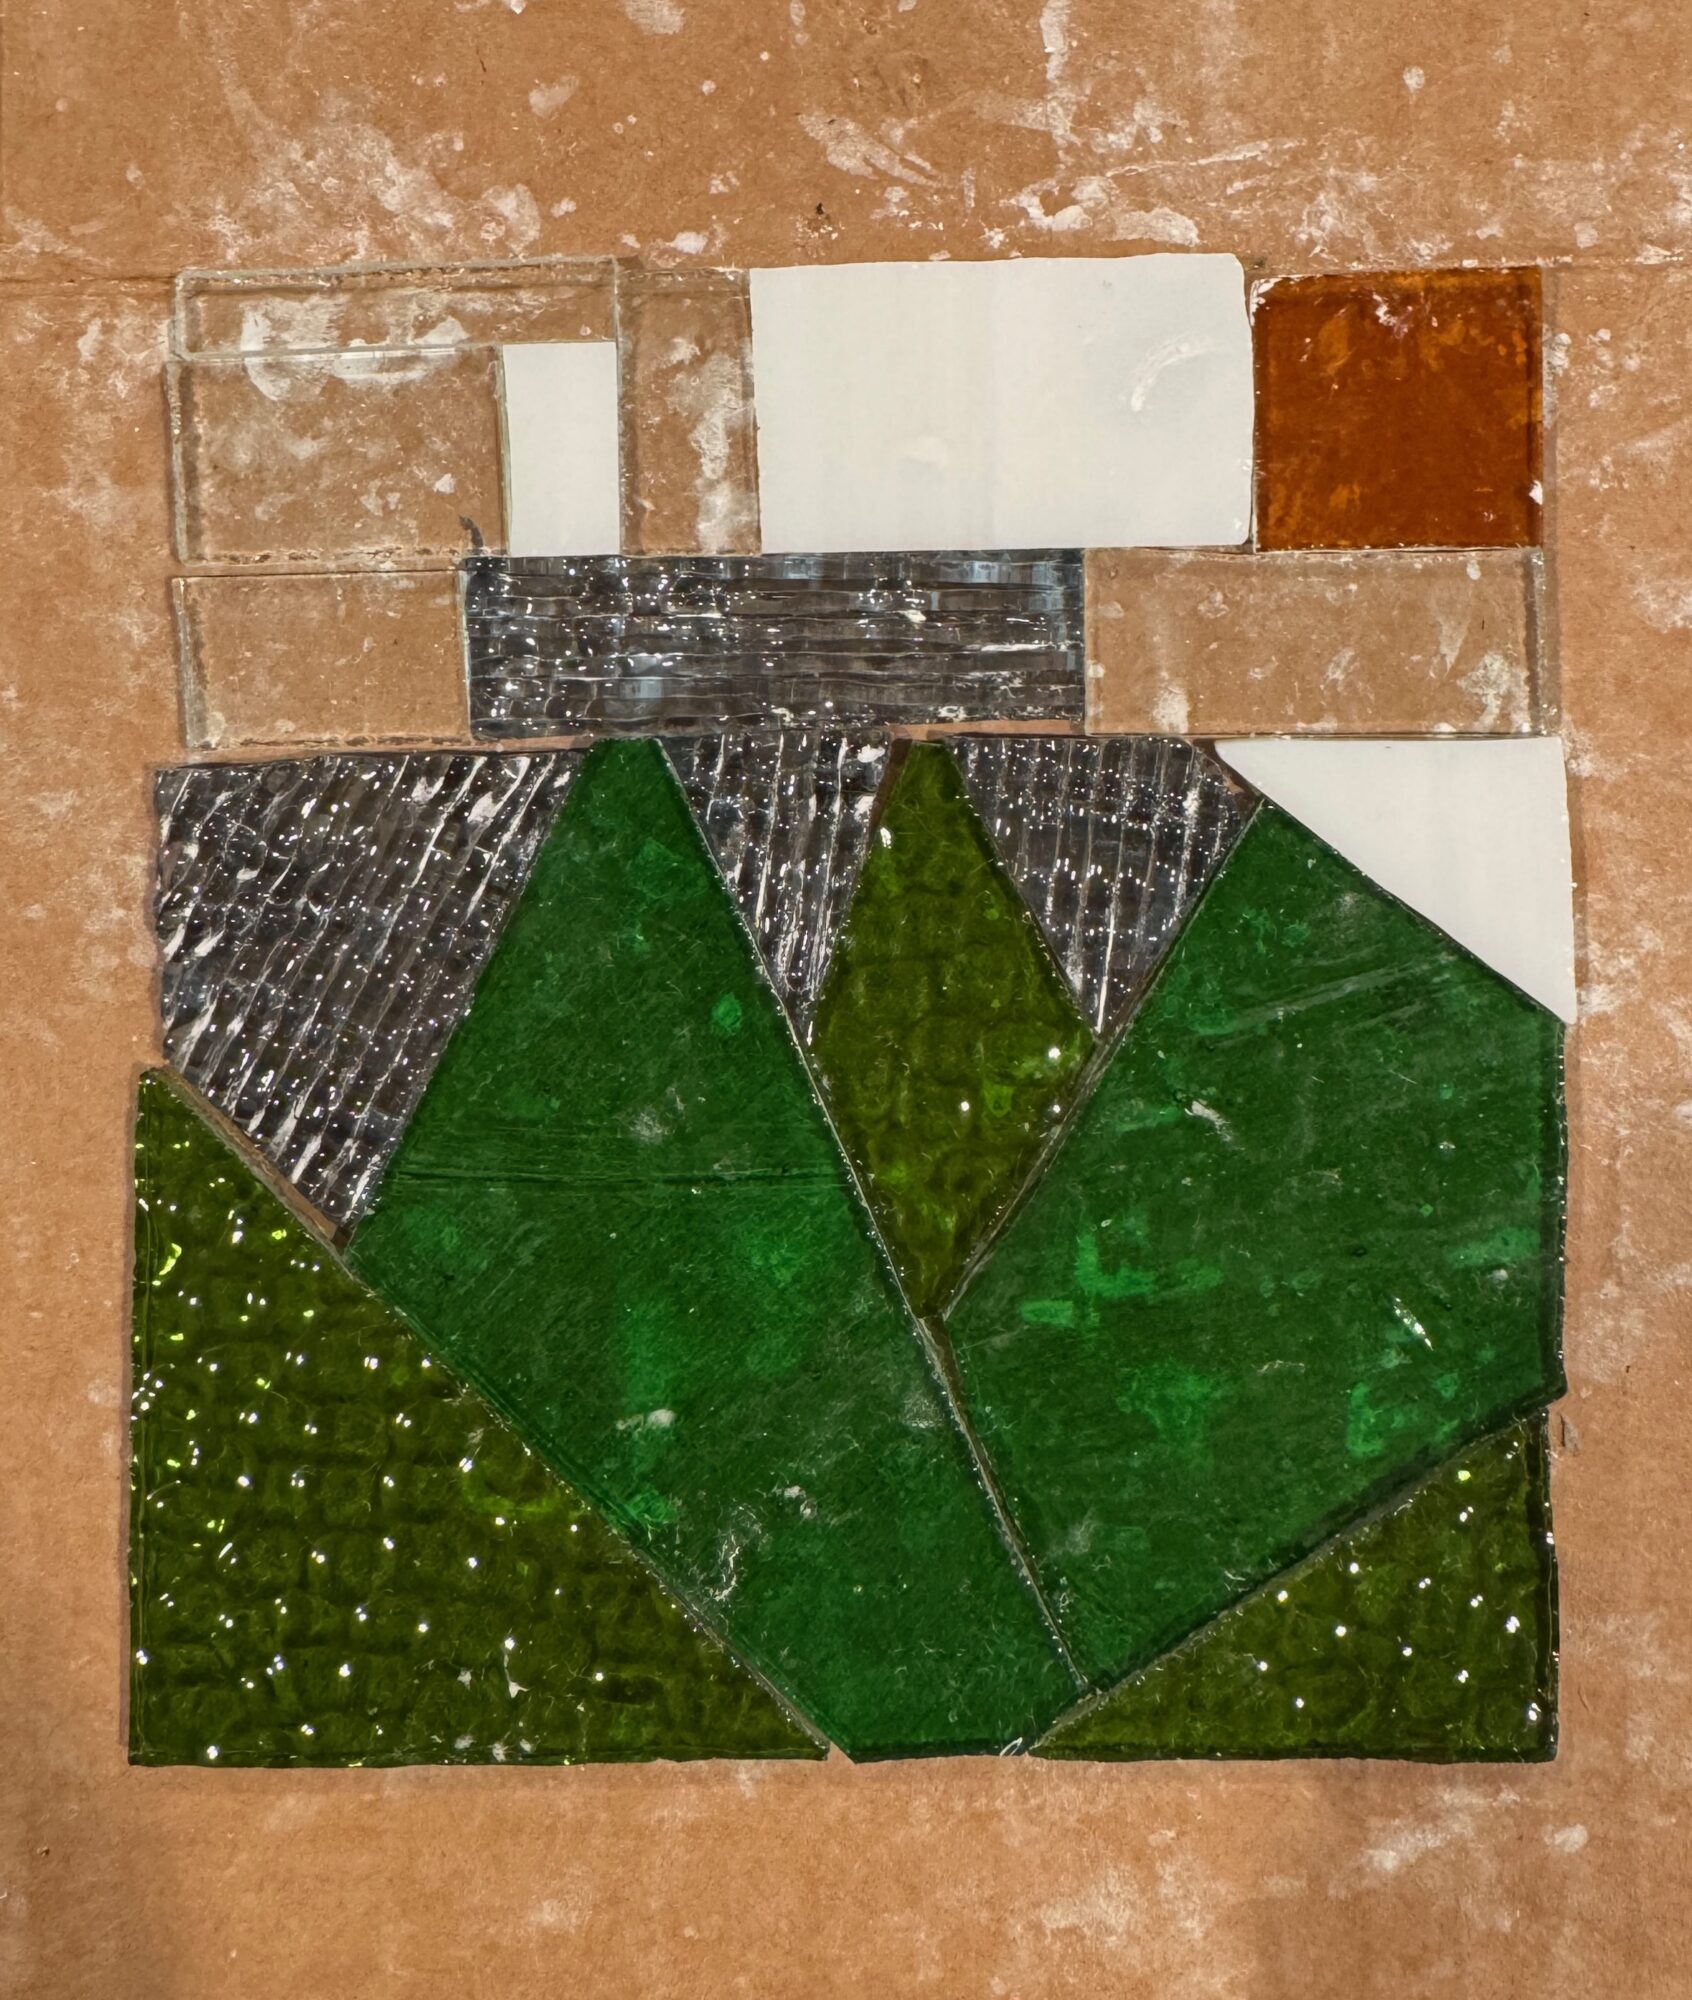
I traced the patterns onto my chosen pieces of glass and then cut and broke them into the desired shapes. I got my pieces as close as possible to the shapes I desired. This was a bit difficult as the cutting process is new to me, so I left a bit more on each piece than ideal, but it will all be ground off in the next step. I also have not done the border yet to ensure the inner design is more complete before cutting.
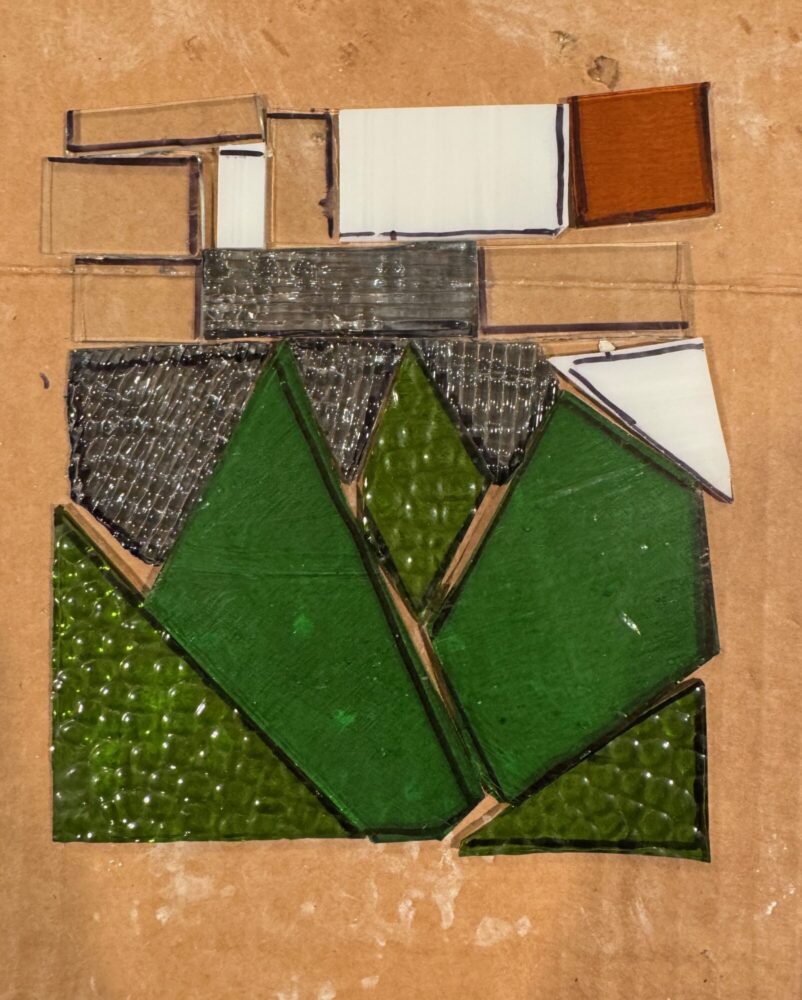
Figure 4: Initial Stained Glass Cut, Arranged in Pattern
I then used the glass grinder to further shape the pieces. I used a Sharpie to trace the pattern which then allowed me to grind until I could not see any more Sharpie. This is a bit difficult as the water in the grinder can wash away the sharpie but I will repeat the process as necessary.
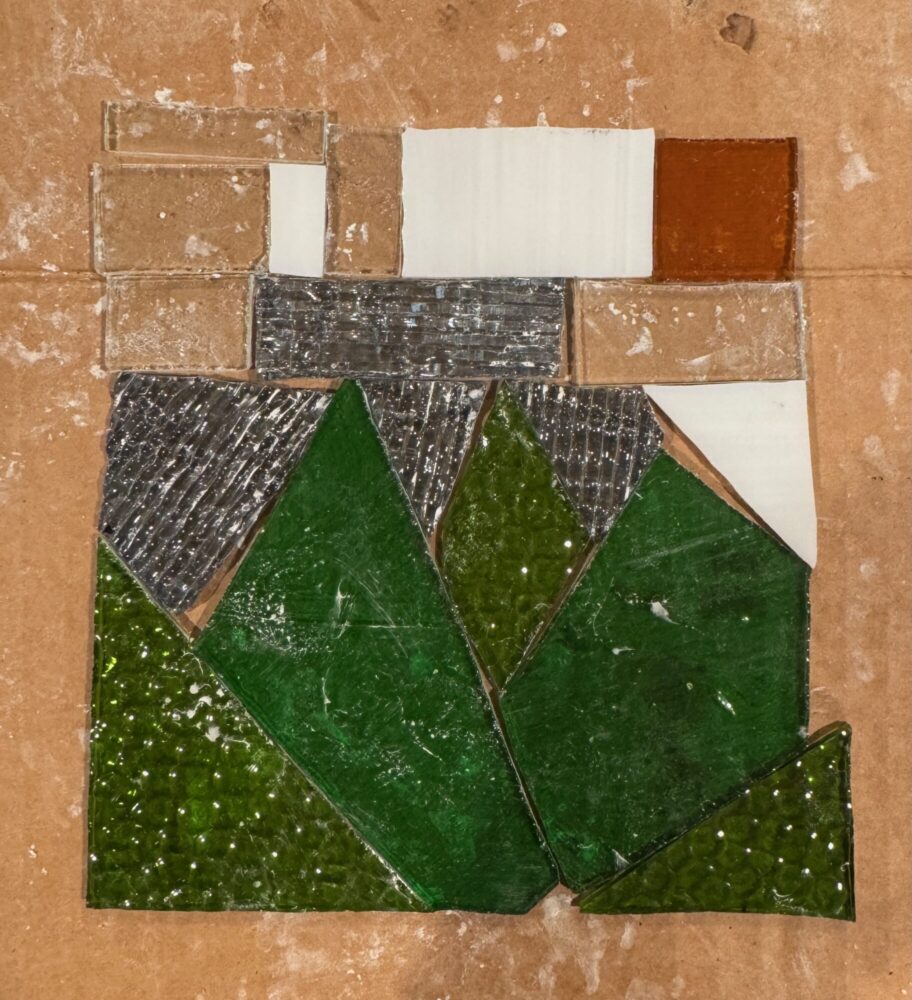
Figure 5: Stained Glass After First Round of Grinding (2/3/25)
This round of cutting and grinding was completed on Monday this week. I then did another round yesterday and below are the results.

Figure 5: Stained Glass After Second Round of Grinding (2/4)
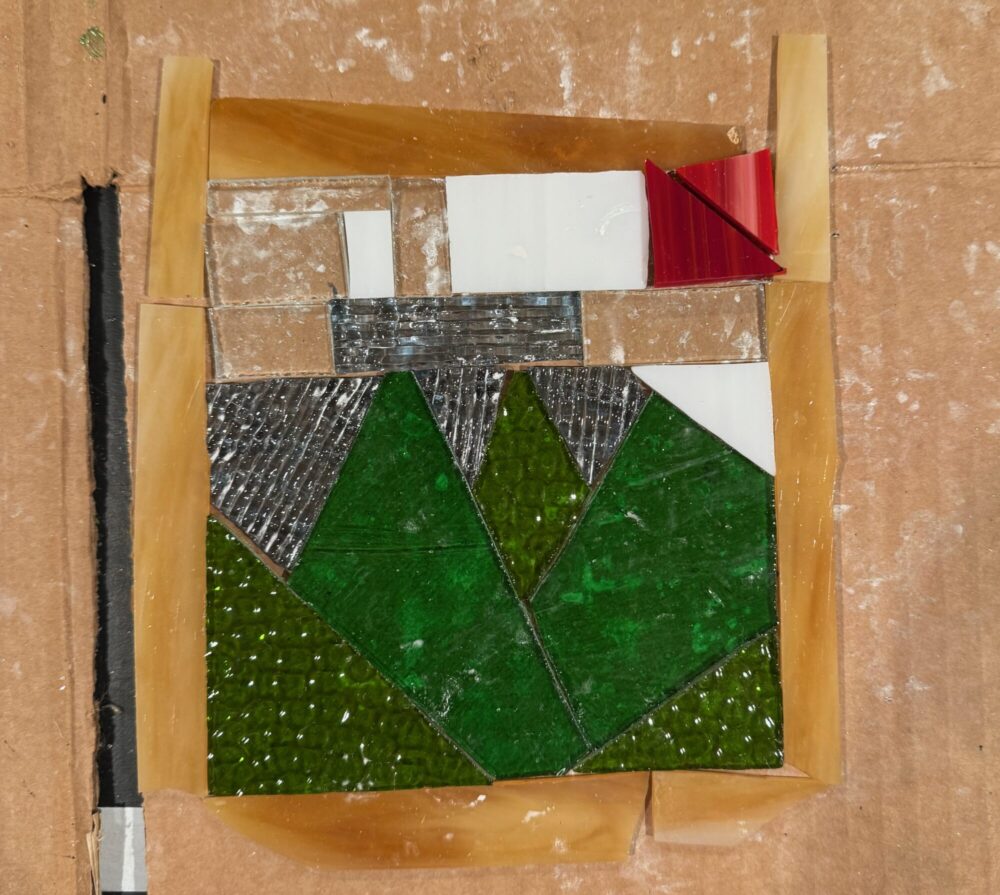
I have picked out the glass I would like to use for the border shown below. I was also playing around with the idea of changing the sun to opaque red glass versus the current orange glass. I will play around with it a bit more and decide later in the process.
Fabrication Schedule
Previous Schedule
Finalize Design: Monday, February 3rd
Cut and Grind Glass: Monday, February 10th
Foil and Solder: Thursday, February 14th
Finalize Design and Display: Sunday, February 16th
Present in Pods: Monday, February 17th
I am a bit ahead of this schedule which is good because I believe soldering will take a while on this piece. I also have never soldered stained glass so I imagine there could be a steep learning curve. My revised schedule is below:
New Schedule
Finalize Design: Completed, February 4th (Monday)
Cut and Grind Glass: Grinding is in progress, Finish by February 7th (Friday)
Foil and Solder: Wednesday, February 12th
Finalize Design and Display: Sunday, February 16th
Present in Pods: Monday, February 17th
I would like to keep the “Finalization Period” because I want to find a way to display the piece indoors. Stained glass is usually in windows and looks the nicest with the sun shining through it. I hope I can make it look nice even away from a window. My current ideas are a wooden base that it can slide into, this could also have a lightbulb or LED strip to illuminate the piece.