

A Sisyphus table is a kinetic table that uses a small steel marble to draw intricate designs in sand. I was inspired by some YouTube videos that I saw, similar to the one below. I have been wanting to make one for some time, so this project seemed like the perfect opportunity to attempt it for myself.
Initial Vision for Project:
Initially I wanted to do a 2 axis mechanism to move the marble. I considered several options for the mechanism that were based on other designs I had seen on the internet. The design that I chose to go with was a centrally turning gear, and a rack and pinion. For the aesthetic, I looked at various table designs and chose to go with a minimalist, black aesthetic. I felt that I could use LED lighting to make the design more visually interesting, and allow the designs in the sand to be the main focus of the table.

Initial Design:
Materials and Manufacturing:
It was important for my project to be quickly and easily manufacturable. This is why I chose to design all of the components to be out of laser cut acrylic. That way if I needed to quickly change a part, I could do so without having to wait for hours for a 3D print, or have to re machine it. I had also used lasercutting in several other projects, so I was more familiar with it than other methods.
Mechanical Design:
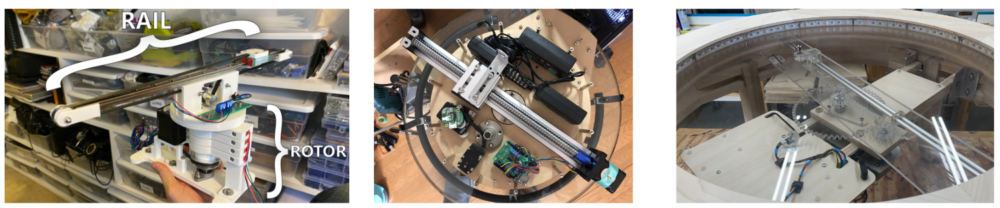
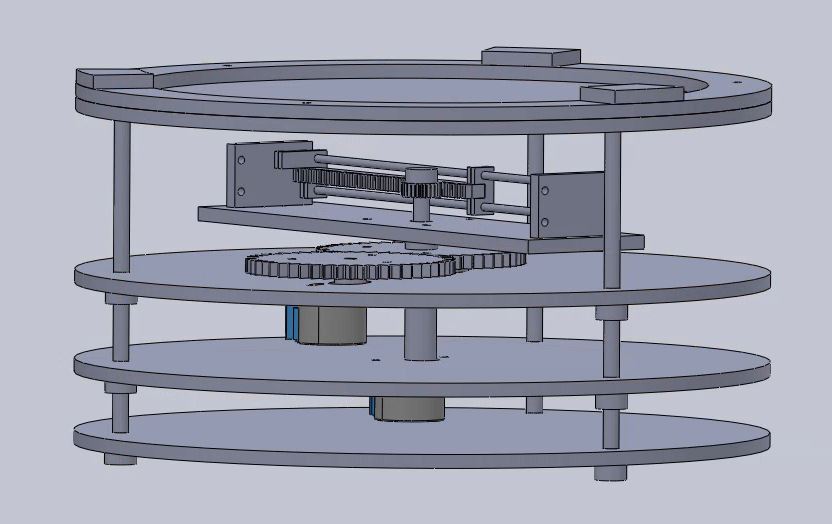
Although much of the project involved mechanical design, the mechanism moving the marble is a large part of the aesthetic. For the structure of the mechanism, I used 3 aluminum rods to create a layered design of acrylic plates. These plates are supported by shaft collars. The mechanism works by using one centrally mounted motor to spin the top gear, which translates magnet in the “r” direction. The offset motor turns a series of gears which rotates the whole rack and pinion mechanism, allowing for both rotation in the “theta” direction and translation in the “r” direction.

Electrical Design:
I completed the assembly for all of the electrical components and wrote some basic code to test the functionality. With these components I could control the stepper motors and use the switches for homing.
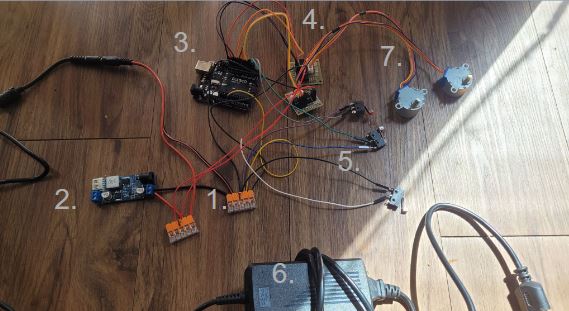
- Power and Ground Rails
- 12V to 5V DC-DC converter
- Arduino Uno
- ULN2003 Controllers
- Limit Switches
- 12v Power Supply
- 28BYJ-48 Stepper
Final Design:
Due to some manufacturing issues, which I will detail in post 12, I needed to redesign the table to be much smaller. Originally the diameter was around 12 inches for the sand table and featured two degrees of freedom. For the redesign, I chose to only use one motor and create a design more similar to a spirograph.
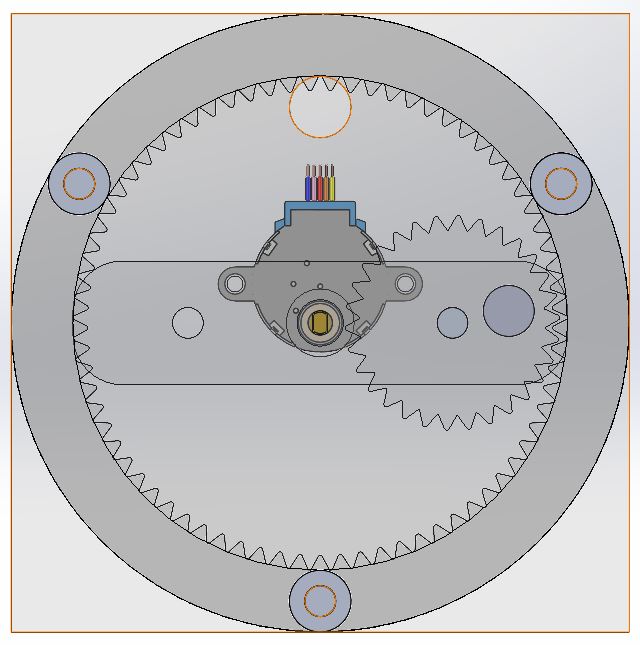
Mechanical Design:
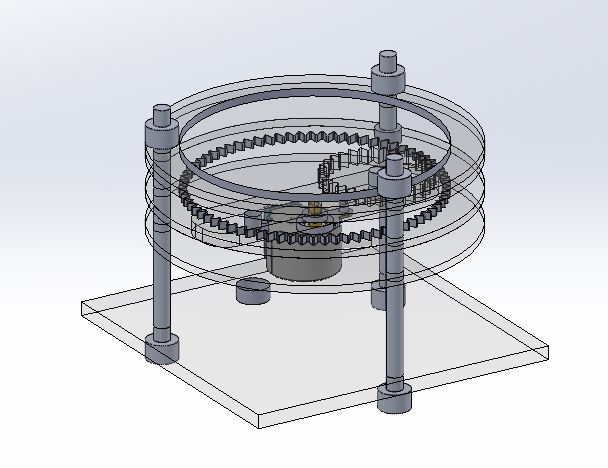
I stuck with a very similar design for the structure of the redesign, however the mechanism is a bit different. It uses a centrally mounted motor to spin a rotor that has a gear mounted on one side. As the motor spins the rotor, the gear rides around the track of the internal gear, spinning the magnet. I made it so the gears have a diameter ratio of about 2.5 to allow the design the process rather than tracing the same track in the sand.
Aesthetic Choices:
I focused more on aesthetics with this design, with a matte black acrylic case that sits on the top of the 3 posts, and considerations for how the LEDs would be wired and fixed.
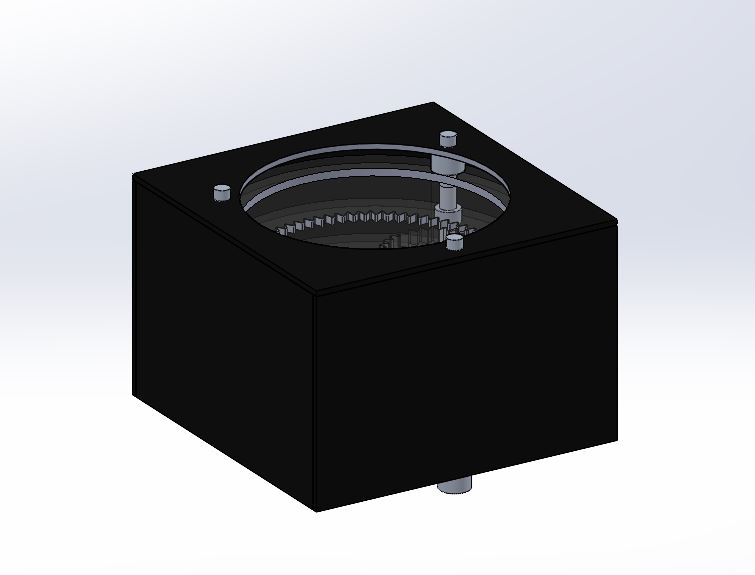
Final Product:
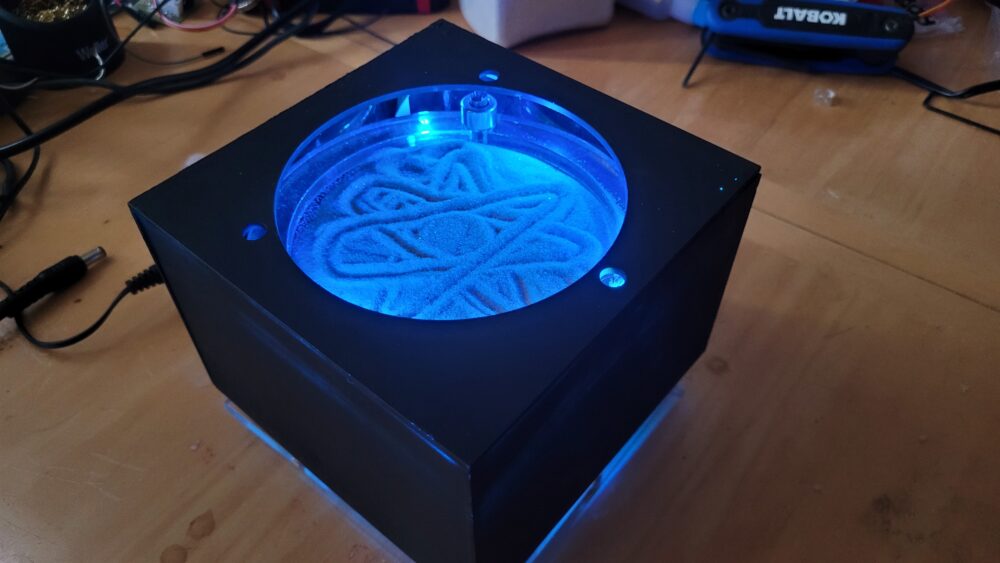
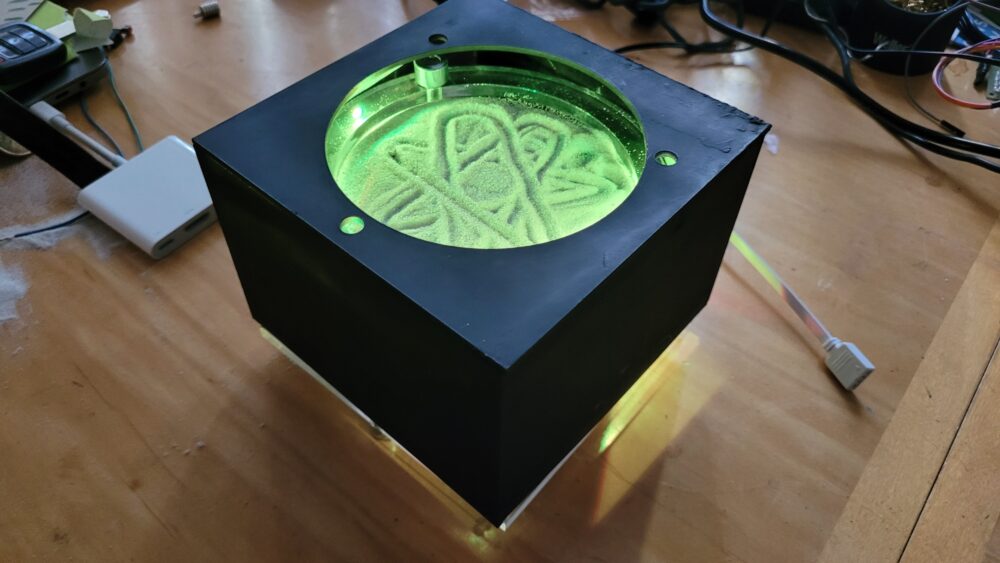
I am pretty satisfied with the final product. The mechanism isn’t very reliable, but it does draw designs in the sand. The LEDs and the black enclosure fit the aesthetic I was going for. As time has gone, the paint has started to chip off of the enclosure, and I think it actually looks more interesting because you can see light from the LEDs shining through.
Note: This video was taken after I had to repair it, so it is a bit noisier
and has some hitches in the mechanism.
https://home.tarkett.com/en_EU/node/what-is-minimalist-interior-design-style-8860#:~:text=Minimalist%20furniture%20and%20accessories%20focus,accessories%20or%20highly%20detailed%20ornamentation.https://promnicesk.live/product_details/95543917.html
1 Comment. Leave new
Hey Luke, this project rocks! If you did it a second time how would you improve the design?