Abstract:
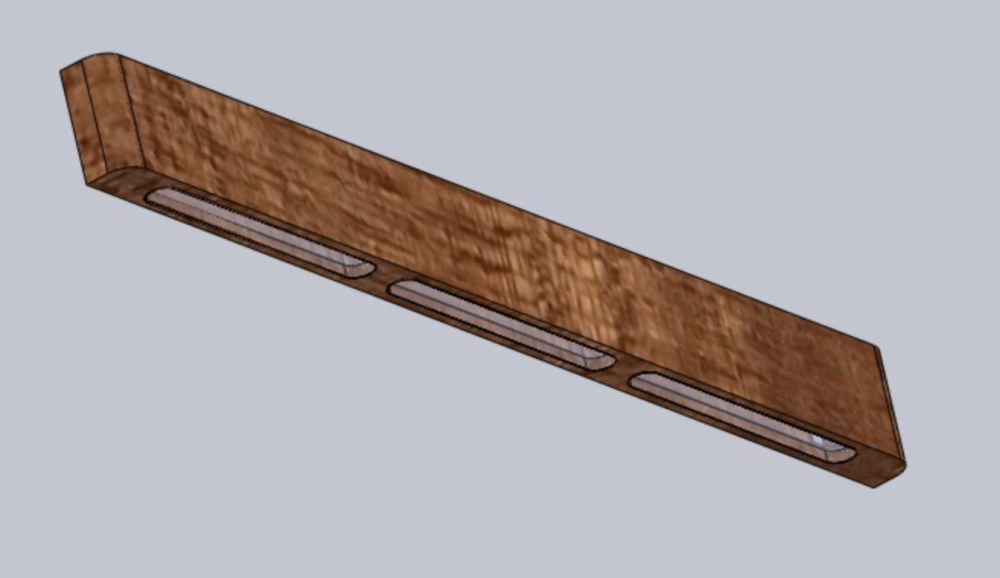
My final project will be a simplistic, low profile wooden light fixture taking inspiration from the minimalist aesthetic. It will be constructed from a hallowed out 2×4 plank of wood, a 3/8th acrylic sheet and warm LED strip lights. The dynamic component of this project will be from the LED’s ability to change shades, so as the light is on it will periodically cast out different shades of warm light. In the second part of this report I will discuss the manufacturing and assembly of the final piece. I will also discuss the different challenges I faced within this process and the lessons I learned. Below is a timeline which I created for the duration of this project:
Timeline:
- March 10-March 23: Design Process
- April 2-April 7: Materials Purchasing
- April 7-April 20: Manufacture, Re-design, Re-Manufacture, Finish

Manufacturing:
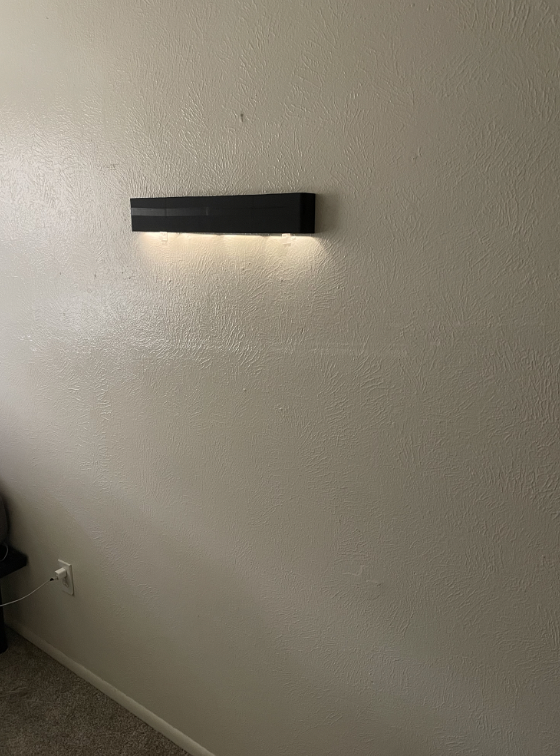
After receiving all of my raw supplies I was ready to begin manufacturing my light fixture. I started by cutting down my 2×4 piece of wood to 3 feet on a table saw and sanded all the rough edges. Next I printed a stencil of the light cutout holes and trace three of them onto the 2×4. From there I drilled a very small through hole for each of the lighting hole and used a jig saw to saw all three of the shapes out. Unfortunately, after successfully sawing the first hole, I snapped the wood in half will attempting the center one due to a weird knot in the wood. Because I was already tight on time, I have to pivot the material of the main body of my project to 3D printed filament. That being said, the body was much too large to print as one so I then had to split the piece in three even pieces. From there, I submitted .STL files to the Idea Forge to print the body. Once they were finished I was able to super glue the thirds together. While I thought this would be simple, unfortunately a lot of super glue seeped out in a few different places causing substancial cosmetic defects. This prompted me to then cover the surface of the body in a sticky matte black fabric I was able to find in a scrap bin in the Idea Forge. Next I installed the LED strip into the main body buy cutting the strip to size and running it around the internal structure. This process was quite easy due to the sticky backing of the LEDs. Finally the last step was to implement the acrylic coverings for the light holes. To do so, I brought my acrylic sheet to the ITL and cut it on a laser cutter using a .DXF file. This required a few iterations to create a press fit into the main body of my piece. Once I achieved this, I then super glued the light covers in (this time being a lot more careful) and the piece was complete!

Lessons Learn:
Throughout this project I learned the following lessons:
- Buying cheap wood is a gamble especially when trying to do intricate things with it as the grain structure can make things very difficult.
- Super glue is very noticeable on dark colored 3D prints so if you do not expect do an additional finishing step be very careful with its application.
- Laser cutting tolerances at CU can be all over the place so even straight forward operations may take more time then you think.

1 Comment. Leave new
I think the end product looks super clean. I think it would look great either right above a bed, door frame, or in a closet to light up your clothes. I particularly like the cordless design. Great job m!an