For my final project I aimed to create a useful addition to my vehicle’s interior in the form of a gauge cluster cover. I wanted to follow the mid-century modern aesthetic, and I think I achieved that well through my choice of material and clean design. I took inspiration from the various mid-century modern furniture that I’ve seen in the past; in my opinion, these clean designs with their lack of decorative embellishments are timeless and visually appealing (see the example below).
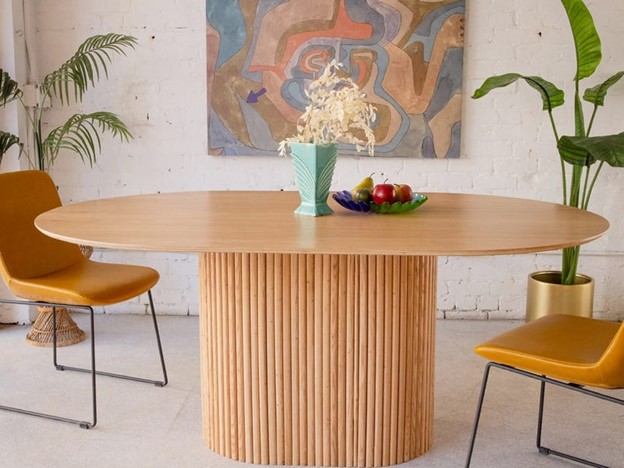
Image Source: https://i.insider.com/6318e5d55a0e5a0018d2f1fa?width=800&format=jpeg&auto=webp
Since a gauge cluster in my daily driver is something I’d look at every day, and I’m not a fan of cluttered designs in general, the choice of midcentury modern for this projects design seemed to fit quite well.
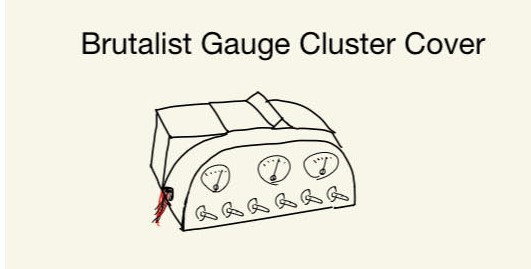
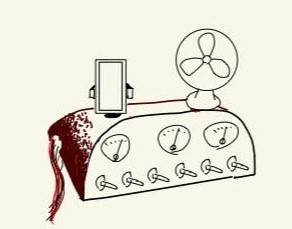
As for the overall design, there is a front panel that’s made of laser-cut stainless steel. This panel holds the water temp, transmission temp, and voltage gauges as well switches, making up what I’m calling the gauge cluster. I think that the metal panel aesthetic fits well with the mid-century modern aesthetic goal of this project, since its filleted corners and symmetrical design looks clean in my opinion. Furthermore, there are wires that run from the gauges and switches to various engine components, ground, and an overhead light. These wires do not look great sticking out from the back of the gauges and forming a jumbled mess behind the gauge panel, so naturally I wanted to cover them up in some way. To match the interior’s rugged construction, I chose a rugged material, like my choice of denim for the previous upcycling project of reupholstering the driver’s side sun visor. This time, I thought that the color of leather would be a nice contrast to the blue dashboard components of my truck’s interior. This is especially true when considering that there are a few brown trim pieces throughout the dashboard. After some light leatherwork in the past making axe sheaths, I have extra vegtan leather that matches these trim pieces well. After bending the leather to match the gauge panel fillets, I can use small wood screws to fix the leather to the wooden base of the gauge cluster. In doing so, I hoped to make the rear of the leather cover slope downwards, with an overall low profile. As seen below in my initial sketches, the design had additional elements and aesthetics which I ended up choosing not to implement.

I chose to exclude the installation of the phone holder for two main reasons. First, the space above the cluster is more limited than I had thought, so installing a phone in that area would limit its range of movement and feel too cramped. Additionally, the top mounted phone holder would add clutter to the cluster overall, taking away from the clean, mid century modern aesthetic that can be accomplished without it. Therefore, I made the choice to omit the phone holder installation. Similarly, I’m thinking ill omit installing the fan that I planned to install, for the same reason of a cluttered aesthetic. I haven’t fully decided on this yet, since the AC system needs work, and a fan could work if centered on the gauge.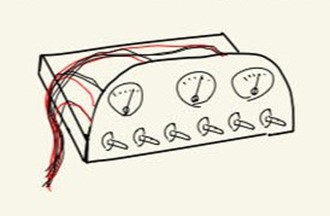

2 Comments. Leave new
Jadin, your attention to detail and commitment to the mid-century modern aesthetic in your gauge cluster cover project is impressive! It’s evident that you put a lot of thought into not only the design but also the functionality and overall visual appeal. The decision to use stainless steel for the front panel to achieve that clean, timeless look aligns well with your design goals. I appreciate how you considered the practical aspects, like covering up wires, and chose materials like denim and leather to complement your truck’s interior while maintaining a cohesive style. It seems like your project is coming together nicely, and your thoughtful approach to omitting certain elements to avoid clutter shows a keen eye for design balance. What were some of the challenges you encountered during the design and implementation of your cluster cover?
Thank you for the thoughtful comment, Tim. A main challenge implementing the cluster cover was getting the angle of the leather after its bent to sit right on the dash. The first leather piece was too narrow and didn’t sit parallel to the dash, so I needed to cut out a second one. Given the thickness of the leather and my limited tools, this is easier said than done; I needed to trace the first iteration to get the layout exactly how I needed it.