What and Why
For the final project, I’ve decided to clean up a prototype I made last summer and hopefully create a nice housing. The prototype is essentially a swamp cooler, but ideally my version will produce less humidity. The inspiration of it came from camping in New Mexico during the summer. When I went, it was unbearably hot and I didn’t want to run my car overnight for A/C in the middle of a desert(I’m not a backpacking camper-more of an overlanding type). I thought about buying a standard swamp cooler, but I usually travel to places where adding humidity is not the best idea. I also looked at portable air conditioning products, but those are not priced for a college student.
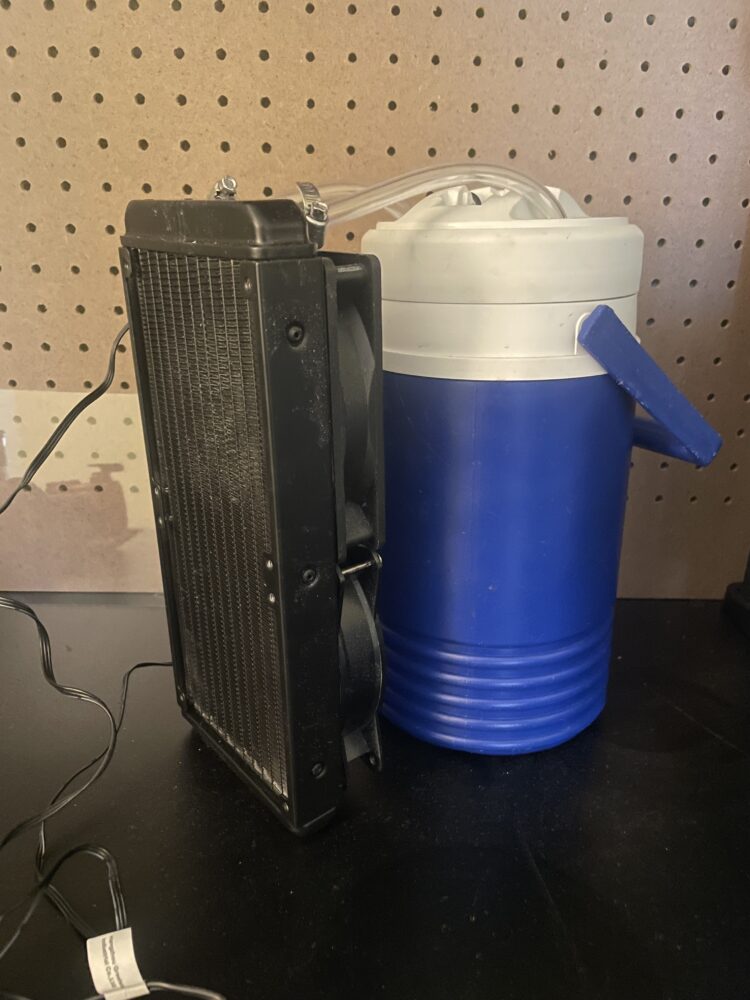
Old Prototype Cooler-Fan
Another use case I was designing around was for outdoor work. I used to work as a diesel tech and I found myself working outside more than in. As much as I enjoyed that job, I hated work during the summer, as there was just no way to escape from the heat. In addition to camping, I think I would’ve used this fan when I was constantly moving around a vehicle or when I was out in middle of an asphalt lot.
The Aesthetic and Vision
The aesthetic I am aiming for is minimalism, but I also want to add some elements of ruggedness seen from other camping equipment. I haven’t found a specific name for this aesthetic I’m trying to achieve, but I believe minimalism with an outdoor/camping aesthetic could describe it well enough. I don’t want to use an unnecessary amount of material to house everything, so I designed it to only house the main components, and not the cooler. This was more of a decision based on practicality rather than form. The reason I am adding a rugged looking component is because I want to include more materials than plastic, which is most of the material used. I’ve always liked the look of exposed covers and fasteners, so that’s a design element I am aiming for.
When I was first thinking about what to make, I had no idea but eventually settled on improving something I already made; so there wasn’t too much outside inspiration. The design is almost completely functional, so there weren’t really any components to inspire for. In terms of the choice to use metal covers, I just wanted to work with metal, and designed it how I thought it flowed with everything else.
During the designing phase, in an attempt to follow minimalist principals, I only used straight lines, circles, and circle segments; the most basic geometric shapes I could build with. The cap portion is entirely composed of extruded circles, the bridge is a rectangle with simple filets at stress point, and the heat exchanger body is a simple box. The design deviates from the minimalist aesthetic at the body cover and cap cover, both made from aluminum; completely unnecessary and a decision based on my personal preference.

[1] Jean-Paul Jérôme, “Comètes”
Function
The function of the cooler-fan is quite simple, just to blow cold air. The way I’ll achieve this is by storing ice and water in an insulated jug(the cooler). The chilled water then gets pumped through a heat exchanger with fans blowing air across it. The ice will melt as the water returns from the heat exchanger slightly warmer than going in. The fan and pump will be powered by a portable battery pack, such as the ones used as phone chargers.
One problem to address immediately is the efficiency of this cooling system. I didn’t calculate it, but based on assumptions and intuition, it might as well be zero due to it just melting ice for the cold source. I didn’t consider this a problem during designing, as the purpose of this fan is to be used in situations where running cooling systems using kilowatts of power is not practical.
On the aluminum cap cover, I added an on-off button to turn on the fan and pump. I also added a USB-C port as the power input. Initially, I wanted to add a variable switch of some sort to control the fan speed, but turns out the max fan speed is kind of weak… but not terrible so there is no need to adjust the fan speed.
Initial designs
During the initial design phase, I came up with the drawings for a baseline of what I need and visioned. I kept the shapes simple and fileted some edges. This design was as minimalist as I could design it; every part of the housing is needed for a function and kept simple.
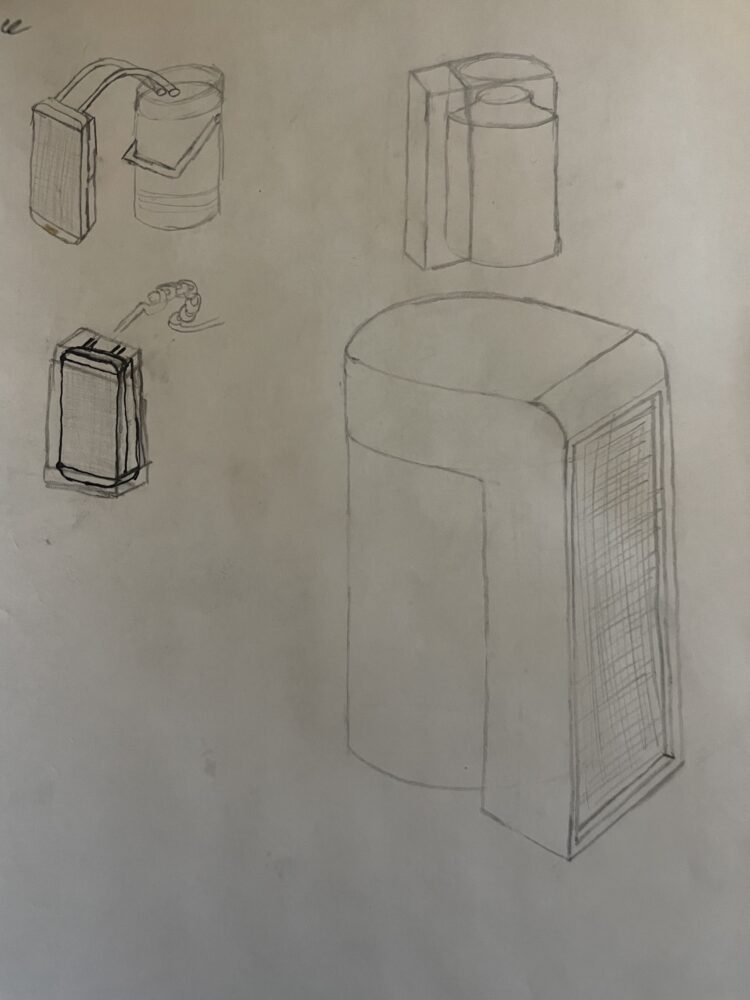
Sketches
This first CAD model I made changed a few things compared to the hand drawn drawing. I included a needed gap in between the jug and fan to allow air to flow in. I also made the cap a bit sleeker by removing excess material.
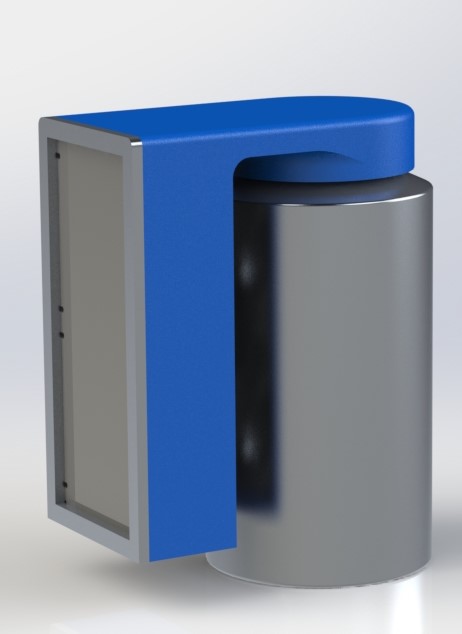
Initial CAD assembly with modifications
Final design and cad
In between the initial design and the final design were many, many modifications and even completely new models. I eventually landed on a fourth and final design.
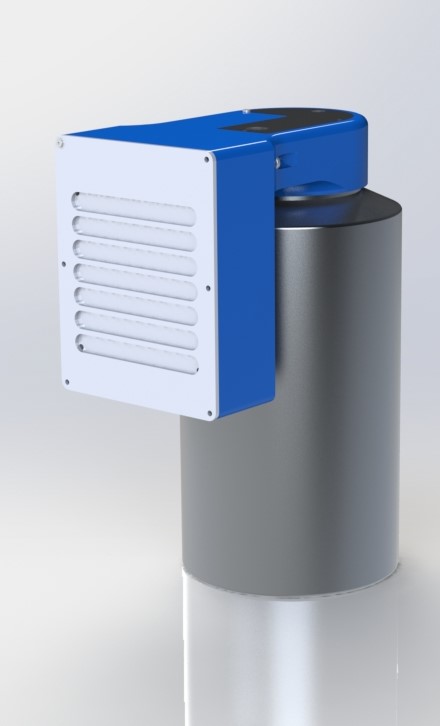
Final CAD assembly
The original plan was to use a 240mm heat exchanger, using two 120mm fans to blow air. But once it came time to 3D print, I learned it would take over 2 days to print; and the size was simply too large to print. I fixed this by changing this design by finding a single 120mm fan sized heat exchanger and redesigning the housing. I also added a cover to protect the fins on the exchanger.
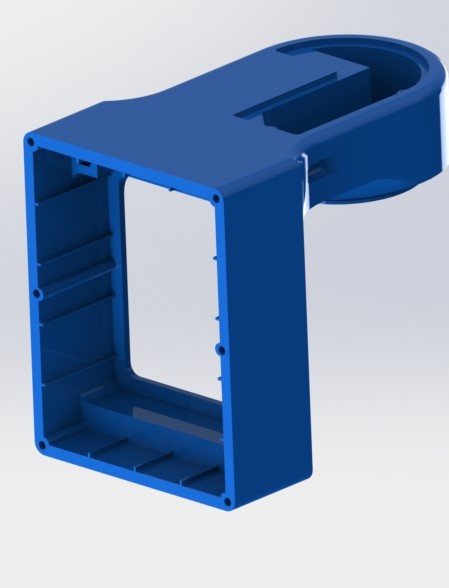
Housing CAD model
To decrease the print time further, I split the entire part into two and made some holes to use some bolts to connect it back together.
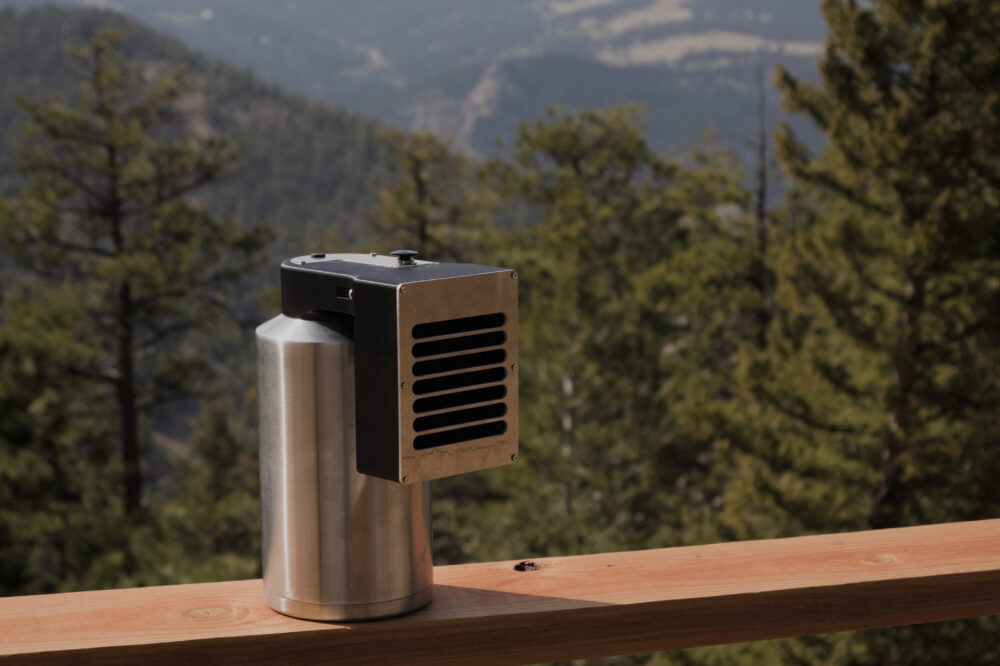
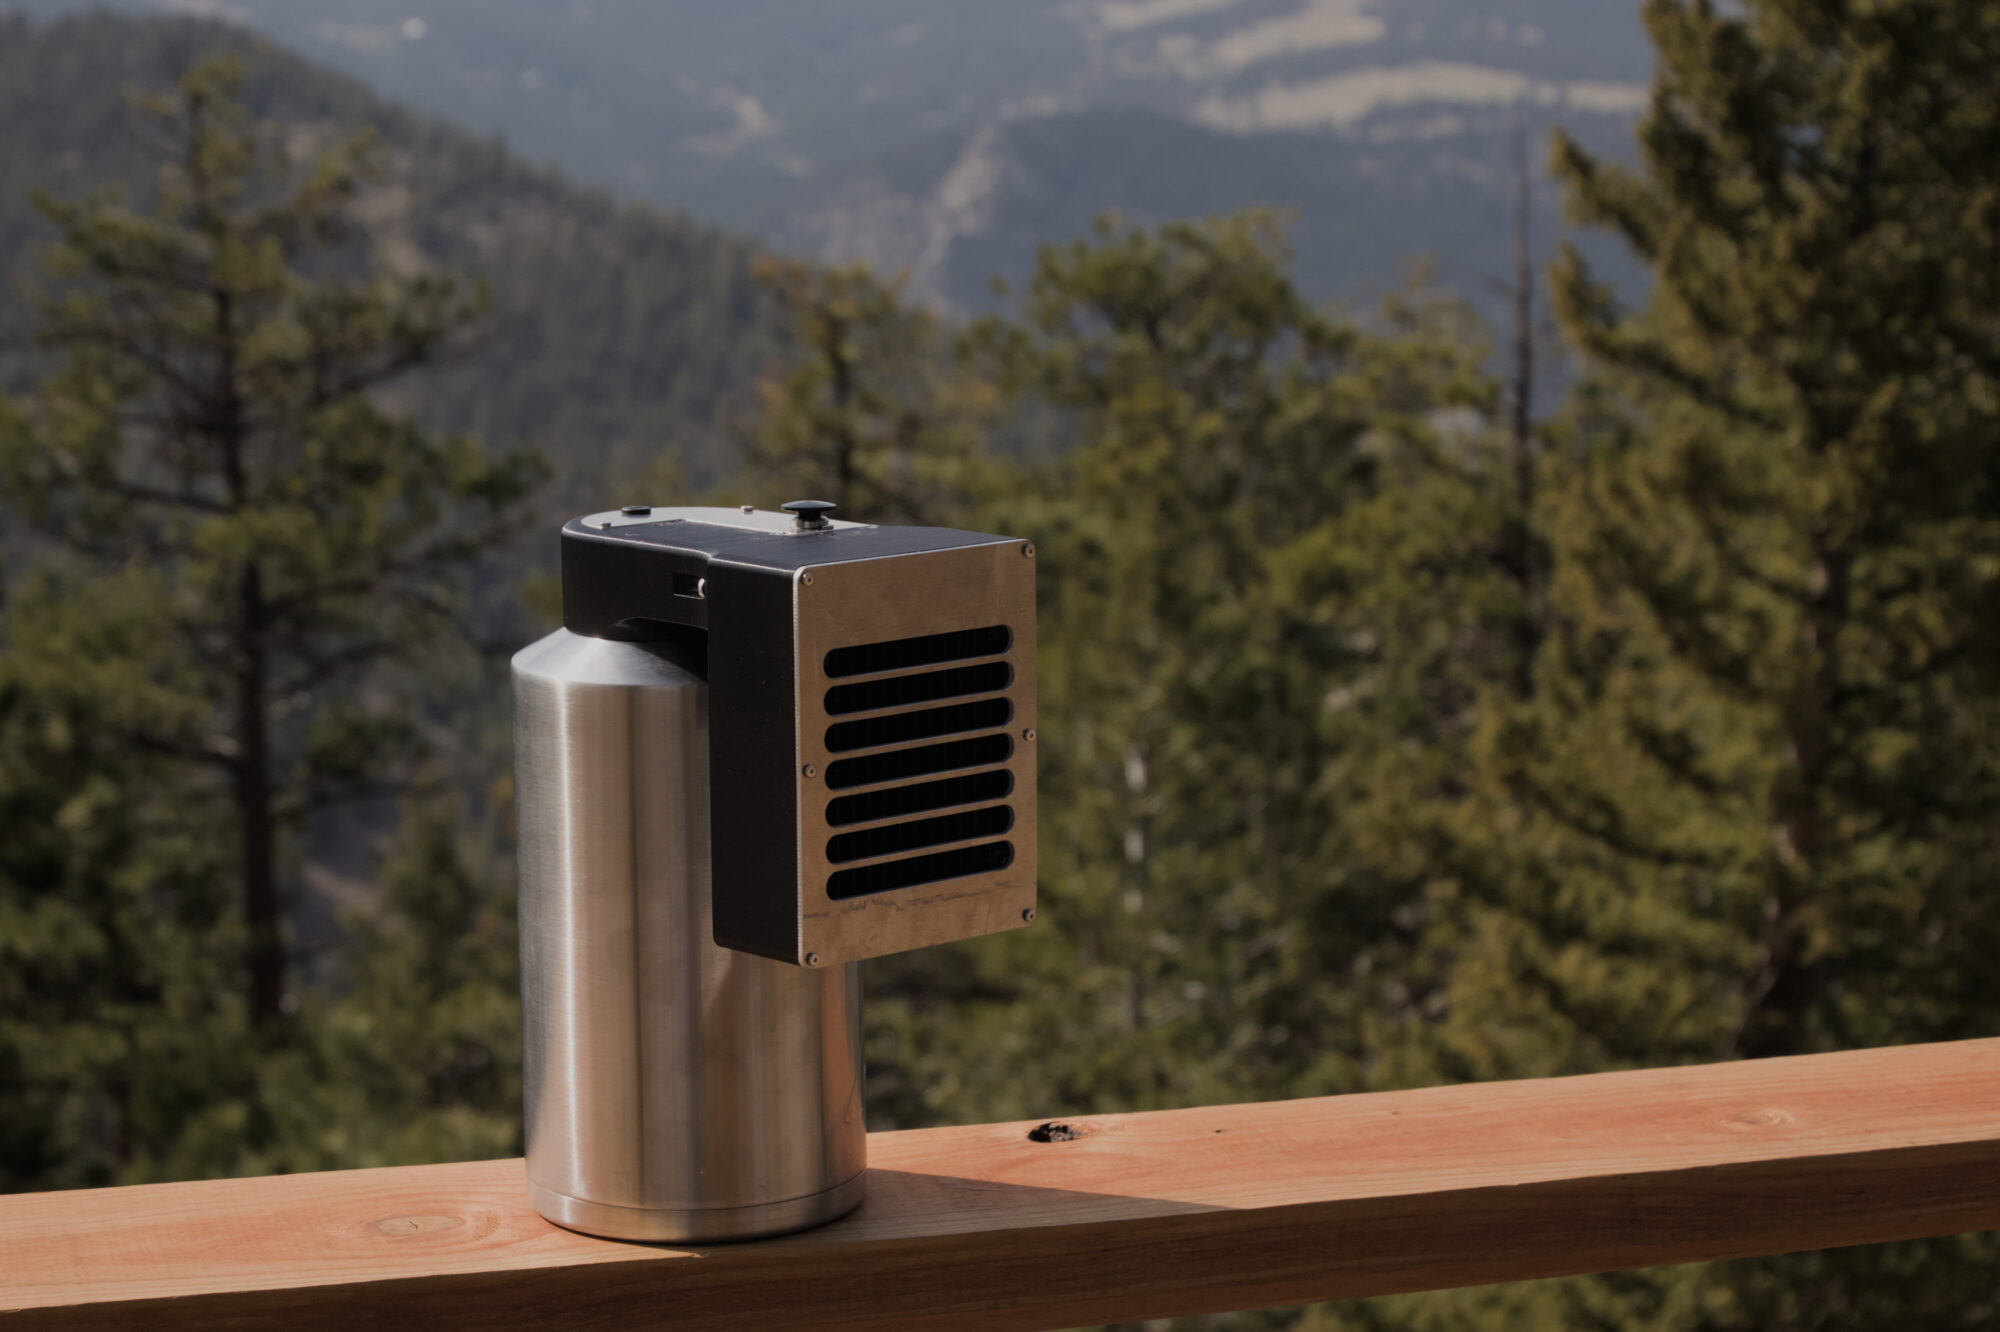
The final version is the one where aluminum covers were added. The J-shaped cap cover was designed to be flush with the top, and the body cover has vents to allow air flow.
I also added a cavity in the cap portion to house the electronics and wiring. To connect the separate sections for the wiring and tubes, I added channels and holes to allow them to pass through certain points.
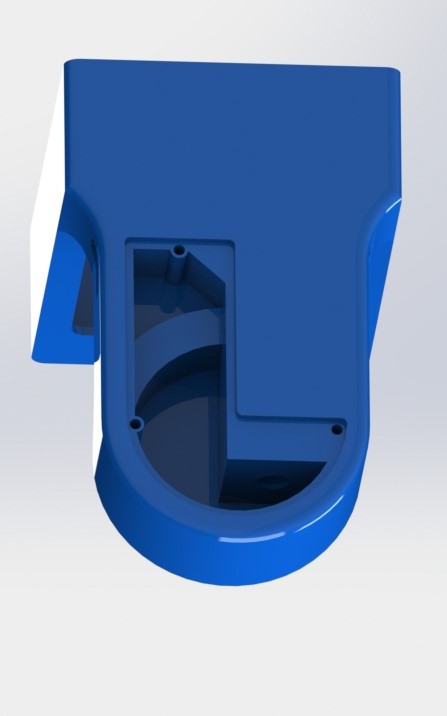
Cavity for electronics
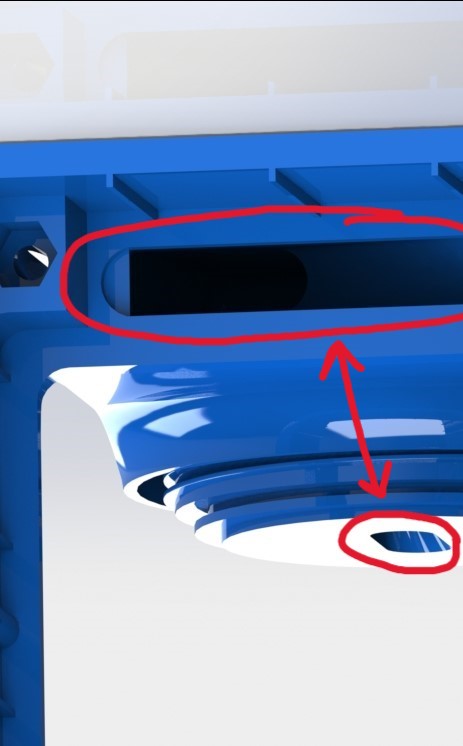
Channels for tubes and wiring
Overall, I really like the design I made and the overall aesthetic of it. Now after having finished item, I do have some things I would like to change if I ever wanted to redesign it; which I will go into in my next post. Before then, here’s the final product:
Citations
[1] Jérôme, Jean-Paul. “Comètes”. 1993. https://jeanpauljerome.com/app/uploads/2021/12/Simon_Blais_Catalogue-short.pdf
2 Comments. Leave new
Wow, this is a really cool (haha) project! I really appreciate the design choices that you made for this to be more than just functional but also not so minimal that it is impossible to use. I also like the use of metal on the case which ties into the bottle you used. This is an often overlooked aspect of attachable products, but you blended the bottle into the design seamlessly. I am curious to know how well it works without the evaporative cooling effect that swamp coolers would typically use. I also wonder if you could use dry ice in the container (with pressure relief) to improve efficiency if ice doesn’t cut it.
Hey Kevin,
Your final project combining a swamp cooler with less humidity is incredibly thoughtful and well-designed, especially given the challenging conditions you’ve described from your experiences in New Mexico. It’s impressive how you’ve managed to balance functionality with aesthetics, choosing minimalism with a touch of ruggedness to suit both the outdoor environment and practical usability.