[1] 3D Printed Gears – Jakk, Additive X
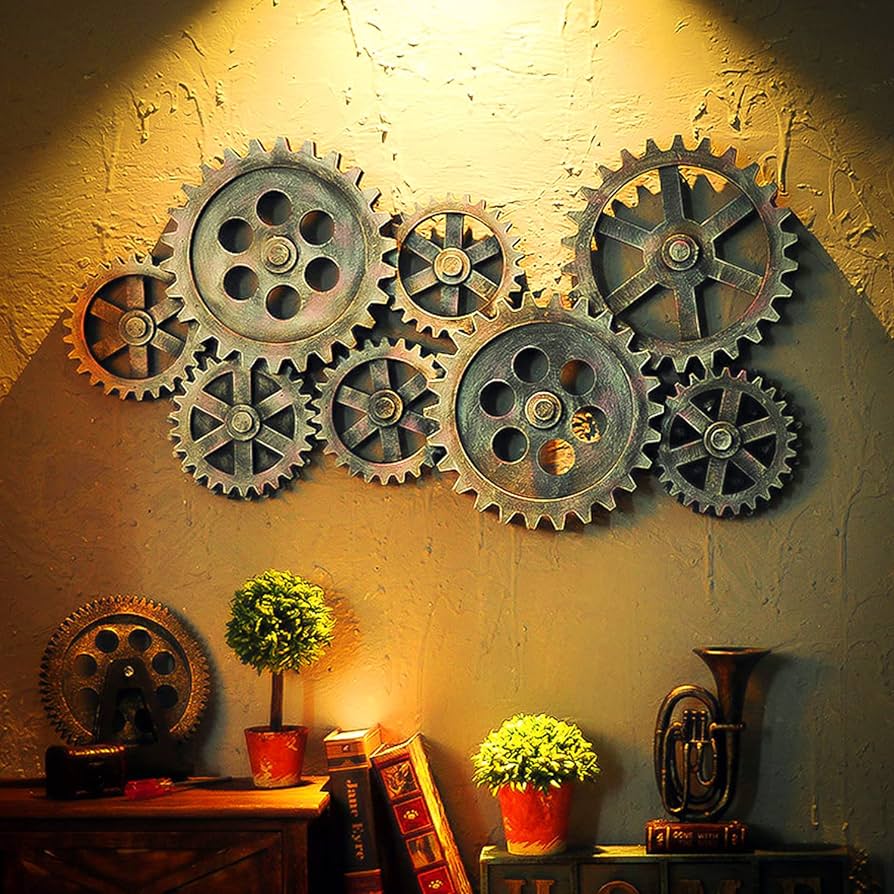
My initial idea for the final project in this course was to 3D print a series of gears and mount them to a board or series of arms that would then attach to a wall for a piece of interactive art. I wanted to incorporate some activated components that would function with these gears, these would add some complexity and curiousity to the piece, and make it more interesting for the beholder. This would take the form of an aperture opening to show a topographical piece or model beneath it, along with some other similar mechanisms.

[2] Aperture Model – Turbosquid
I have modeled and printed some aperture designs for a different project, but they unded up being scrapped so I thought it would be nice to bring the idea back in a different medium and purpose. They require some complex parts and a difficult assembly, but they make for a cool movement that I would like to attempt again.

[3] Steampunk Aesthetic – Aesthetics Wiki
The aesthetic chosen for this initial idea was a steampunk / futuristic aesthetic. Steampunk is kind of a fantasy aesthetic that poses a question about what the world would look like if everything continued to rely on steam power. This brought many designs involving gears, screws, analog clocks, steam powered machines, rotating propellors, and dials. I wanted to work with gears on this project, so this seemed like the best fit to me at the time. 3D printing requires material that strays from the steampunk aesthetic a little bit, as plastic is uncommon, but painting the gears a metallic color could fix this for me.
Upon further reflection on my project, as well as some other aesthetics, I decided to pivot slightly from the previous plan mentioned above. I wanted to take on the steampunk aesthetic mainly because of the gear medium of my project, and it most easily aligns with that aesthetic. After considering some different possibilities for my aesthetic as well as my own personal aesthetic, I found something that matches my aesthetic a little more closely and also uses the gear medium that I like.
My personal aesthetic is a mix of skate, surf, and nature. I believe this was an outcome of my upbringing and location. I was born and raised in San Diego, CA, and was close with many people who surfed and skated. I personally began to longboard when I was young, but only dabbled in park skating when I was in high school. I surfed throughout high school, typically three to four days a week, and hung around the beach most days. My personal aesthetic drew from these activities and my friends who participated. The skate aesthetic is marked in fashion by baggy clothes, graphic T shirts, Vans or similar skate shoe, and denim. The surf aesthetic is marked by flip flops, sunglasses, shaggy hair, board shorts, comfortable clothing, and earthy colors. I came to Colorado for college (obviously) and here I integrated into the outdoor culture that Boulder seems to foster, with puffy jackets, warm wear, flannels, and neutral colors. Currently my personal aesthetic is a kind of mix of these things.
My final project inspiration came from the desire to create something for myself that would represent something about my college experience, since I am graduating in May. I have been feeling torn about leaving, since I have some ideas that have not come to fruition during my time here due to lack of time or effort. My main concern with this is that I’ll be leaving behind all of the resources that I have here, and I think that I have only recently begun to take full advantage of these resources for personal use. I wanted my project to be something that would benefit me using the resources on campus (3D printing) and represent my time spent studying engineering, hence the gears.
After exploring some different options for my project’s aesthetic, as mentioned in post 7, I decided to change my path slightly. I thought at first that it would be very difficult to use any aesthetic other than steampunk with gears, but after doing some research I found that there are some interesting other options. I discovered that gears can come in all kinds of shapes, which I could use to my advantage in harnessing a different aesthetic. Square gears could align with cubism, and oblong gears could align with a more natural aesthetic. Most gears use a circular shape, since these are the most efficient and can utilize uniform teeth, but I found it interesting that I could change the shape and not be attached to this shape.

[4] Square Gears – Clayton Boyer

[5] Weird Gears by Steve Johnson
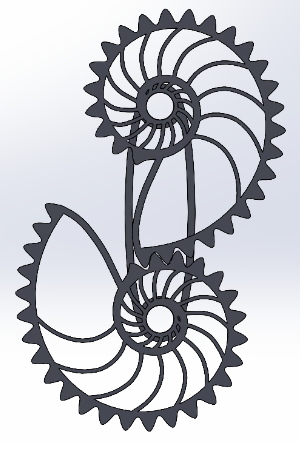
These interesting gears led me to think that I could do more with this medium and expand my view on my aesthetic. After some thought, I discovered that I could use the gears to achieve multiple aesthetics, which align more with my personal aesthetic and would fit my vibe better. In my research for more weird gears, I came across one that represents a nautilus shell. This is based on the golden ratio, and functions like a normal gear when two are linked together. I thought at first that it would need to move in another axis for function, but this could pretty simply be integrated into a gear train if gears were stacked. Upon further review of this, I found that the complexity of two alone would be considerable, and that if done correctly could match both my personal aesthetics as well as my inspiration for the project.

[6] Weird Gears by SpringerLink
The look of these gears alone is enough to captivate the viewer, and the interaction between them could astonish. I think that this gives off my engineering inspiration with the gears and interaction, and the shape resembling a nautilus shell fits my surfer aesthetic. If I take the old bearings from my favorite longboard (that I saved when I replaced them last week) and used these to allow for smooth rotation of the gears this could pull from my skate aesthetic. Finally, using wood for the gears would pull from my nature aesthetic, and a proper varnish or stain would show the wood grain perfectly.

[7] My Design – Noah Howell
The above photo shows my 3D model of the current design. This design will incorporate a steampunk/engineer aesthetic with the gears, skate bearings for my skate aesthetic, nautilus shape for the surf aesthetic, and wood for the natural aeshetic. I think I would like to get some different types of wood for the two gears, one light and one dark- maybe an oak and a walnut- or I’ll stain them to look the way I want. I will change the base from this design, I think I want one with a layered lasercut topographical map kind of look. This piece will be about 3 feet in length, large enough to act as a distant art piece, but small enough to remain functional.
I think the best way to manufacture this is to cut my desired wood into several large, thin sheets. These will then be lasercut to shape and glued together. This will require me to clamp the layers together overnight, and sand all of the edges to get rid of burn marks and any potruding glue. This goes for both the gears and the back mount. These pieces will then be stained or sealed, this will allow for the natural wood grain to show more strongly. I can mount the ball bearings from my skateboard by making the holes in the back mount tight enough for a snap fit, or I could vary the diameters of the holes in the mount and seal in the bearings during my gluing process. I’ll add some wooden dowels going through the gears, these can be glued to the gears and pressed into the ball bearings, assuming that my tolerances are tight. Assembly should take the least amount of labor after initial manufacturing of the components, but could take the longest due to the long process of gluing and clamping required.

[8] Timeline – NH
Above is my timeline for this project. I know that it’s a little ambitious to have so close to the initial idea for this project, but I figure that if I plan to finish this early it will leave me more time to iterate if necessary. This will also allow me to open up more time in the end of the semester for my other classes. Hopefully I can stick to this timeline well, such that I have more time to reflect on the project for the final documentation submission as well as opening time for other things. This will also allow me to keep this piece on my wall longer before I graduate and move out, I am not sure where I will end up after
I graduate but I hope that I will still have room for my work. Excited to start.


4 Comments. Leave new
Thanks, I think this change will be more fun for me to work on because it has closer ties to me and I don’t personally care for the steampunk aesthetic all that much. It should be a fun project.
If you’ve gone to Dark Horse before here in Boulder, they have gears behind the bar that are fully functioning during some parts of the day. I think that your steam punk aesthetic would be great. Finding a way to make these work whether it’s with a motor and chains or some other way would be so cool.
I haven’t noticed that. I think I’ll add a crank or something to make it easier to manipulate the gears.
So many cool things in this post! First, I never understood the steampunk aesthetic, but you explained it really well. I think it’s super cool that you pivoted to the surfer/skate aesthetic because that’s an aesthetic I personally love! The way that nautilus gear works is really wacky and I can’t wait to see how it looks when it’s all done. I think this piece is a great way combine your nostalgia of home with the experience you’ve had getting your degree here in Colorado.