Inspiration / Goal
For my Upcycling Project I decided to make a shelf out of gas piping and recycled wood. I am hoping to utilize the Industrial Modernist aesthetic for this shelf and it will become more evident how my project developed during the entire process. My main inspiration for this project is from when I visited Berlin, Germany and saw a lot of Industrial Modernism. On the Eastern Side of the city, although many of the buildings were in disrepair from past regimes, the city found a way to revive businesses while embracing history. This is where I first found Industrial Modernism which included aspects such as exposed material, open spaces, concrete walls, darkness, and sharp edges. My goal for this project was clear, I wanted to make a shelf utilizing materials I saw in the past during my travels, and I wanted to construct it from purely recyclables. I hoped this shelf could allow for sufficient storage while also adding an artistic sense to the room in which it will be placed. I also hope the shelf would provide an addition of depth to a room as it has a lot of exposed material. This shelf would be perfect if it was used to hold plants, books, or nic-nacs.
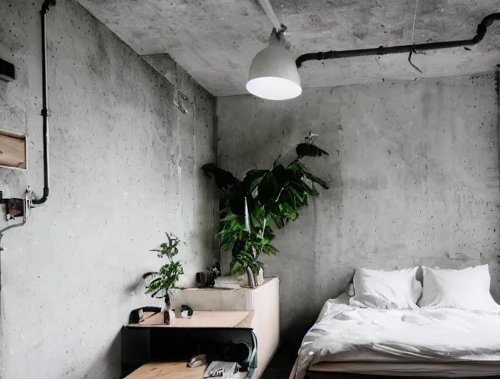 More On Industrial Modernism
This rather niche aesthetic often spoke to me as it gives a certain depth perspective to any room you enter. Exposed pipes, rusting metal, and sharp edges just scratch the surface of this aesthetic. In addition, many people leave materials un-painted, leaving a raw look that I have grown fond of. In a sense, Industrial Modernism almost encompasses Upcycling in itself due to the frequent recycling of materials. The more Industrial Modernist buildings you encounter you begin to notice certain nuances like recycled concrete, repurposed pipes, and old wood that was re-stained. Industrial Modernism is a growing aesthetic in America and it has a growing popularity in industrial cities like Detroit and Baltimore. Many cities have been converting abandoned factories into living spaces that utilize industrial modernism.
Fabrication
The biggest initial roadblock which held me back was finding proper materials. Initially, I wanted to use curtain rods to make my shelf but after being ghosted on multiple Facebook marketplace I decided it was time to go a different route. I decided to go explore in home depot to find some pipes in the used section. After a short search, I was able to find galvanized steel gas pipes and figured they would work perfectly. Below you can see an image of my piping assembled.
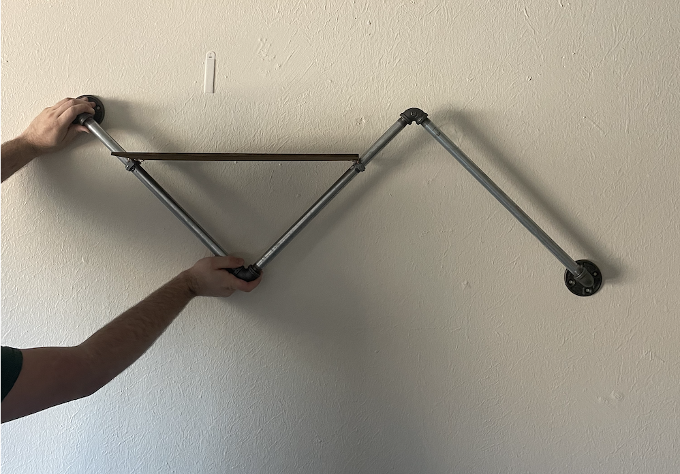
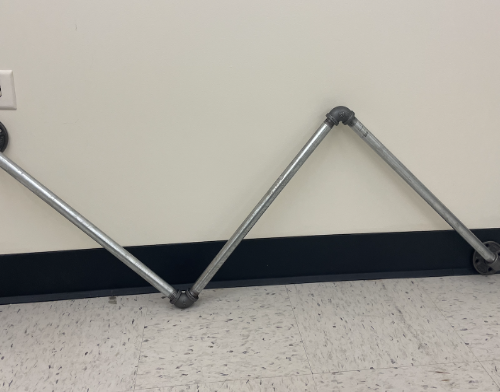 Here you can see I used three identical gas pipes that would eventually be created into the shape you can see above. After finding the pipes, I knew I needed a way to connect them at the 45 degree angle shown above. With this in mind I found some angled pipe connections that threaded onto the end of the pipes. These worked out great as they did not only keep the pipes together but they allowed me to explore some interesting angles for my shelf. My next roadblock was how I would mount the assembly to a wall. I knew I was going to need to screw it to the wall so I went searching for some flanges. In the home depot I found two extra floor mounts for gas piping and threaded them onto the two end pieces, allowing easy wall mounts with four bolt connections.
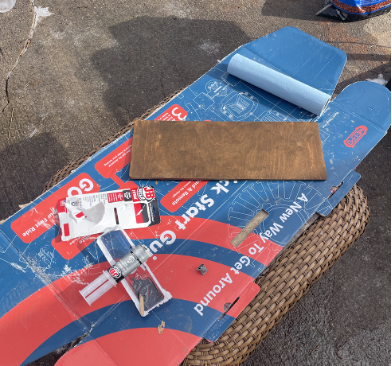
 The circular flange helps the user mount the shelf to any wall surface. After all of these components were accounted for it was time to find the shelf itself. I started my search in the woodshop at the idea forge and quickly found some scrap wood that would work perfect as a shelf. However, I ran into a problem very quickly, wood color. The piece of scrap I found was a very bright color that did not quite match my industrial aesthetic. Therefore I decided to stain the wood as shown below.
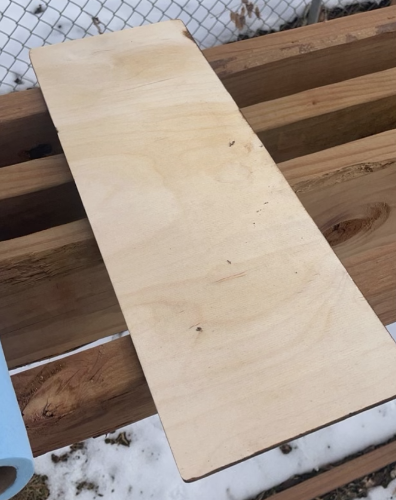
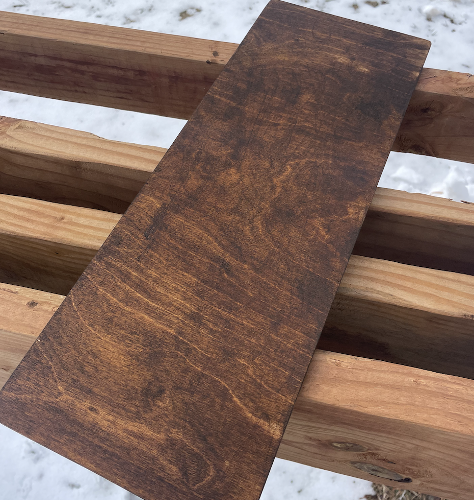 After a little bit of research, I found that you can easily stain wood with a little bit of product and a lot of time. To begin, I sanded down the wood to a very fine consistency and then added a clear coat to the wood. Next, I applied the stain and allowed it to dry for approximately four hours. After that, I reapplied the stain for the final coat and the end product was magnificent. Now that I had all major components figured out I was ready to assemble the shelf. This was done by utilizing epoxy and a few plastic pipe mounts. First, I did a few measurements to ensure that the shelf would be down the centerline of the shelf and then I mocked everything up. After confirming the placement of the shelf, I epoxied the mounts and let them cure for five hours. Now I cut four holes into the wood and mounted the wood with copper electrical wire. Finally, the forces all sandwiched together the assembly and I had a solid connection from the shelf to pipe.
Final Product
After the epoxy set and the wood was dry I had my final product as seen below.
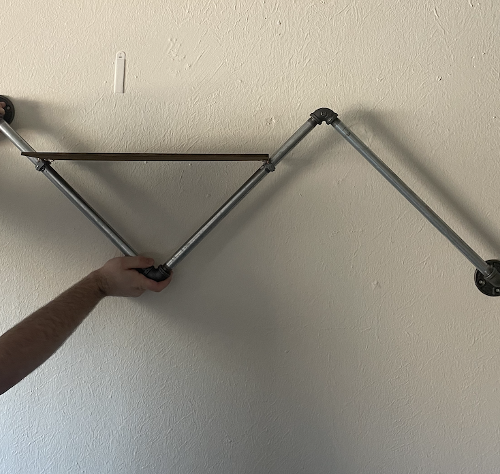 I am very proud of how my shelf came out and how it remained within the realm of my aesthetic. I like how the forty five degree angles on the shelf amplify the aesthetic and the pipe connectors also amplify intensity. I think that this shelf would work the best on a white or gray wall as the colors would really pop out in the room.
Artistic / Functional Goals
I am very happy with the end result as it stayed within both my artistic and functional goals. At the beginning of this process, I knew I wanted a shelf that emphasized the aesthetic of Industrial Modernism and was usable for the average person. I think that I really hit all of the boxes with my design and I am completely satisfied with the work. I like how the piping is very exposed and has sharp edges while also allowing usability for the person who would use this shelf. In addition, I think the shelf space is perfect for someone who may want to put succulents up or any sort of nic-nac. Utilizing aspects like raw material, dark colors, and metallic properties truly left me with a final product that was exactly industrial modernist.
Future Aspirations
As I finished this product I kept debating between if I should use one shelf or two shelves. If I added another shelf I think I would have increased the functionality of my shelf because there would be more physical space to store items. However, I think that when I add the second shelf I would remove some of the intensity presented by the aesthetic. With respect to the future of the shelf, as I will be using it in my room I think I would like to add the second shelf. Other than that, I am very happy with where my project is at the moment and do not feel the necessity to change anything further.
Bibliography
- C. (n.d.). Industrial Design. Industrial Design. https://www.masterclass.com/articles/industrial-interior-design-explained
Kocharian, A. (2020, August 7). Here’s everything you need to know about industrial style. Apartment Therapy. https://www.apartmenttherapy.com/industrial-style-36771433

4 Comments. Leave new
Your shelf turned out awesome, you designed it to the aesthetic perfectly. You did a great job on the post, I especially like your detailed write up on the fabrication process. I’m curious, why did you choose to use electrical wire to mount the board?
I used electrical wire because I thought it fit the aesthetic and it really crimps the shelf down.
Well hello,
Oh Alex, Alexander. Alexander the Great I should call you, for your work rivals the conquered lands and spoils of the late Macedonian hero. The simple beauty of your shelf brings into being a feeling that is hard for me to describe. I love the industrialism of your piece, bringing forth visions of factories and sewage systems to the inner palace of my mind. Are you considering adding a secondary shelf to include more trinkets? I think it would look quite beautiful. Good luck in your future endeavors!
-G
What a read!
I think I would add a second shelf if I had more time!