I have a bookshelf in my room next to my desk that is in no way aesthetically appealing, however it is functional. When deliberating for my upcycling project, it hit me that I might improve upon the design. To do this, I wanted to change the typical form of bookshelves and I needed some inspiration. Upon searching the internet, I came upon a few different designs that stuck out to me.

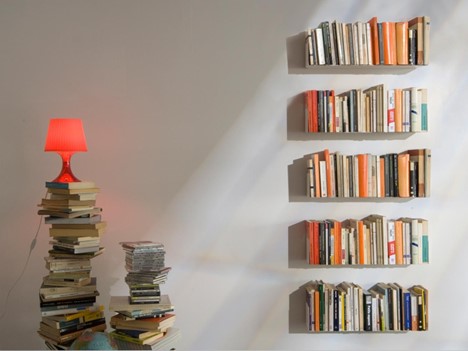
A major design aspect that I wanted to impose upon myself was to have a book/s as a key structural component of the bookshelf. I figured there were a few different ways I could do this. One method was to use epoxy to solidify the books into a sort of brick, in doing this the book cover and other elements would be visible. Another method would be to use wood glue in the pages to seal the book shut and solidify the pages. However, this method would likely alter the visual appearance of the book. With some possible methods determined it was next on the agenda to create the visual form of the bookshelf. I wanted the bookshelf to be self-supported. The two options in that regard were either a traditional on-ground bookshelf, or wall mounted.
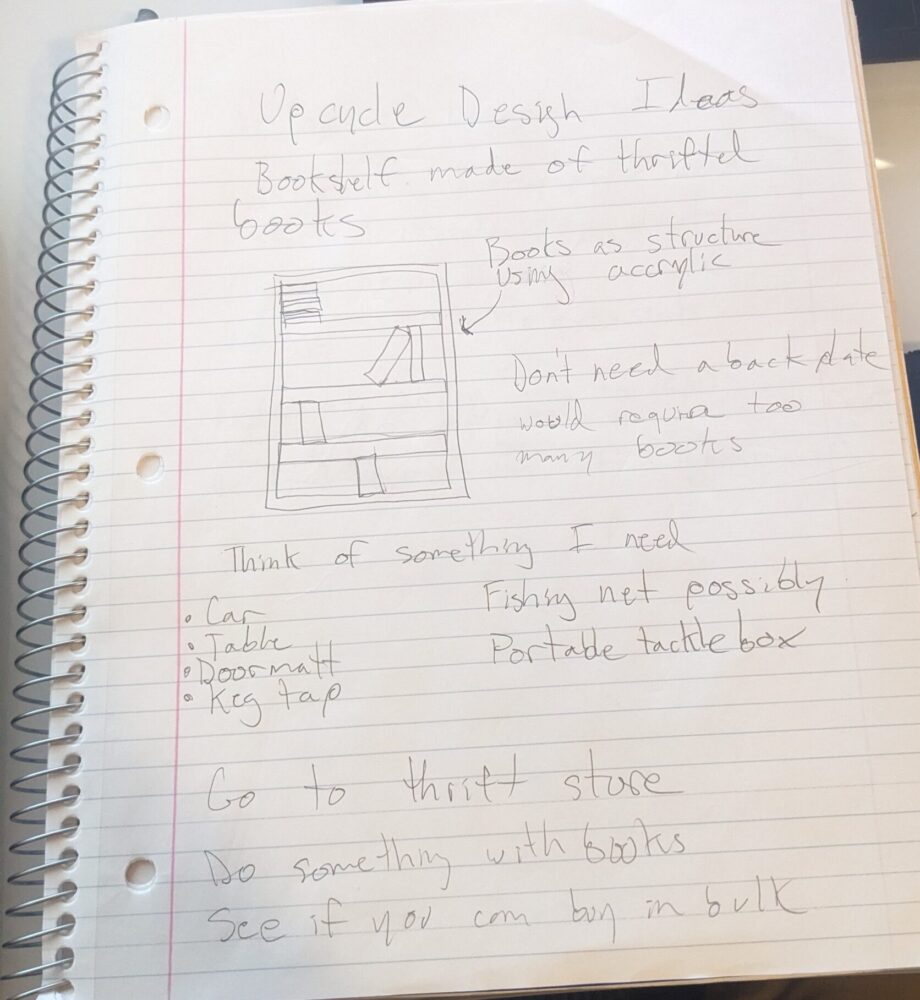
This sketch idea centered around fabricating a traditional bookshelf using book planks as the external supports.
Another was to have a floating bookshelf with a book as the main supportive element.
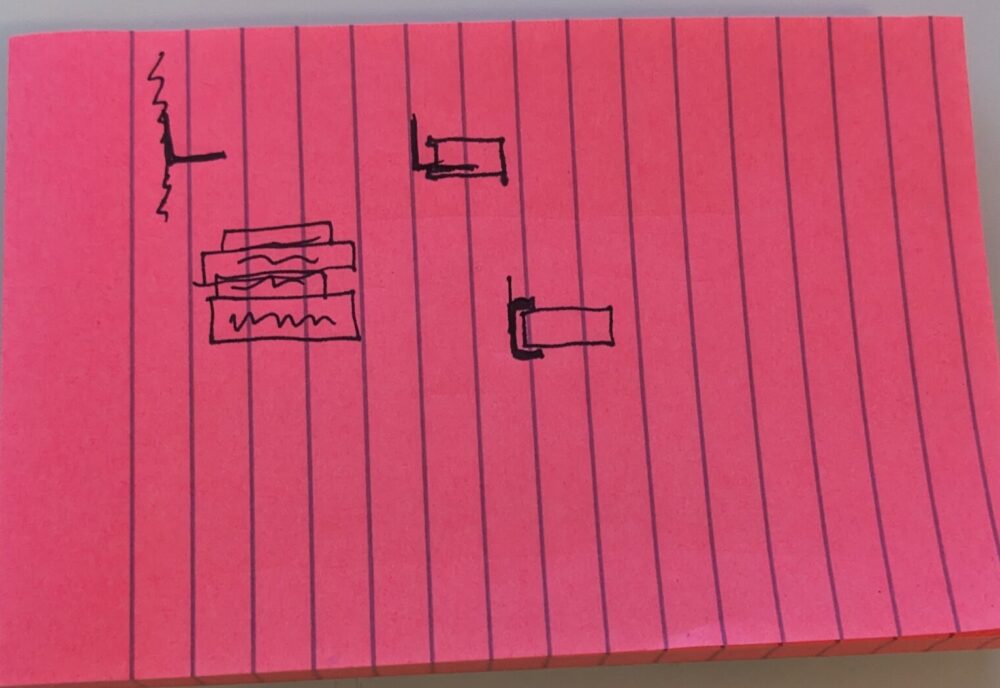
This focused on having an unseen support to give the impression of the books levitating in the air. When thinking about the two methods, there were a few specifications that I wanted to adhere to. The bookshelf needed to be aesthetically pleasing, deliberately crafted, inexpensive, scalable and functional. The on-ground bookshelf was hitting the aesthetically pleasing and functional metrics however, it was expensive and materially exhaustive, requiring many books to create the shape as well as expensive epoxy. The floating bookshelf idea was able to hit all metrics, who wouldn’t want a floating bookshelf.
To characteristically define the bibliophilia aesthetic it would be to highlight the collection of and use of books. Everything, made out of books. Books supporting other books. Books as a center piece. Books as an ornament.

Functionally, I wanted the bookshelf to at least hold 3-4 books and be removable. A bonus functionality would be to have the supporting book be undamaged and interchangeable, allowing the book the be readable and swapped out.
To collect the materials needed for my project, I headed to the local Goodwill to find books. I was able to pick up 8 similarly sized books for a dollar apiece.

I chose these books in particular so that they could be uniformly sized and shaped. This would help with the fabrication. I also figured that the books would need to be a bit larger and heavier duty to act as a structural aspect.
Other materials that I had to collect were a set of L-brackets, nuts and bolts. These were going to be the actual behind the scenes hardware.
With all my materials sourced, for under $30 total, it was time to begin the fabrication process.
The first step was to conduct measurements of the books and mark off the locations where the hardware would be fashioned. This was done with a ruler and sharpie, a mundane but important first step.
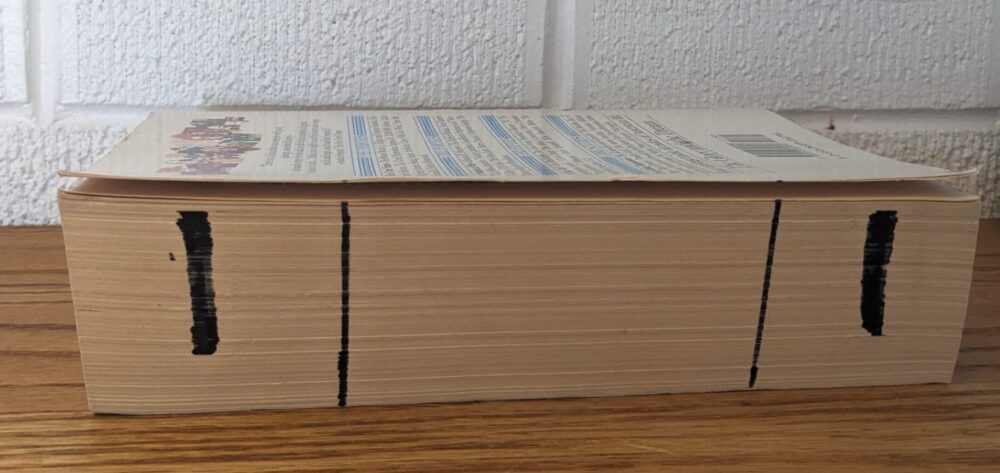
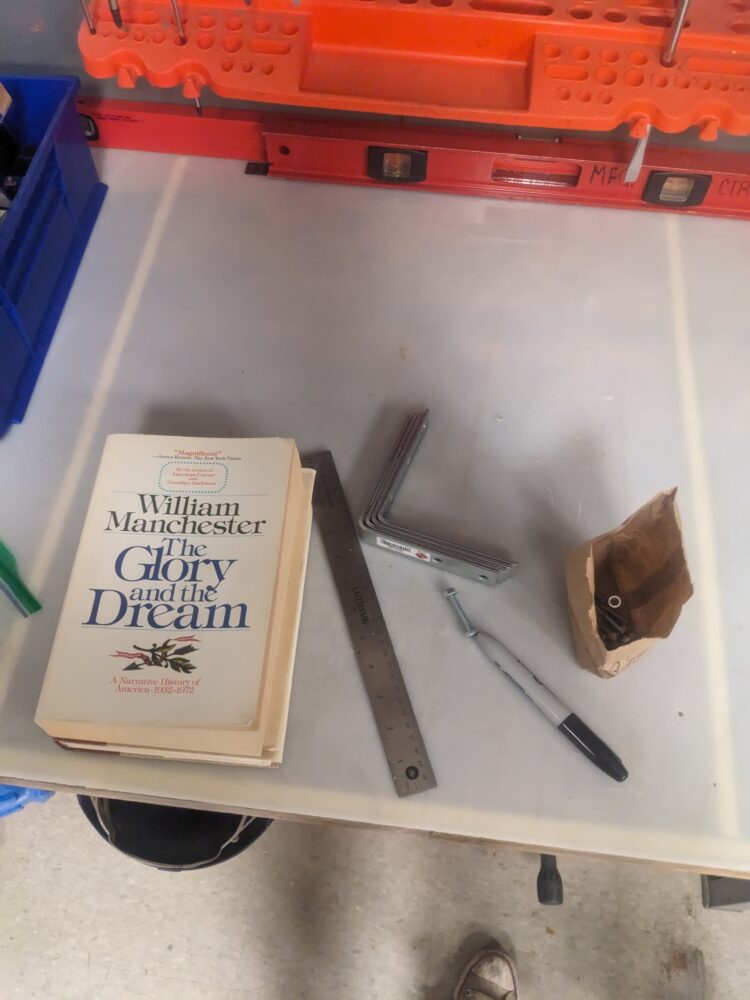
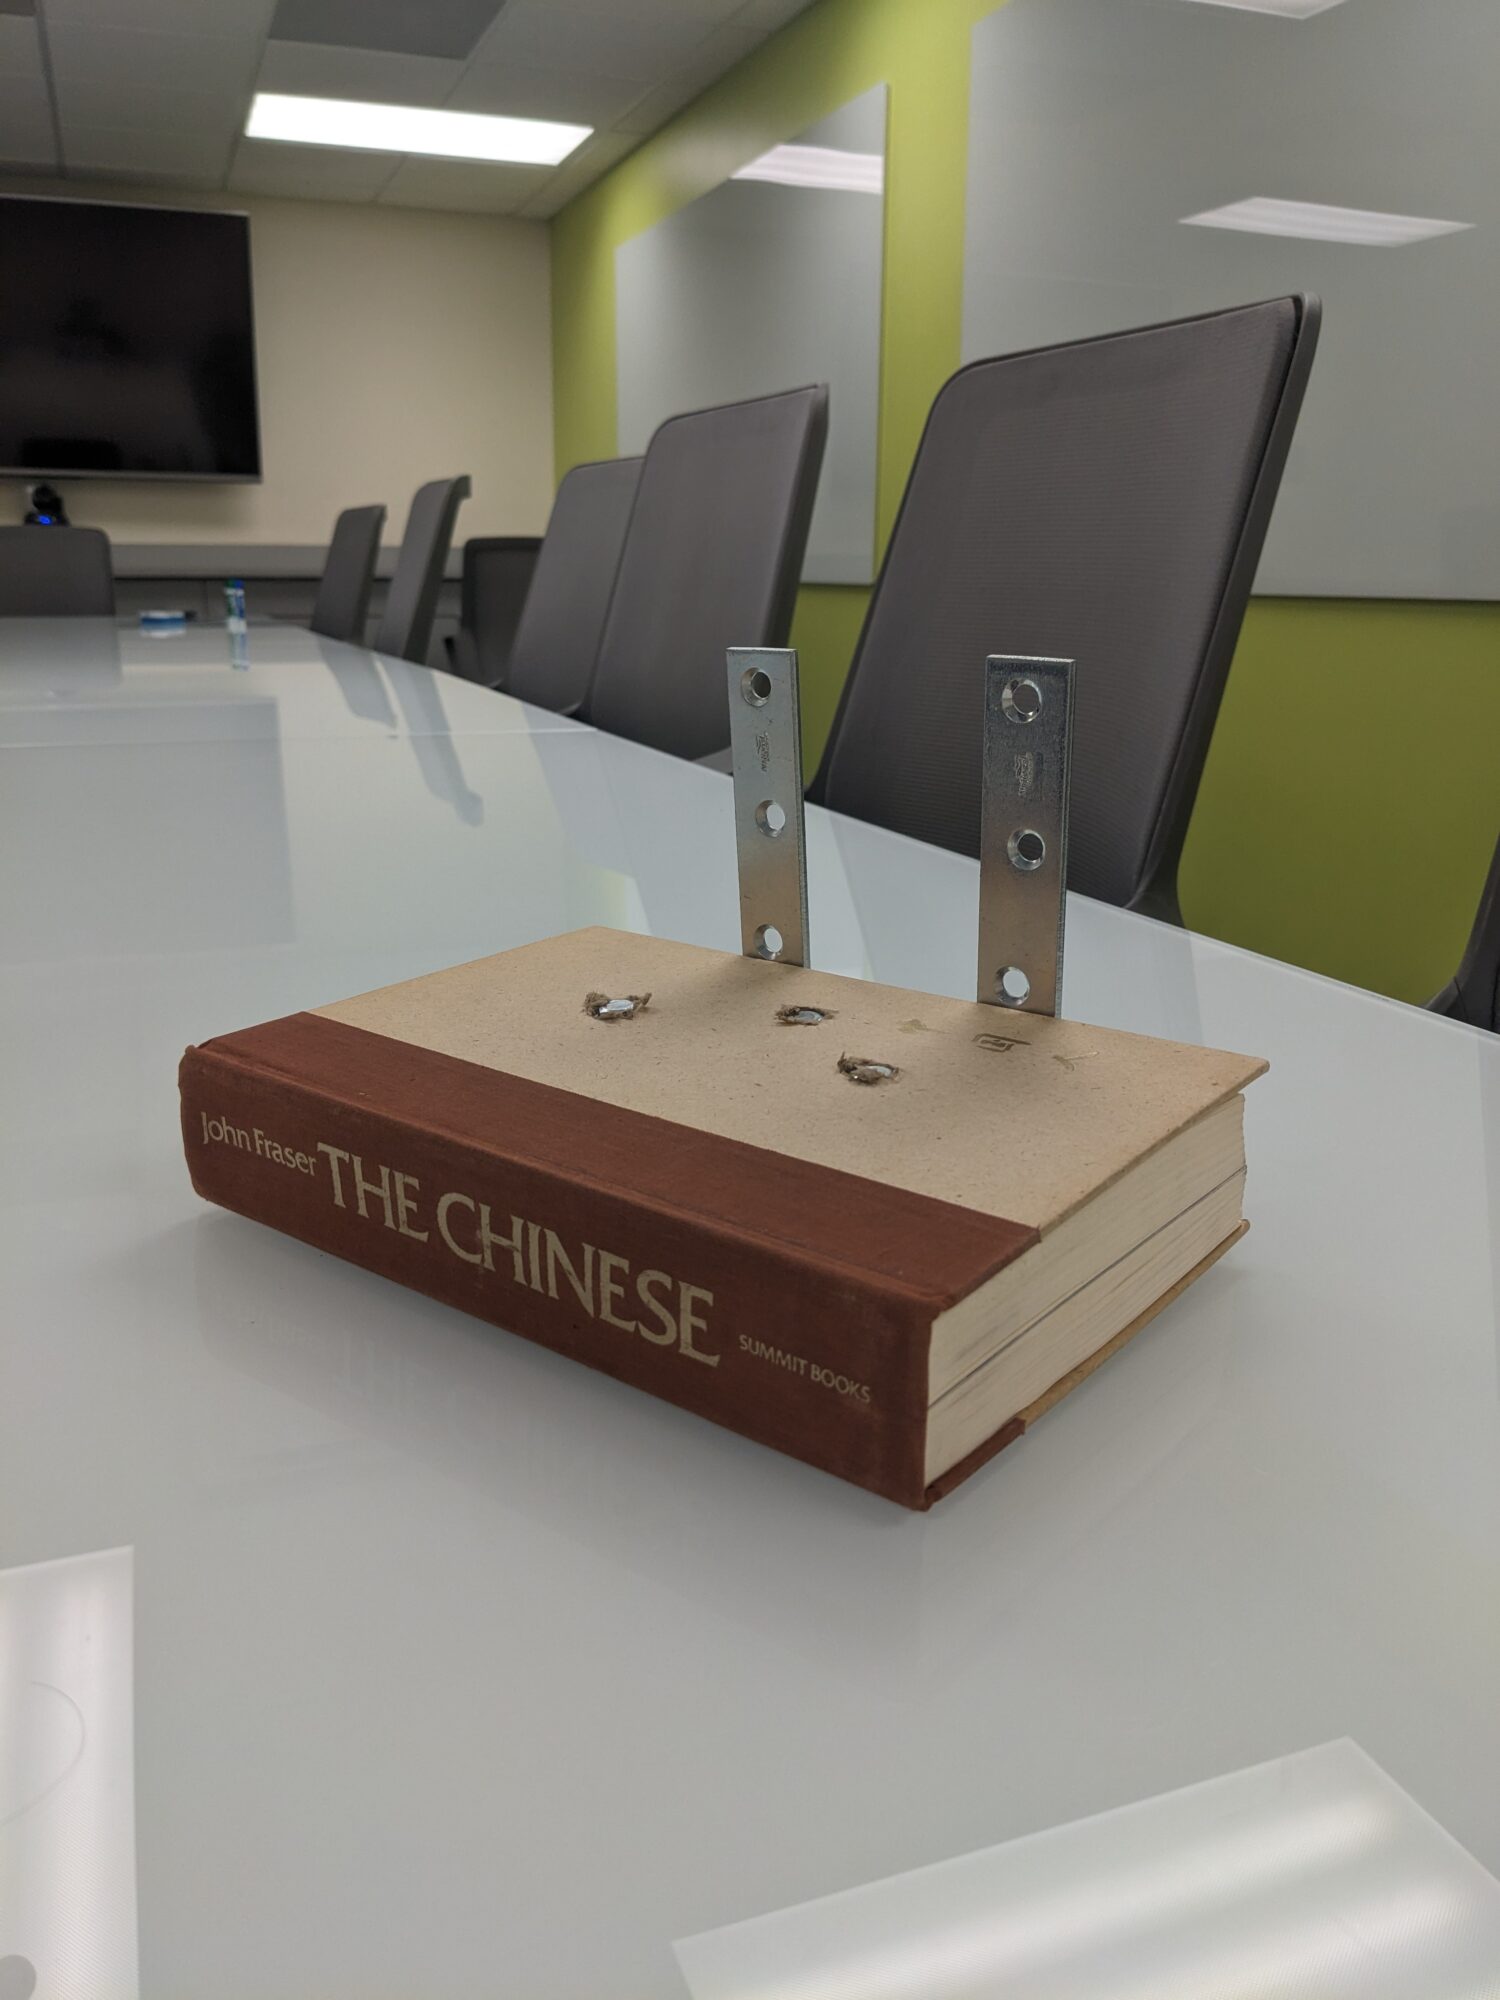
I was hoping to be able to fasten the bolts to the outside of the book, while having the L-brackets sit inside the pages. The problem with this was that this would create a very obvious spacing from the wall, taking away from the floating aspect of the shelf. At this point I was forced to make the unfortunate decision of book destruction. This was going to be done by drilling through the pages in a way that I would be able to secure the L-brackets in position inside the pages. I used a drill press and later a cordless drill to make the holes. The spacing was determined by the holes already found in the L-brackets.
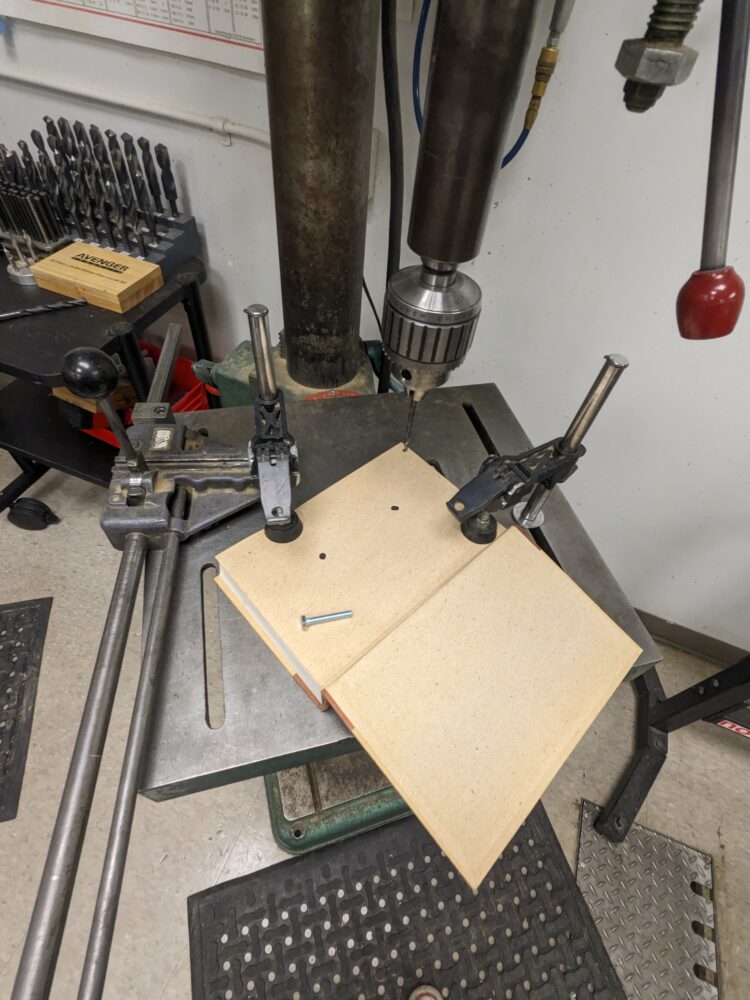
With the holes drilled in the book it was time to thread the bolts through. I sized the hole so that the threads of the bolt would still be able to bite into the pages, adding strength. With the holes drilled it was time to fasten the brackets to the book by feeding the bolts through the holes and threading the nuts on.
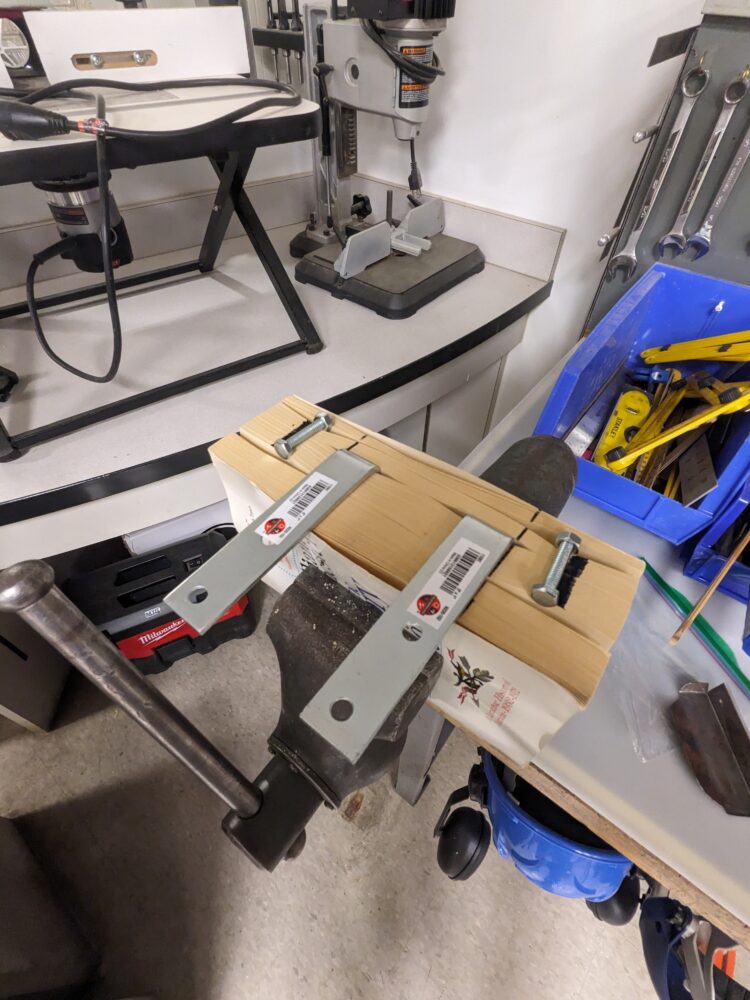
A problem that arose was that the top part of the bolt and the nuts prevented the book pages from fully closing, giving it an unappealing look. To counteract this, I used a larger drill bit to clear out a larger hole in the pages and top cover where the bolt heads and nuts would fit. This allowed the book to close, giving the piece the look I desired. While at this point the book was structurally sound, it had not fully achieved the aesthetic that I was hoping for. The problem was that there was nothing supporting the last couple pages of the book nor the back cover of the book. If it would have been mounted to the wall at this point the book would sag down and not look closed. It was important that no supportive elements extended beyond the confines of the book except for in the back. This was because the vertical parts of the L-bracket were going to be covered by other books. To fix the book sagging, I used a vise and a bunch of clamps with some wood glue to glue all the pages together. I made sure to do this only on the back of the book so that it would be unseen. There was an added benefit of increased strength through using the glue so that was a plus.
The final product turned out really good.
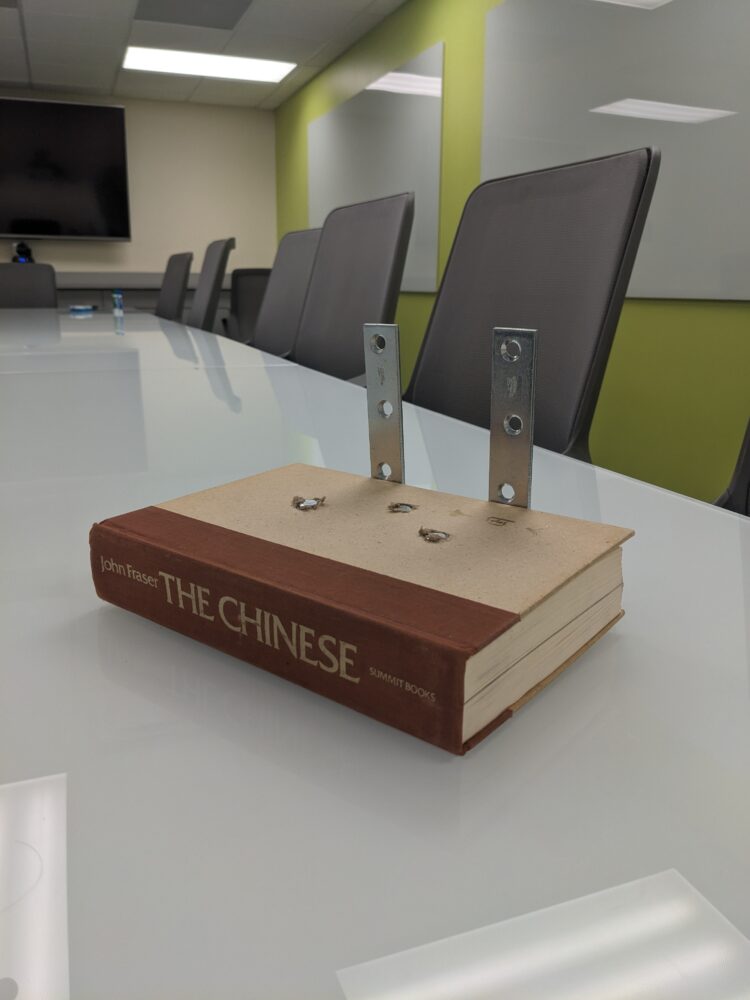
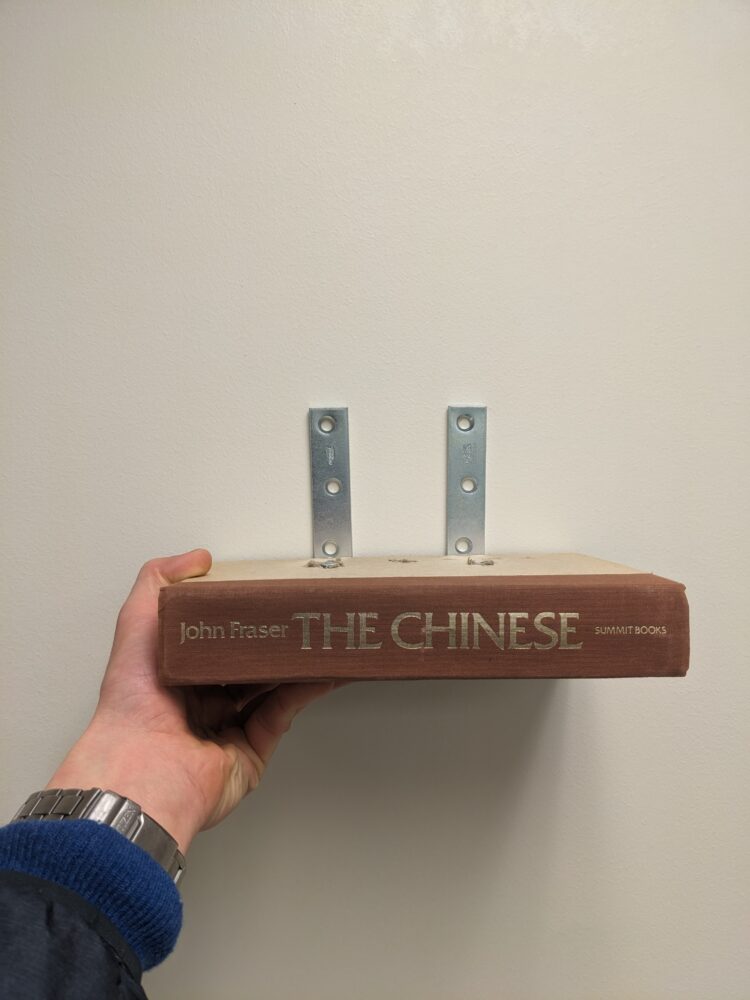
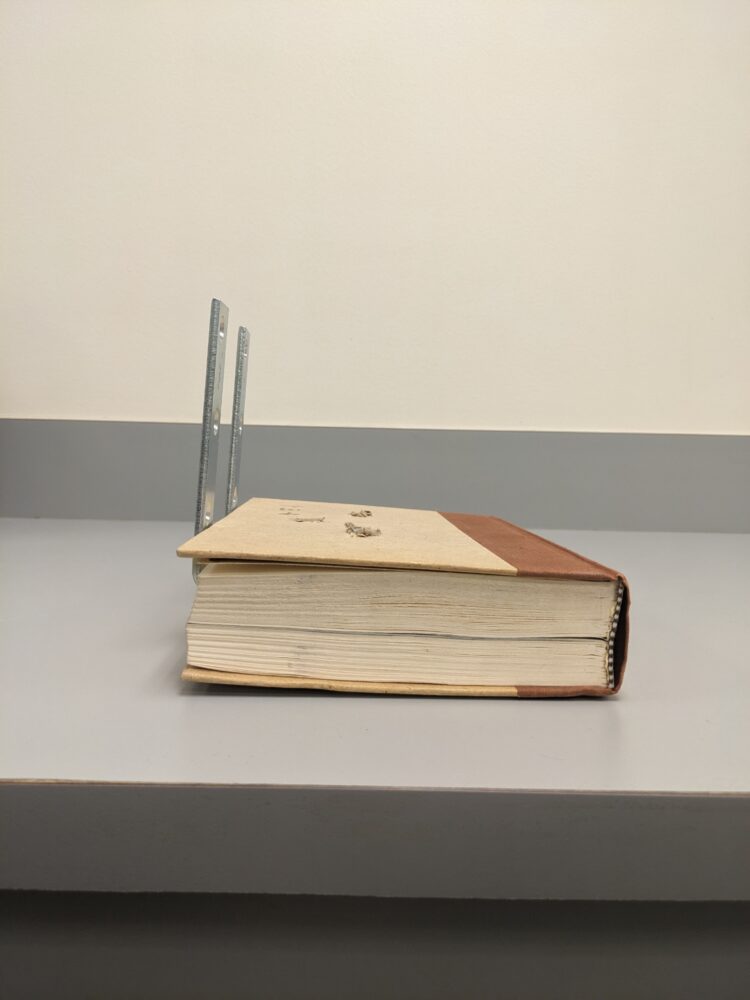
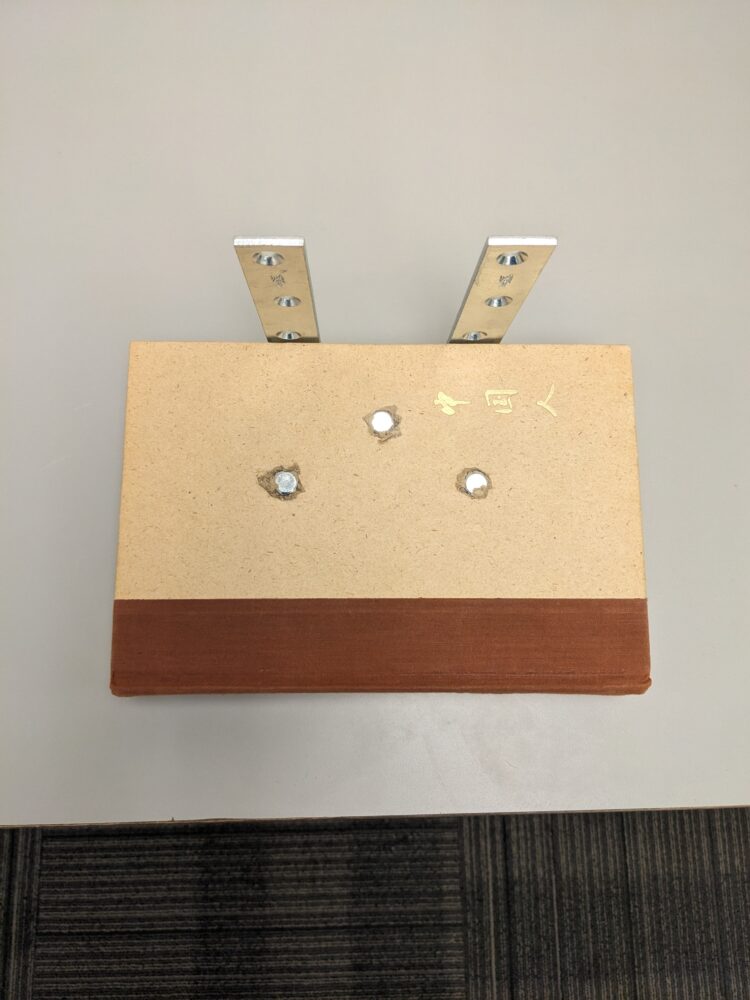
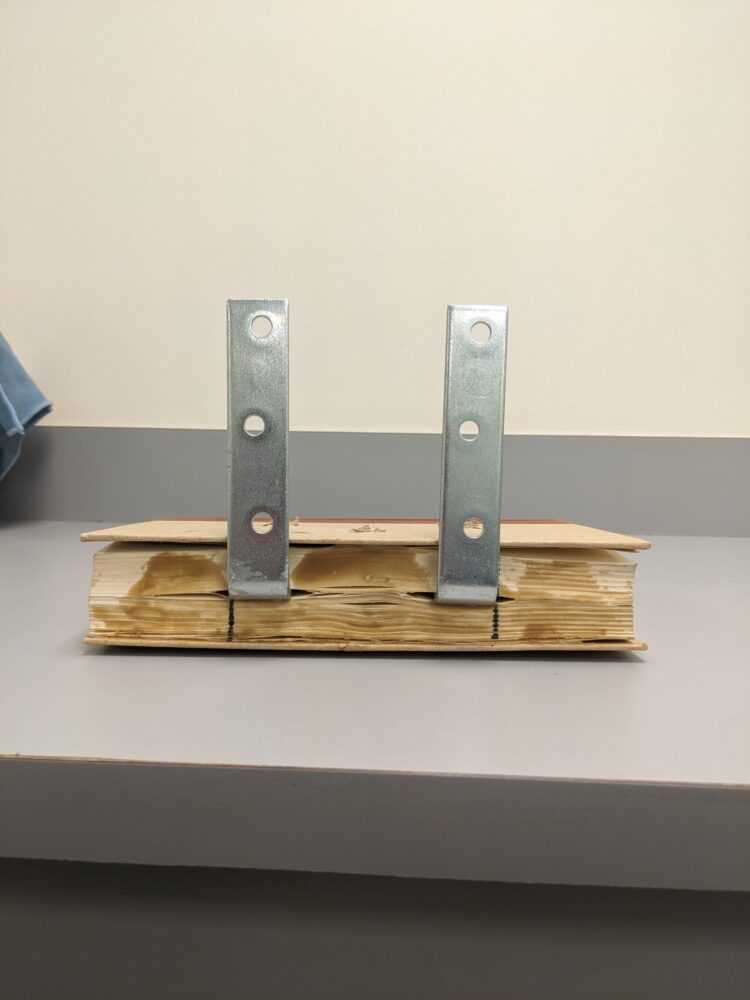
Functionally, this is nearly exactly as I hoped. The only aspect that fell short was the interchangeability of the supporting book. Regardless, the bookshelf is exactly a book shelf.
Artistically, I think this hits all the metrics. It looks great, I am especially excited to get it on the wall. The floating aspect is really cool.
Next up, I think I would like to make another, considering I have 7 more books to choose from. A interesting aspect that could be explored is attaching a light to the underside of the book, this way it could be functional and help promote even more reading.
Overall, I think this was a success and challenged me to think about both form and function as well as following a certain set of aesthetic requirements.
Sources:
https://i.pinimg.com/originals/ea/25/2b/ea252b1193bc332c2e8476162ae76406.jpg
https://www.google.com/imgres?imgurl=https%3A%2F%2Fthegadgetflow.com%2Fwp-content%2Fuploads%2F2015%2F08%2FJudd-Wall-Shelves-by-TEEbooks-02.jpg&tbnid=u5Z1g4AhHXlSTM&vet=12ahUKEwiTxN-gpL6EAxXPJmIAHfRtCBYQMygAegUIARDfAQ..i&imgrefurl=https%3A%2F%2Fthegadgetflow.com%2Fportfolio%2Fjudd-wall-shelves-by-teebooks-keep-your-books-suspended-in-air%2F&docid=4SMRtB6HCtLlwM&w=1300&h=1000&q=Judd%20Floating%20Bookcase&hl=en&gl=US&ved=2ahUKEwiTxN-gpL6EAxXPJmIAHfRtCBYQMygAegUIARDfAQ
https://en.wikipedia.org/wiki/Bibliophilia

1 Comment. Leave new
I think this is a very clever design approach to designing a floating bookshelf, the creativity and form/function work seemingly work very well with a clear delivery that you upcycled a book into a shelf. Do you think the problem you had with making the bolts flush with the book could have been solved by using materials like wood or thin sheet metal to reinforce the structure of the book’s shape, giving the shelf more of a solid build?