
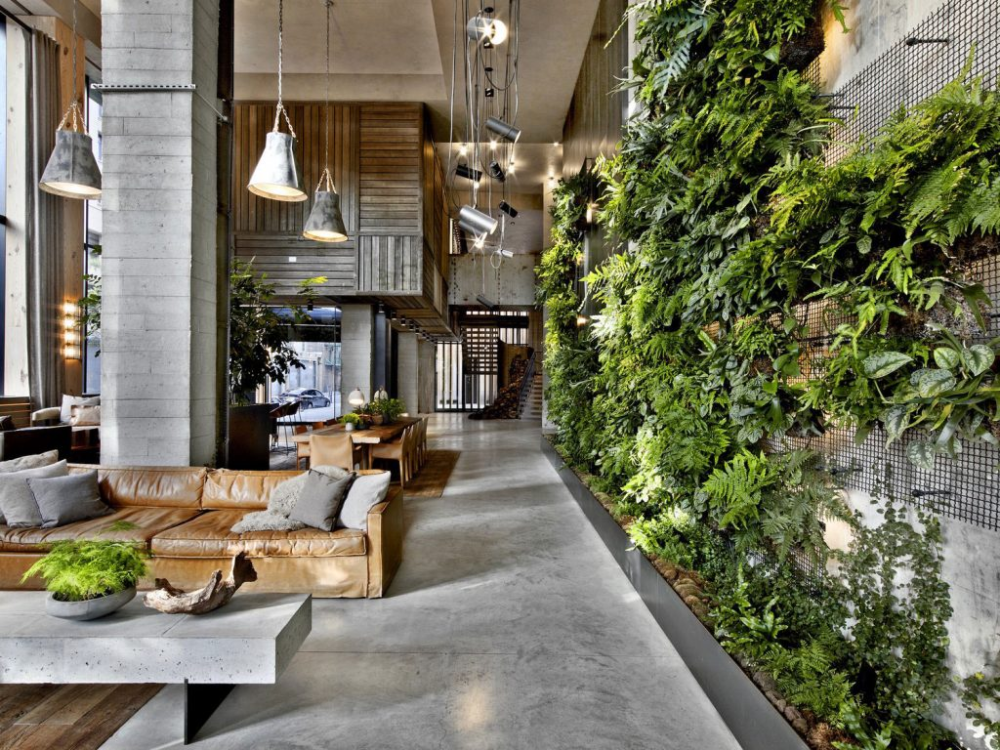
My inspiration for this design comes from several sources. Primarily, however, my inspiration comes from seeing 3D topographic maps and the industrial aesthetic. Both of these things have appealed to me for quite some time, so I though I would try to incorporate them into this project. Large sources of inspiration were the topographic relief created by Makendo and the blended biophilic and industrial chic aesthetics in the 1 Hotel in Brooklyn (below). The fern wall of the hotel also inspired me to add greenery to my project in some way. I wanted to do this both to increase the artistry and because I thought that it would provide a good contrast against the darker tones of my base material, though at that time I had not selected a base material.
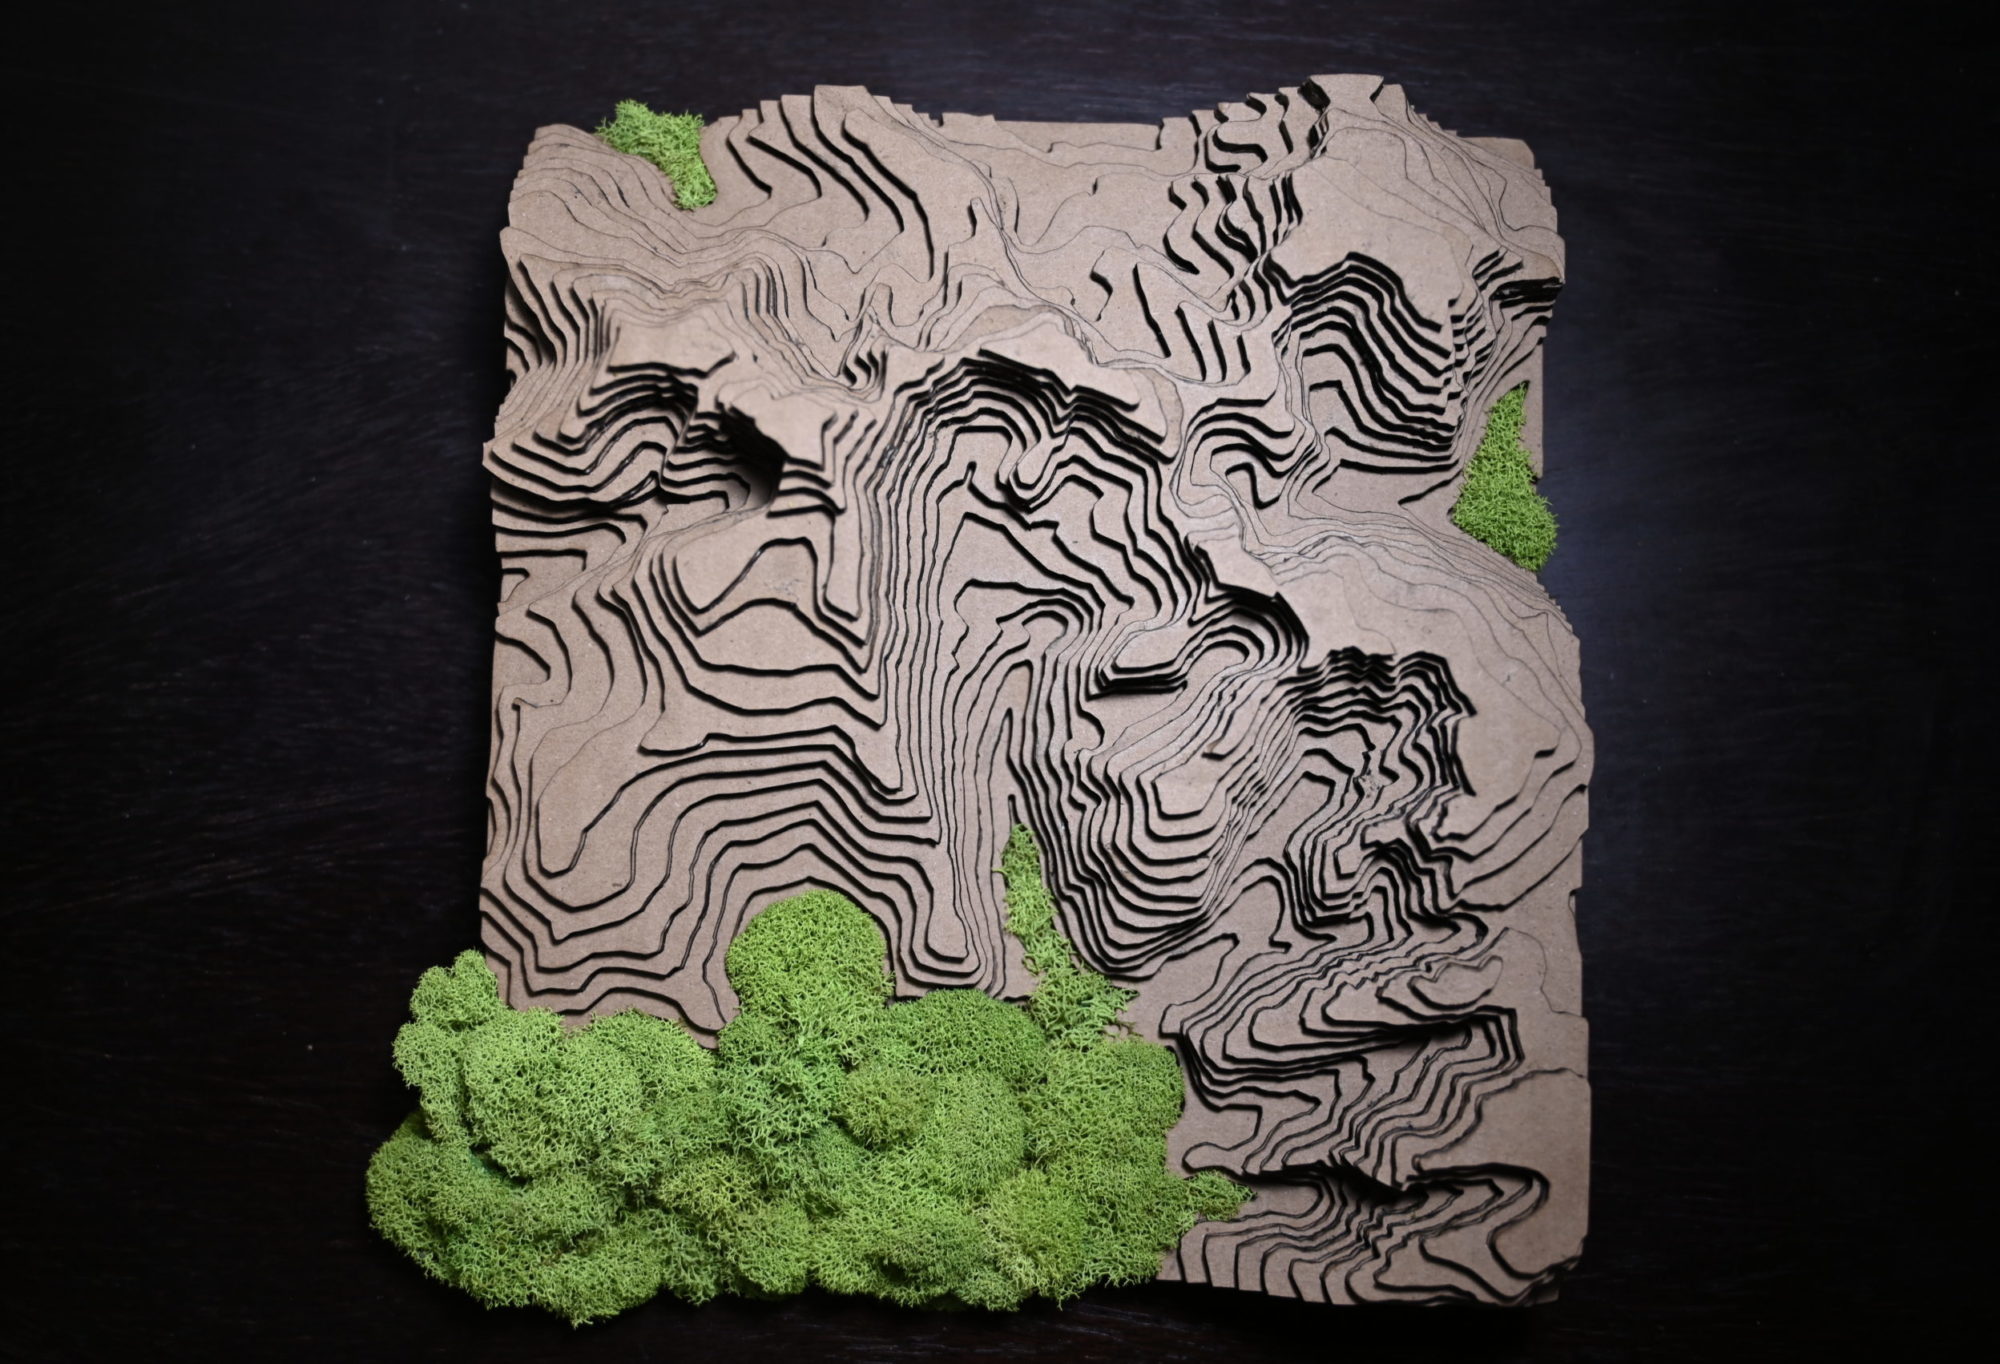
 Minimalist Cardboard Topography Relief – makendo

The above images really helped to shape my vision for the project, though I was also heavily inspired by topographic maps carved into wood pieces, such as the provided example by Topside Maps. My initial vision for my project was to take a piece of scrap 4×4 and carve a section of Rocky Mountain National Park into it using a CNC machine. I wanted it to also have areas where I could insert moss (living or preserved). This would contrast against a dark stain which would help to tie the piece back into the industrial aesthetic and to contrast against the brighter colored foliage. My vision for the project was purely artistic, though depending on the direction I chose it could have functioned as a small terrarium to keep heartier plants that could withstand lower levels of humidity. The form of the piece was going to specifically include Longs Peak and the Emerald Lake area of Longs peak as those are areas that I particularly enjoy snow-shoeing and hiking in. The aesthetic of this project I names as “biophilic-industrialism” because I wanted to combine the material recognition and color-palettes of industrial chic with the more typically inviting feeling of a more natural aesthetic. The aesthetic of this project is then defined my exposed construction materials, with a focus on more industrial materials like wood and metal, combined with foliage and greenery. The greenery should also be fully integrated into the design, and shouldn’t appear as an afterthought. It almost functions as an extension of industrial chic, but instead of just re-using old industrial spaces and construction materials this aesthetic focuses on the reclamation of the materials by the natural environment. This, however, doesn’t preclude the aesthetic from clean and tidy designs, but instead dictates that the designs should seek to incorporate the natural and artificial together.
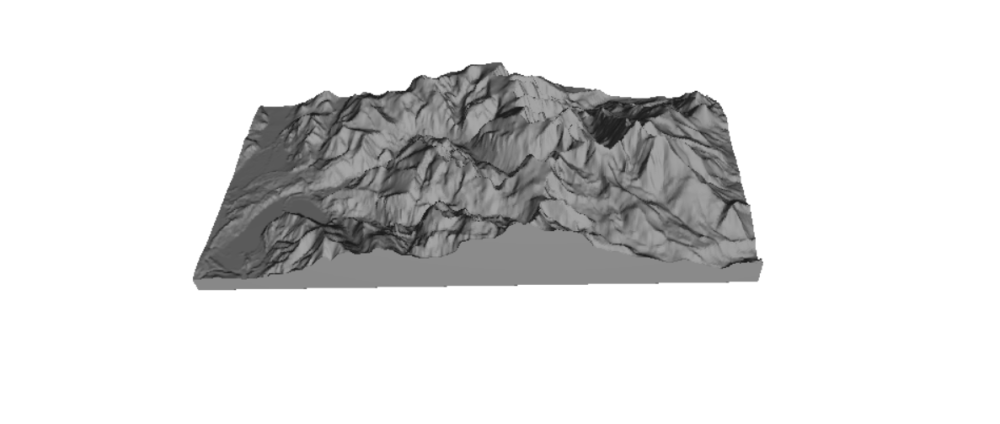
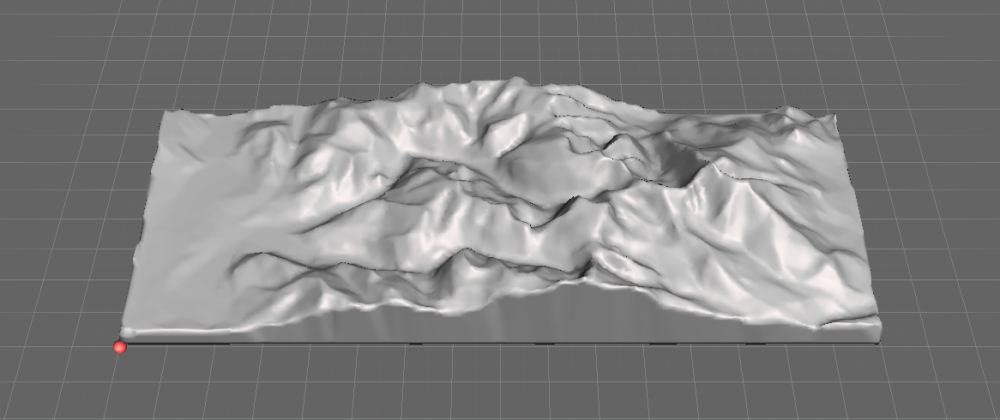
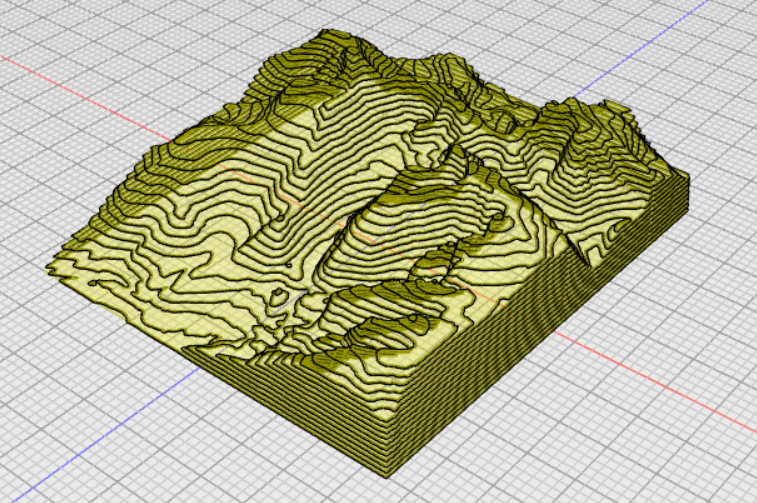
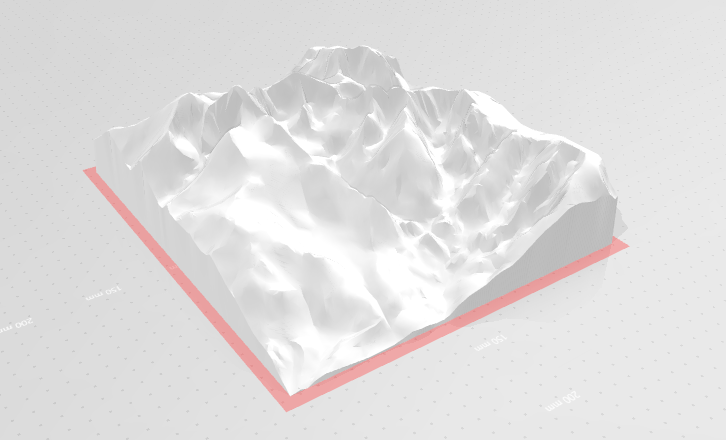
However, once I reached the construction phase of my project I soon realized that my initial vision was infeasible. I reached out to three fabrication facilities within CU and one outside and was unable to find someone who was able to help me engrave the chosen area into a 4×4. At the CU facilities I was turned away due to complexity or the time required to fabricate the artifact, and though I had much greater initial success at the Lafayette Public Library’s makerspace, I soon ran into hurdles there as well. As I detailed in my previous post, working with one of the librarians I was able to set up and get a file that seemed like we would be able to cut it, but was thwarted by the software their CNC used! We were unable to to get the machine to actually cut the artifact, even though it would successfully generate the necessary G-code. So, after devoting many hours to trying to fulfil my initial idea, I instead pivoted to something more feasible. I decided to switch the base from wood to cardboard as I knew I would be able to fabricate the design, and I had already gathered cardboard in preparation for the project. I altered my initial STL file to increase the size and focus more specifically on the Longs Peak and Emerald Lake area, instead of the wider CNC plan I had when the project was going to be carved. I then took my part and used Kiri-Moto, a free online slicer to generate the necessary layers as an SVG file which could be cut out on a laser cutter. I then began the process of cutting all of the necessary pieces, which took around 2 hours in total.
Once I had all the pieces, I organized them by layer and orientation before gluing. I also pulled up the sliced image so that I could use it as a reference when placing the upper layers. To secure the pieces together, I used a combination of craft glue and superglue. I primarily used craft glue as it appeared strong enough when dried and didn’t leave any unwanted marks if excess was applied. However, several pieces of cardboard were slightly warped, and the craft glue was not strong enough to flatten them against the other pieces. I used super glue in these cases to ensure all the layers were flat and had good adhesion. I also used super glue in limited areas where the layer pieces were too small to be pressed down enough to get the craft glue to create a good bond. The assembly process took around 2.5 hours to ensure that all the layers were in the correct orientation and closely matched with the actual topography.

Once I assembled the cardboard structure, I added the moss. I started by setting out an initial moss layout before gluing it down in sections to create the final look. I wanted to make sure that the moss had texture and looked good both from the front and from above, so it took quite awhile to actually get everything placed and glued. For this section, I used more super glue as the craft glue wouldn’t have been able to hold the moss to the cardboard.

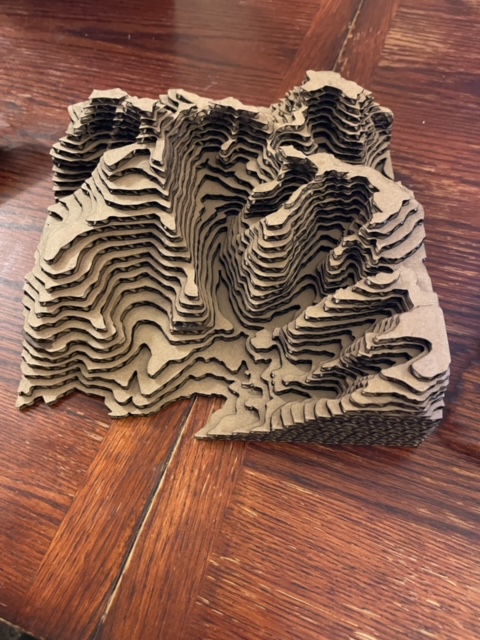
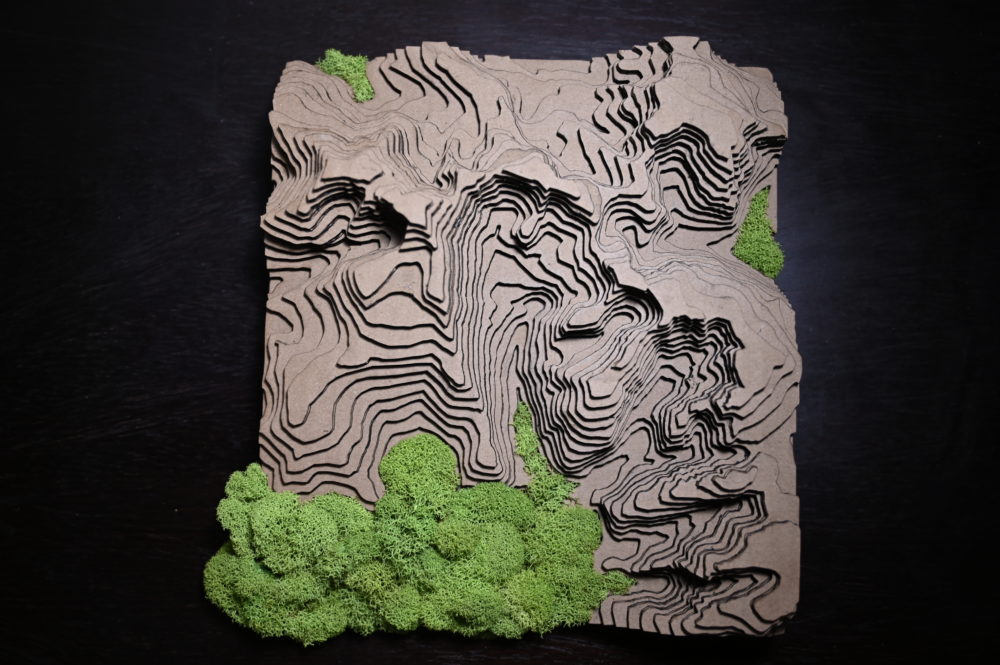
The final artifact is a cardboard topographic representation of the Longs Peak and Emerald Lake area of Rocky Mountain National Park. It uses preserved craft moss to add depth and greenery, which contrasts with the darker tones of the cardboard. Moss was added in low areas to give the impression of the rest of the topography “rising” out of a sea of green. The construction was made using craft glue and super glue on moss and laser cut cardboard pieces.
Though the final product is not what I set out to create, I think that it meets both my functional and artistic goals. Functionally, it adds greenery to my apartment, and provides a place for moss. However, due to the limitations with using cardboard, I had to use preserved moss instead of live moss. The process of maintaining living moss would have destroyed the artifact over time and that was something that I was not ready to commit to. In terms of my artistic goals, while it may not initially seem to match up with my outlined aesthetic, I think that it does indeed satisfy what I laid out earlier in my post. By keeping the cardboard exposed, I am paying homage to it as a material, and while it is not typically thought of in the industrial chic aesthetic, I think that it can fit into more modern interpretations. Cardboard is a pervasive material, especially in fabrication areas where boxes may arrive from couriers, on pallets, or be involved in the export of materials. It also matches with the tones that are often associated with industrial chic as it combines neutral browns and darker tones, which match with some of the common wood tones used in industrial chic. It is lighter than would be typical, but I believe that it still fits within the aesthetic. In terms of the biophilic aspect, I think that the piece encapsulates it fairly well, though it is limited because the moss can’t be alive. I think that I was able to achieve a fairly natural look with the moss that doesn’t clash with the clean lines of the cardboard topographic section. Especially by somewhat following the topographic layers, I think that I am able to create a natural-ish look to the piece that highlights that the moss was an intentional part of the design. I do think that my initial idea of having a wood base would have more closely matched with the aesthetic that I chose, but I think that the final product I made pays homage to the materials from which it is made.
To close out this blog post, I want to turn to the future of this project and idea. I plan to keep this iteration as I am very happy with how it turned out and I think that it will make a nice addition to my apartment. I also want to try to bring my initial idea to fruition as I am still drawn to precisely carved wooden topographic reliefs, though I realize that may be months down the road depending on the access I can find to fabrication facilities. Overall, I am satisfied with my project and the end result, especially after the obstacles I ran into with my initial idea!
7 Comments. Leave new
[…] In last weeks post, I detailed how I was going to create a topographic map of Greece and give it to my girlfriend. I drew inspiration from a previous students work, found here. […]
Super cool-looking artifact. The thick cardboard makes it really interesting to look at from the top angle. Very easy to see the map-based inspiration. Did you consider what it would have been like if you had used thinner cardboard stock? I’m curious how it would have differed if you had.
I considered thinner cardboard for a little bit, but ultimately decided on the thicker cardboard for a few reasons. One was timing considerations, since I had been trying to complete this project with a different idea initially, and I already had 1/8″ cardboard, it allowed for an easy transition. The other aspect that I considered was how many layers of cardboard the piece would require. If I used a thinner material and wanted to keep the scale the same, it would have required much more material. Especially since the artifact itself is roughly 8×8″ and has around 24 layers, that would have dramatically increased the amount of material required and the time to both cut out the material and clue the material together. While I think that it would offer an interesting contrast with tighter layer lines and smoother gradations, I do like the look of my final artifact with how much depth is conveyed through each of the lines.
This is so cool. I want to do an inverse of this for my final project, a lake instead of a mountain. Did you have trouble lining up the pieces one you had them cut out? Or keeping the layers in the right order? I have 3D printed terrain maps of Boulder using Touch Terrain. It sure is a cool and unique perspective!
Hi Alex, thank you for the comment! It can be tricky, especially once I couldn’t use the sides to alight the features. I laid out the design before I started to glue everything together, so I had a rough idea of how everything was going to look when layered together. I also made sure that I had the sliced stl up. I used this once there were no longer any convenient alignment features to ensure that I was aligning layers correctly with respect to the layer immediately below them. It definitely takes some times, but I don’t think it is too hard to align the pieces. Something I also thought about is the use of alignment features, such as a dowel rod, so that you know the bulk of the layers are aligned properly. Making sure to do a mock up ahead of time really helps with making sure things are in the right order! I look forward to seeing what you make for your final project!
Oh my gosh, the greenery combined with the fantastic photograph really makes this pop. Can I use this as a desktop wallpaper?
Hi Will! Thank you, I worked to try to make the photography a focus for the post. Feel free to use it as a wallpaper!