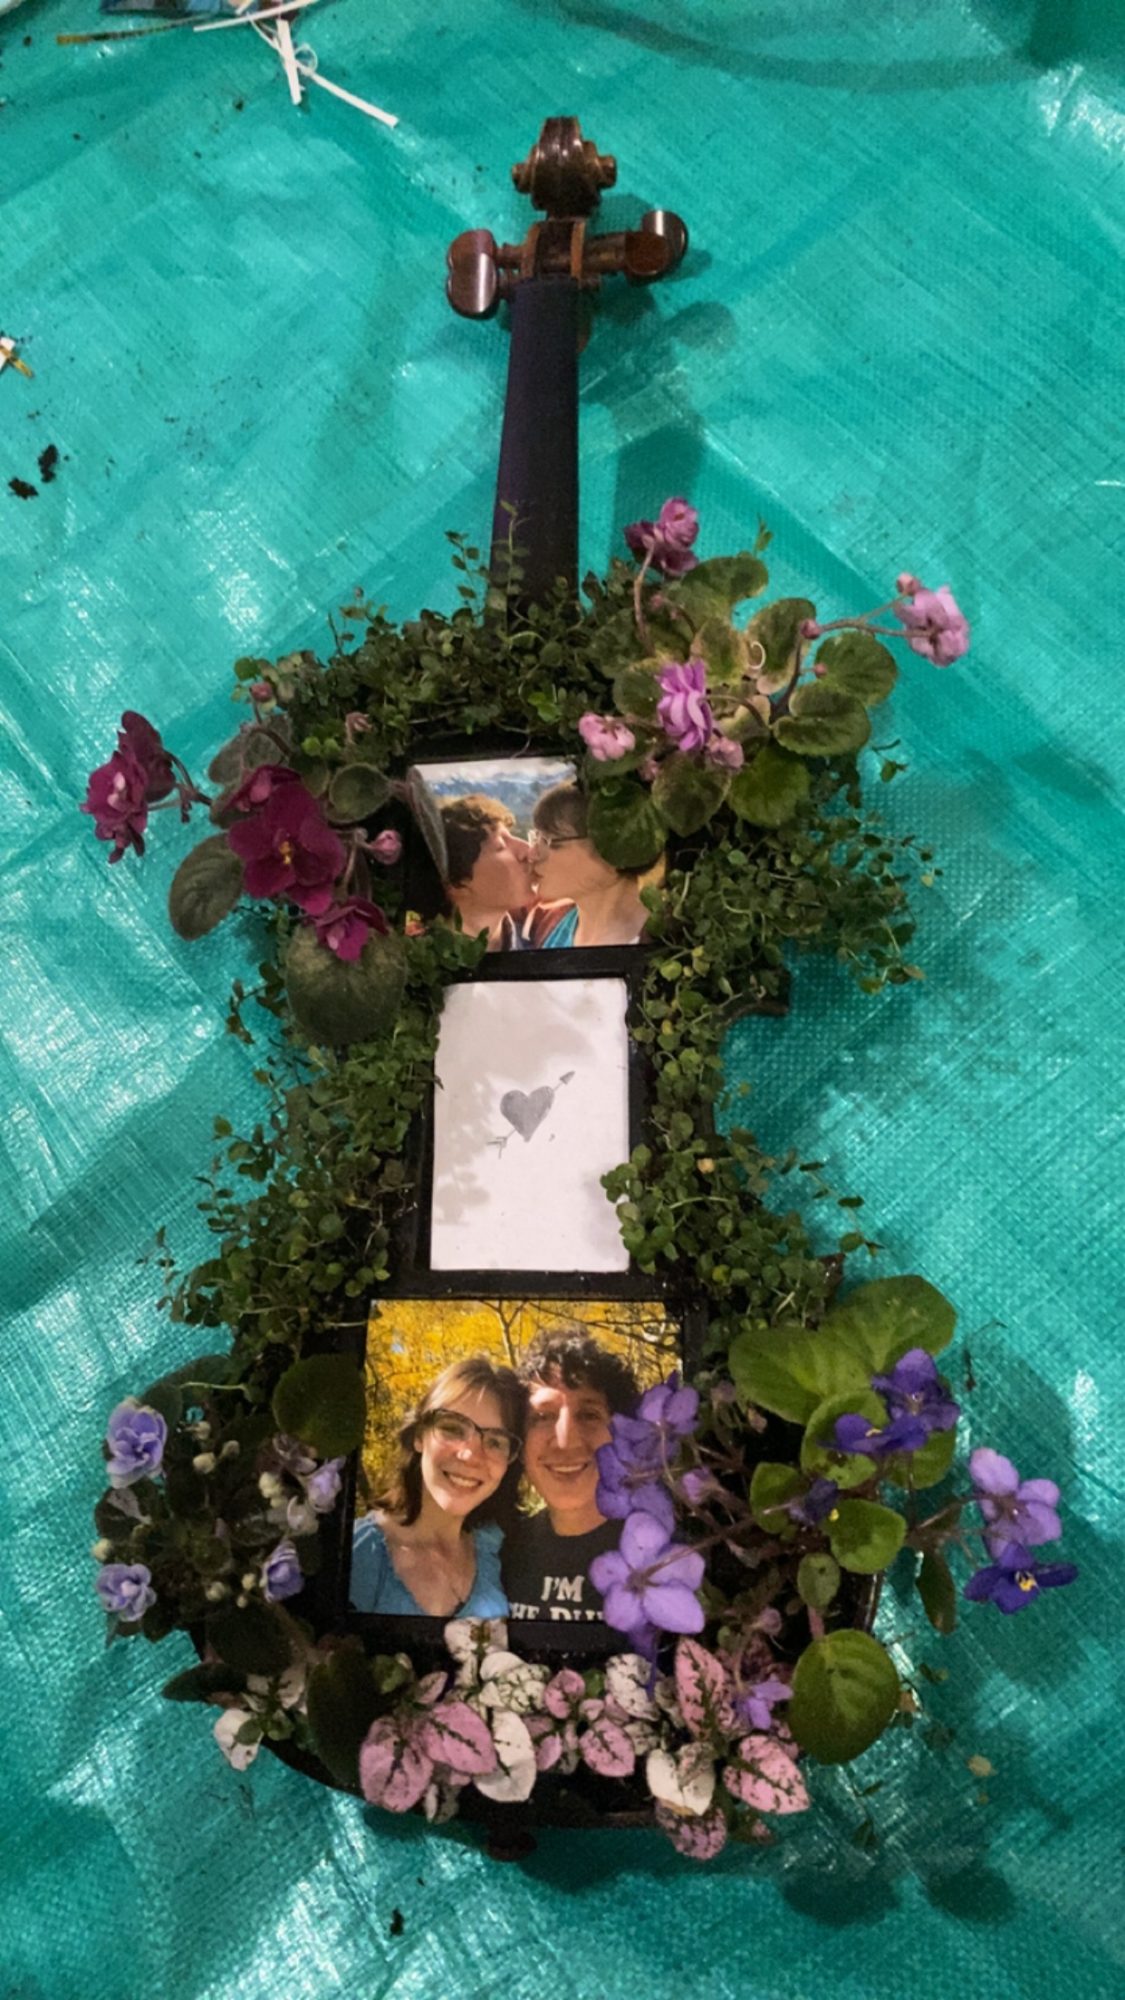
The construction of the biophilic violin picture frame was very successful. There are more design elements that will be added in the future; however, due to the constraints of the due date, I was not able to implement all of them The process shifted since the last post into a 4-step construction process
Step 1: Taking apart the violin
As mentioned in previous post, this consisted of removing the front plate by breaking the glue seal. This process used less than ideal tools however resulted in great results.
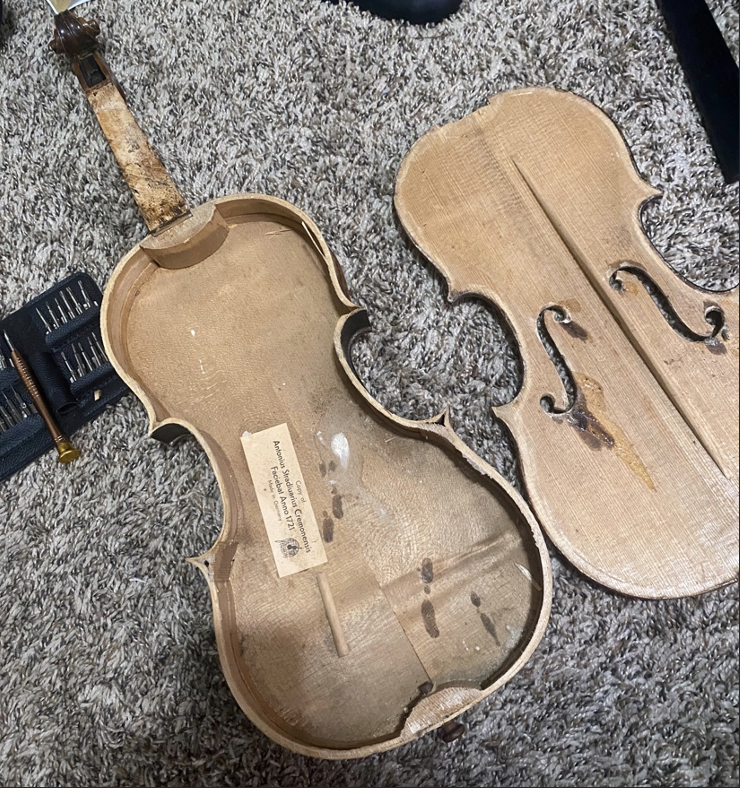
After the front plate and fingerboard were removed, this allowed for me to gather measurements of the base to understand the curvature of the backside
Step 2: Internal structure
Also mentioned before the internal structure of the required fine measurements and woodworking. Using the measurements that were taken in the previous steps, this allowed for the basic shapes of the wood that would be used for the internal structure. With some trial by fitting, I was able to sand these pieces so that they would be flush with the curvature of the violin. This worked very well.
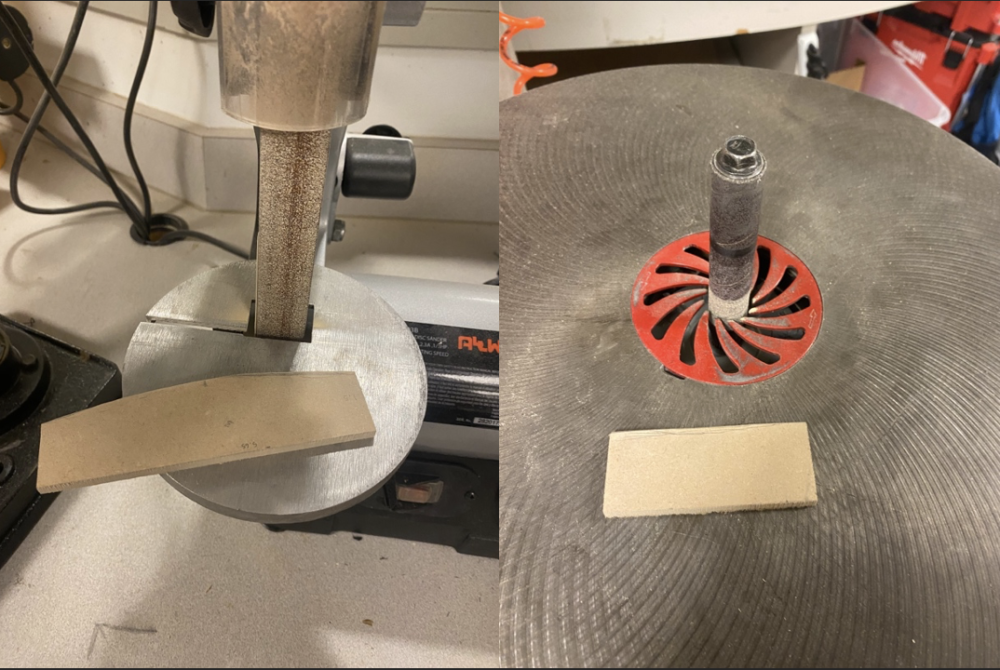
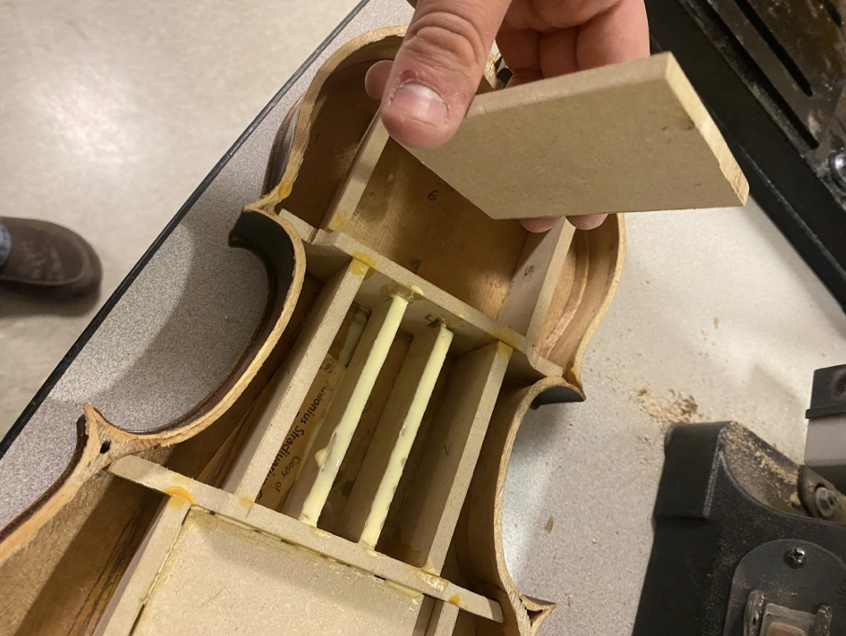
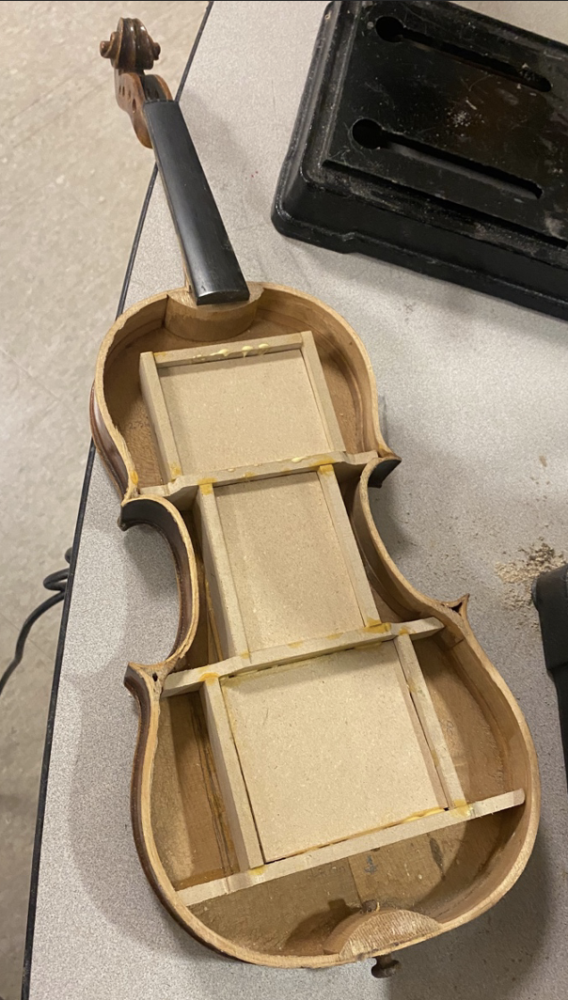
The internal structure makes room 3 pictures frames as well as room for plants around the edges. Despite being measured to fit perfectly, wood glue is used to make sure that the pieces stay extra secured.
Step 3: Wood treatment
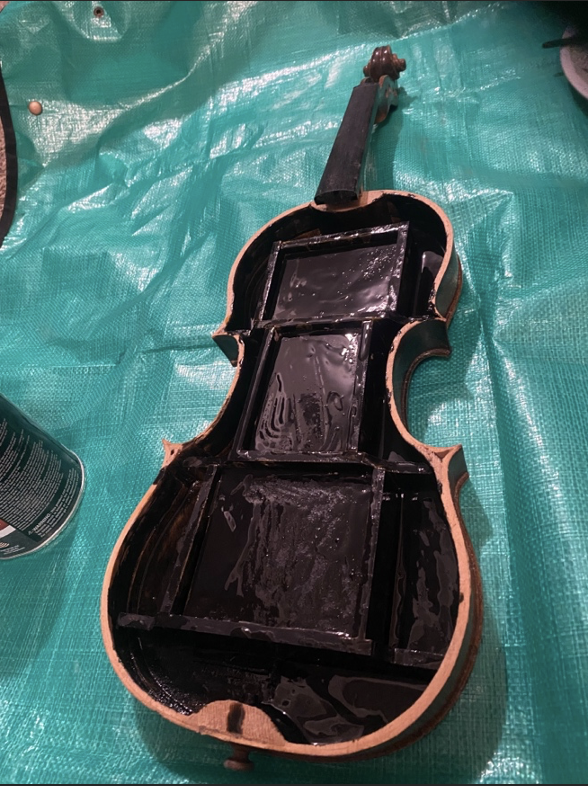
Fortunately, I was able to use some Flex-seal that my neighbors were about to throw away. Being able to treat the wood allows for being able to have plants that require extra water. This was the longest process because of the drying time needed.
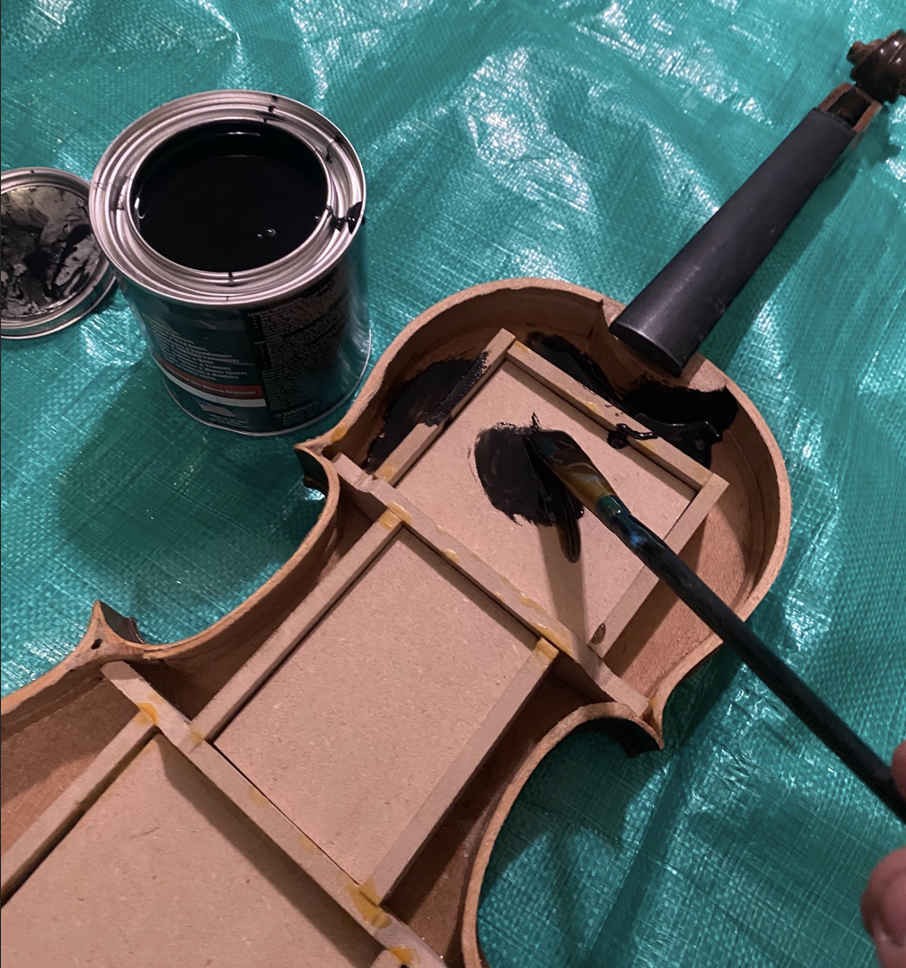
This process required several coats. The Flex-seal is very much affected by gravity. Because of this, I would change the orientation of the violin so that all of the sides would get an equal coating.
Step 4: Planting and pictures
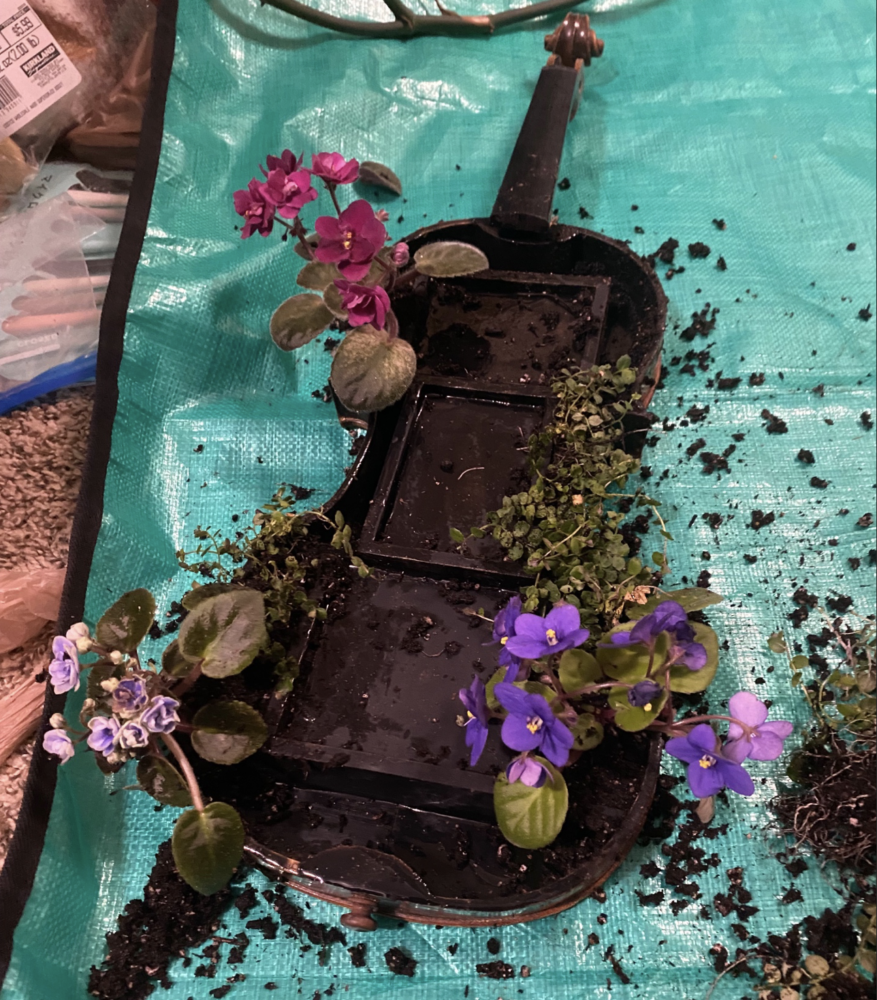
For this step, I did not gather moss as planned because it is not the right season. Instead, I went to the plant store and got flowers, nerve plants, and ground foliage. I made sure that these plants could be planted together because they have very similar lighting and water requirements. I took these plants and slowly put them into the edges of the violin. There wasn’t too much room and required extra time in order to properly get the roots in the right orientation so that the replanting recovery would not be severe.
Future work:
In the future, the middle picture will be an embroidered heart with extra aesthetic design. Another addition would be to have little glass panels that would be able to cover the pictures and future embroidery (this would allow easier watering without risking the pictures. The final addition would be to create a functional violin stand with upcycled materials.
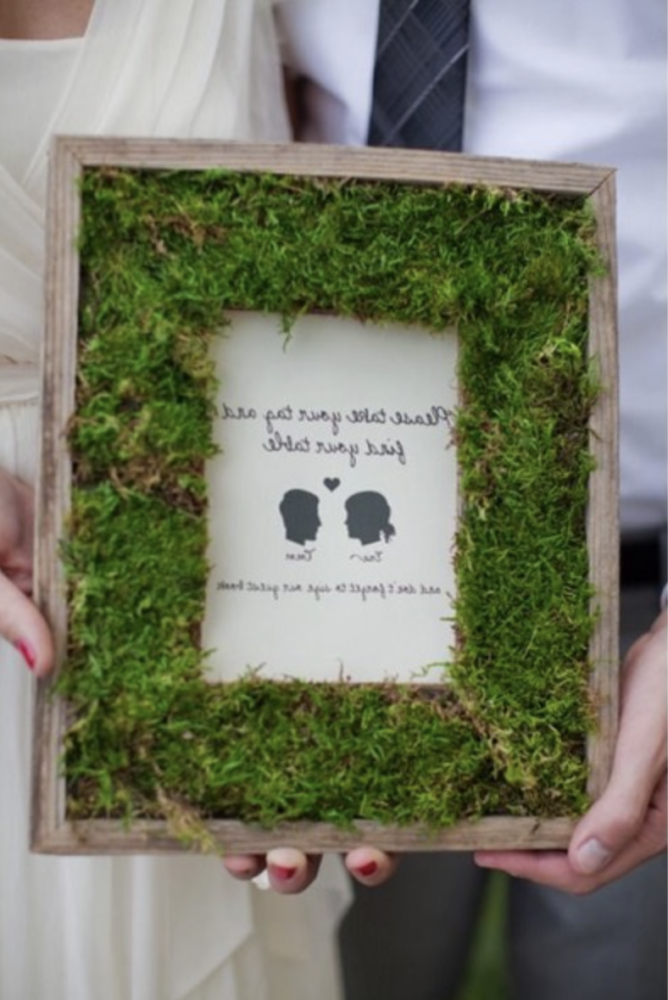
Inspiration vs Final:
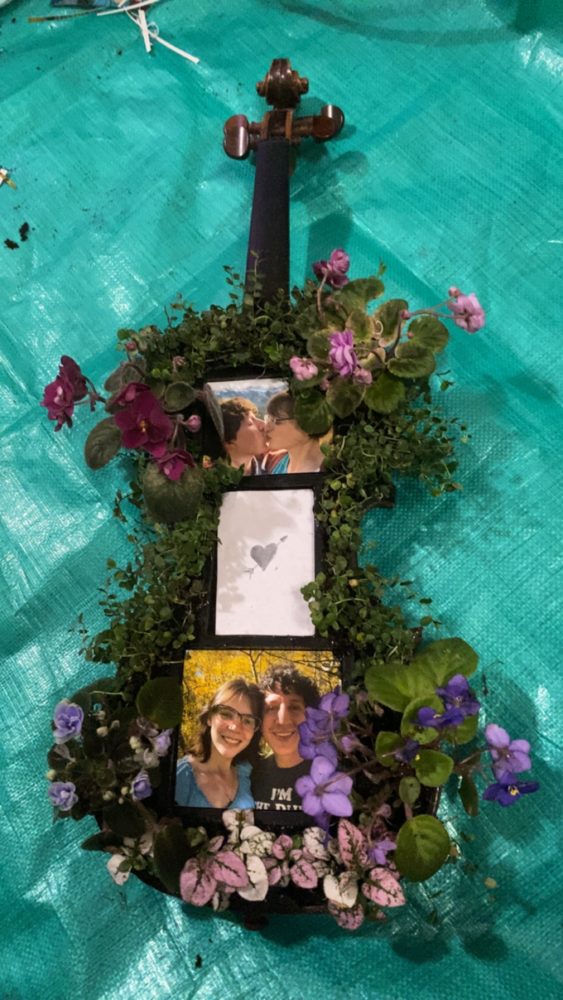
Upcycled Materials Sourced:
Violin – Old & broken violin that I bought awhile ago with the intention of learning how to restore a violin (from ebay)
Internal Wood – This wood was left over laser cut wood from my mechatronics class last semester
Flex-Seal – This was old leftover flexseal from a project that my neighbor was making. I asked if I could use up the rest of it and he let me have it
Plants – These were bought at the plant store (not upcycled)
Pictures – These were printed at walgreens (Also not upcycled)
Update 3/7/23:
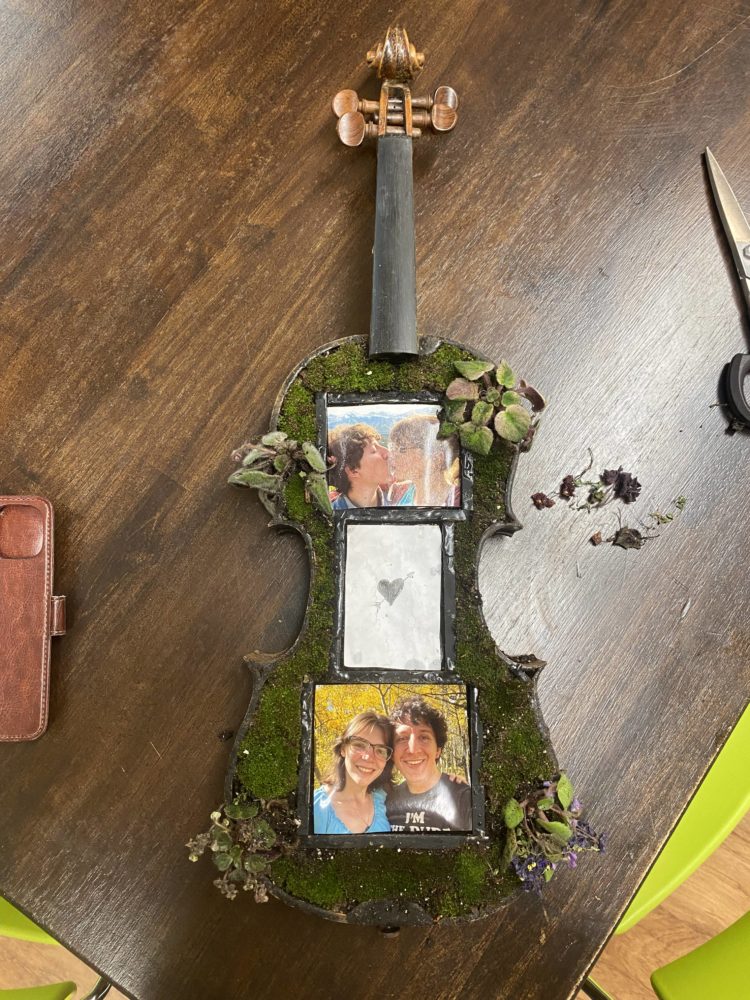
I planted these plants in order to meet the deadline. When the plants were at their most vulnerable planting, Boulder was hit by a really harsh cold snap. All of the plants (except the flowers) died. This lead me to do a second round and realize that the dirt is able to dry really quickly. Because of this I decided to use moss after all. I collected a lot of moss from some hikes and planted it in the violin. This moss will be more ideal because it will be able to trap more moisture into the violin. The flowers currently look a little rough however I think that they will be able to bounce back from the transplant + storm

4 Comments. Leave new
Hey Ethan, this looks so awesome! I love your choice of plants, it gives the frame a very naturecore aesthetic. I’m curious to know how you plan to water the plants and how the soil would stay in once you place the frame upright.
Hey Anil! So the plan is to have it on a violin stand so it will never be completely vertical; however, the plants a packed in pretty tightly and wont fall out even if it was verticle. As for watering them, I will be using a spray bottle. Once I am able to put the glass panels to protect the pictures, it will be really easy to spray water without having to be precise where the water goes
Ethan! This turned out awesome – I bet your girlfriend loved this makeshift Valentines Day gift. How do you plan on putting in your house? Do you want to hang it or will it be on a shelf somewhere?
Thank you so much! Were planning on displaying it on a violin stand and putting it up near one of my other violins that I currently play because it would go really well next to another violin to really bring home the aesthetic!