Patchwork Aesthetic: Japanese Gi Inspired Bomber Jacket
This blog post will show my final product of the upcycle project. I made a Japanese Gi Inspired Bomber Jacket following the Patchwork Aesthetic. However, before detailing the outcome of my project it is important to recap a few things that some people might not know if they have not read my previous posts. There are the Patchwork Aesthetic, my sources of inspiration, and the construction process.
First, I will recap the Patchwork Aesthetic. As with anything involving textiles or cloth, sewing must be involved. Sewing can be traced back to over around 25,000 years ago. It was bout this time that the Patchwork Aesthetic developed out of necessity. Animal hides and pelts were only so big, which meant the must be sew together to for both bedding and clothing. While this strategy originated thousands of years ago the same idea was still used in recent centuries. The figure below shows a Native American blanket made from rabbit pelts:

Figure 1. Native American Bedding made from Rabbit Pelts
As time when on artisans became more skilled in sewing giving new life to the Patchwork Aesthetic. However, this aesthetic transcended class divides. Those in lower social classes would continue to use Patchwork out of need by mending old clothes. While a dominant expression of this highbrow Patchwork Aesthetic was intricate Quilting in Britain and its colonies such as India. Since these projects would often take so many hours, multiple people would work on them at the same time. This caused the beginning of sewing parties acting as social events for women who were often those quilting at the time. The image below shows a British quilt that was made as a wedding gift:

Figure 2. British Wedding Gift Quilt
With a strong background in the Patchwork Aesthetic, I can now move to the inspiration of my project. Two major sources acted and inspiration for me: the Japanese Gi and classic Bomber Jacket.
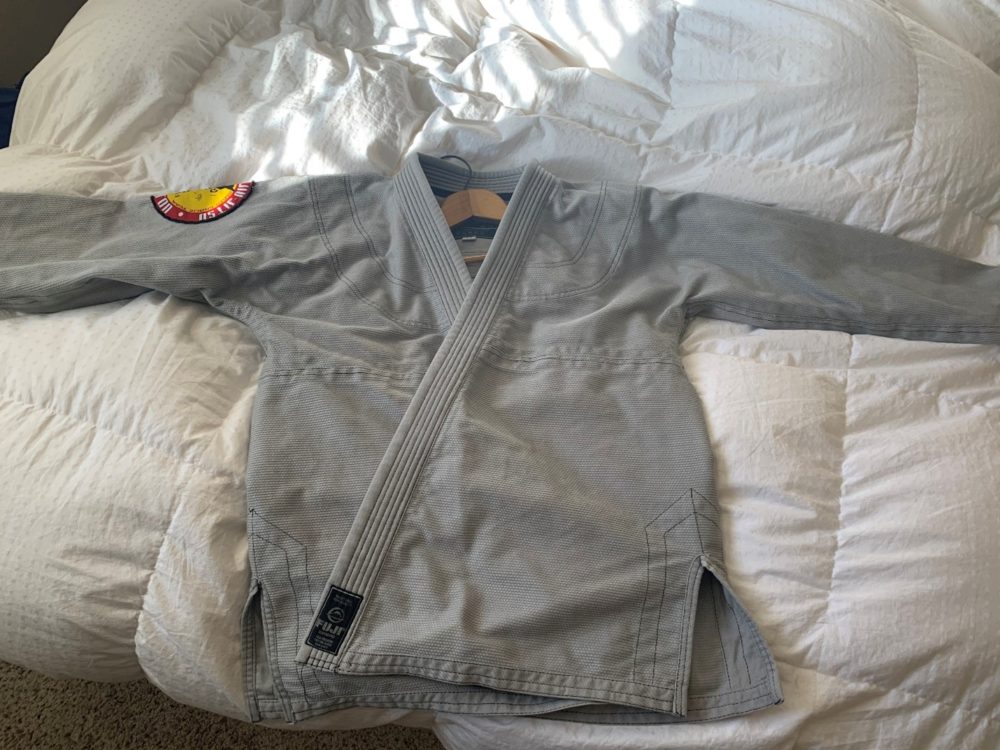
I knew I did not just want to sew a bunch of scrap fabric together and call it a Bomber Jacket. Instead, it should resemble something and what better to use as inspiration than the source of my scrap material, old Gis. Below is an image of one of my Gis for those who haven’t seen one:

Figure 3. Brazilian Jiu-Jitsu Gi
The common word Gi is an abbreviation of the more traditional Japanese word Keikogi. Its roots break down as ‘keiko’ meaning “practice” and ‘gi’ meaning “dress or “clothes”. These uniforms were used primarily in Japanese Martial Arts and their descendants such as Aikido, Judo, and Jiu-Jitsu. It was not until the 20th century that Chinese Martial Arts such as Karate adopted this uniform. The modern style of the Gi was designed in the late 19th century by a famous Judo practitioner as a uniform that can hold up during the explosive throws in the Judo system. It is speculated that his inspiration were the hemp jackets that Japanese firefighters used. Some identifying features I hoped to include in my project were: a thick collar, an overcut in the front, and various patches as seen in Figure. 3 above.
The other main source of inspiration for my project was the classic Bomber Jacket. Honestly, the reason for this is that I have always wanted one. These jackets have a couple of specific features that I am going for in my design thick collar/cuffs/waist, and a silk like liner fabric. These features are depicted in the image below:

Figure 4. Classic Bomber Jacket
We can now jump into the construction of my project and land at the final product. It is important to keep both the history of the Patchwork Aesthetic and my sources of inspiration in mind as they truly drove the fabrication process.
The first step in constructing my project was planning, this consisted of gathering materials and making a template. I had a bunch of old Gis and belts at my parent’s house from doing martial arts a kid. They had been sitting around for so many years that I though its about time to give them a new life rather than just throw them away. This led to some interesting issues as all my old Gis were from when I was younger and inherently a lot shorter. However, I will get into this more later. To make the template I traced a long sleeve shirt that I liked the fit of onto construction paper that I bought from Art Parts. The image below shows all these components:

Figure 5. Back Template (Top Left), Front Template (Bottom Left), Belt Material (Top Right), Sleeve Template (Bottom Right)
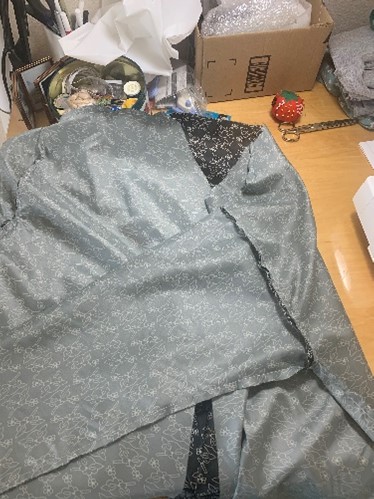
As I am a beginner in sewing, I wanted to start with something that I could mess up on. With this in mind I decided to make the inside liner. The material for this component was also sourced from Art Parts as it caught my eye matching Asian inspiration. I used the templates I had made previously to cut out the panels and sewed them all together. This effectively made an inside out jacket which is shown below:

Figure 6. Liner Component of Jacket
This process effectively hade to be repeated two more times for the Dummy Layer and Patchwork Layer. The Dummy Layer acts both as insulation and a backing to sew the different patches on to. In order t complete the project on time a had to cut a few corners with the Dummy Layer. I used an older t-shirt that was slightly smaller than the liner material. This was the trend of the project as any mistake that could not be fixed quickly made the jacket smaller.
Ideally, I would have used many small patches of fabric for the Patchwork Layer. However, due again to time constraints I had to use larger panels of fabric in this layer. Since so many of my Gis were from when I was younger, I had to do some interesting thing to make the patchwork layer large enough. For example, I used pant legs as sleeves and large back panels as general use. Even with all these adjustments the final jacket was still a bit tight. This is something I plan on addressing in my own time throughout the future but still have a functional article of clothing by the end of the project timeline. The image below shows my final product from this upcycle project:

Figure 7. Final Jacket Front View
Overall, I am very happy with the final product of as I achieved many of the identifying features I discussed above. These include a thick collar, thick cuffs, thick waist, an overcut, and a silk liner material. With all these identifying features, I believe it is a clear success of the Patchwork Aesthetic with inspirations from the Japanese Gi and Classic Bomber Jacket. The following image highlights the liner:

Figure 8. Final Jacket Front View with Open Liner
The main colors in my jacket are black, white, and blue. The liner material matches perfectly with these colors being black and white. It has a repeating pattern of what seems to be an Asian inspired cat with some sort of grain in its mouth. This aligned with the sources of inspiration I was uses and happened to be made from silk. The thick collar and waist material help frame these colors and add a bit of consistency to the chaos of the Patchwork Aesthetic. The following figure shows my jacket from a back view:

Figure 9. Final Jacket Back View
The dominant colors on the back of the jacket are black and white. This gives a sleek look on the back and allows the eye to be drawn to the dragon patch on the upper back. The sleeves are a bit poofy as another identifying feature of a Classic Bomber Jacket. In the future I plan on adjusting the armpit areas of the jacket to better fit me. If one looks closely at the image above, they can see issues with the left armpit area. The image below is a close-up of the dragon patch on the upper back panel of the jacket:

Figure 10. Final Jacket Back View Patch Close-Up
The patch depicted in the image above was on a Gi that was gifted to me by one of my old teachers. I then though it deserved a prominent location on my jacket.
Presentation Video:
Sources:
- https://www.jonessewandvac.com/sewing/the-history-of-sewing/#:~:text=Although%20some%20ancient%20sewing%20needles,official%20from%20the%20Han%20Dynasty.
- https://www.vam.ac.uk/articles/an-introduction-to-quilting-and-patchwork#:~:text=The%20history%20of%20quilting%20can,England%20in%20the%2013th%20century.
Picture 1: https://americanindian.si.edu/static/exhibitions/infinityofnations/california-greatbasin/072281.html
Picture 3: Original Content
Picture 4: https://images-na.ssl-images-amazon.com/images/I/51JISPYJlwL._AC_UX385_.jpg
Picture 5: Original Content
Picture 6: Original Content
Picture 7: Original Content
Picture 8: Original Content
Picture 9: Original Content
Picture 10: Original Content

4 Comments. Leave new
Burns this turned out great. I love the materials you ended up going with and the way the final panels were placed on the garment, most notably the Dragon Patch. Although you might need to make alterations to the fit, the craftsmanship you were able to achieve on a first attempt at patchwork is impressive! <3
Thanks Pete, the Dragon Patch is definitely the star of the show. Since the placement of all the panels match more standard seem locations, viewer’s eyes don’t bounce around as much as in the Patchwork Aesthetic. It is nice to not have any more deadlines and I can work on this project as I see fit.
Hi Michael,
First of all, great job on your project. I don’t know much about sewing but I feel like you did an awesome job with it considering that you’re a beginner in sewing as you mentioned. Do you think that your project portrays a minimalist aesthetic? if not, what kind of aesthetic do you think your project portrays?
Thanks Thuc! I suppose I could see some minimalist influence on my project especially since I used few large patches. If I were to go with many smaller pates as originally indented, I think the Patchwork Aesthetic would be more prevalent.