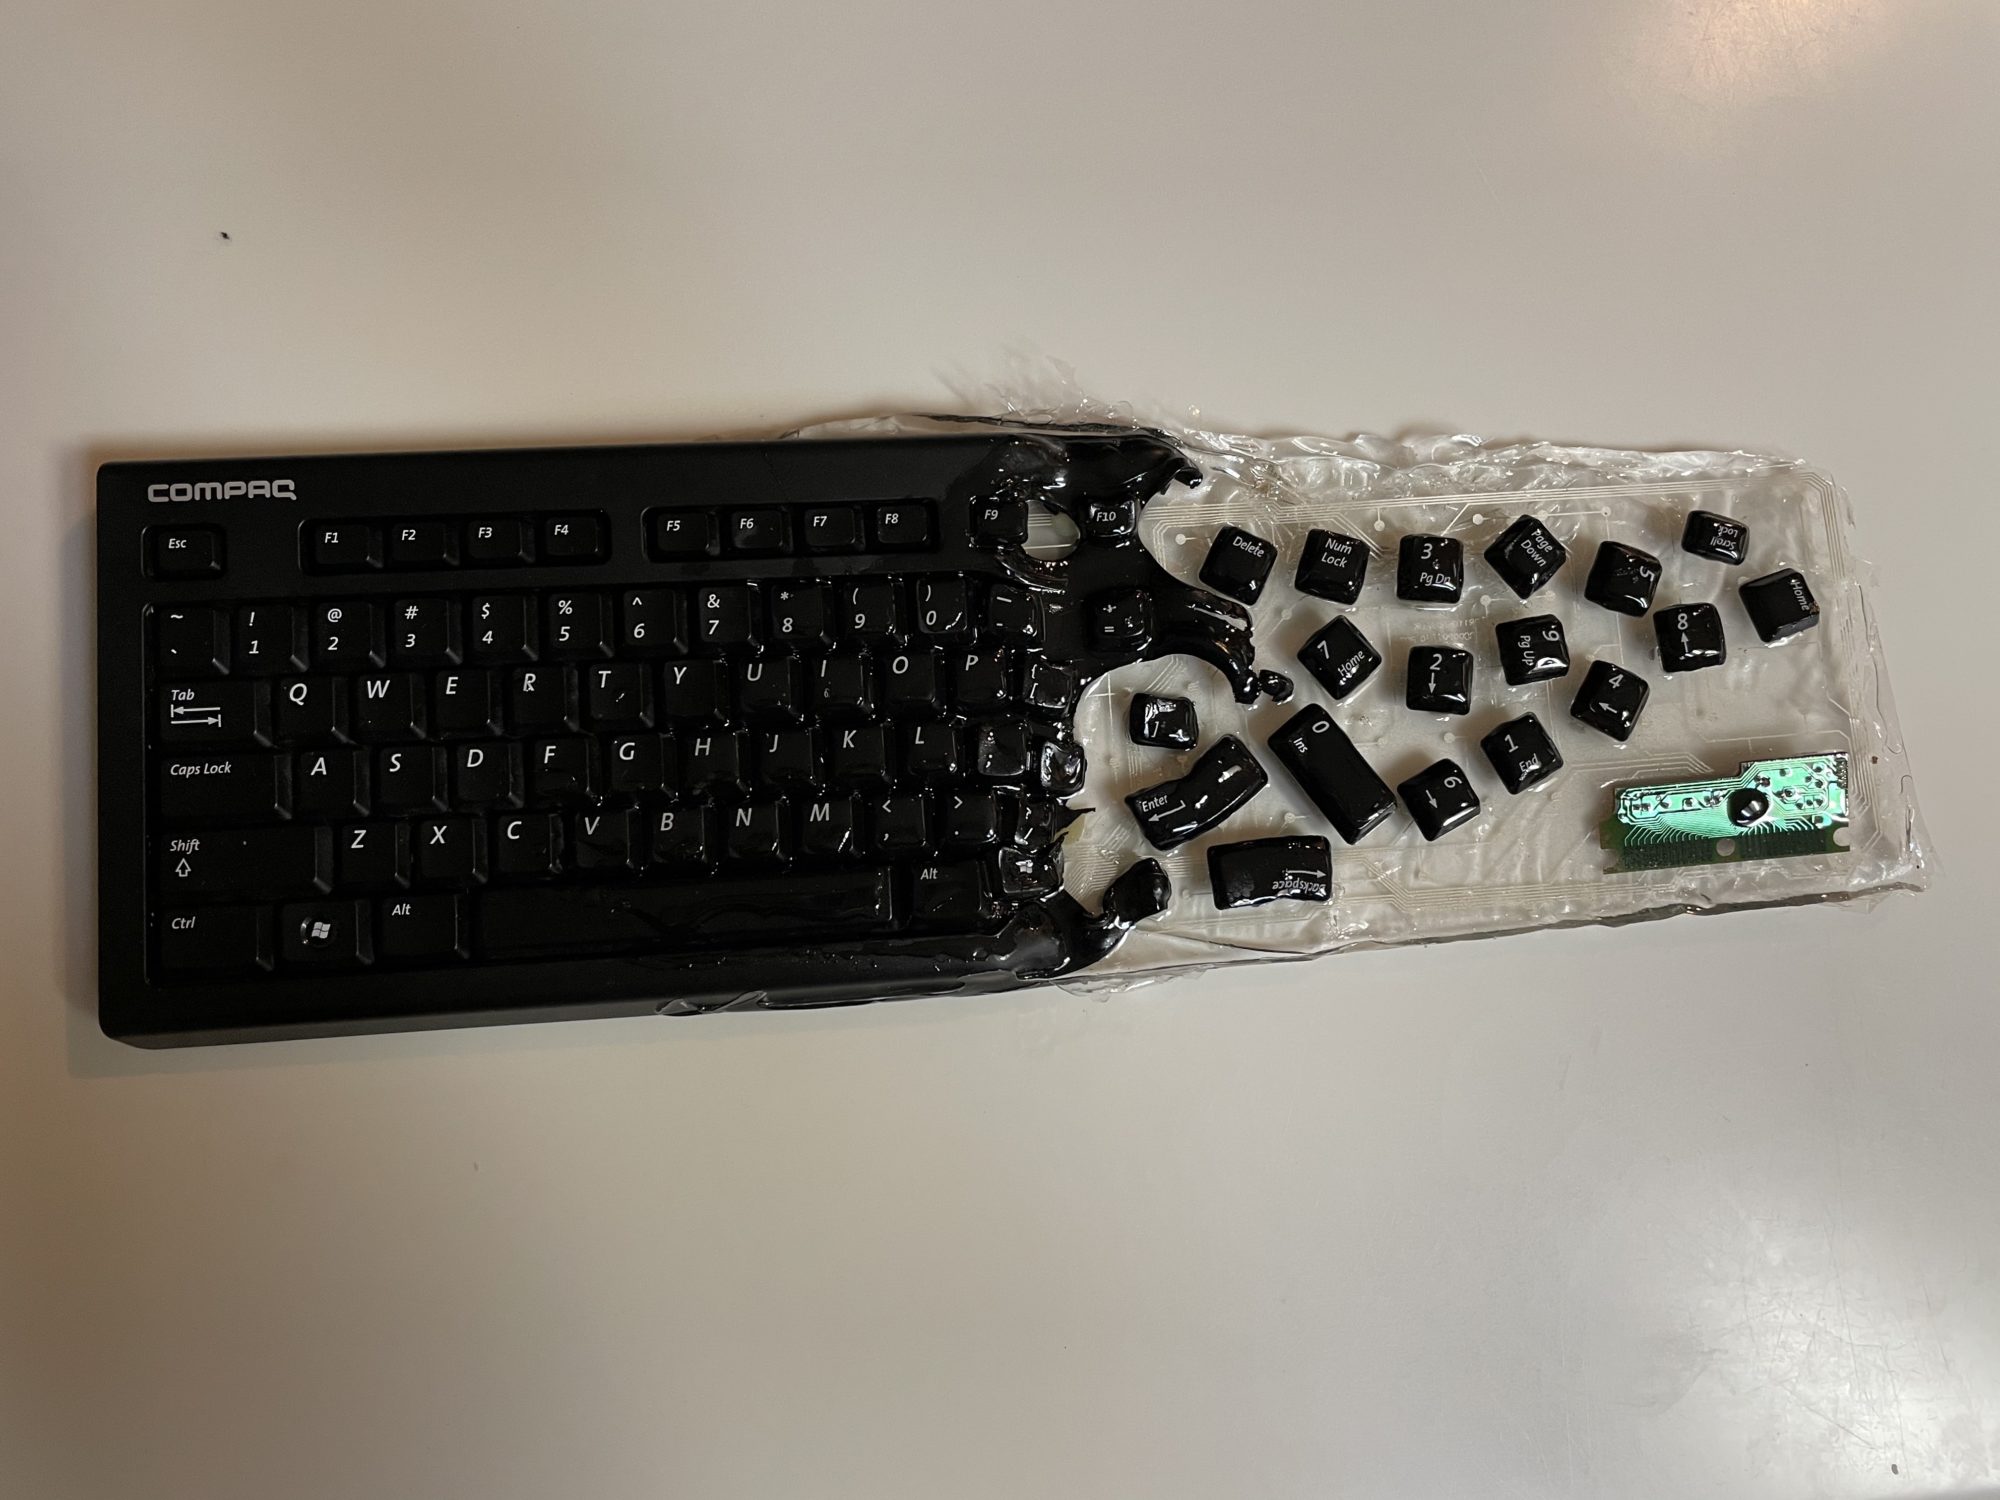
Throughout the process of constructing my upcycling project, I have overcome many challenges that I didn’t expect. I have found that even though you have a good idea of what you want to do, it usually won’t be as easy as you imagine. As you may or may not know from my blog post last week, I have taken an old keyboard and transformed it into something of meaning and beauty to me. I wanted to represent how I felt about this current time where we are always on our computers to take classes, to work, or even just for leisure. This situation can sometimes make me feel like I am melting into the keyboard because my entire life revolves around it.

I found this outdated keyboard in my garage collecting dust and thought I could convey this idea well using it. First, I deconstructed it to examine the internals of the keyboard. I found quite a few interesting pieces; I really liked the aesthetic of the clear circuit section that was used for detecting button presses when the keyboard was in use. I also liked the rubber section to make the key presses feel better, but I couldn’t find a way to incorporate it effectively without ruining my minimalist aesthetic. I also experimented with removing the keys to be placed back into the artwork later.


Next, I heated up the keyboard in the center using a heat gun to the point where I could see the plastic begin to deform before pulling it in half. This generated quite an interesting effect as is appears the keyboard is melting away into nothing. My next step was to figure out how to present all of these pieces in an aesthetically pleasing fashion.

To do this, I turned to a medium I have never used before, a clear resin that can be poured over anything and then hardens to create a hovering effect of the components. Being the first time using this, it took a few tries to get the mixture correct and ensure that the resin didn’t flow past where I wanted it to. Even so, I still struggled with this in my final product, with some edges being inconsistent and some of the keys not fully covered. I also had trouble with the cure time of this resin as it has taken much longer than I anticipated which means I have to wait before I can complete the project. However, I feel that these flaws give the artwork character and add to the overall effect of the piece.

My final step will be to add color to the backside of the keyboard to better display the intricate circuit that controls the key presses and make the floating keys pop. I have decided to use only one color and I think it will end up being metallic blue, as it adds some meaning to how I feel about being behind a keyboard all day. I hope you enjoy my finished product!


4 Comments. Leave new
I really like that youve latched on to an emotion that we’re all really feeling right now with your project. Is the first picture on your post a picture of your actual project or is is what you hope your final product to look like? Adding color is a great idea to make that circuitry pop! do you plan to paint it black or will you be using a brighter color to add a different emotion to the art work? Good work, I’m excited to see the final result!
Yes, my cover photo is the actual progress on my project. I feel as though it is still a little boring though so I think I will paint with something brighter than black, I was thinking metallic blue.
Hi Zack,
First off just wanted to say what a cool project! I think your addition to color with meaning is spot on especially in our current time. This piece appears to be leaning more into the art side of upcycling rather than a repurposing for a new function that some others have chosen to do. I have never worked with resin but have always wanted to! What’s your plan for the finished project?
Thank you for your kind feedback! I did lean more to the art side because I couldn’t find a lot of inspiration to make something functional. However, I think that in a way I am repurposing this keyboard, but instead of something functional, I made something that I can look at and enjoy on the wall every day, which is all I really wanted to do with the project.