As is the case for most of us, I unfortunately will not be able to complete a physical manifestation of this project due to COVID related closures. Despite my expedited ring manufacturing before the laser cutter closure, my order for custom buttons just barely did not get through. The shop announced closure the day after I sent in my completed designs, and other alternatives I’ve explored have too long of a lead time to arrive on time. I will be pivoting to a 3D CAD rendering for the remainder of this project, which fortunately should be fairly straightforward given the simple nature of this toy.
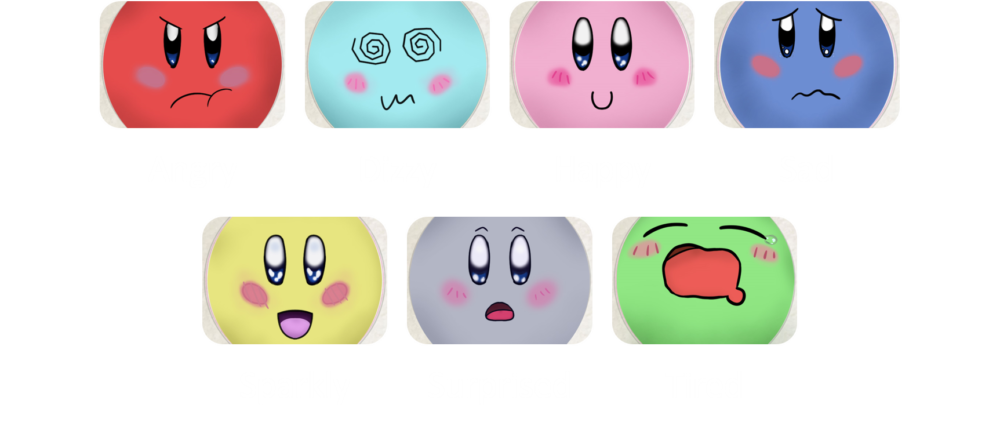
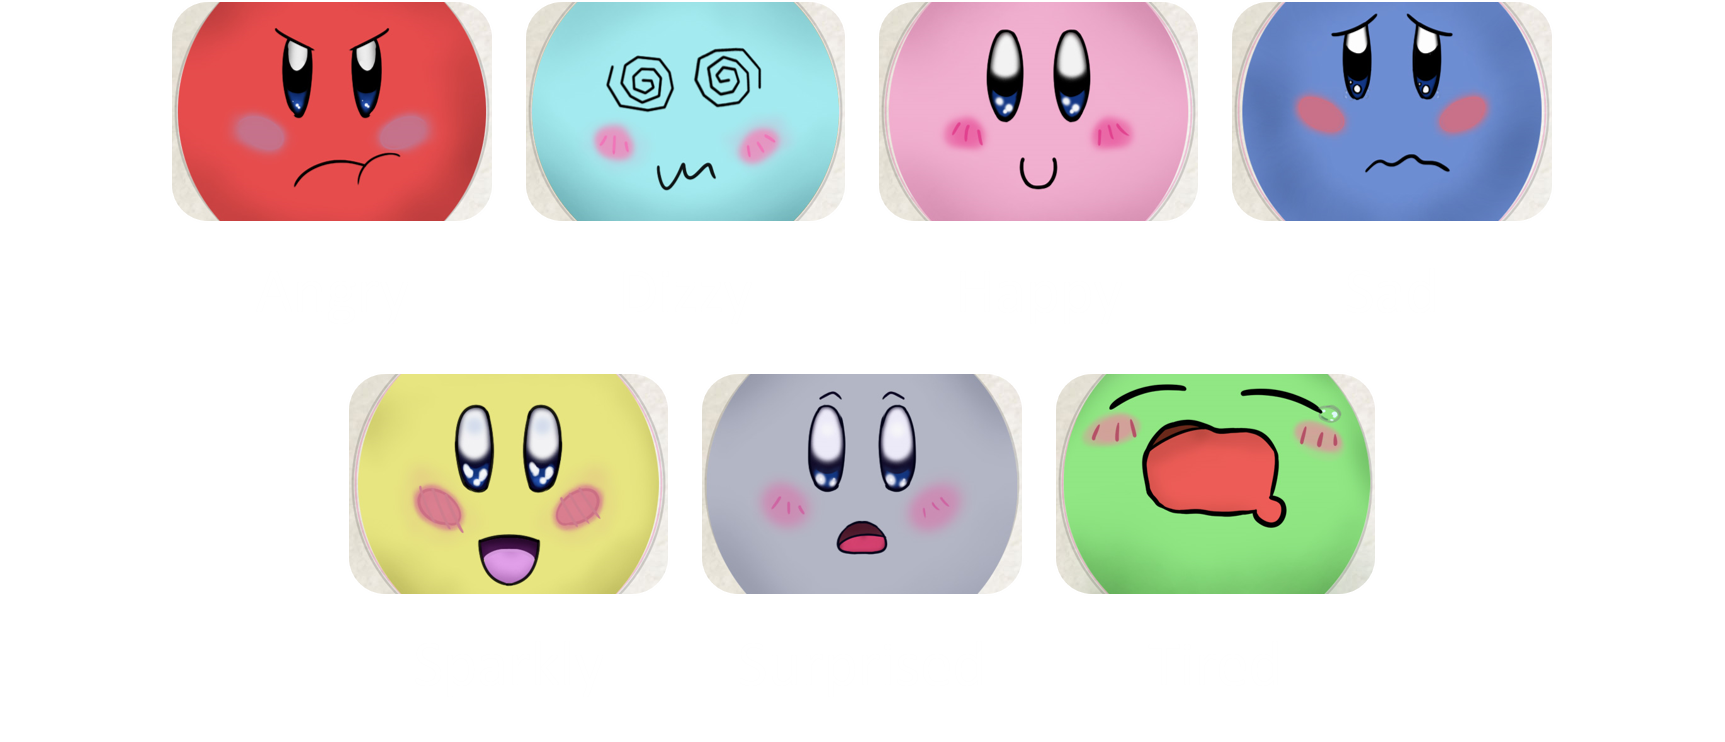
Here are my completed designs for all 19 buttons, shown below, starting with the head-wear then the different moods.
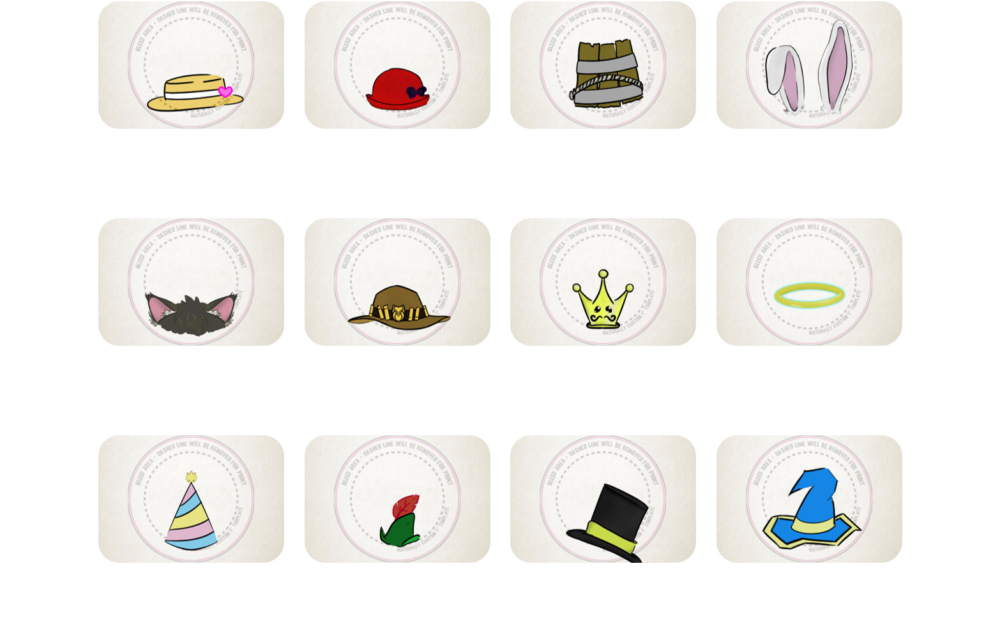
My plan is to add additional background details to the head-wear buttons, if I am able to figure out the rendering quickly enough for me to do so. Likely I will only be able to complete a more detailed version for a fraction of them. Here are my ideas for additional background details:
- Boater: sailboat sails
- Bowler: English style glass storefront
- Bucket: janitorial supplies, e.g. mop, broom
- Bunny ears: grass, easter eggs
- Cat ears: pyramids
- Cowboy hat: desert, cactus
- Crown: castle
- Halo: clouds, sky
- Party hat: balloons
- Robin hood hat: forest/tree tops
- Top hat: circus/stage curtains
- Wizard hat: night sky, stars
I’ll likely also take the time to touch up the mood buttons’ details, like the eye shine and blush patterns, and more careful shading.
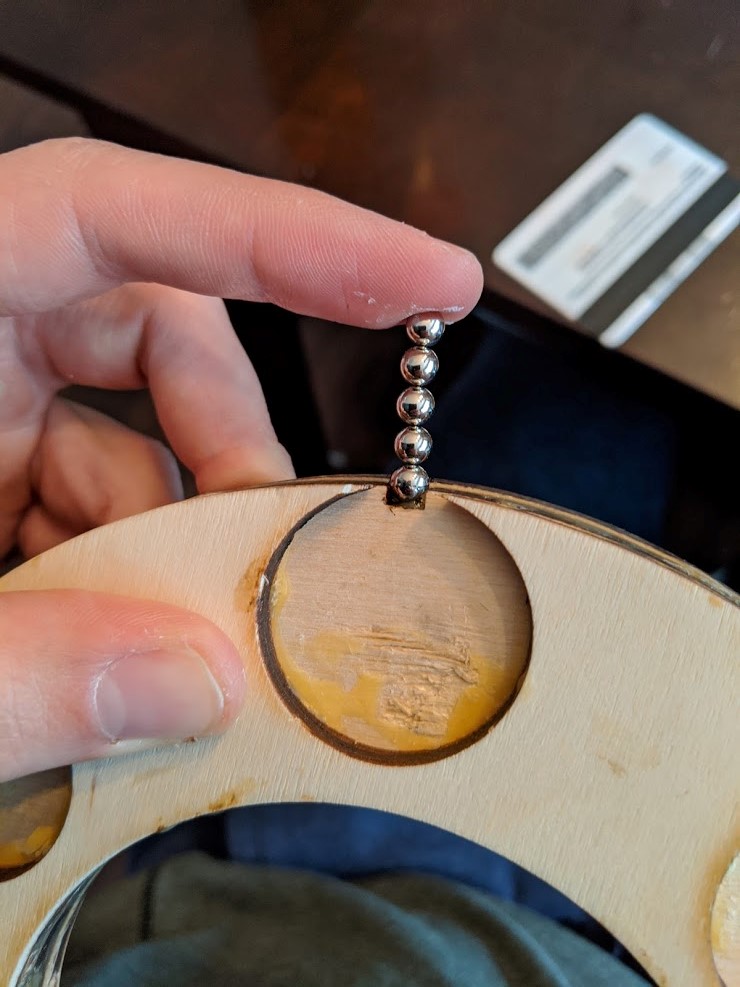
Regarding the magnetic detents I had planned, the notch coupled with super glue and some scores on the bottom of the magnetic ball worked well for just the first iteration. I quickly discovered this would be far too tedious and finicky for me to finish for the rest of the slots, so I bought an epoxy which should work much better. I pressed the example one below into the notch with superglue while attached to other magnets to ensure an orientation where it would “snap” together rather than repel.
You can see the selected bearings for each of the rings below:
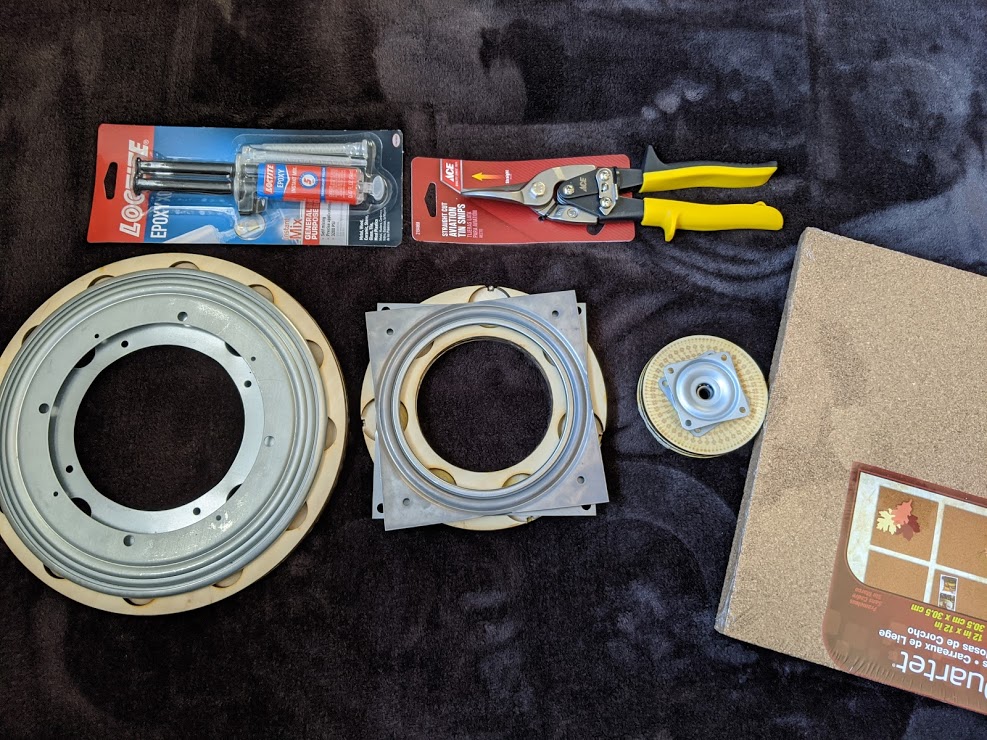
Because of the middle ring’s bearing’s current square shape, I bought some tin snips to get the corners out of the way of placing the middle ring within the larger outer ring. I planned to use the corkboard tiles to cut out layers for an offset, so I could mount the rings in a consecutive manner without having them move dependently. I.e. the outer ring bearing would mount to the base, biggest layer, and another, smaller layer would be added to the inside of that bearing for the middle bearing to rest on, and so on for the last, innermost bearing. This does create an unforeseen tiered effect for the rings, but it’s the easiest solution I could think of while lacking a 3D printer.
My last theoretical step would be the painting of the rings, which I’ll of course include within the rendering. I am thinking of the below color palette, left being the inner ring, middle the middle ring, and the right being the outer.
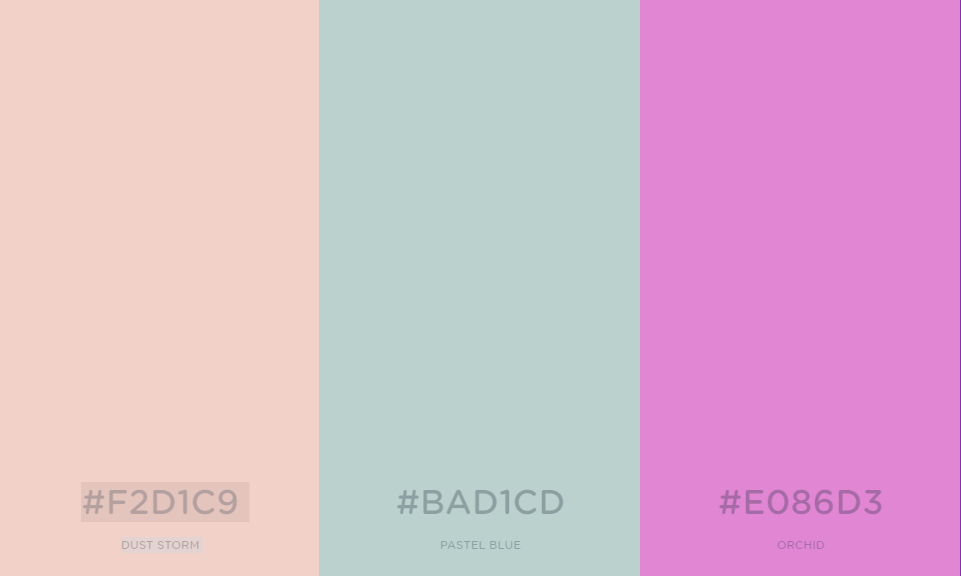
Generated using coolors.co
While I’m more than disappointed I won’t be completing a physical version on time, I am happy with how the individual elements have turned out thus far, for the most part. Given the virtual nature of our presentations, the rendering will likely be a better form to show this off anyway, and will let me quickly adjust or altogether skip physical manufacturing hiccups, such as finding a way to have the magnets reliably bond to the wood.

6 Comments. Leave new
Hi Thomas. So are you going to complete this project at a later time? Or not. It would be really cool to see this project all the way through. Other than that, looks like you have great ideas and that is awesome. Keep up the goodwork. I would highly recommend seeing this project through to the very end. It could be very cool!
Thanks George! I think I will end up constructing this over the summer, since I have most the materials anyhow. Plus it’ll be a lot more fun to play with than the clumsy rendering I’ve been able to make so far
Hi Thomas, I really like how your project is coming together it looks good so far! I also appreciate that you have kept the similar aesthetic across your projects. Keep it up!
Thanks Paul, I’m looking forward to having this completed! I think as I near completion I’m realizing I’ve strayed a bit from my aesthetic on a couple elements, but overall I’ve maintained the kawaii spirit, I think.
Thomas, this is a cool idea and I am excited to see how your renderings turn out. What program are you planning on using? Let me know if you need any help with PV360 in SolidWorks. Do you plan to make an animation as well?
Hi Danny, I don’t think I’ll be doing an animation after all, I’ve been fumbling through it for a few hours and have decided my time is better spent focusing on a more complete design in terms of aesthetic vs functionality. I’ll likely just do a quick SW demo in my presentation to show the general idea of its movement. I might include my botched version of one for the sake of it, and maybe you or others will happen to know a quick fix for the issue when you see it. Thanks for your help!