At this time in the semester, I have made some progress in my coffee capsules holder. At this point, and with everything going with the Coronavirus, campus access is impossible. Luckily, I have managed to buy the material I need to work on with the laser cutter at the last minute, and was able to finish everything I need to do on campus. My project timeline can be better shown below:
Completed tasks:
- Brainstorming and sketching
- 3D modeling
- Main material acquisition (needed from campus or needed to used in a campus machine)
- Laser cutting
- Assembly preview
To be completed tasks:
- Week of Mar 16: Acquire wood stand, fasteners, and magnets
- Week of Mar 30: Wood painting (if needed), acrylic box gluing, and assembling everything
**Timeline accelerated due to campus conditions
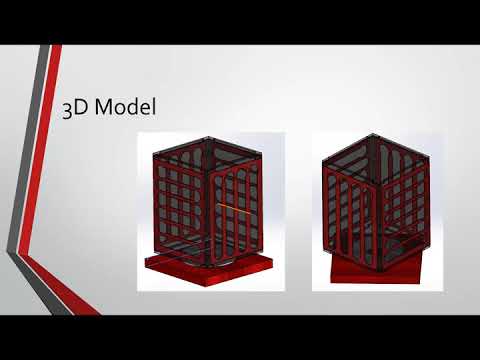
For the things I have done so far, I have brainstormed and sketched 3 different ideas. After spending sometime deciding which one I will pursue and being sure of that, I made a 3D CAD model of what my final project should look like.
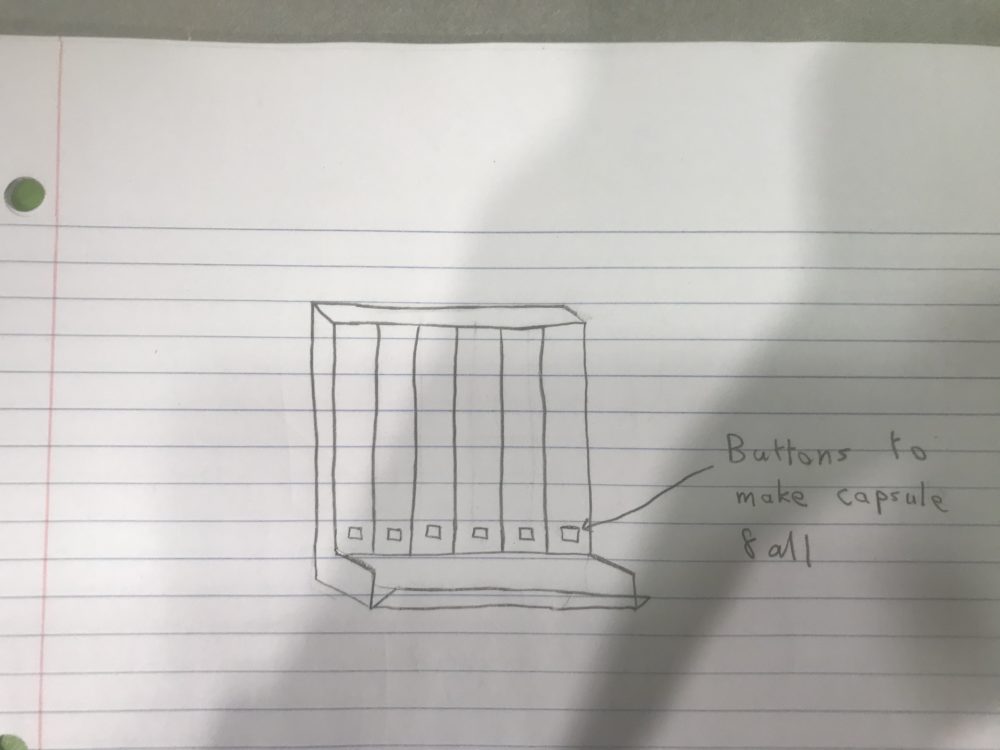
Design 1: Laser cut wall mount. Unnecessarily complicated to laser cut all parts and relatively boring design.
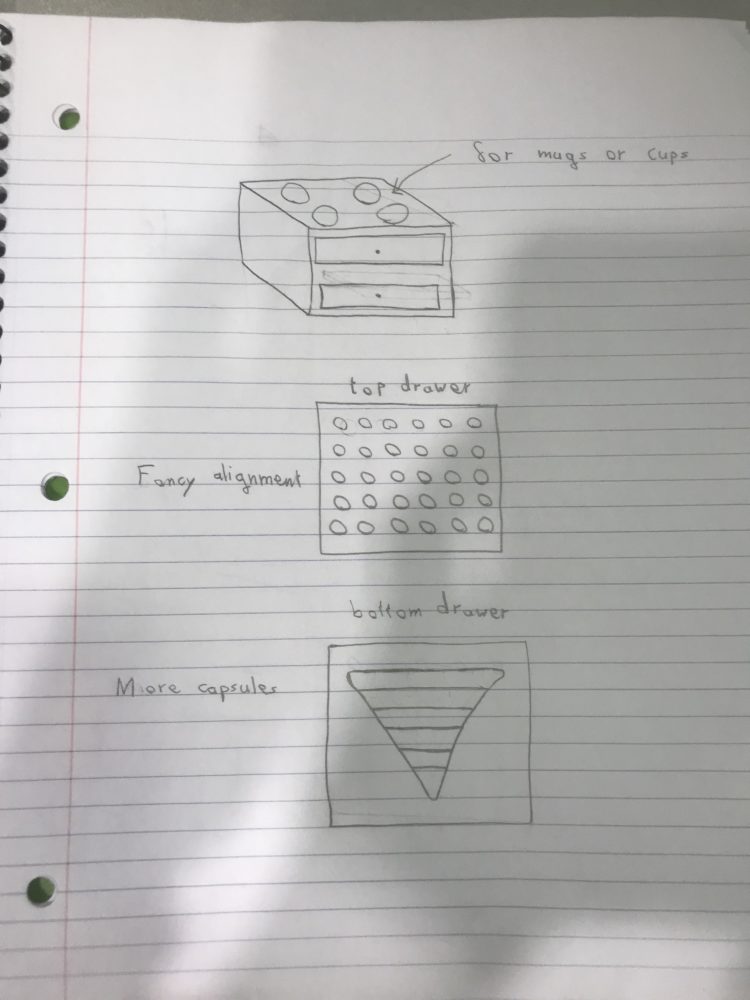
Design 2: Capsules cabinet with mugs storage. Takes a lot of space, more complex than I intended, and not very convincing.
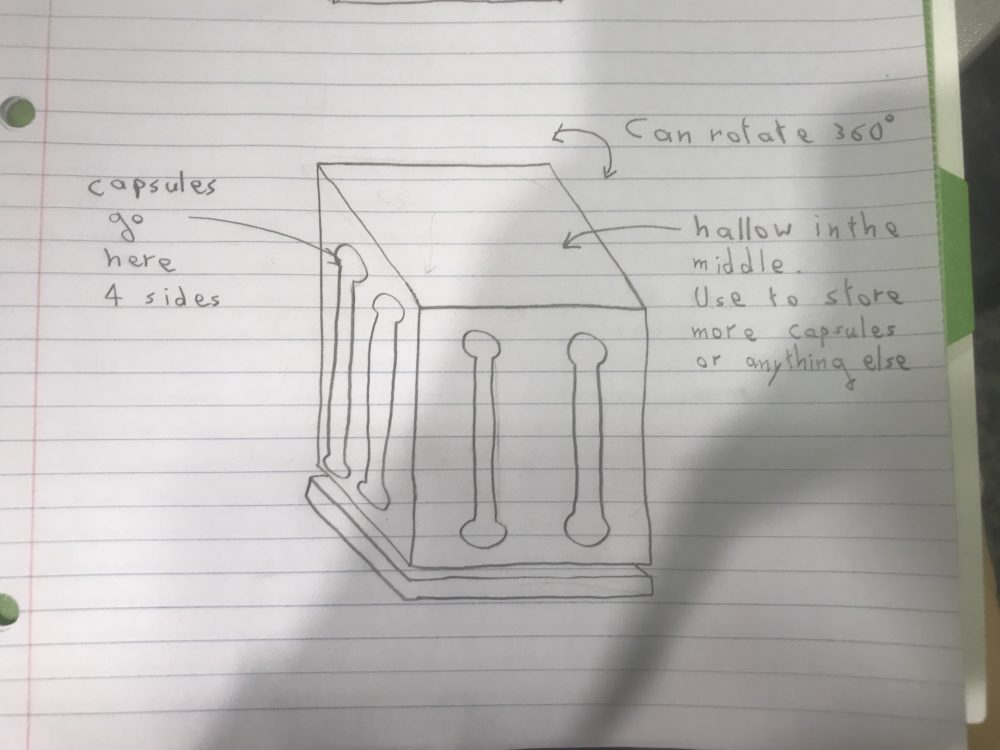
Design 3: Rotatable Coffee Capsules Box.
The reasons I selected this design are:
- It takes a reasonable base area
- It is more aesthetically appealing
- And it allow for unique movement
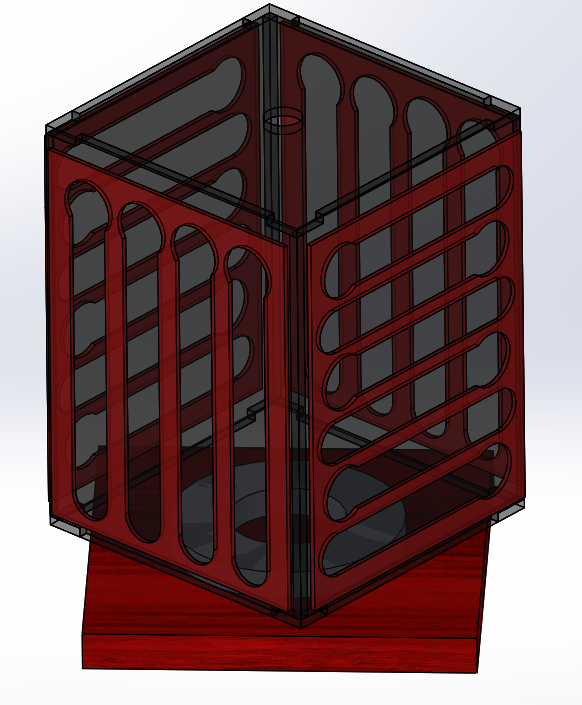
3D model of the current design
Once I had the design ready to be worked on, I was planning on buying acrylic online since I will have more color options to choose from. However, due to the need of using the laser cutter before campus closure, I ended up going to a nearby store and spending way more than I anticipated. Anyway, I was successfully able to laser cut all the parts I need. In addition, I needed to buy the ‘lady susan’ part ahead of time just because one of the acrylic pieces have holes that need to match the holes on the lady susan.
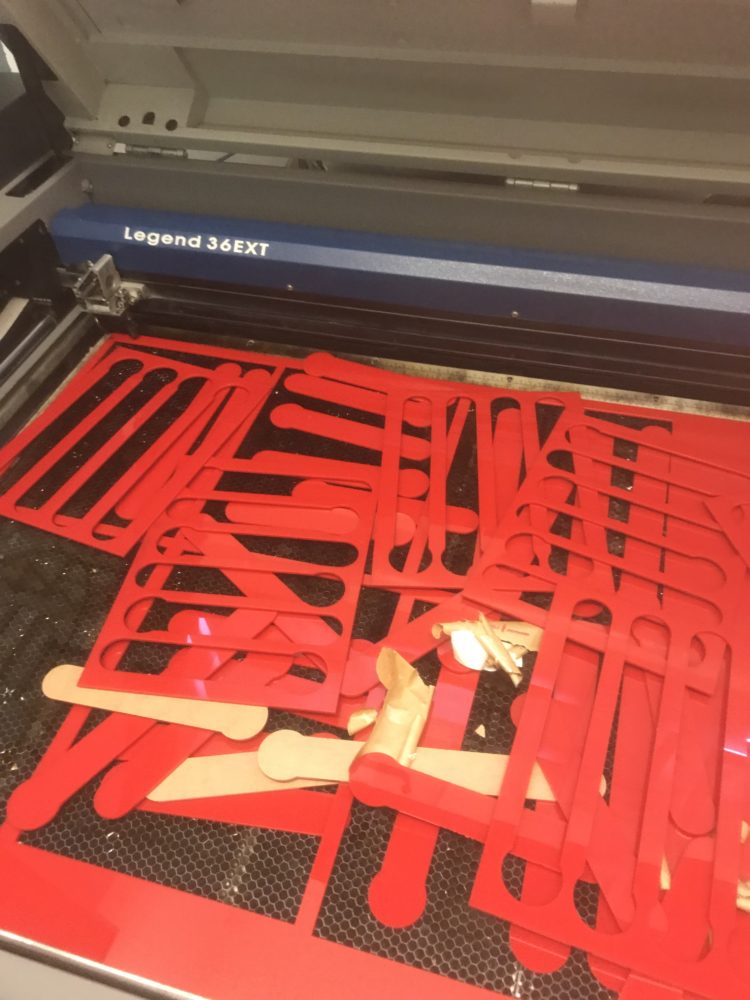
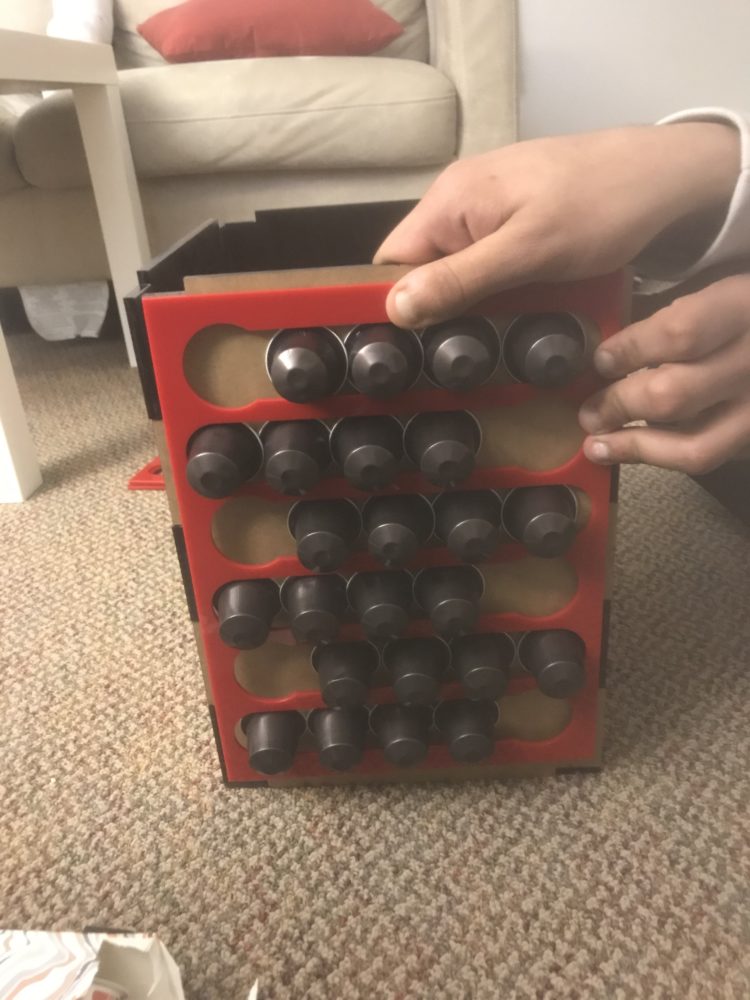
Following the laser cutting, I had to make an assembly preview in case some of the parts did not match and I still need to laser cut again. It turned out that everything fits perfectly!
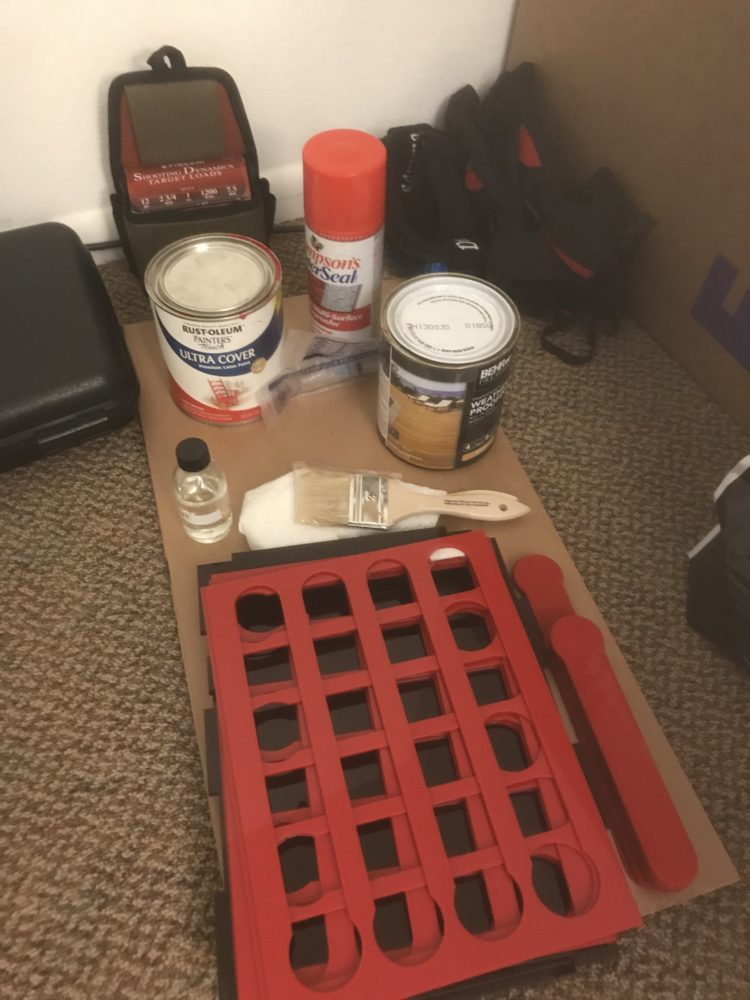
At this point, I have all the tools I need in order to finish my project at home, shown in the image below. My next step, which is currently in progress, is to order fasteners, magnets, and purchase a piece of wood. I have contacted a place in Longmont that should have what I am looking for in terms of wood, and I am planning on going there sometime soon.
Once I have the remaining parts in possession, I can work on my final step which is painting the wood, if needed, gluing the acrylic pieces together using acrylic cement, and assembling everything to have a complete project.
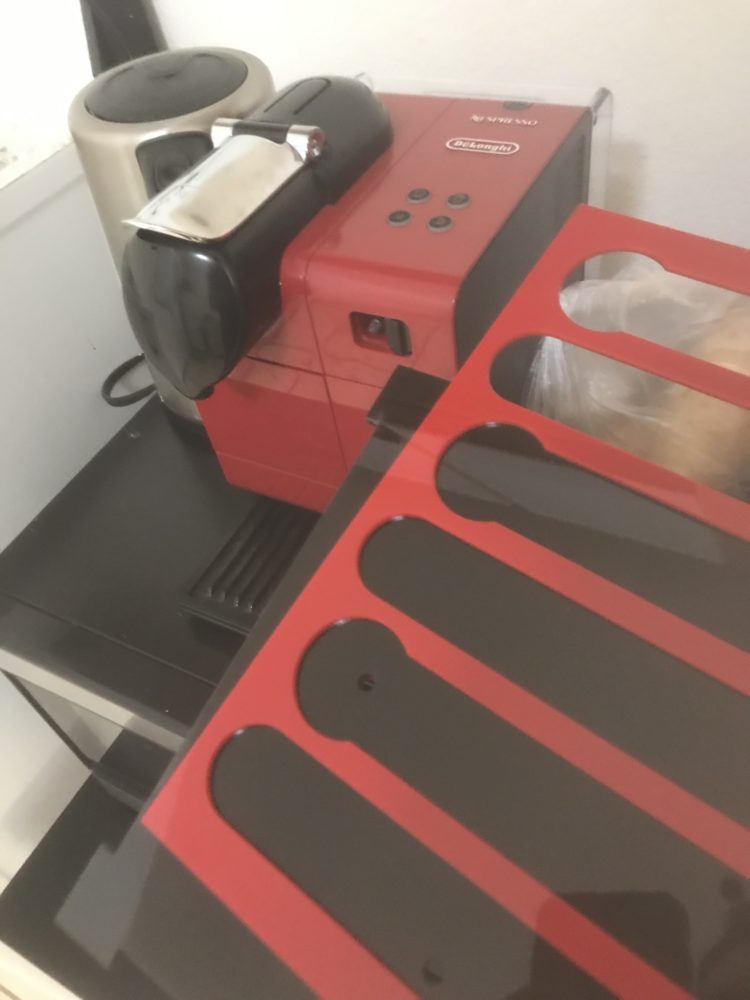
I was asked by many students on my color choice and the reason for that is because red is my favorite color and I wanted to match my project with the coffee machine I have.
My design review presentation can be found on YouTube using the following link:

2 Comments. Leave new
Nice progress! Glad we were both able to eke out the last of the laser cutting while we could. I appreciate how well you were able to pivot last minute with material, especially with having the foresight to buy a lazy susan immediately as well, to ensure proper clearance for its mounting to the acrylic. A question I have for you is, how do you plan to mount the red acrylic to the black, while maintaining that offset you are demonstrating with the cardboard above? And in terms of fasteners, where will those be used? I hope you are able to avoid creating any unwanted cracks. I really encourage you to give the wood a nice finish, I think if you skip this step it will look a lot less professional. You can pick up a sanding sponge at somewhere like Ace for pretty cheap, and while you’re at it, you can buy a small can of red-tinted stain that will give you a closer resemblance to what is in your rendering. The spray paint you have in your supplies picture might not be the best choice since it’ll hide the wood grain of your base, and may also be a bit brighter than what you’re aiming for. Good luck!
The way that you adapted was great to see. It is always important to be able to adapt. It is an great example to see how scope, time, and money interplay with each other. You lost time, and money made up for it. How are you supposed to know what coffee is in each slot? Are you going to place a label? Or are you going to somehow make the tops visible at some point? Was the material considered when you were choosing your aesthetic? Were there any ways that you included your material into the decision of your aesthetic?