Aesthetic Inspiration
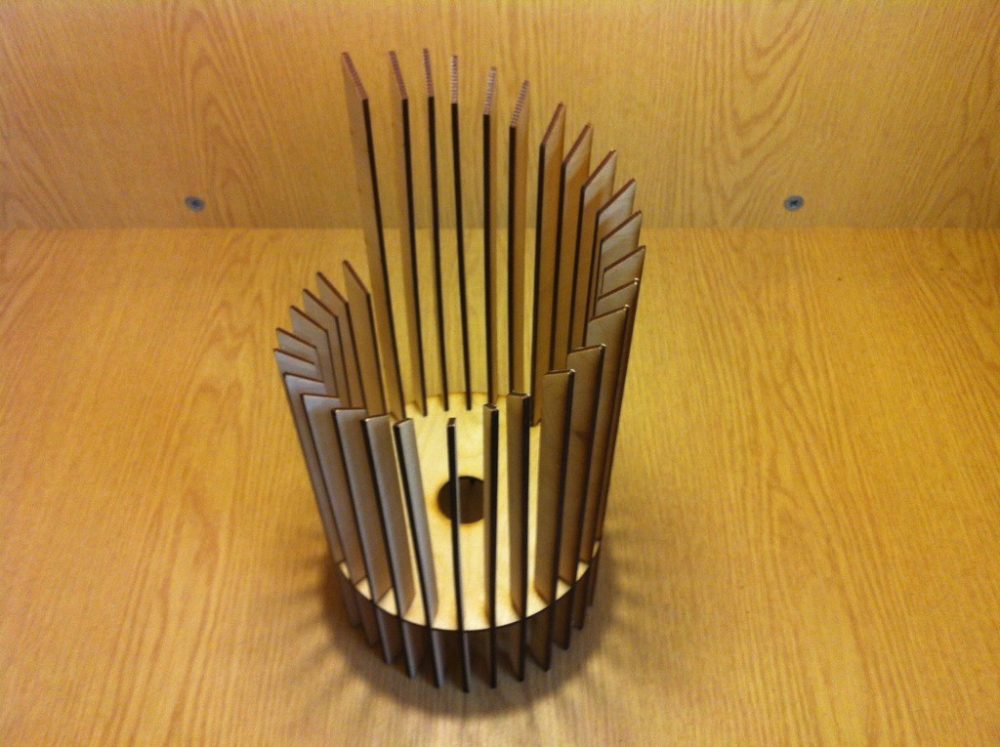
As explained in my previous posts, I decided to create something similar to the laser cut wooden desk lamp shown below as Figure 1.
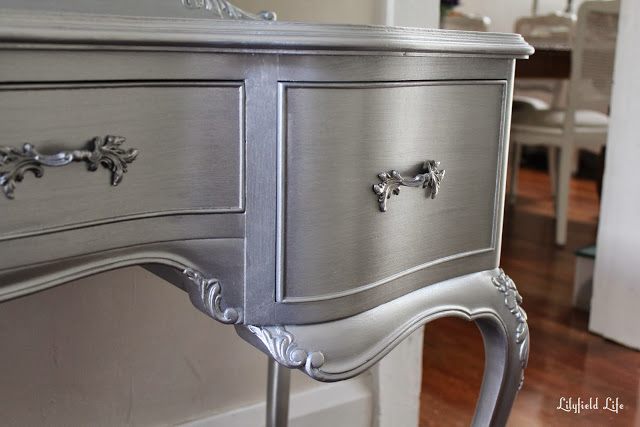
I would also like to add a metallic silver paint to the wooden panels that I hope will add even more to the futuristic aesthetic.
Detailed Plans
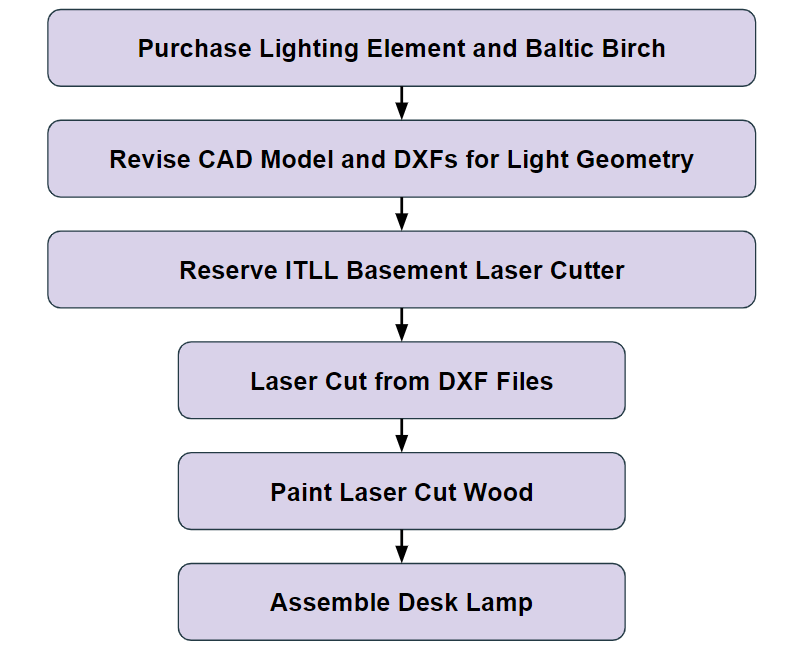
I anticipate a very straightforward process, shown below, for constructing this desk lamp. I do have previous experience with laser cutting, though it has been many years. Accordingly, I will get work-trade assistance from Patrick Bodine-Ellison.
CAD Model Evolution
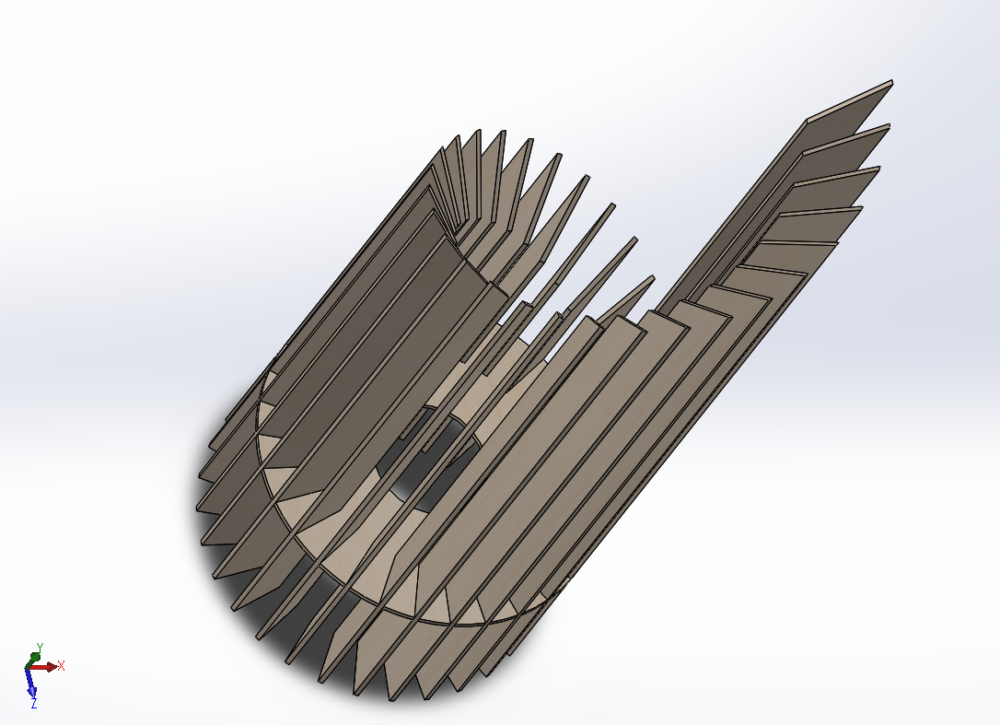
I figured a good place to start would be to create a CAD model in SolidWorks to try to make an identical design to my inspiration [1]. The renders below are my attempt to model it, with slight adjustments to align with my Top 5 Constraints post.

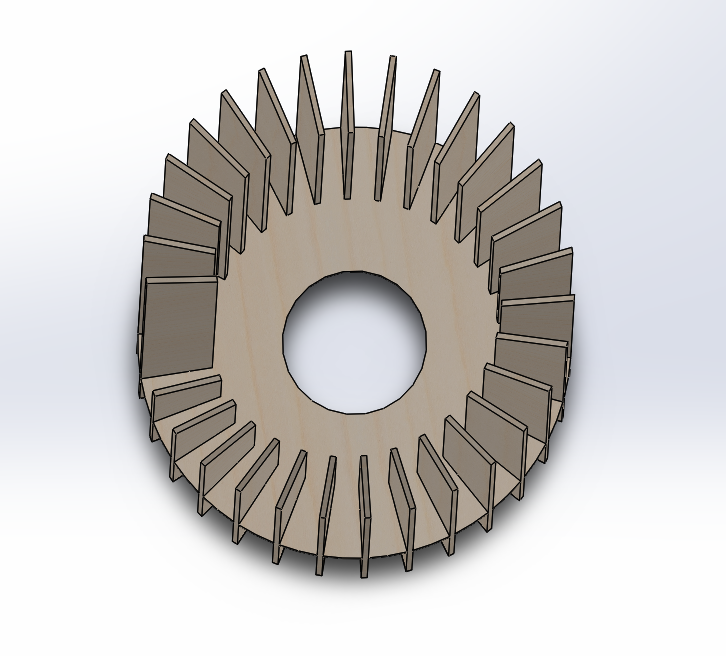
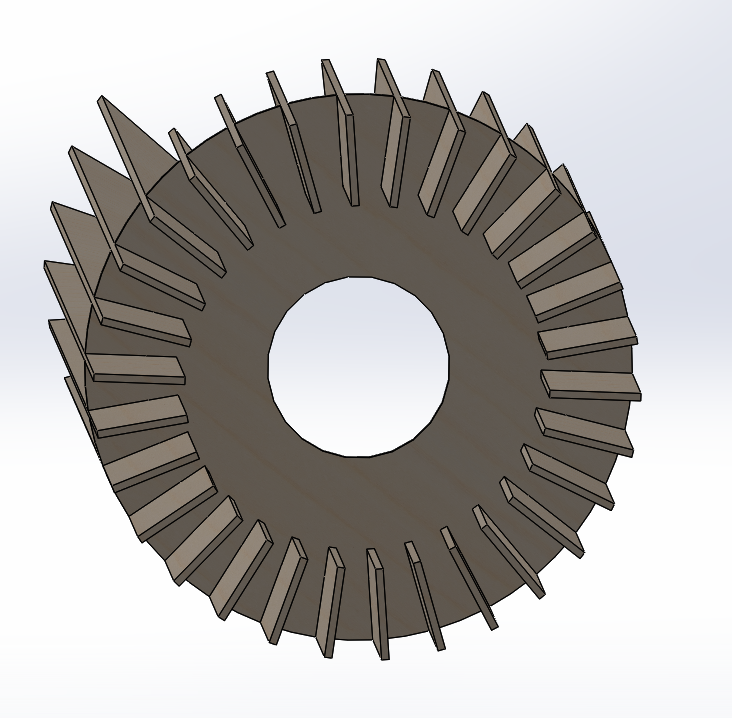
From this point, I made several modifications to see how I liked variations of the design. For the first variation, I made the height gradient between the sides of each decorative panel more steep, as shown below.
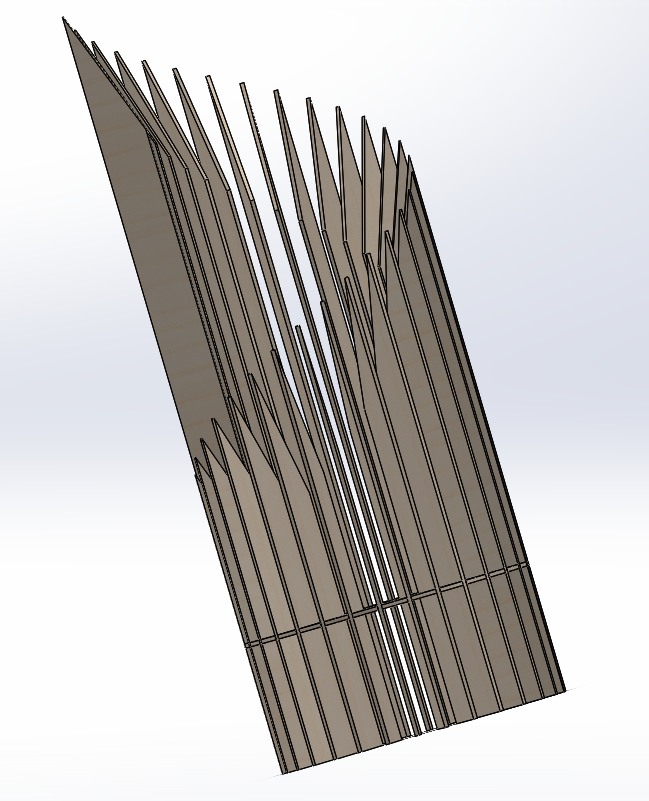
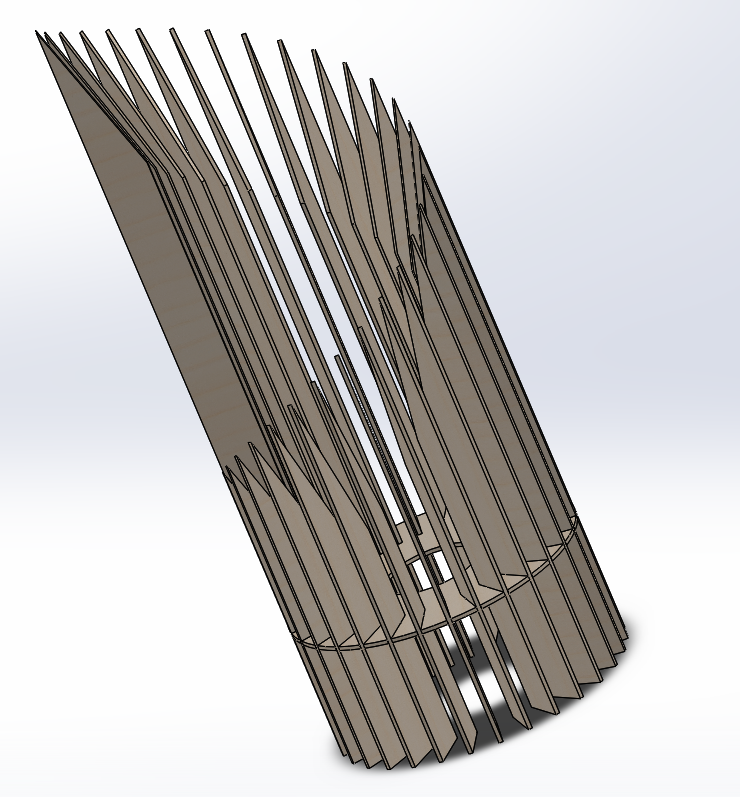
I liked this change, so I took it even further, to the point that there is a 5″ difference in height between sides of each panel, again shown below.
As an option to reduce materials needed and overall cost for the desk lamp, I could reduce the number of decorative panels from 30 to 20. This reduction in panels is shown below.
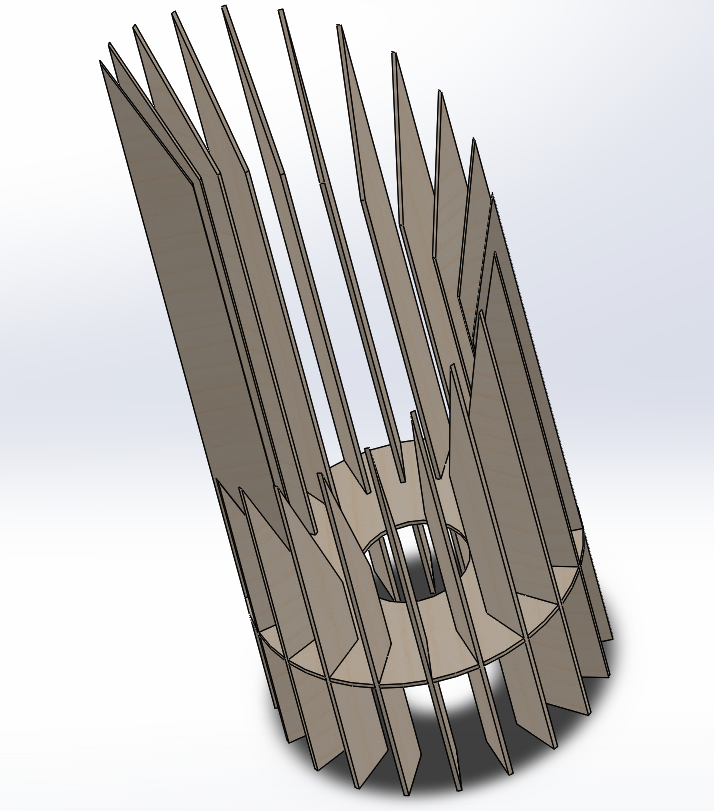
Finally, while reducing the number of panels reduces cost, it is noticeably less decorative than the original design. I could widen the decorative panels from 1.5″ to 2″.
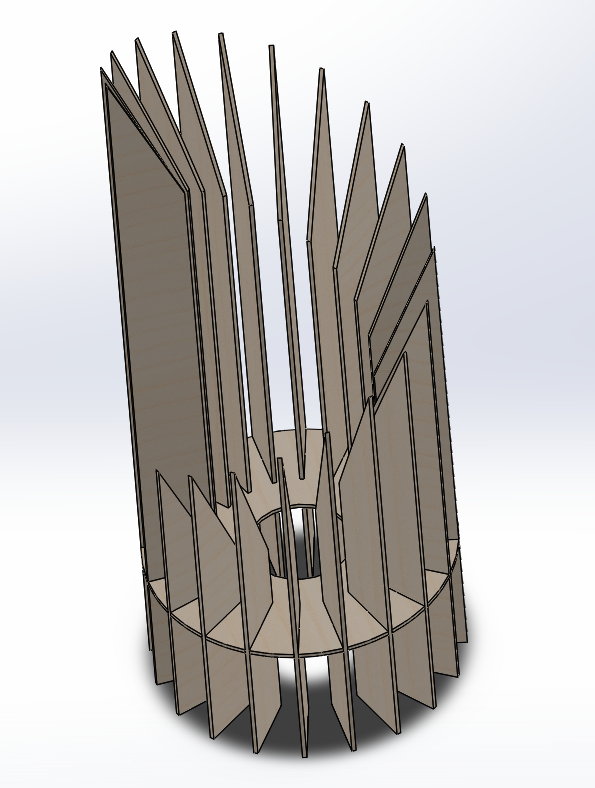
I do like the above design better than the original design that inspired me, but I am open to suggestions for alternate variations.
Material List
I will use one of the ITLL laser cutters, but I will need at least the following raw materials to finish fabricating my desk lamp, following the steepest panel gradient, and with fewer (20 instead of 30) 2″ wide panels:
- Baltic Birch plywood (likely ⅛” thick)
- At least 28”x 20” sheet for desk lamp decorative panels
- Around 10” x 10” for desk lamp base (possibly two needed)
- Metallic silver paint
Laser Cutter DXF File Preparation
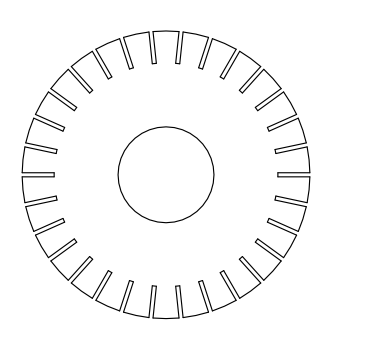
After checking in with Patrick Bodine-Ellison for advice on how to prepare for laser cutting, he said I will eventually need dxf files to guide the laser cutter along the specific cuts I’ll want to make. It was easy enough to suppress the panels of my first CAD model and save the subsequent drawing file as a dxf, as shown below as Figure 3.
The decorative panels might require more work, as I used the base geometry to create the planes on which I sketched the decorative panel, and as a result cannot suppress the base alone within SolidWorks. Additionally, all but one of the decorative panels were created with a circular pattern. I created Figure 4 below, a concept sketch of how I wish to lay out the decorative panels within a dxf.
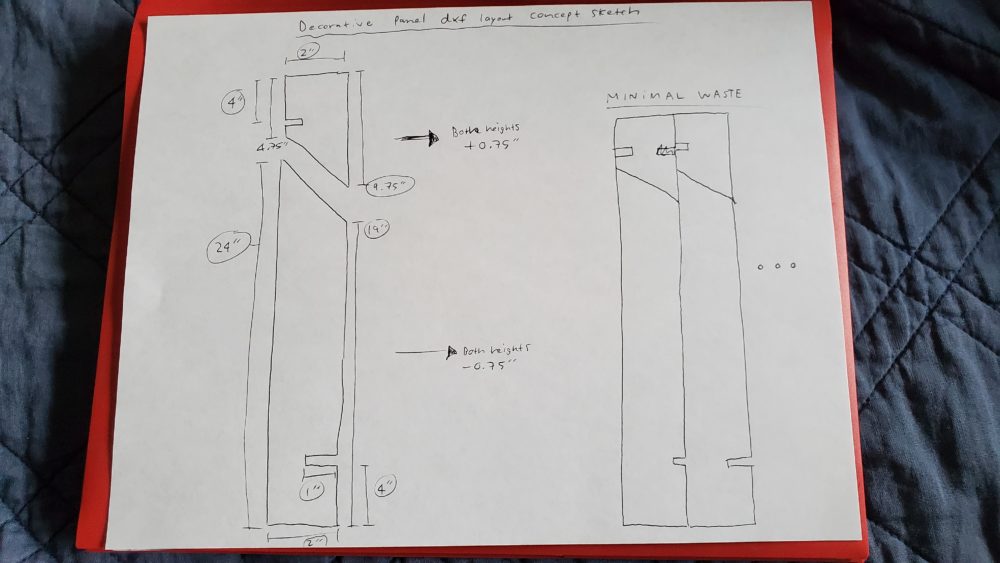
I will have to be conscious of where I add lines to the dxf, because if a side of a decorative panel is just the boundary of the stock material, It will not have the laser cutter dark burn markings along it. I think it will be desirable for all of my decorative panels to have uniformly dark edges, but it likely won’t be necessary on the bottom of each panel.
Two-Base Design
I hope to find a light with a circular base sometime this week. Once I know the geometry, I can determine if my following plan to have two separate circular frames to conceal the circular light pedestal will work. I will have one lower base with no holes that has 1″ slits to interface with the decorative panel 1″ slots. I will then have a higher wooden frame that will fit over all but the topmost socket of the light, with 2″ slots such that it can be adjusted up and down the height of the decorative panels. A concept sketch of these two pieces can be seen below as Figure 5.
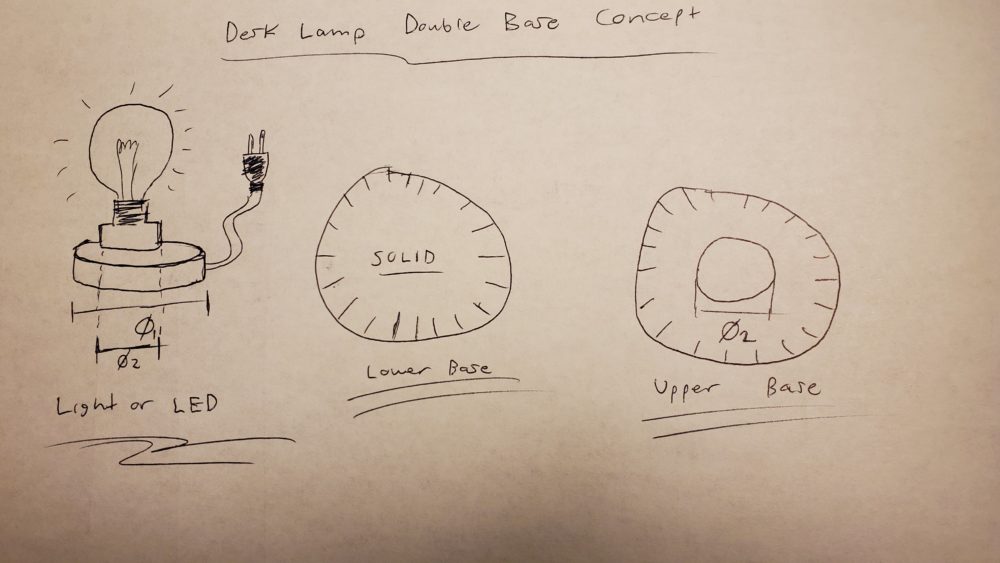
This is my final consideration for my detailed main project plan. I look forward to making progress by purchasing the necessary materials and lighting element this week.
Aesthetic Inspiration Citations
[1] “Cascade Design Laser Cut Wooden Table Lamp Shade”. Decoratorist.com. Accessed 24 February, 2020 from https://decoratorist.com/laser-cut-futuristic-tabletop-lamp/cascade-design-laser-cut-wooden-table-lamp-shade/
[2] “ Tips on using Metallic Paint and a Silver Painted Dressing Table Set”. LilyfieldLife.com. Posted by Fiona on 13 December 2013. Accessed 24 February, 2020 from http://www.lilyfieldlife.com/2013/12/tips-on-using-metallic-paint-and-silver.html

6 Comments. Leave new
Hey Justin!
This documentation of your design process thus far is great! I can see that you have put a lot of time and detail into designing this final piece. I especially appreciated the multiple CAD iterations that you went through, and your inspiration and reasoning behind each iteration. Your design review post as a whole was very well put, and detailed to the point that anyone could pick up your project from where it is now and finish it. I think that is the perfect end goal with posts like these, where they inform the audience of your own personal journey and reasoning into the design up until this point. Good job and I can’t wait to see how this turns out!
Justin,
I liked your clear and simple design plan.
Statement of meaning:
I think that it’s neat that you plan to not use fasteners. It looks very interesting and futuristic as well.
Artist as a questionnaire:
I think it would have a nice aesthetic if you used an Edison bulb.
I like the form of your design a lot. Do the joints hold tight enough to warrant not using glue? I think your minimum waste method for lasercutting your panels should work. I think the lasercutting will add to your aesthetic in it’s exactness.
It’s interesting, with such a simple design you have a lot of space to explore different aesthetic properties. Your actual templates are also very streamlined and efficient. I feel like you’ll be able to end up with a lot of polish on this project.
I really enjoy your vision of minimizing waste, and using one piece of material for two panels. I think its a really good idea and definitely feasible.
Have you put any though into the way it will cast light? diffuse or direct light?
Have you put any thought into the lightbulb you will use? maybe something unconventional to keep with the futuristic aesthetic