The upcycling project I decided to do is a coat hanger with shotgun shells. Initially at the beginning of the semester, I struggled a lot to come up with an idea that I like. When Prof. Hertzberg introduced the upcycling project, I quickly thought about shotgun shells and how to use them. When I did not get any good ideas, the idea of using shells got stuck in my head and I could not think about using other material. This delayed me for about a week, but then a coworker suggested that I make a coat hanger with the use of shells in the design which was a brilliant suggestion as I ended up doing it.
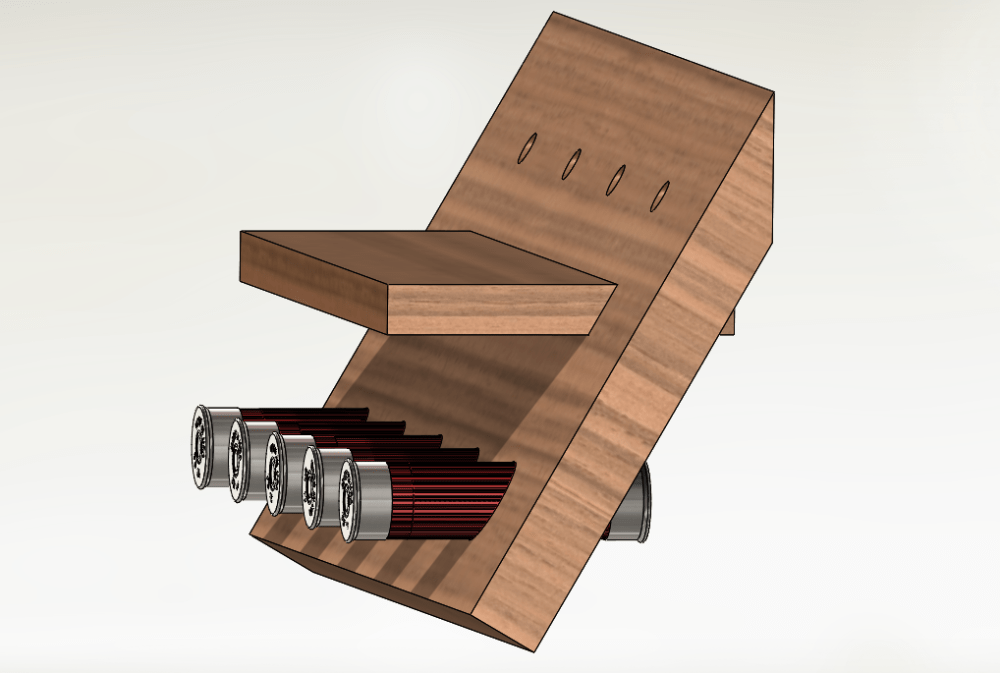
Starting with my coat hanger design, I decided to make it out of wood. Since I am terrible at sketching, I decided to make a CAD model which would help me finalize the idea more. Doing my CAD model, I wanted to do something that would require some engineering and have geometry aesthetic, so I chose to make the coat hanger tilted with an angle as shown below.


I was really excited about this design and seeing it in real life, but unfortunately, although it looks very simple, it was extremely difficult to make. The reason for that is having all the cuts and holes being at an angle and not perpendicular to the plane which in return required additional tools and precise measurements. After going to both wood shops in the ITLL and Idea Forge, I was told that this is very hard to make and requires a lot of time and was advised to change the design a little. As a result, and for the sake of the actual purpose of the project, I decided to change the geometry a little while keeping the concept the same. The second design on CAD came out to look like this:


After gathering a nice piece of wood from the manufacturing center in the ITLL and the rest of the material I need, I started doing the project. The first step I made was extremely unnecessary and time consuming which was cutting the wood using the laser cutter. Although this was very precise, I used the laser cutter simply because I was able to use it on Sunday and not have to wait until the manufacturing center opens. I was between either working on Sunday or Tuesday, because I was unable to go to campus on Monday, and I was worried that the manufacturing center would be closed due to the bad weather since it actually closed all Friday when I was originally planning on going there. Eventually, laser cutting the wood was a bad idea since the cuts did not go all the way though, even after running the job like a thousand time, and I ended up finishing the cuts with a hand saw. Luckily, the pieces turned out to be good to use but slightly burned on the sides. With a little sanding, the burn marks disappeared.


Now that I have my wood cut to the right sizes, I went to the manufacturing center to make some holes that will have wood dowels, that I got from the shop, inserted in them and then the shells will go on the dowels. I made the holes needed and then I realized that I cannot assemble everything and then engrave on the wood using the laser cutters. As a result, I had to pause working on the assembly and decided to engrave right away before putting everything together. Once the engravings were done I resumed my work in the wood shop. At this point, I was nearly done. I cut the wood dowels to size and just needed to glue and/or fixing some pieces together using screws.


Now that I have all the wood cut to sizes, engraved, and assembled, I had two more steps to do: emptying and preparing the shells, and applying a wood finish to the whole thing. Fortunately, I was able to do these two things at home easily, and now I have a finished project!


One final step that I need to do which will be after the presentation is to screw in hooks so that I can hang the coat hanger on the wall. The reason I did not do that yet is because first, I need to talk to my apartment complex maintenance and ask them how far apart the hooks need to be for my wall because not the entire wall has wood studs and I need to know what is the right placement for it to hang properly. Second, I want to take and present it to the class and hear their feedback and whether or not I will get a more interesting idea on how to hang it on the wall.
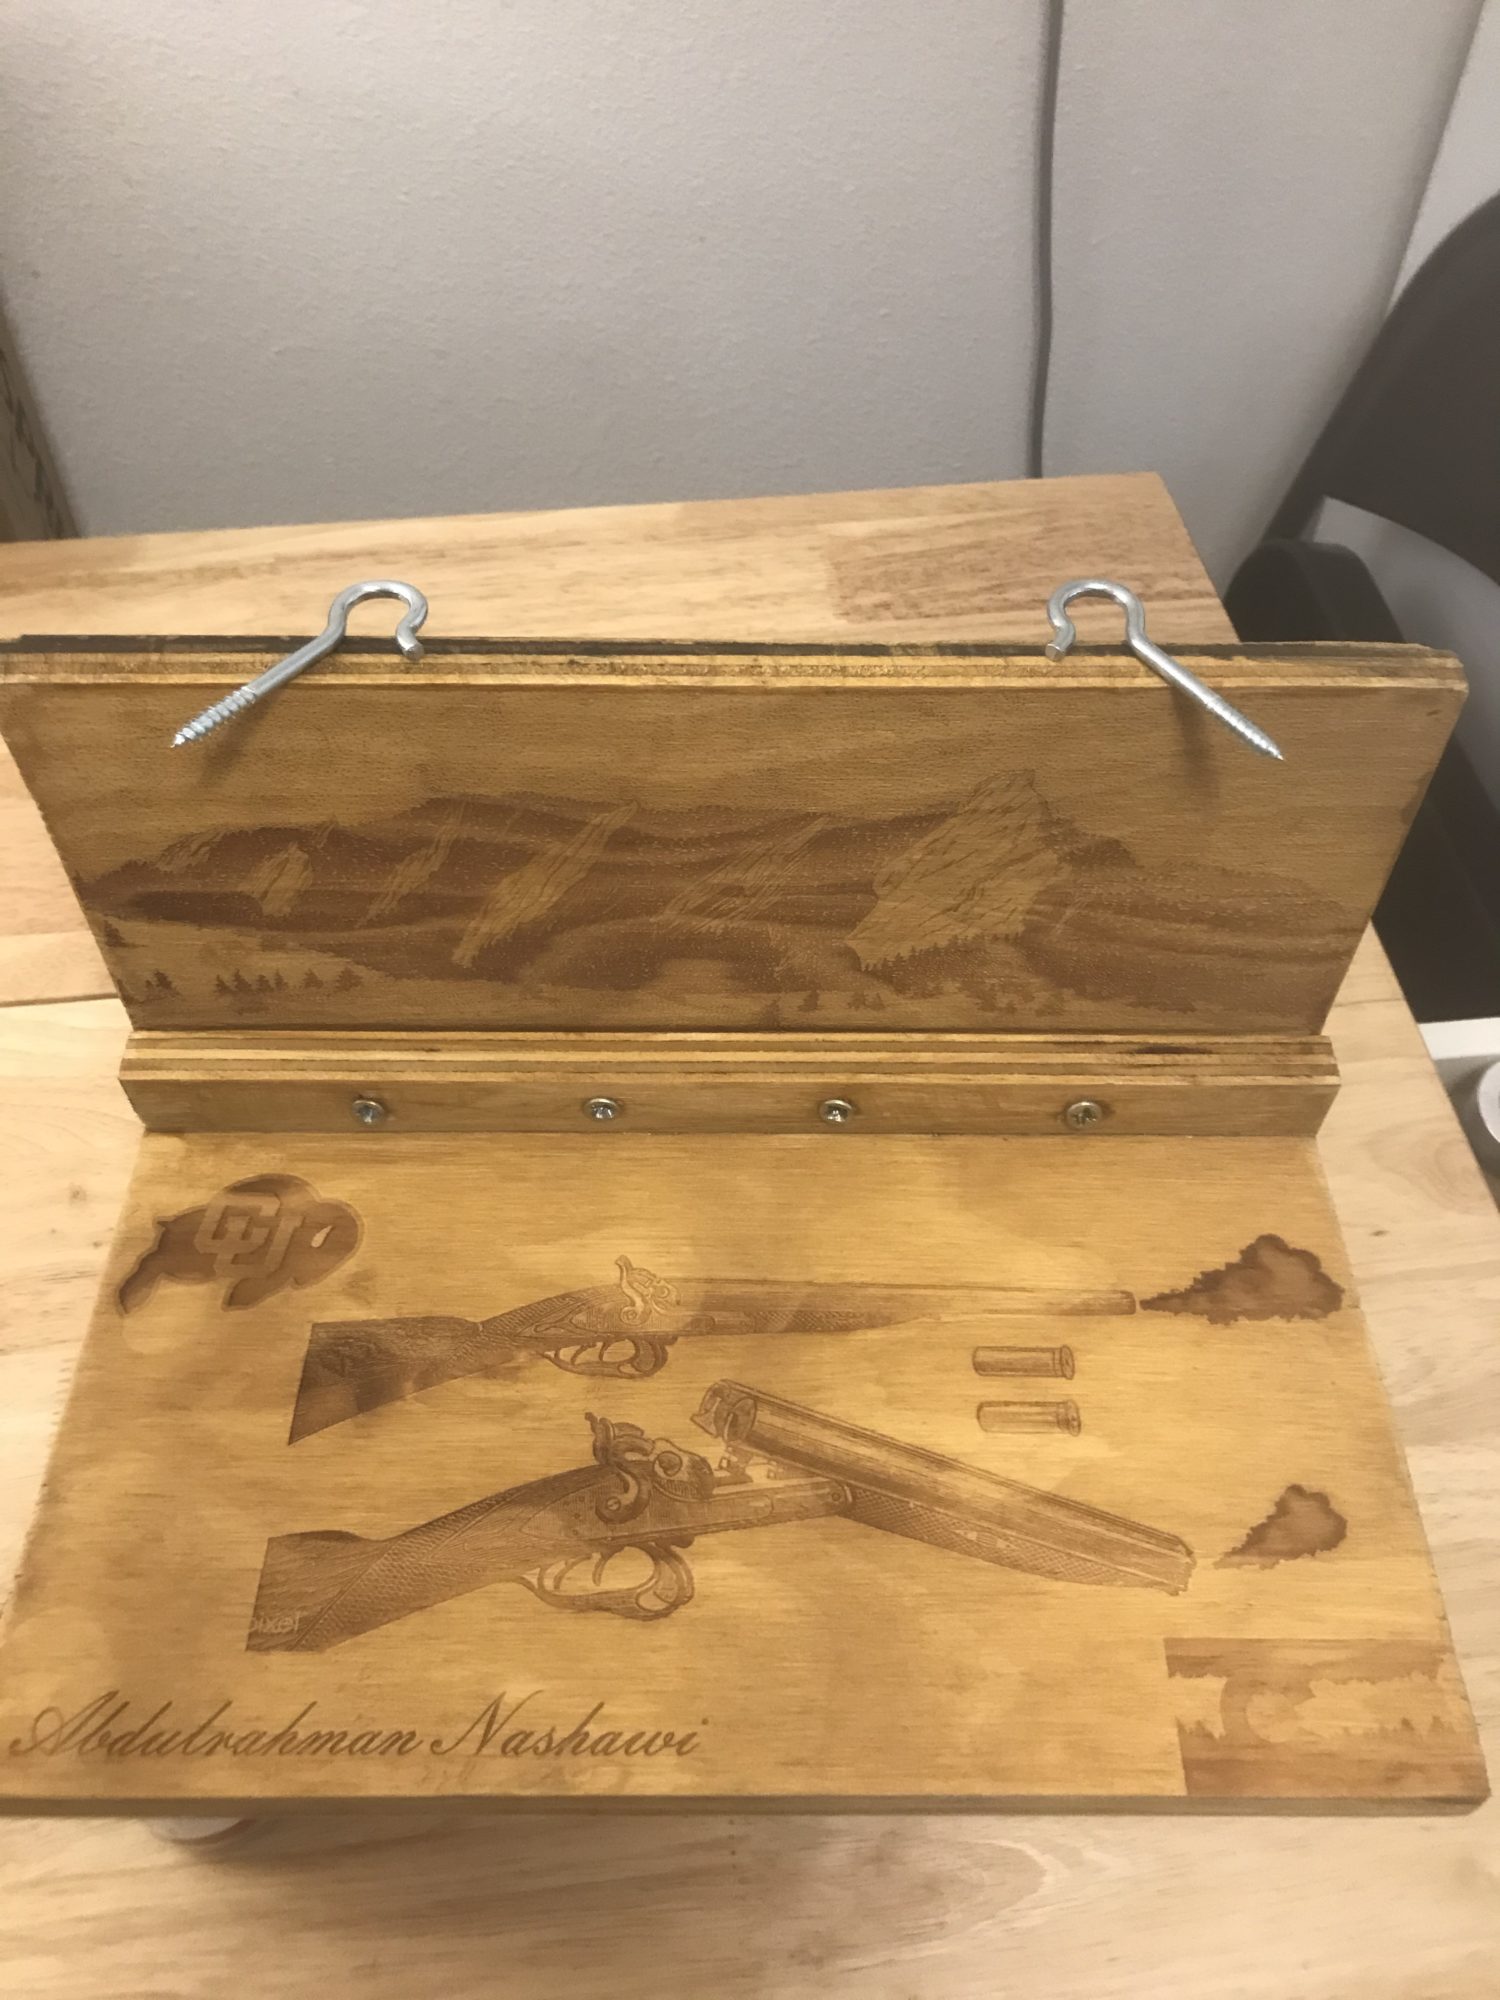
Surprisingly, the final product turned out to be better than I expected, especially with the wood finish applied. When I looked at it after I finished, I instantly remembered that this is an upcycling project and that I did not spend any money on it! I was truly amazed by how much we can do with things that others do not need or want and how something that was going to be thrown away can be turned into a functional piece of art. I realize now that as long as we have imagination, we can bring it to life as long as we put in the necessary effort. The finished project is shown below.


Class presentation can be found on YouTube using the following link: https://youtu.be/C-MPI4tpUdU


6 Comments. Leave new
Hey Adbul! I wanted to say that I really loved your upcycle project! I love to go shooting and seeing you integrate shotgun shells into your coat hanger/rack is ingenious. I am also amazed with the detailed laser engraving you did. I may ask for your advice on getting such a good final product since I am looking to laser cut some wood for my main project. Some advice for having it hang properly: you could bore out holes half way through on the back panel, and have nails in studs sticking out so they can slide and lock into place.
This is a great idea for this project. I love pieces that have a functional purpose. This definitely has the “western”, “cowboy” aesthetic to it. The laser etched patterns absolutely add to this aesthetic. Is this the aesthetic you were going for? Do you plan on using the coat hanger?
Thank you! I was going with the western aesthetic that specifically reflects my personality. I am indeed going to use it but I will have to buy a specific piece before I can mount it on the wall.
Hi Abdul! I very much enjoyed your coat hanger project. I like how you also implemented a shelf into your project and the craftmanship is very sturdy and symmetrical. It was cool to see how you disassembled a shotgun shell, I have never seen that before! Good work.
Hey Abdul! I chose your project to “critique”, and I am so impressed with what you have done with your recycled objects!! At first I didn’t quite understand how the wood would look and how the angles played into everything, but it was so interesting to see your process and watch how you created it! I absolutely LOVE the final product, and the staining was a beautiful addition to the entire aesthetic.
Why exactly was the laser cutting a bad idea for your wood? How else would you have accomplished getting the pieces you needed? I think it ultimately made perfect lines for you to work with and seams like it aided in the rest of the process. What do you think? Also, is the primary function of the top board just for the aesthetic of the piece, or does it have a functional purpose as well?
I think your project is especially unique in how you engraved it with symbolic images – the CU buff, your name, the flatirons, etc. It looks so amazing! Was the design entirely stained? It would be really cool if you engraved it (it kind of looks like your name is engraved already), but the design is so sleek and easy to understand.
I think you did such a good job with this project and the whole process, Abdul! You truly made the best out of recycled material, and your hard work is clear in how well your final product is. Good job 🙂
Hello Hailee! Thank you for the great reply! The laser cutting was a bad idea because the laser cannot cut through the entire wood thickness I used and it meant that I will have to run the cutting jobs tens of times. It started cutting deeper run by run, but eventually it reached a point where it was not going through the entire wood regardless of how many times I rerun the cutting job. The alternative was to just go in the machine shop and cut the wood using a table saw in less than 5 minutes rather than spending an hour and a half in the laser cutting room. I only used the laser cutter because it is open on Sundays and I had a very busy week and could not wait to start after. It worked pretty well after all with the laser cutter but it was not worth it to spend all that time cutting with the laser and then using a hand saw.
For the shelf, I added that so I can leave the things I take out with me everyday like keys, wallet, watch, etc. When I put everything together, I stained the whole thing from all sides to keep it consistent. In addition, all the the images on the piece are engraved before the staining but the camera does not do a great job showing that.
Thank you again for your comment and glad you like it!