Upcycle Inspiration
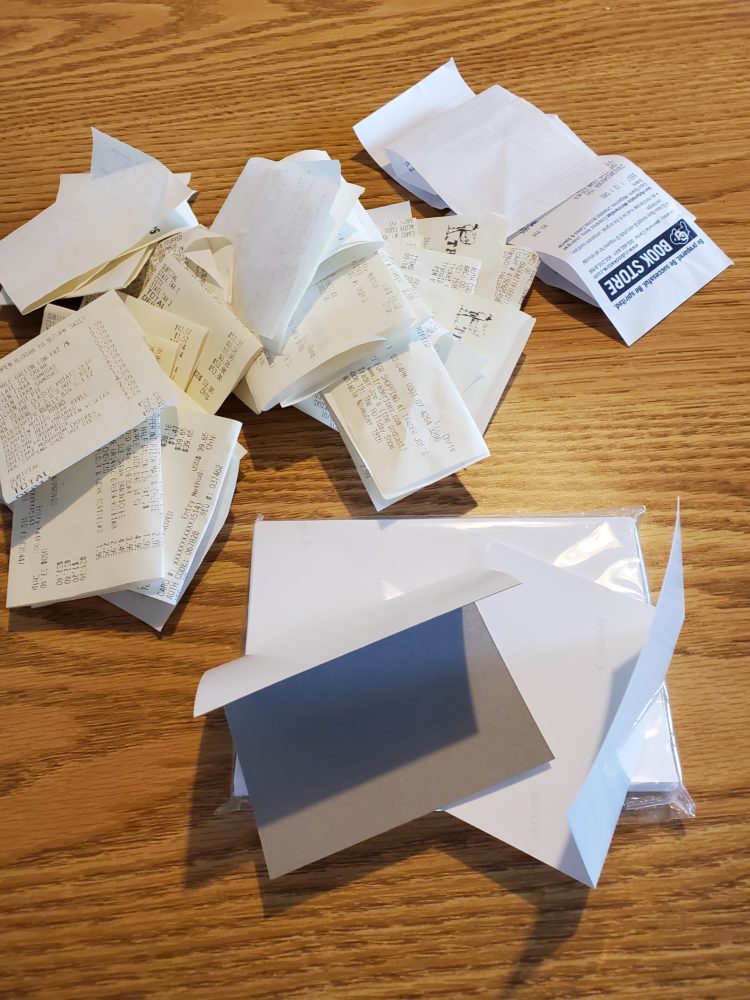
While we were discussing the importance of doodling within lecture, I realized that while I have a full-size notebook in my backpack dedicated to this course, I wanted another smaller sketchpad that I can carry in my pocket for whenever inspiration strikes me. In the context of upcycling, creating pages for this notebook was achieved with careful folding of my accumulated, weekly grocery receipts. All receipts must be blank-backed in order to function as blank pages for this sketchpad, once folded properly. I intended to fold either a piece of glossy Canon photo paper (4 X 6) or the photo paper package’s cardboard backing to serve as the front and back cover of the sketchpad. The photo paper package was included with a printer that I was gifted a few years ago. An image of the freely available materials is included below.
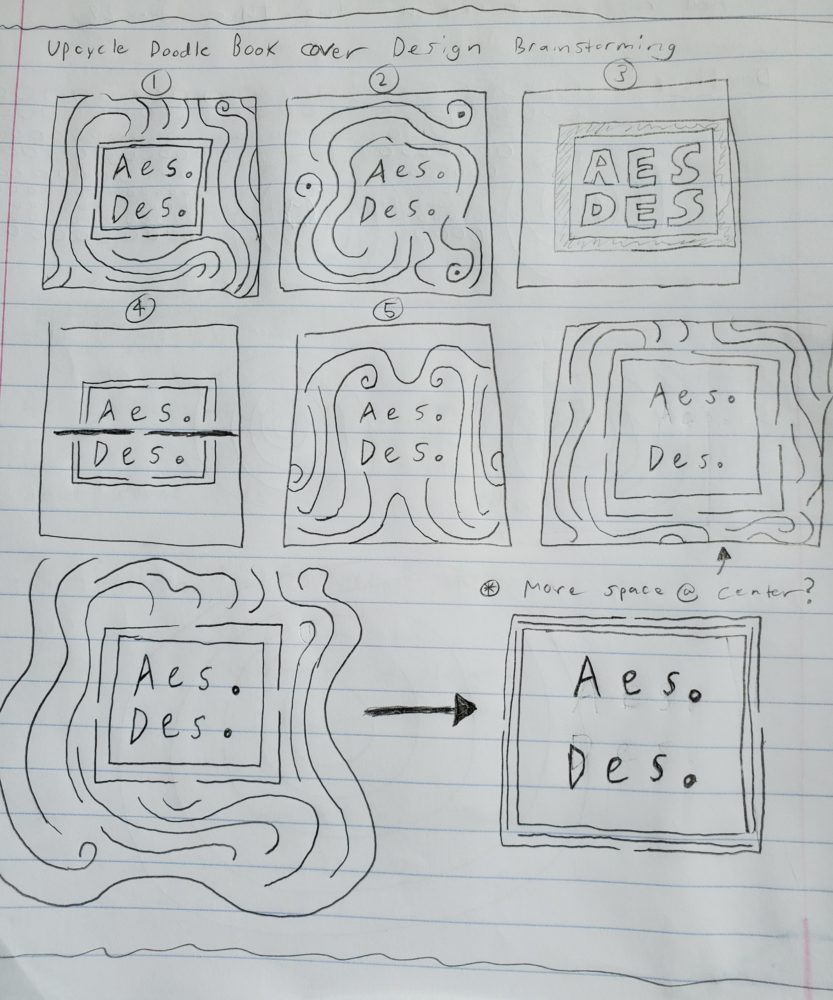
While this project is intentionally small scale, I spruced up the aesthetics of the sketchpad. I like the fluid, curved lines within the website tab image for this aesdes site, and incorporated similar designs on the cover of the sketchpad with black Sharpie on the cardboard cover. Within lecture I brainstormed concept designs for the sketchpad’s cover when we were instructed to doodle five thumbnail images. These designs can be seen below.
Finally, while I anticipated the actual fabrication process for this sketchpad to be relatively straightforward, I was constantly thinking over the following two weeks of any possible additions to make the sketchpad more sturdy and add functionality. One such addition I incorporated was a makeshift strap to hold the cover closed, as is found on a lot of leather-bound notebooks and journals. The challenge for this proposed addition was in free material sourcing and permanently fastening the strap to the back sketchpad cover, in order to create something similar to the strap shown below.
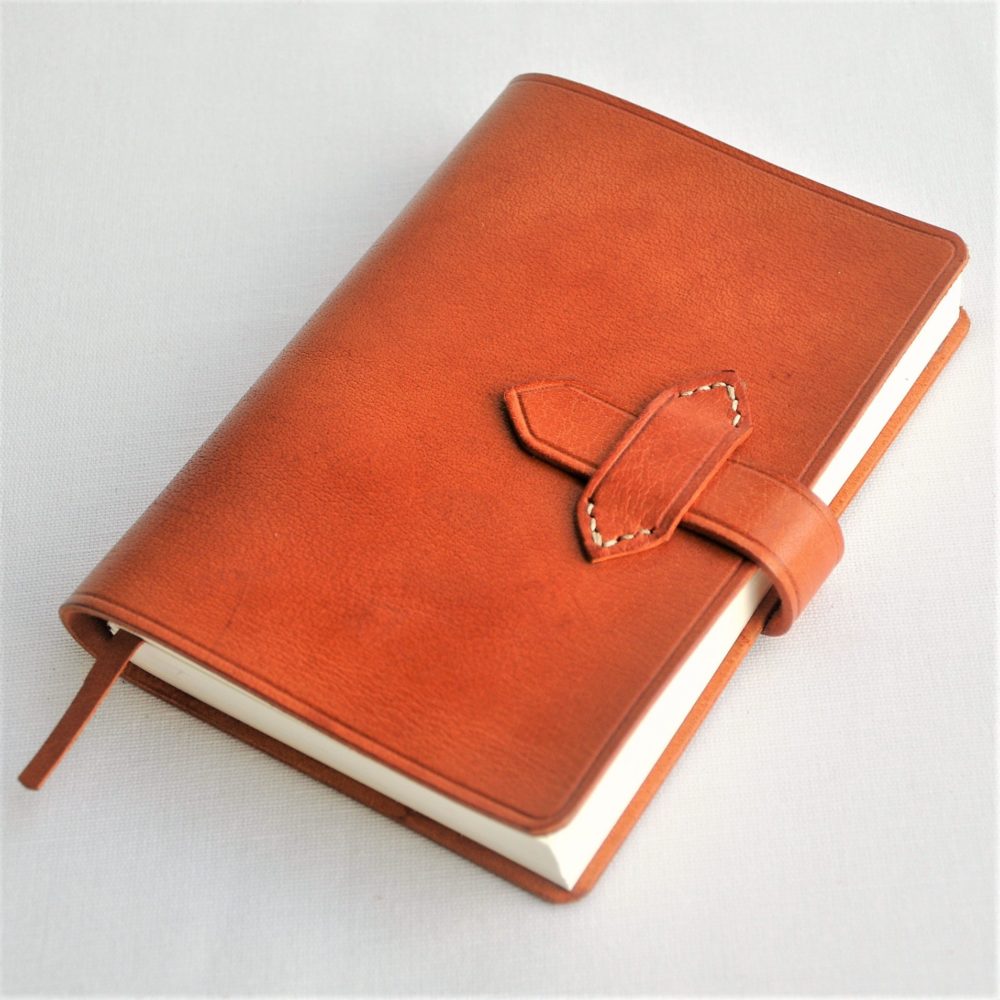
[1] “ACADEMY A6-P Leather Plain Journal with Strap and Keeper”. Arkademie.com. Accessed 27 January 2020, from https://www.arkademie.com/products/a6-academy-leather-cover-portrait-plain-journal-with-strap-and-keeper
________________________________________________________________________
Upcycle Progress
Shortly after making my inspiration post, I found an extremely similar process conducted by a craft-cycle.com user “McKenzie” posted to the site on August 3rd of last year, with pretty promising results regarding notebook/sketchpad functionality [2]. Reading through this post addressed a lot of my own concerns regarding how I would proceed with fabrication of the sketchpad. I referenced procedures I follow from McKenzie throughout this post.
Within my inspiration post, Jackson Hootman made an excellent suggestion to create a digital stencil for my sketchpad cover design. Since I only made one sketchpad, I decided instead to lay down pencil work of the design on the cardboard cover first. I had initially planned to lay down the final design in Black Sharpie, but I was open to suggestions of another pen, marker, or any other marking instrument for my finalized cover design.
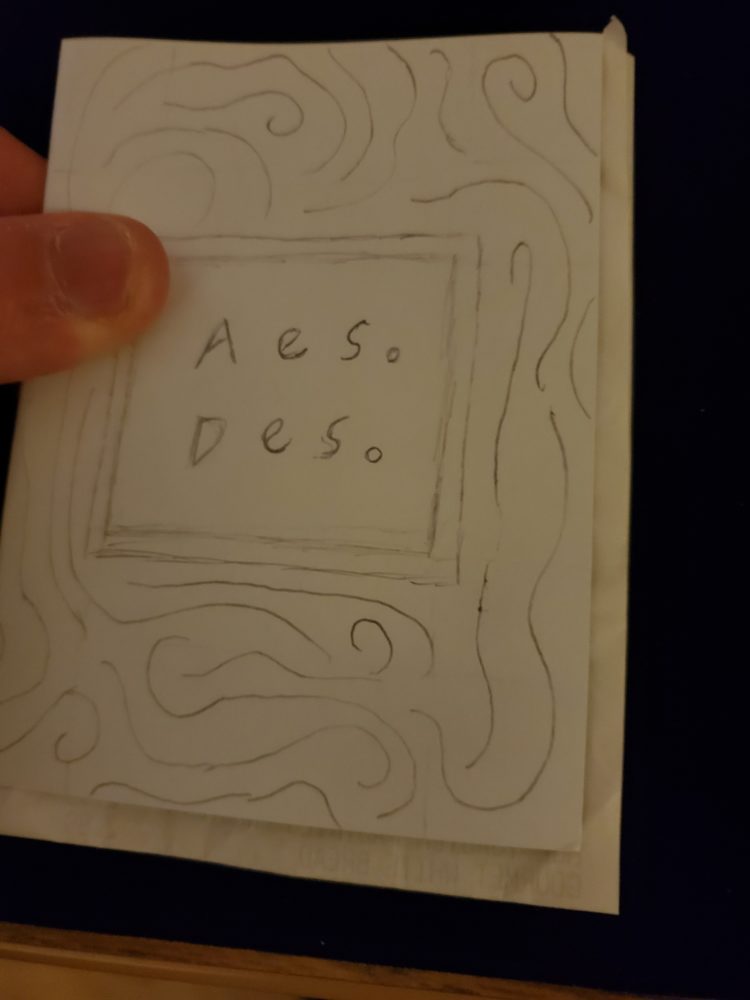
I folded all my accumulated receipts – 27 total – in half such that the blank back faced outwards as both sides of a sheet. After doing this, four of the receipts were significantly smaller than the cover, so I set those aside not to be used within the fabrication.
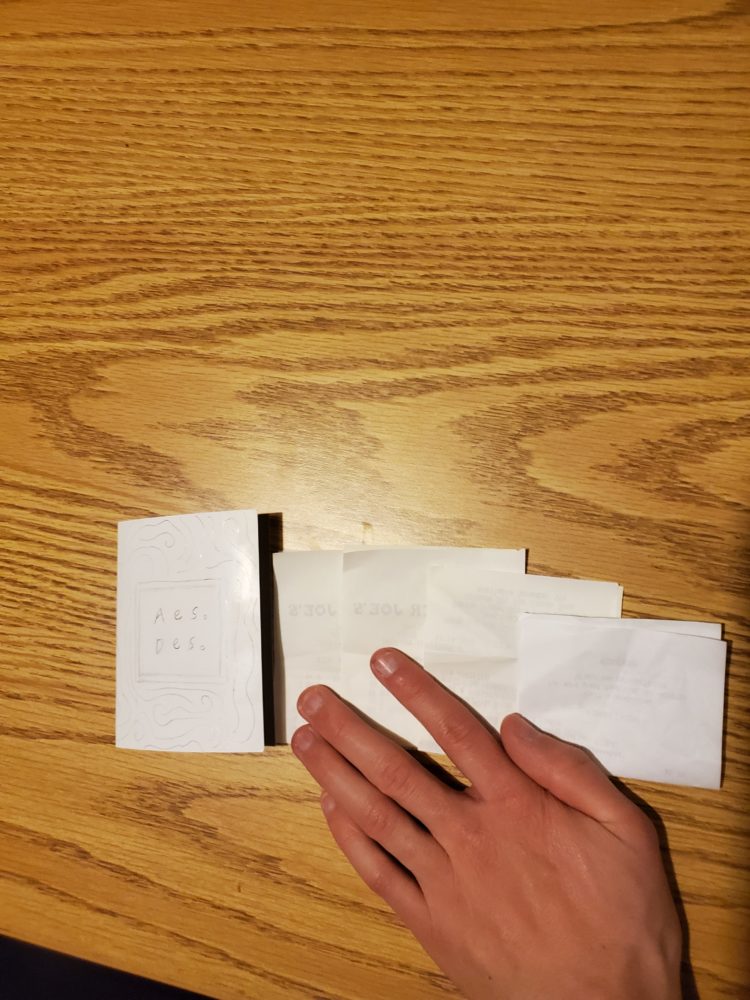
The remaining receipts all were similar enough in size to the cover to be functional, so following McKenzie’s procedure from the Craft-Cycle post I snipped them all to better fit the sketchpad cover, and compressed them below a stack of textbooks overnight so they would hold their folded shape better for subsequent fabrication steps.
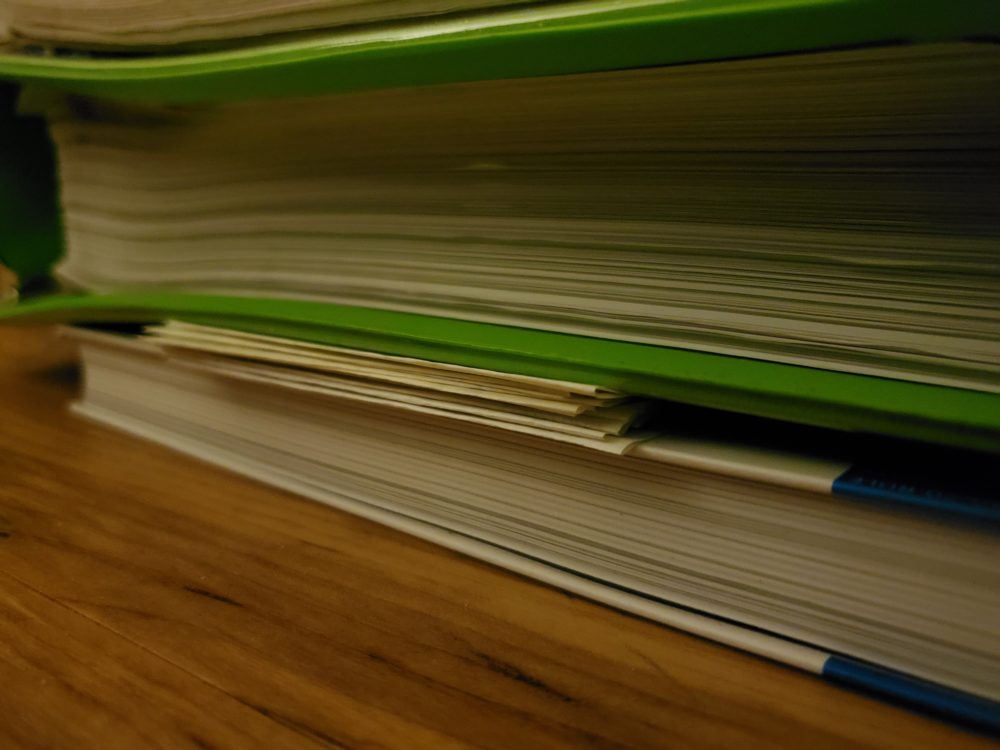
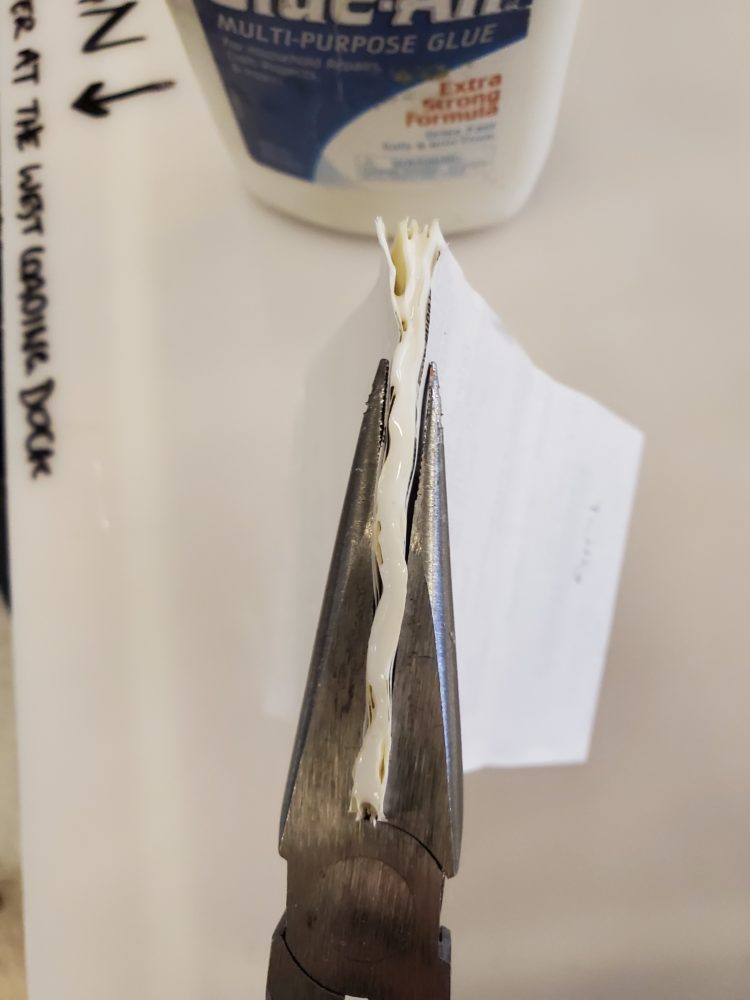
Again following McKenzie’s Craft-Cycle post procedure, I added glue to the top of my clamped stack of receipts, though for holding the stack together I used long needle nosed pliers in lieu of two clothespins. I then followed her step of adding a top binding of painter’s tape, fully completing my sketchpad pages.
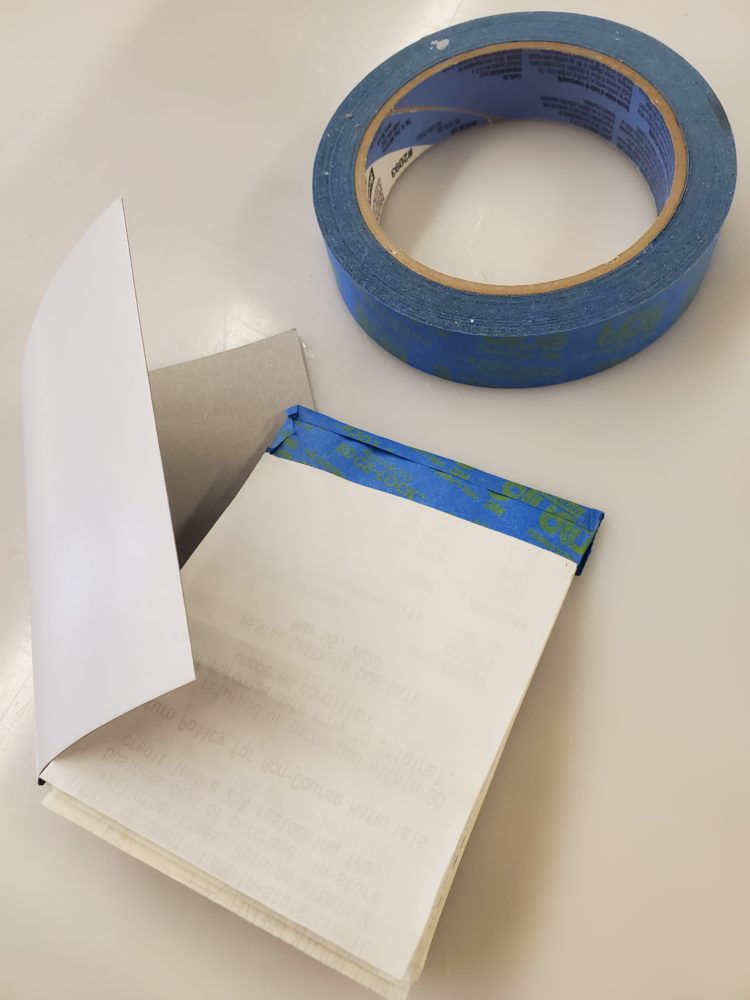
Following my initial plan to add a journal strap to hold the cover closed, I was able to find an abandoned strip of hook and loop (“Velcro”) in an Engineering lab over the weekend. I then cut the Within the Craft-Cycle post, McKenzie also created a notebook strap with an old command strip.
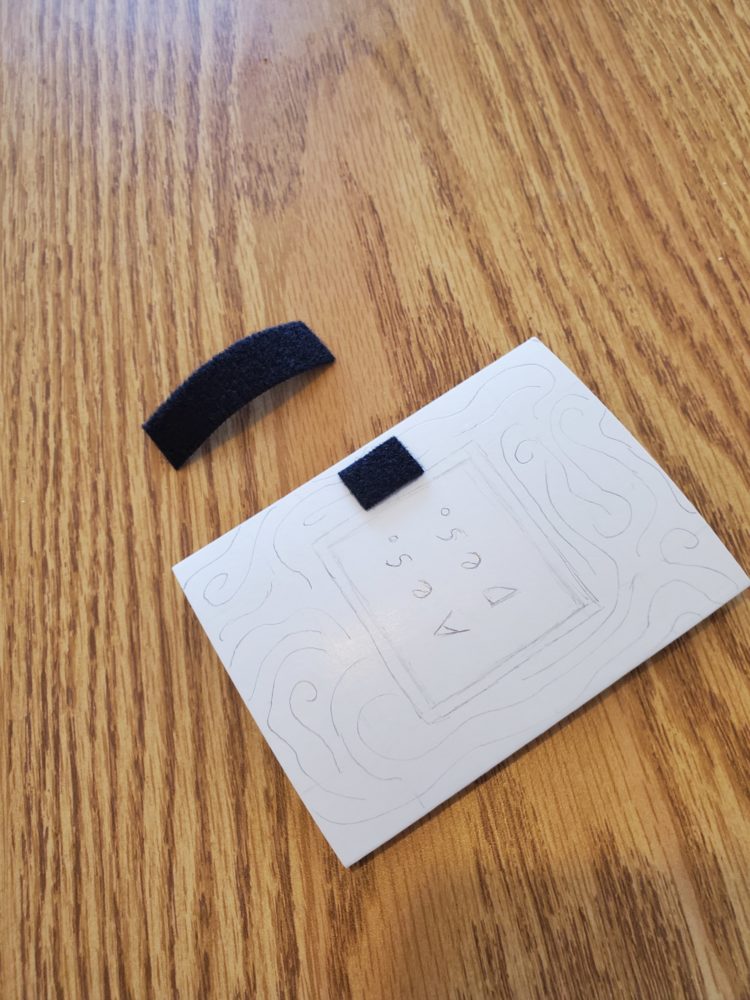
The work that remained to be done at this point (2/5) to complete my pocket-sized sketchpad was as follows:
- Trace over cover pencil design with desired marking instrument
- Add an aesthetic to the back cardboard cover
- Fasten the Sketchpad pages to the inside of the cardboard cover with hot glue
- Potentially add layers of packing tape to cover for sturdiness
- Fasten the cut sections of hook and loop to the front and back covers
________________________________________________________________________
Upcycle Final Work
Final Fabrication Process
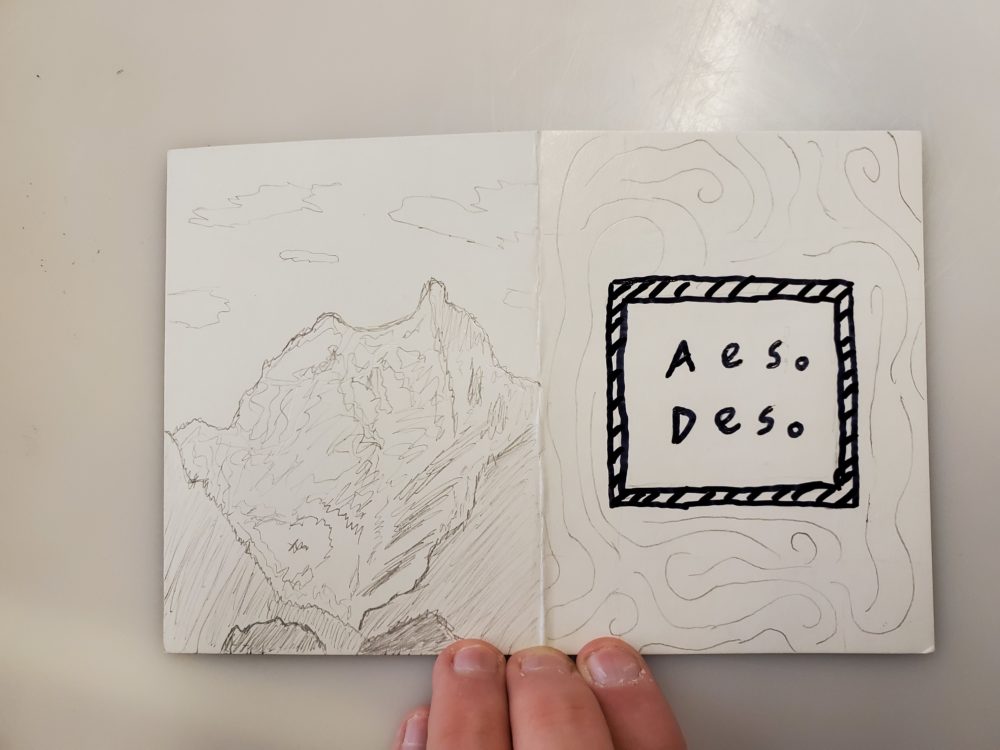
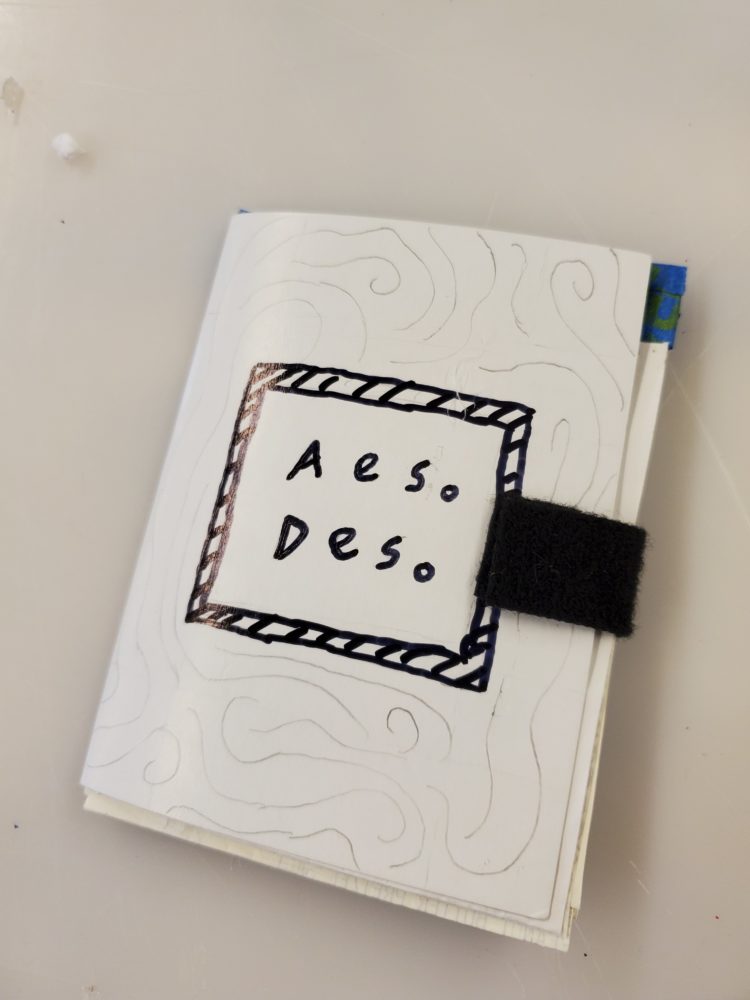
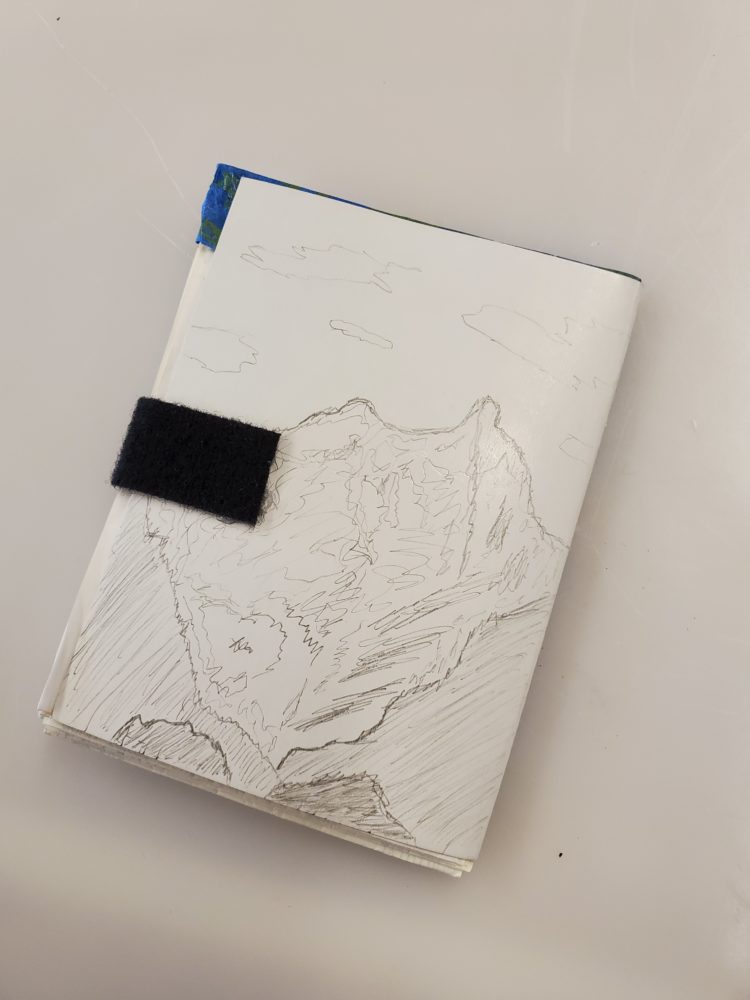
I chose to add a mountain scene in pencil to the back of my sketchpad cover. I also chose to add black Sharpie only to the central section of my front cover. I felt leaving the front cover’s fluid, curved sketched lines and the back cover’s mountain scene as pencil instead of black Sharpie lends a certain self evidence to the functionality of my sketchpad. The final cover designs can be seen below, as Figure 10.
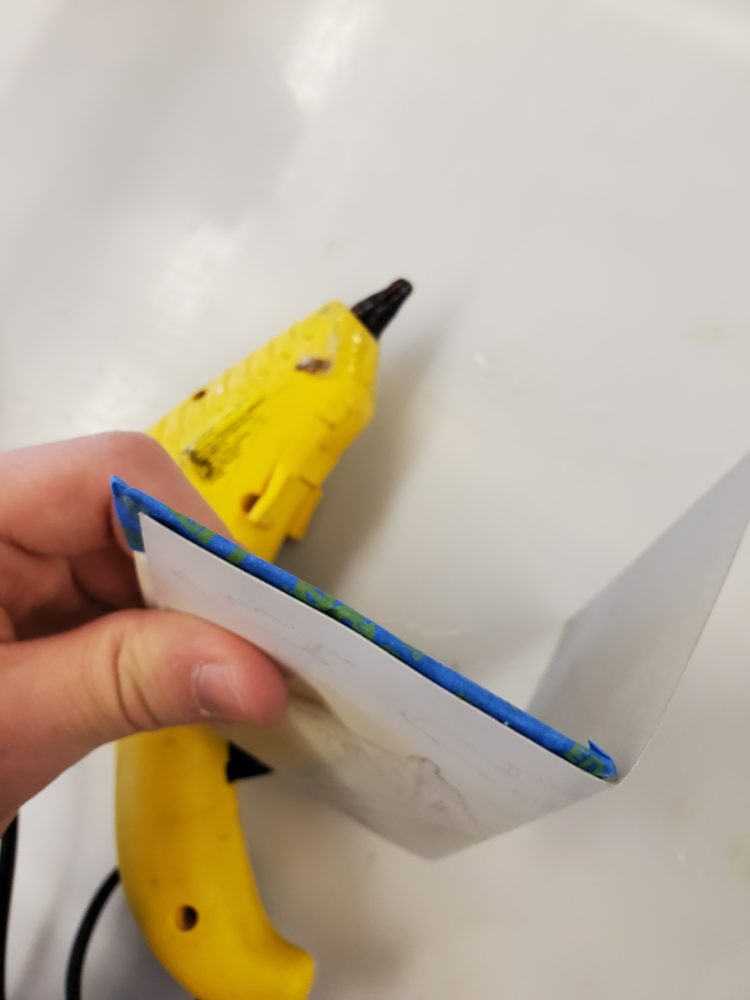
I then proceeded to secure access to a hot glue gun within the ITLL Project Depot, carefully applying a line to the sketchpad component’s painter’s tape top section before adhering it to the inside of the cardboard back cover, as shown below in Figure 11.
After securing the inner pages to the inside of the back cover, and thereby creating a sort of book binding, I then added hot glue to the hook and loop strips and fastened them to the front and back covers to create the strap to hold my sketchpad covers closed when not in use sitting in my pocket. This can be seen below as Figure 12.
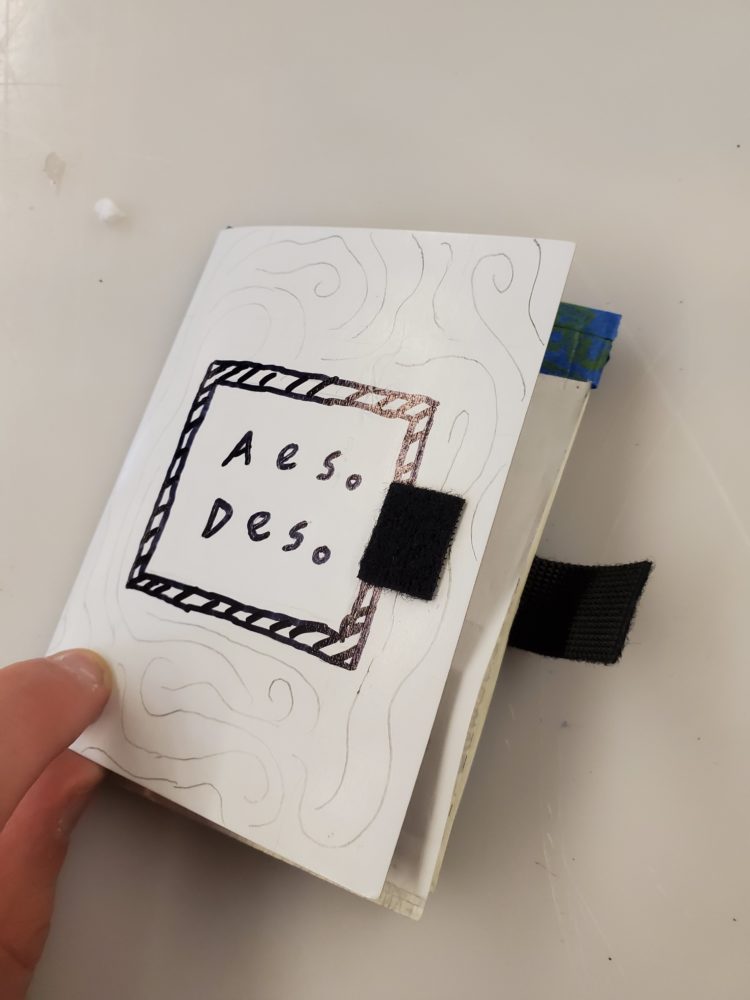
I had decided not to add packing tape to the front and back covers of my sketchbook. Part of the motivation for this decision was that I actually liked the feel of the photo paper cardboard against my hands, and another reason was that it would be more difficult following the fastening of the hook and loop cover strap.
Supplies Used
In total for this upcycling project, I used the following materials and tools to fabricate my pocket-sized, receipt paper sketchpad:
- 23 blank-backed receipts
- 1 4″ X 6″ Canon glossy photo paper packaging cardboard insert
- 1 strip of black hook and loop (“Velcro”)
- Painter’s tape
- Scissors
- Elmer’s Glue-All multi-purpose glue
- Hot glue and hot glue gun
- Long needle nose pliers
Nearly all of the tools listed above were used within the ITLL Project Depot after lectures on 2/5 and 2/10.
Project Vision
The main goal for this project was to create something I will actually use regularly as a sketchpad from something previously useless to me: a stack of accumulated receipts from various grocery trips. Early on, I had no concept of how I wanted the sketchpad to look, my focus more on a desired function rather than a desired form. In that regard, I hoped that the form would follow this desired functionality. Upon finding the Craft-Cycle post detailing the receipt notebook creation process, I had a better idea of what the notebook would look like, though I desired mine to look “cleaner” than those shown within the images here: https://www.craft-cycle.com/upcycled-receipt-notebook-2/ . Throughout this project, I could not think of a thematic aesthetic that would lend itself well to a sketchpad.
Design Process
The actual design process for this project was quite simple. The only real brainstorming I did for this project was of the possible designs for the front cover, and I just added the back cover mountain scene on the fly. That being said, within the second week or so of this project – immediately following my “Upcycle Inspiration” blog post – the process was made incredibly clear to me after reading through the full fabrication process for multiple receipt notebooks made by Craft-Cycle.com user “McKenzie” as mentioned before, and found here: [2] https://www.craft-cycle.com/upcycled-receipt-notebook-2/
An ideal design process for this project may have included one more iteration upon the aesthetics of the sketchpad, particularly the front and back covers. I wanted to add more by tracing over the pencil work with another marking instrument, but I couldn’t decide on one and left the fluid curved lines and mountain scene as pencil approaching the final presentation. I might have also been able to think of a more inspired or thematic illustration for the back cover of the sketchpad, if I had conducted another aesthetic brainstorming session.
Final Product
My final product or “Artifact” can be described as a hook and loop sealed, cardboard cover sketchpad with pages of receipt paper, as shown below.
Functional Goals
I have not used the sketchpad extensively yet, so it is still too early to comment on whether I have achieved my goal regarding functionality. The strap appears to keep the cover closed well, and I can page through the receipt sheets easily enough. At first glance following the final fabrication process, I am very happy with the end result.
Artistic Goals
I do wish I had done something more involved than just pencil work for the front cover fluid lines and back cover mountain, but I received no feedback within my Upcycle Progress blog post regarding suggestions of another marking instrument with which to trace over the pencil lines. The end product is also entirely lacking in color, aside from the strip of painter’s tape, so that could have been improved upon. From a utilitarian perspective, this project was a complete success, but I am fully aware that there is significant room for improvement regarding the aesthetics of my final product.
Whats Next?
I will use the sketchpad often throughout the semester, and take detailed notes of any complaints I have while using it. If I notice too many flaws in its design, I will likely feel inclined to iterate and improve upon the design, though currently I can’t think of anything I desire to change about it. I will also think of ways to improve upon the aesthetics of the front and back covers, likely through adding vibrant coloration.
Live Presentation Link
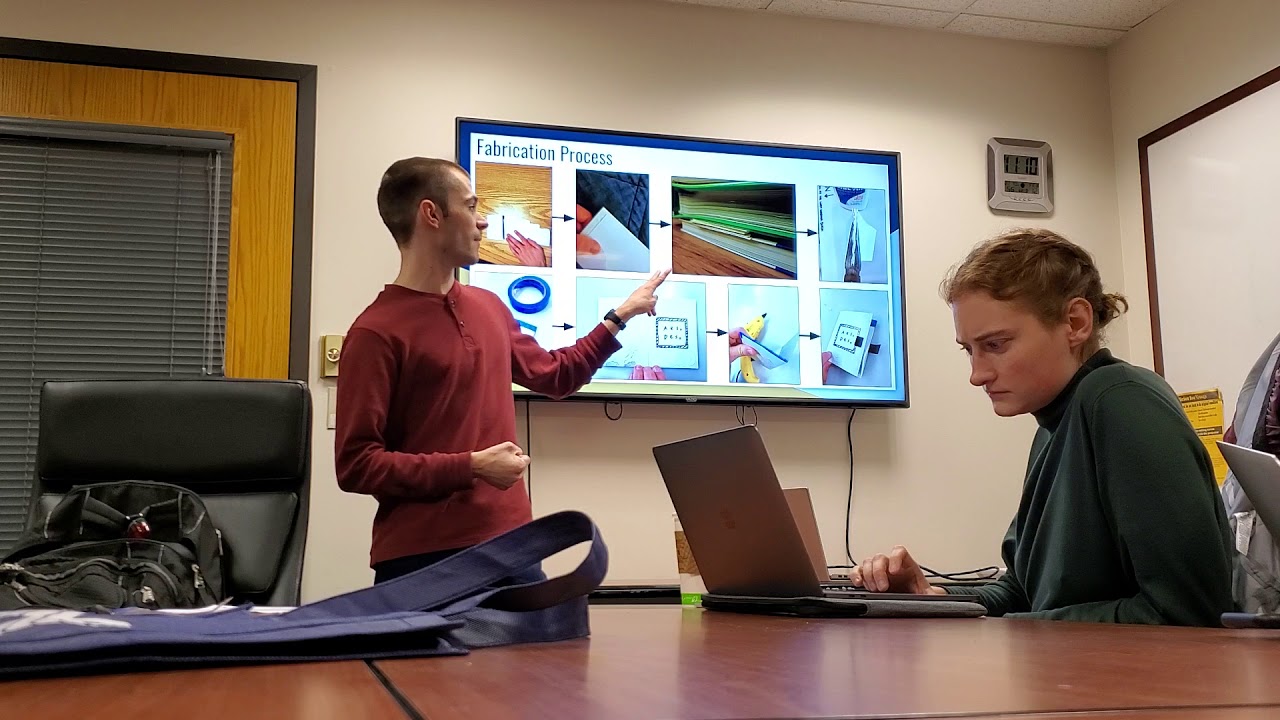
I presented to my course pod within ECME 137A on Wednesday, Feb. 12 and the presentation was recorded and uploaded as the Video Thumbnail.
________________________________________________________________________
Work Inspiration Citations:
[1] “ACADEMY A6-P Leather Plain Journal with Strap and Keeper”. Arkademie.com. Accessed 27 January 2020, from https://www.arkademie.com/products/a6-academy-leather-cover-portrait-plain-journal-with-strap-and-keeper[2] “Upcycled Receipt Notebook”. Craft-Cycle.com. Posted on August 3rd, 2019 by user “McKenzie”. Accessed 29 January 2020, from https://www.craft-cycle.com/upcycled-receipt-notebook-2/

9 Comments. Leave new
Justin,
This post is very detailed and contains great documentation of you intent and your design process. The presentation itself was very organized as well. Making your project from old receipts is an interesting idea, because that is a recycled material that very few people would think to repurpose. Do you think you will actually use this sketchbook? If so, what will you use if for?
Hello Davis!
Since you weren’t in class the day of my presentation, I’ll be happy to respond to your question now. I have already used my sketchbook a fair amount within this course, for example to sketch the two-point perspective plane stack we were instructed to begin practicing on the Feb 14th lecture of “Contour Bias”. I will continue to use the sketchpad whenever an opportunity to practice sketching arises.
– I like the way the receipts are held to the sketch pad. If feels secure
– The aesthetic of sketching on the outside really matches the overall design
– I may have missed it, but did you glue the receipts at all? Or is it just tape?
I like how Justin was very in depth with his presentation slides. He clearly laid out his goals for the project, laid out his supplies, and outlined his goals for the future. I think that Justin could work on not showing his nervousness when presenting for future projects; practice will help ease his tensions.
Justin, I really appreciate how your notebook is completely from repurposed material. I don’t usually keep my receipts, so I think this was a creative way to use something that I would likely throw away. One thing that I think could be improved for the project would be to spend more time on the cover; maybe add some color, or create a more focused aesthetic. Functionality-wise, I think it’s a great sketchbook! I would never think to use receipts as they are quite smooth and may not be receptive to pencil, but it seems to still work well. How long did this take you? Have you been using it for your personal sketches? Will you continue to use it throughout the semester? Great work on this project and I’m looking forward to seeing your work in the rest of the semester!
Justin –
Very nice documentation of your design process and a very clever use of a recycled material, being receipts. The structure of the wallet itself seems quite nice and fairly sturdy. I just had a couple questions: if you had any other repurposed material at your disposal, what would you use for the sketchbook (considering texture, quality, etc)? What would you have done differently if you had the change or more time? Thanks for your hard work and nicely done.
Will
The receipts especially are a good example of the spirit of upcycling. It looks like you could rip them out and replace them once you’ve filled it up. The rest of the notebook seems built to last. What other materials could be used for the inside of the notebook? You said that the receipts could only be used with pen, so maybe there’s another material that would be more convenient.
Do you find receipt paper difficult to write on with pencil? Overall great project. Aesthetics of the cover could be accentuated a bit.
I love that your upcycling project is functional as well as aesthetic. As someone who also saves receipts, I think it was a really cool way to use them, because I tend to stockpile them for a while and then throw them all away when there are too many to deal with.
What do you want to fill this sketchbook with? Will you use it for this class, or for personal ideas?