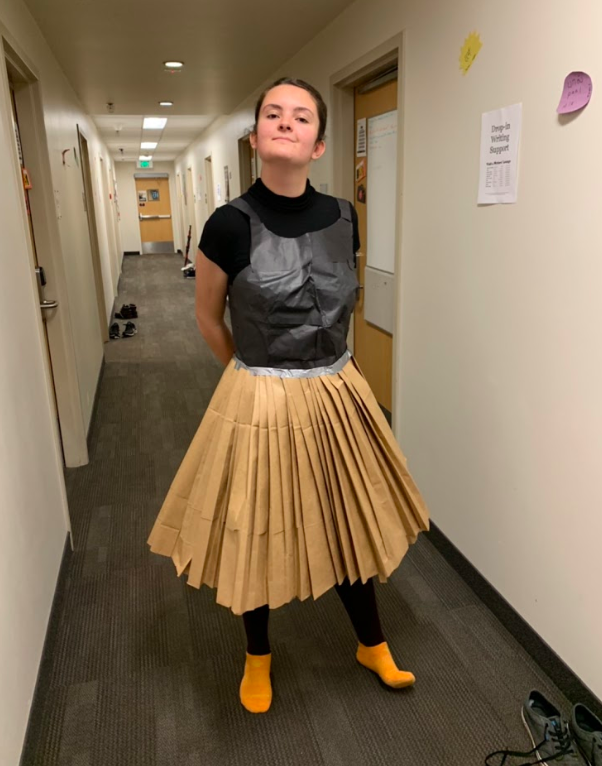
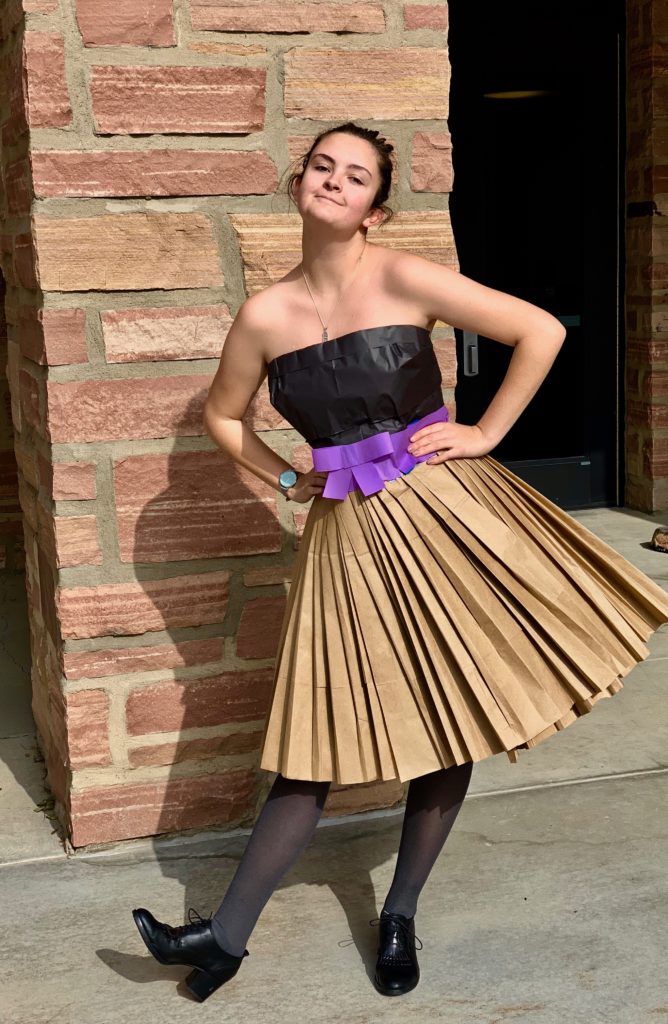
For my up-cycle project I made a 50s style dress out of paper. Here is the final product.

Inspiration:
The reason I wanted to make this dress is because I am attending a Time Travelers Ball in mid February. Last time I went as someone from the future so this time I want to be from the past. When trying to decide what to make for my project I watched ‘Singin’ In The Rain’. This movie was made in the 50s and is set in the 20s. As shown below, there are a lot of great outfits in this movie but the one I thought might be possible to make is the flapper one in the second row. To me that’s a classic 1920s dress.

The flapper dress looked a little too easy so I started looking at 50s fashion instead. I was drawn to the two dresses shown below. I decided to replicate the style of the second one because it’s more fun and the first dress looks more like something one would wear to work in the 50s.


Materials:
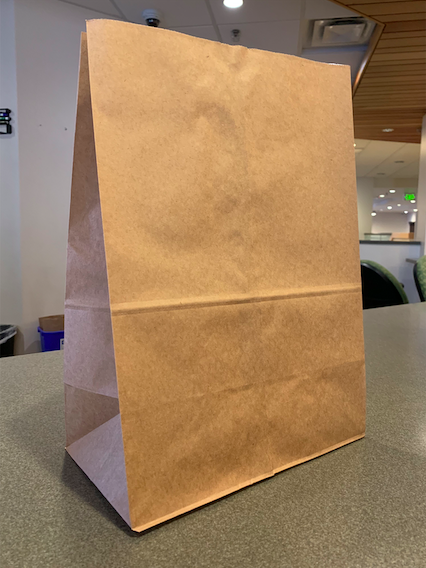
For this project I used paper recycling bags. These bags are provided at grocery stores and are also handed out at the dorms on campus (where I happen to work). I also ended up using some thinner paper from the giant rolls of paper that people use to make big posters.
Building Process:
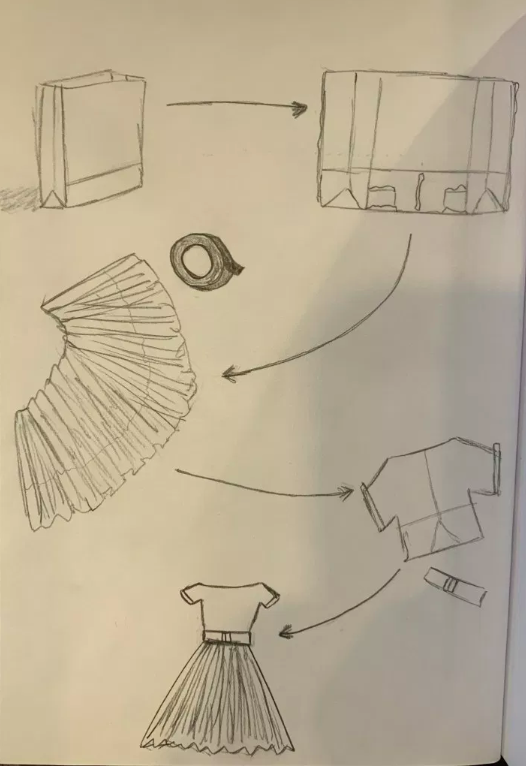
To make this dress I decided to split it up into a couple of different sections, the skirt, the belt, and the shirt. I planned out the dress during our quick drawing in class.
Skirt:
For the skirt portion I thought about laser cutting a bunch of sections and taping them together to make the skirt wider at the bottom.
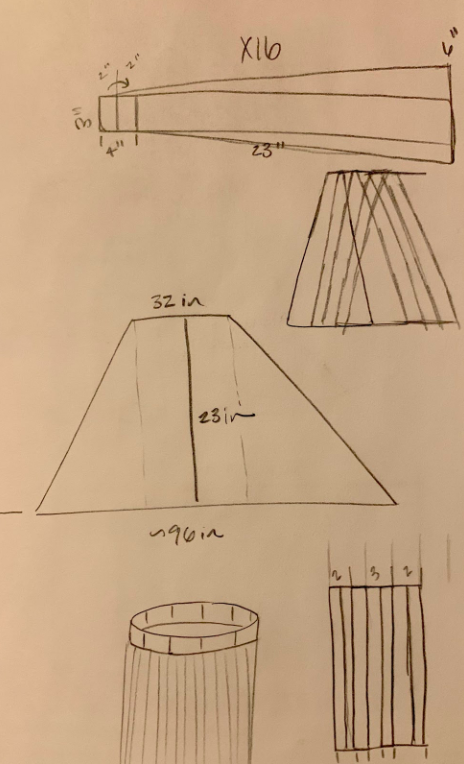
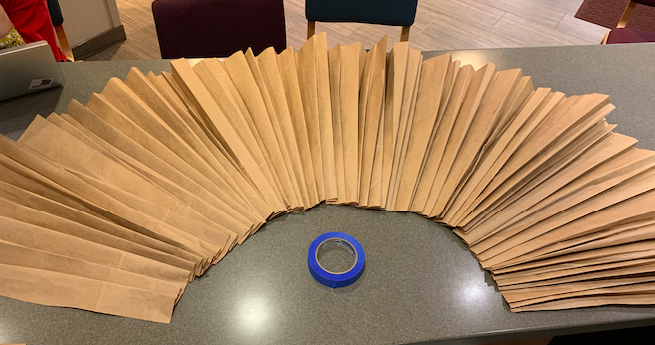
I looked up how to make a regular skirt and saw the technique of crimping the top so that the bottom is longer than the top (4). They also said to use material 3 times the length of the waist size. I flattened the bags and cut off the unusable parts, then I taped the bags together and made one big flat piece. Then I folded one side over and over until it had a length of 32 inches (my waist size). It ended up looking like a giant paper fan.
Shirt #1:
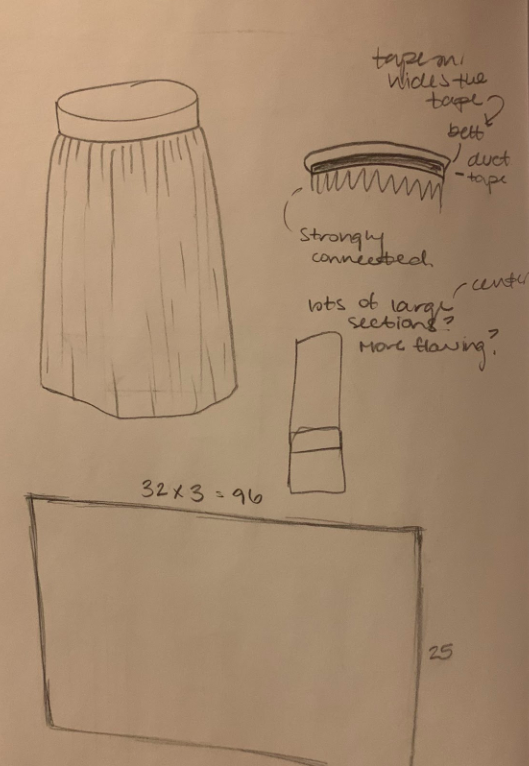
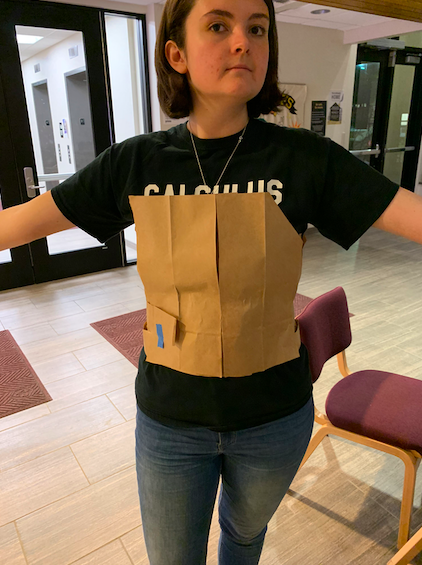
I planned it out and took some measurements and made this shirt out of the same paper bags as the skirt. The method was to make three belt like sections and then use a lot of long sections to connect them from the waist to the bust to the shoulders as shown below.

This kind of worked but the material has no give because its paper. It also was really hard to get the right shape and it kept looking very boxy. I didn’t have time to make the straps/sleeves at the time but I thought I would make them later. This is what the first shirt ended up looking like.
After I started working on the shirt part I realized that the sleeves on this dress were going to be really difficult to make out of paper, so I decided to change the design to look more like the dress below. I like this dress because of the pleated skirt and the wide belt as well as the different sleeves.

Shirt #2:
Instead of adding straps to the first shirt I made, I decided to make an entirely new shirt because I didn’t really like the first one. I ended up also switching to to a different paper that was thinner so that I would have more control.
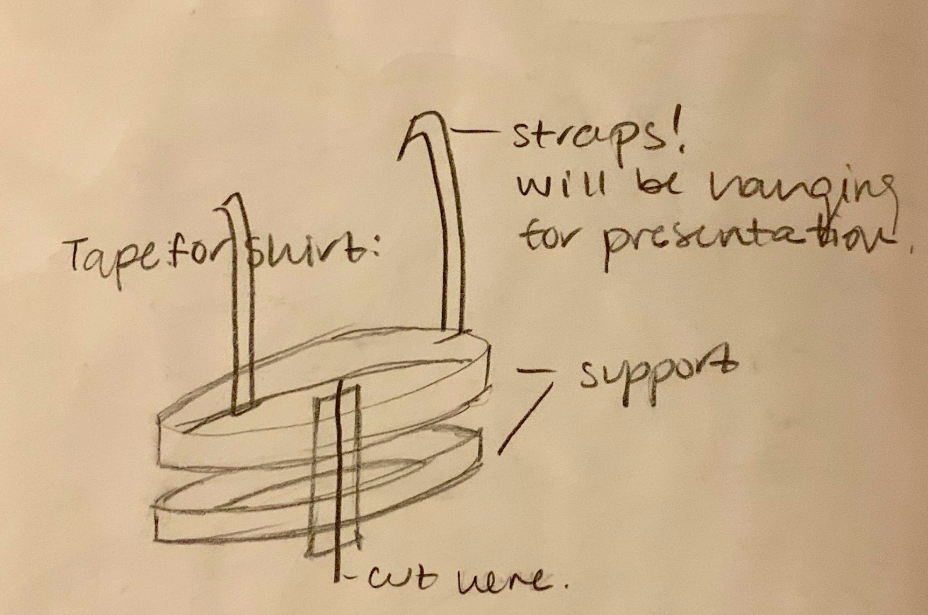
For this shirt I had more of a plan. I made a lot more measurementsI decided to make three separate sections and tape them together. The sections are the bottom, the bust, and the straps.

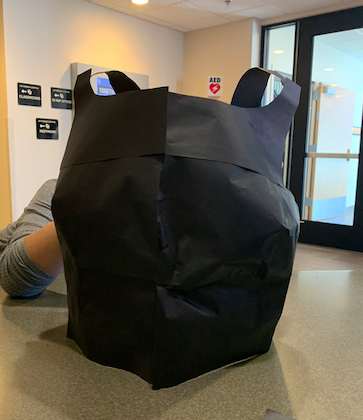
After making the shirt I taped the shirt and skirt together to make one dress.
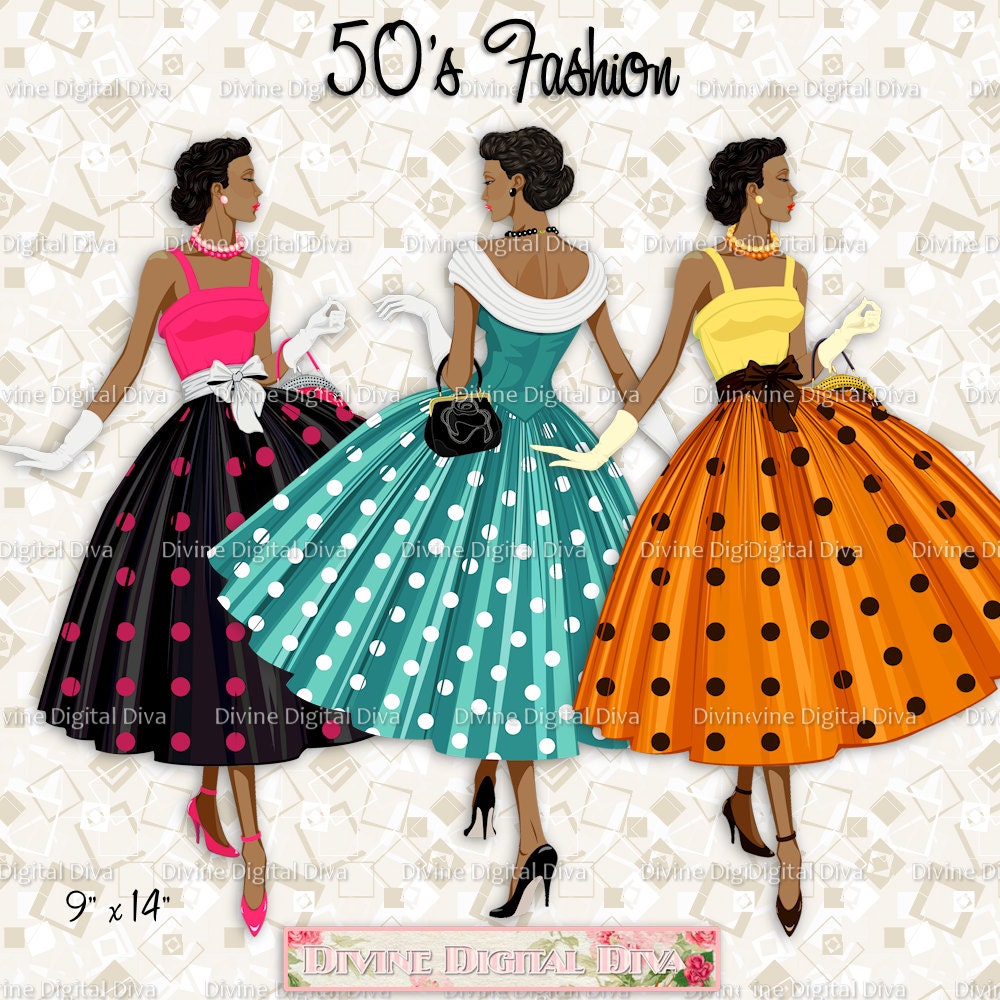
Then I decided that I didn’t like the way the straps of the shirt looked so I looked around for more inspiration. I also didn’t like how crumpled the shirt ended up. I found two 50s style dresses that I really liked and decided to combine the two concepts. The first dresses I liked because the skirt, skirt, and belt are all different colors. I also liked the bow on these dresses. The second dress looks a little more high fashion for the time so I decided to cut off the straps on my current shirt and make it strapless to emulate this design.
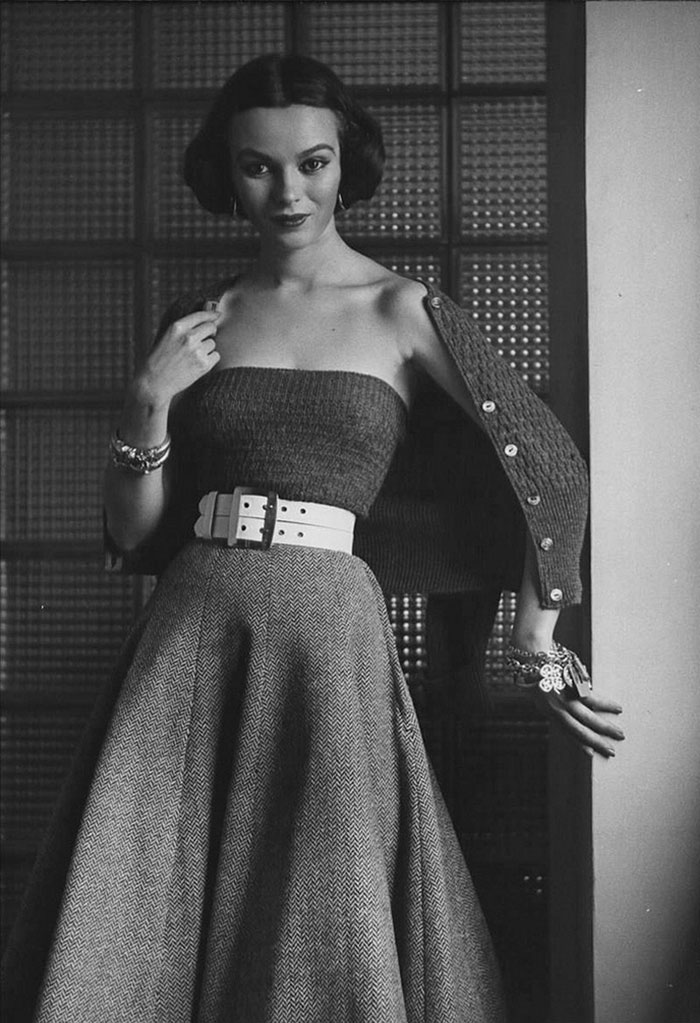
I also added another sheet of paper to the shirt to the shirt so that it was not crumpled and added a little piece to the top to replicate the first image from above. Then I quickly made a bow and taped the belt to the dress.
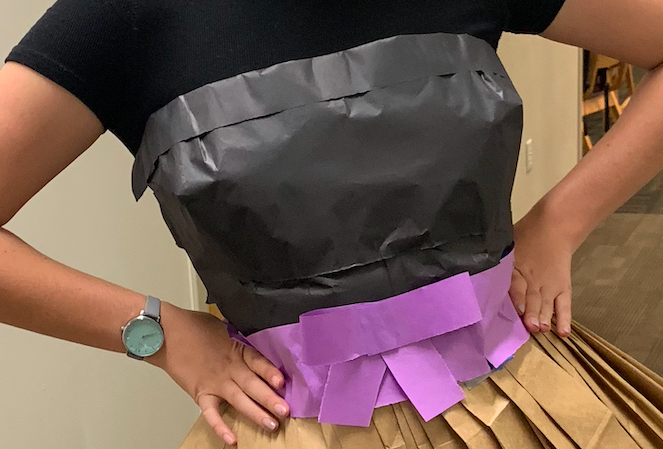
In order to get the dress on and off I decided to add a zipper down the back of the dress. I got a 30 inch zipper at Joanne’s Fabric and taped the zipper in. The tape didn’t work completely so I sewed the top half on and reinforced that with duct tape.
Then I was done!

Video from class presentation:
Citations:
- https://fashionsizzle.com/2014/01/01/costume-designer-walter-plunkett-influence-on-fashion-and-the-movies/
- https://www.myvintage.co.uk/Graphics/fashions-of-the-fifties.jpg
- https://www.whowhatwear.com/50s-fashion
- https://byhandlondon.com/blogs/by-hand-london/34307717-5-easy-skirts-to-make-refashion-without-a-sewing-pattern
- https://www.amazon.com/Belle-Poque-Womens-Hepburn-Sleeveless/dp/B078SNNHB1
- https://www.etsy.com/listing/230446553/12-ladies-of-color-50s-fashion-polka-dot
- https://www.boredpanda.com/1940s-and-1950s-fashion-photography-by-nina-leen-206/?utm_source=google&utm_medium=organic&utm_campaign=organic

11 Comments. Leave new
Awesome! I like how you iterated through a few different designs for the shirt part, and that you’re actually going to wear and use this dress!
I am very impressed with the amount of work you put into it. I really like the 3x size rule you found when making the dress. I would be curious to see how it hold up when you actually wear it. You can try to speak a little slower, but that may have been hard beacasue you seemed so excited about it!
This was a really creative idea and the final product turned out great! Your presentation did a great job at showing progression in the design. It would have been interesting to see more of the production process in your presentation, such as how you reinforced the dress.
50’s fashion is a unique period of fashion and can give way to a lot of creative approaches. The idea of using paper as a type of fabric was a bold choice, especially with how easily it can tear, even with the reinforcement is a failure of the dress a concern when you’re wearing it? Overall the design is nice and does a really good job of capturing that era of style.
This was such a cool idea! I can’t believe you were able to get it to a final product stage including a zipper in the back to make it more practical. Maybe someday they will create better waterproof paper so you can wear it and wash it.
Very well documented presentation, I liked the pictures a lot. All the drawings you showed with the labels really helped all of us understand your design intent and what aesthetic you are trying to display. Did you think of using materials other than paper to make the dress? something like bag liner maybe?
Very technical design with all the dimensions and drawings. Great planning and execution. I think you nailed the aesthetics that you were trying to get. What next to design in terms of adding to the ensemble?
The iterative process was my favorite part about your project. You weren’t afraid to iterate when you didn’t like the first, second, or third iteration. The added belt was super cute, and the finished product is something that you are actually going to use! Great job on this project!
It was great to see Eleanor go for a project surrounding 50s fashion. Given that most likely no one is aware of that style, it’s nice to be educated. I was very interested to see the execution with you wearing the final dress/skirt. It really shows how hard you worked on it. Great job.
The example pictures were great to have when you were explaining your design process. Chronological build process is easy to follow. Maybe try to speak with a bit more confidence. Dress looks awesome.
It was really interesting to hear how you got to the final product. You went through several design iterations and came to a great final product. 50’s fashion is iconic and I think it would have been a cool time to live. You were very resourceful along your design course. Maybe next time you can do some research on how to make a dress with sleeves. Otherwise, well done.