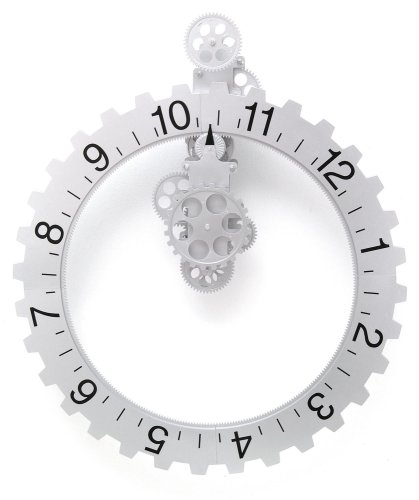
For my final project I wanted to recreate a clock that I have seen before, I didnt want to make a 1 to 1 replica of the clock, I wanted to do it differently. The clock that I was drawing inspiration from is as shown below:

This clock is very nice and has a lot going on but to me is muted by the monotone grey aesthetic that it has. I wanted to make a steampunk version of the clock to bring out the beautiful machinery that allows the clock to work. I first had to figure out how I was going to make the clock function. I knew that I wanted to display as many gears as possible so I knew that I was going to be needing a compound gear train. I needed a place to start to make the calculations, I chose 60 RPM as the speed that I wanted my driving gear to spin at. I then went through creating the proper gear ratios to end up at a speed of 1/60 RPM which my final outer gear would spin at. Once I knew how many gears I would be needing and how many teeth each gear would need I went to SolidWorks to model everything up.
Once I had everything modeled I knew that I needed to create a gearbox to hold all of the gears in place in order for them to mesh properly together. I began by creating an assembly of all of the gears. In order to figure out where all of the gears would be placed I needed to set some boundary conditions. First, I knew that I wanted my driving gear to be directly in the center of the gear that has all of the hours marked on it. Second, I knew that in order for the gear with the hours to balance properly it had to be centered over the driving gear. I now had my first and last gear positions defined and they were set in space, all other gears could be placed anywhere in-between as long as the pitch diameters of all the gears lined up. I then calculated all of the pitch diameters of each individual gears and made a sketch on each piece part. I then applied a coincident mate to all of the sketched pitch diameters within the assembly. Now in my assembly my first and last gears were fully defined and they would not move, all other gears shown in the assembly were free to move and with their respective coincident mate they would only move in positions that would satisfy that condition (the pitch diameters meshing together). The reason that I chose to model this way was because now I have the freedom to move the gears into the positions that I thought looked the best and would show as many of them off as I could. Once I moved everything in a place that I liked I then used the built in SolidWorks measuring tool to find the coordinates where the shafts would need to be located within the gearbox in order to make sure that all of the gears meshed together properly.
After the gear positions were finalized and the shaft locations were all dimensioned I then began thinking about my aesthetic. I did not like the plain look of the gears and I knew that I wanted to draw inspiration from some steapunk gears that I had found online. I figures that I had two choices, I could either paint the finish over the plain gears to mimic different gears, or I can individually modify each gear to mimic the designs in the gears that I have seen. Knowing that my SolidWorks skills far surpass my painting skills so I decided to modify each gear within SolidWorks. The image below is the final design that I modeled and then used these files to make a physical version of my clock rather than just the digital one that I created.
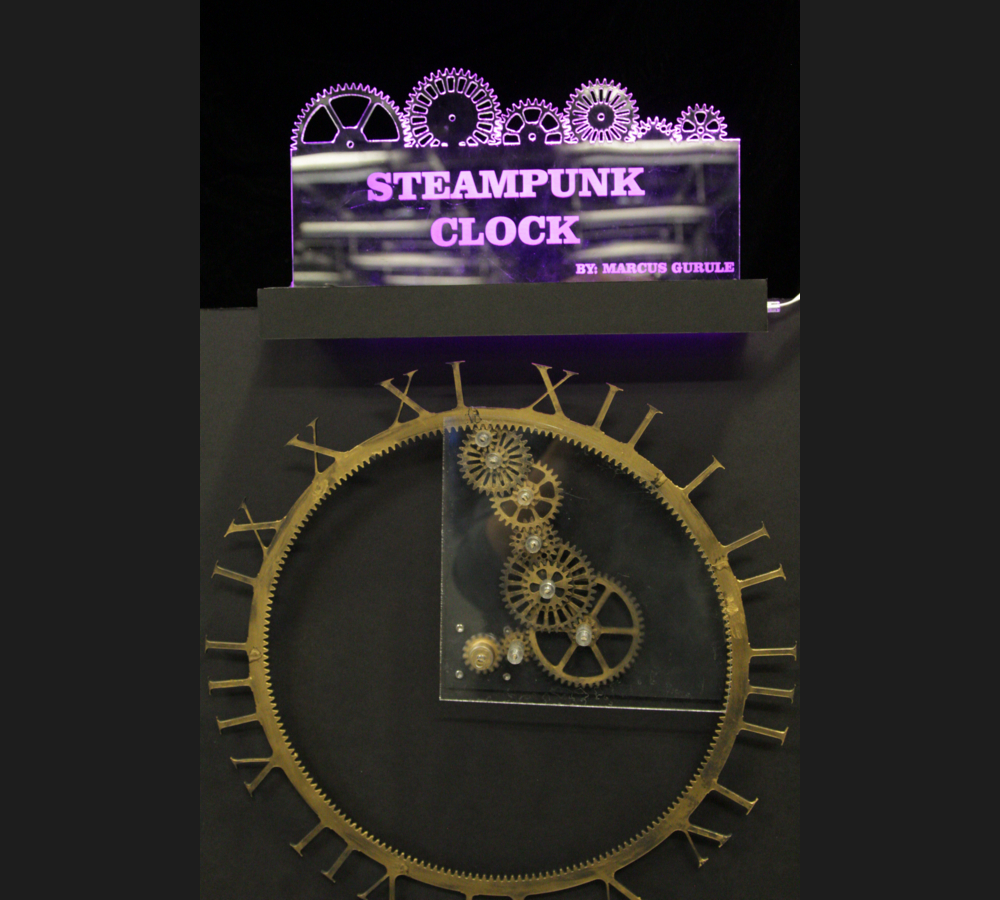
Knowing that it would be near impossible for me to make all of these gears by hand I knew that I needed use the laser cutter to make all if my cuts. The material that I chose to cut all of the gears from was 3mm acrylic. Knowing that I would need to finish these parts to give them the aesthetic that I was going for I had to do some research on “weathering” techniques. I came across a product called ‘Rub N’ Buff’ that many people on steampunk forums swear by to give ordinary objects a steampunk look. The process to do this was very simple, the parts were all cut out of the clear acrylic, spray painted with a black base coat, and finished with the gold leaf ‘Rub N’ Buff.’
After all of the gears dried the gearbox was then assembled.
Finally the outer gear was cut and finished using the same method as all of the other gears. and the final product was assembled.


4 Comments. Leave new
Really awesome project. Im glad you used roman numerals instead of numbers. Much classier this way. How does it work? I hope it keeps time accurately. Great job marky
This clock turned out to be very cool looking. It has this very sleek look to it. you made great use of the laser cutter and the acrylic material. It’s a simple design and i really like the aesthetic
This project was awesome! I love how you actually figured out the gear ratios for it to be exactly right. I would suggest that you add something that clearly tells you what the time currently is. You absolutely captured the steampunk aesthetic. Great job.
This is really cool. I love looking at the intricate meshing of gears involved in clockwork. The gold steampunk coloring goes well on the black background. Where are the hands on the clock, or is does it tell time in another way? Also, something happened with your images where they are not showing up, it just says they are displaying the .jpg