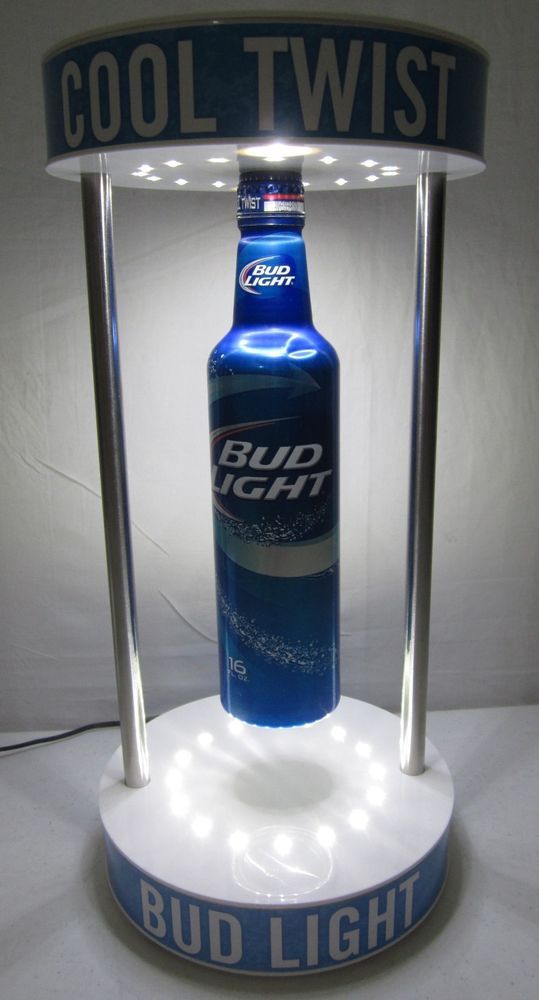
For those of you unfamiliar with my project, I decided to try my hand at a magnetic levitation stand. Basically, this is just a series of magnets, both electromagnets and traditional metal magnets, used to keep another magnet suspended midair. The idea came from a camping and fishing trip I had last summer to Hells Canyon, ID. One they way home, I stopped at a dive bar in a random town in Idaho. Next to the bar, there was a display similar to the one shown below in Figure 1.
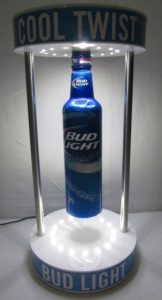
Figure 1: Beer bottle magnetic levitation stand display.[1]
This really got me thinking about what exactly was going on inside this device. I did some quick google searching to see what I could find out the next morning. Unfortunately, my search yielded no results and, after some time, I had forgotten about that experience and moved on with my life. Now, flash forward to the beginning of this semester, the idea pops back into my head as an idea for a final design project.
The most difficult part of this project was making it functional. I had no idea how I was going to make a magnet float and stay floating. I attempting something with an arduino motor, thinking that I could spin a magnet fast enough to create a stable magnetic repulsive force to float another magnet. This experiment was met with failure immediate. After much research on the topic, I came up with an idea that seemed more feasible to prototype out. A rough concept sketch for this method can be seen below.
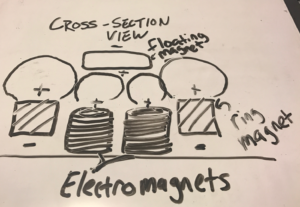
Figure 2: Cross sectional concept sketch for how this device would work.
This method required electromagnets, and the only place I could buy an electromagnet kit without breaking the bank was on eBay. Once the kit was purchased, I order various other magnets so I could do multiple tests in one sitting. The kit came in and I quickly assembled the electromagnets. The electromagnets were quite strong and kit did not include anything for adjusting the strength of the magnets, so I fixed a couple of potentiamometers to the circuit and thus could dial in the power of the magnets to a “sweet spot”. The sweet spot in this scenario was making the power of the electromagnets strong enough to support the weight of a magnet, but not so strong as to push the magnet outside the magnetic field of the ring magnet.
Once the prototype proved to be functional, I began designing the housing that was to go around it. I had 3 aesthetics that I played around with in the design phase; arts and crafts, art deco, and steampunk. These sketches can be seen below in Figures 3-5.
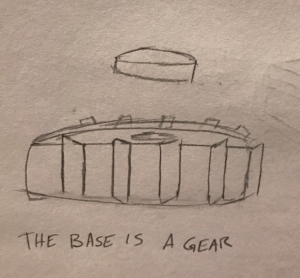
Figure 3: Steampunk idea sketch.
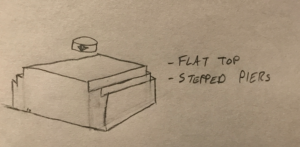
Figure 4: Art deco idea sketch.
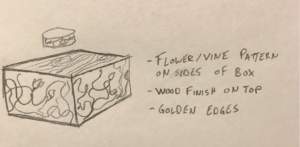
Figure 5: Arts and crafts idea sketch.
The design I ended up going with was more of an art deco look. I liked the stepped tiers on the sides of the base, giving it a trophy base look. Once the design was printed, I added some PCB LEDs around the outside of the circuit board so that the display would have some lighting. The final product can be seen in Figures 6 and 7 below.
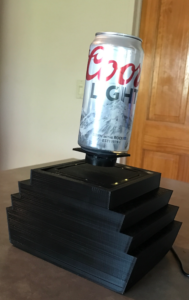
Figure 6: Final product.
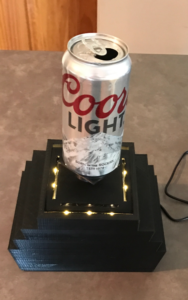
Figure 7: Final product.
The total cost breakdown for this project is as follows:
- 3D printer filament $30
- Electromagnet Kit $25
- PCB LED board $12
- Ring magnet $7
- Solder, flux, wires $12
- Total $86
This cost breakdown is for the final product, this does not take into consideration all the materials I purchased that were not used or were used in the testing procedures.
Sources:
[1] https://www.pinterest.com/pin/440930619742111288/

2 Comments. Leave new
After seeing your project in action at expo I was very impressed with how it turned out. I think that using the 3D printer gives the aesthetic an overall clean look. You did a very good job when explaining the project and how it works. Great job!
I think that your project came out very cool! It is pretty impressive that it can support the weight of the can with the magnet balancing in place. It was interesting to hear about the background for your project, and how you went through design to creating it. Great job!