Original Ideas
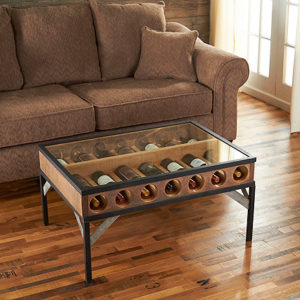
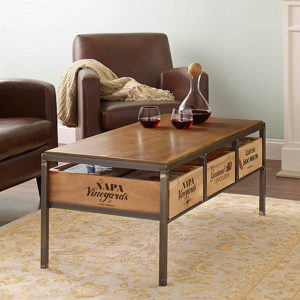
For my main project I wanted to construct a piece of furniture that could store wine bottles. I was trying to achieve the vineyard aesthetic by using oak wood, or wood that is stained to a similar color, wine boxes possibly, wrought iron, the steel hoops that hold wine barrels together and other material such as cork. Ideally I wanted it to store wine bottles while also displaying them through a translucent surface of some kind. The dynamic aspect of the project ended up being a large sliding drawer. I thought about making a side table or coffee table but was also open to other unique ideas such as making a secret drawer that can be installed underneath kitchen cabinets. My design was really dependent on the size and shape of the wine bottle and how many bottles I would like to store. Here are a few pictures I used as inspiration but I wanted to create something unique. I also really liked the idea of using recycled wood such as old shipping pallets but unfortunately they did not make it into my final design. I did however re-purpose an old coffee table.

The Prototype
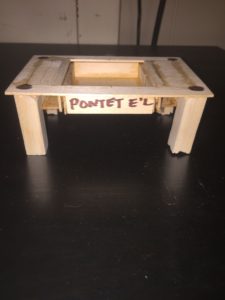
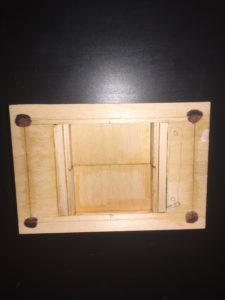
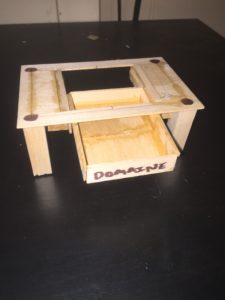
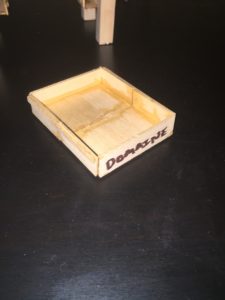
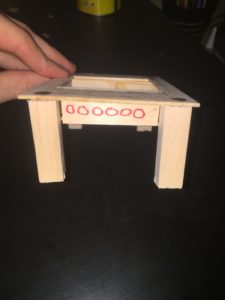
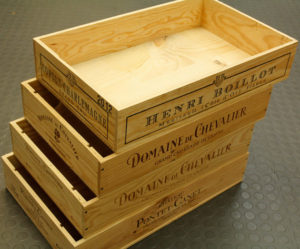
The prototype I created for the wine coffee table was a simple balsa wood model that helped me not only scale but visualize what I want the final product to look like. It also helped my figure out all the various fastening methods I will need to use. The picture on the top left is a general overview of the shape and style I would like to pursue. The model is scaled down to a tenth of the size for reference. I want to keep the design very open and free feeling versus the coffee tables that are very bulky and have very little place to put your feet. Height was a big concern of mine so I measured a few different coffee tables to figure out an appropriate height. The main feature of the table shown in the top middle figure is a rectangular cut out that will be overlayed with glass so you can view the wine bottles in the drawer below. The drawer will be on drawer slides and will extend out from under the table top. Keeping with the vineyard aesthetic I plan on buying two wine “trays” that are slimmed down versions of wine crates for the main drawer. I love the look and logos on the sides of the drawer and I plan on connecting two six bottle trays together to create one large drawer. The lower left picture is a model I made of the drawer. Below is a picture of the trays I will be using.
Project Schedule
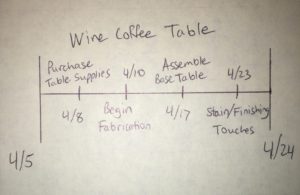
Supplies Purchased: Coffee Table base from Goodwill, Two Wine Boxes from Hazels Beverage World, Oak wood planks and dowels, various brackets and fasteners, drawer slides, rustic handle
Tools Used : Drill, Jigsaw, Sandpaper, Dremel, Tape Measures, Painters Tape
The Build
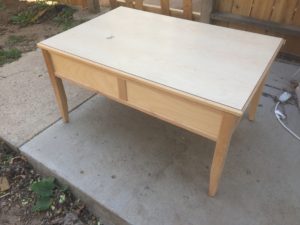
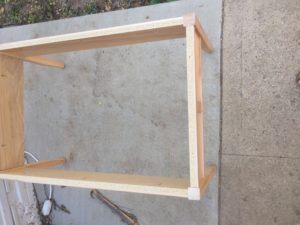
After discovering that oak wood would be rather expensive to use, and after realizing that building just a regular table that stands on its own and looks appropriate for ones living room is not the easiest for a person with rather limited wood working skills, I decided to search for a very simple base that I could modify to fit my needs. I needed to find a table that was approximately the correct size for the wine drawer I wanted to add, meaning the side width of the table had to be at least five inches in height and twenty-four inches across, and it must be rather simplistic in look. Color and wood type was not necessarily a huge factor because I knew that I could use a stain and some sanding to alter its look. After looking at six different goodwill stores I came across the table pictured above that not only was the correct size, look and even stain color but it was also on sale for only $20. Once I had made my purchase I measured every part of the table and removed the top surface so I could begin brain storming modifications I would add. The main feature and purpose was for it to store wine bottles in a custom wine box drawer so that is where I started.
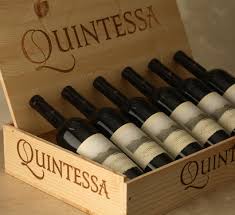
I purchased two wine boxes from Hazels Beverages World for only $5 that each could hold 12 bottles of wine. The boxes were simply constructed with nails and staples and were made out about a quarter-inch oak wood. I chose the boxes with the best stamped logos of wineries I could find because I wanted the logos to be visible from the outside of the table. These boxes were approximately 7″ in height which was way too deep for a drawer so I needed to cut them in half, which converted them into six bottle boxes instead of twelve similar to the Quintessa box pictured above. I measured the new height on the side of the box and without taking it apart, I used a jigsaw to cut all the way around the box. Once the boxes were reduced in height, I had another problem that I did not foresee. The width of the coffee table that I purchased was only 24 in wide and the two boxes stacked next to each other were approximately 30″ in length. I contemplated making two separate drawers instead of one larger one but decided against it. Due to this issue I had to reduce the length of one of the drawers by about five inches. I then attached the two drawers together with a strip of wood on each side using a few screws and wood glue. The two pictures below show the completed drawer.
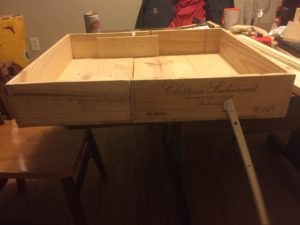
Once I had the drawer complete I verified that its height would fit into the side of the table that I would soon have to cut out. I knew that I would be cutting about a 4″ tall rectangle out of the side of the table and had to be sure that the drawer would have clearance in order to slide properly. Once I determined the proper height of the drawer I added the drawer slides onto the side of the box. I had to be very careful that I positioned these correctly to ensure that the drawer would sit flush with each side of the table. This took a few attempts and some tweaking to get it right.
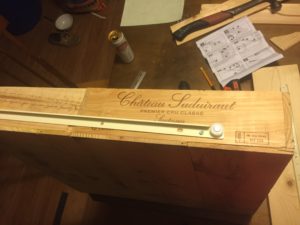
Next I had to add the cross supports on the inside of the table that would hold the drawer in place. The table without the top was just four sides and did not have any cross pieces that I could use so I had to cut an oak plank to length to fit between the cross-section of the table. Before I put them in place though I needed to cut a slot for the drawer so I could make sure they were lined up correctly.
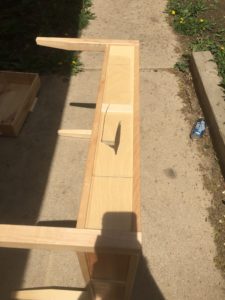
I marked out the slot from the drawer dimensions directly in the middle of the table. I needed to do an internal cut because I wanted to only cut out a slot and not completely compromise the structure of the table. I used the jigsaw for this but had to drill a large hole so I could put the jigsaw blade into the material before I started cutting. I then cut towards the edge of the table and followed the marked outline.
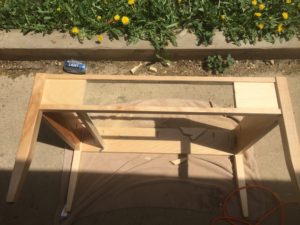
In the end I had a really nice sharp edged cutout shown in the picture above. If you look closely you can see that the table had a trim on the top and bottom that was about 3/4 in thick all the way around. I used the trim as a guide for the jigsaw blade to keep my cut straight. Luckily the distance between the trim was almost a perfect fit for the drawer.
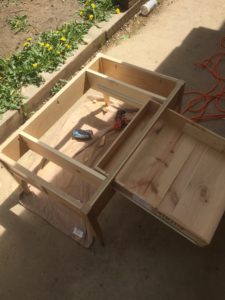
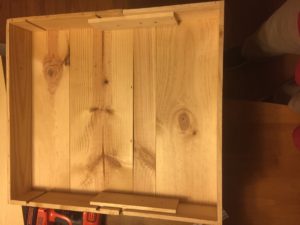
I added the two cross pieces I mentioned above by using eight corner brackets and some screws. After some small adjustments the drawer looked like it would slide in perfectly. There was just one problem. While I left room above and below the drawer for it to slide, I now did not have any clearance to actually get the drawer onto the slides. The picture above shows my predicament.
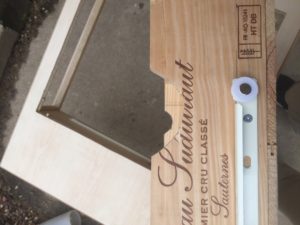

In order to fix this problem I unfortunately had to cut two small chunks out of each side of the drawer shown above. Luckily the cutouts would only be really seen when the drawer was fully extended. Once the drawer was in place and it easily glided back and forth I pushed the drawer all the way till it hit the other side of the table. I marked out where it touched and prepared to make the second cutout so the other side of the drawer would stick out the other side.
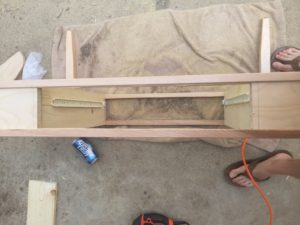
This cutout was slightly smaller than the first as I wanted to hide the drawer slides and only wanted the end of the drawer to visible. This also would be where the best wine logo would be displayed so I made sure that this end of the drawer would be displayed.
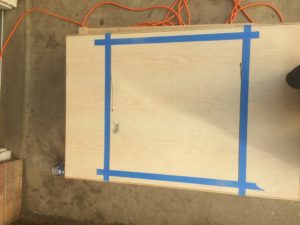
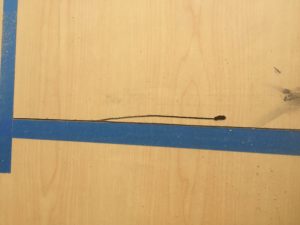
Once the drawer was in place I could dimension the table top. I wanted the top piece to clearly display the wine bottles in the drawer below but not show some of the drawer hardware on the sides. I used blue tape to create the outline that I wanted in an attempt to prevent the edge of the cut from “flaking”. The tape helped keep the material together and provided a great line for me to follow with the jigsaw. The picture on the upper right shows how I made an internal cut with the jigsaw by drilling a hole and then cutting towards the boundary I created. I did this for each of the four sides.
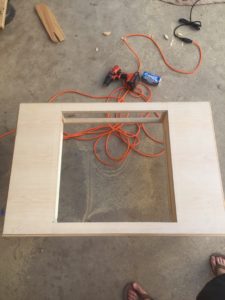

After some quick cuts I was left with a nice square cut out.
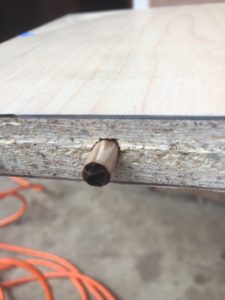
Now I was tasked with covering the cutout with a transparent material. I originally wanted to use a piece of acrylic for the clear top as I wanted it to be durable and quite frankly hated the sound of placing items on a glass surface. Unfortunately McGuckins was out of their acrylic sheets so I had to settle with a 20″x20″ piece of glass. Now the glass is not ideal as it is not tempered and not structurally sound for heavy items so I will be replacing it with acrylic when available but for now it will be fine. I needed to come up with a cleaver way to keep the glass from falling through the cutout as I did not have a tool to carve a shelf out for it to sit around the cutout. I improvised by drilling a specified depth into the thickness of the table top and used pieces of oak dowels as little supports for the glass. I now was able to slide the glass into place after some light sanding with the dremel.

Lastly I added a nice rustic drawer handle to the non logo side of the drawer. I think it adds a nice touch and completes the aesthetic look. Overall the color of the table and the drawer almost perfectly match in a nice oak wood color which was crucial to fit the aesthetic. I was very lucky to find this table as it saved me a lot of staining and finishing time.
Final Results
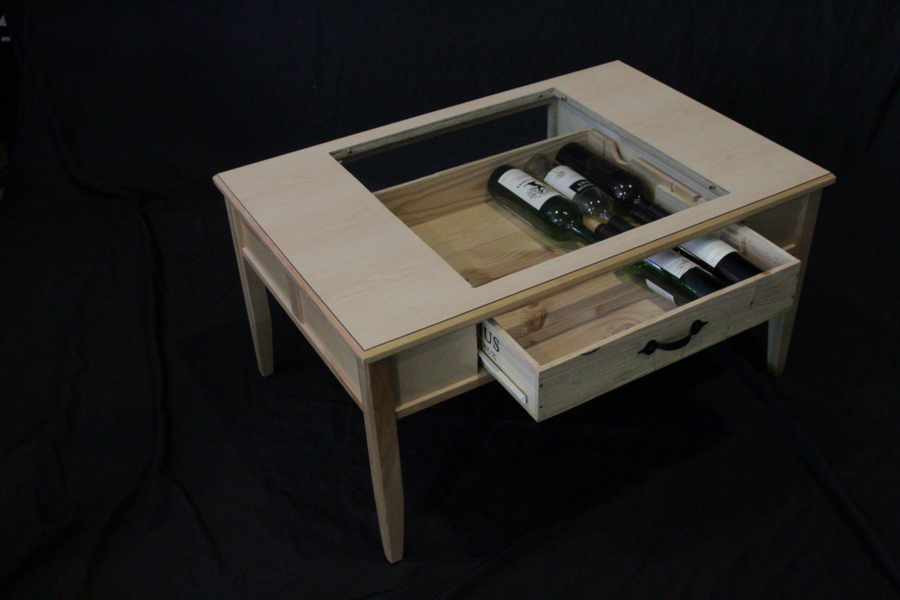
Overall the project turned out very well and I was rather pleased with the overall construction. In the end it could easily hold 11 wine bottles which was right around the target number I was looking for. I do believe I could have added a few extra pieces to the design to add to the overall look and aesthetic. If I had more time I really would have liked to have incorporated some cork coasters into the table to as well a secret stow away compartment. These are all improvements I can add later however. The total project cost was approximately $80 and I feel that is money well spent for a very usable piece of furniture that is also rather nice to look at in my opinion.

References:
http://www.wineenthusiast.com/vino-vintage-coffee-table.asp
http://oaillc.com/brilliant-wine-storage-table/captivating-wooden-coffee-table-with-storage-to-keep-wines-and-drawers-for-more-storage/
http://blogdelibros.net/unique-coffee-table-decor/unique-coffee-table-with-wine-storage-table-in-modernsimple-coffee-table/
https://www.google.com/search?q=wine+box&rlz=1C1CHFX_enUS555US555&source=lnms&tbm=isch&sa=X&ved=0ahUKEwjnjefJ48LTAhUBSWMKHddGCr8Q_AUICygC&biw=1707&bih=790&dpr=1.13#imgrc=YXn9RfWi00270M:

2 Comments. Leave new
It is really impressive that this whole thing only cost you 80 dollars. That is some serious successful scavenging! I know that some wine tables can be a couple hundred dollars, so that alone is quite a success. I saw this at the expo and it looked really clean and polished. Are you going to go ahead and continue on with those next steps to improve it more, or now that the class will be over, are you satisfied with the end result? This looks great!
I probably wont be improving my finished product after thinking about it more. Hopefully I will actually use it as a coffee table in my next place.