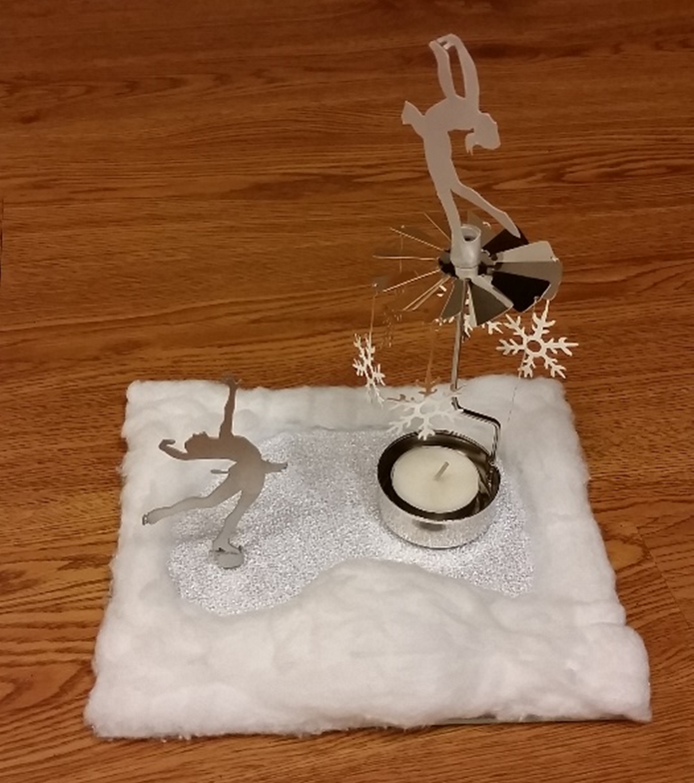
Let’s start at the end. The featured image above shows my final product for my main project this semester in Aesthetic of Design. It mainly consists of two parts: The rotary candle holder and the base. The base was completely handmade, but besides my initial intentions, most of the rotary candle holder is the original purchased item. The rotary candle holder has the dynamic feature as it spins when a lit tea light is placed under it. As you can see, the final product looks like a Christmas decoration. I would classify it as slightly Art Nouveau because of the strong silhouette feel to the whole thing. However, without any coloring (as the whole piece is white and light gray/silver), it does not fully fit the model. Professor Hertzberg recommended it looks Victorian, which I absolutely agree with! Especially the base, as it is textured glass with cotton “snow” on top.
The following section of the report dives into the mechanics of this project. From a brief background to the designing, building, and assembly of the product shown above. Enjoy!
Background:
For my main project, I made a Rotary Candle Holder decoration as a gift for my mom. I was inspired by one of my Aunt’s holiday decorations that I saw when I visited her last Christmas. She had a little tea light candle under a fan, which spun when the hot air off the candle rose past the fan’s blades. Physically, it is due to the change in density of the heated air from the fire of the candle. A similar product is shown in the image below. That one is being sold on Amazon, but the original distributor is Pluto Produktor (A Scandinavian company). I had never seen anything like it before. I ended up purchasing this one for my project. That was not the original intent, but I’ll get to the reasoning behind this in a moment.

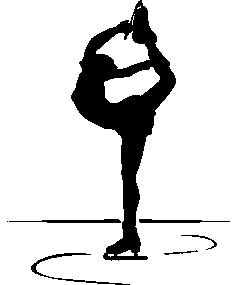
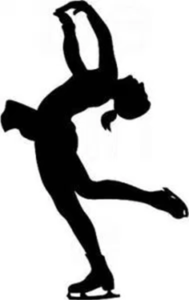
However, I wanted to make my product as unique as possible. And I would like to gift it to my mom at the end of the semester. Thus, I decided I would make my tea light candle ice skating-themed somehow. My mom is a figure skater, figure skating coach, and currently works at U.S. Figure Skating so I thought she would love the aesthetic. I decided I wanted to use a figure skater silhouette as the main piece above the fan to spin around when the candle is lit, and hang snowflakes down below the turbine. The original two silhouettes I was deciding between are shown here:
Design:
I used a figure skater silhouette as the main piece above the fan to spin around when the candle is lit. Honestly, that in itself does not fall in any of the 20th Century design movements. It most closely resembles Art Nouveau since it heavily inspired by nature and has the elegant curves and silhouettes, but also a little post-modern since it will have just the silhouette of a figure skater in top. My final design sketch is shown here:

Prototyping:
To prototype the aesthetic, I decided I would just use mostly card-stock paper and turn the prototype into something of a craft project. Also, I decided to go for the outdoor skating theme, like skating on a pond in the middle of winter. Thus I kept the coloring to white and light blue. The following image shows all of the materials used to build the final prototype.

I made the fan design in PowerPoint and printed all of the materials on card stock paper at work. The skating silhouettes are courtesy of https://www.pinterest.com/pin/448811919092514459/
I used an old pen to wrap the paper around to hold a nice fit. It also provides stability for the center pillar. Then I just had to cut some of them out and tape it all together. The following image shows the post-cutting but not quite to assembly stage:

Then there was the taping and assembly process which resulted in the following images (without the snowflakes hanging down yet):


From this, I learned a few things. First, the final product will differ from the prototype in many ways. The final product will be made out of a light metal (aluminum) since it is light and inexpensive in thin sheets, so there is not risk of fire using a flammable base. I also decided the sizing of the figure skater is a little large here, so it would be best a little smaller actually. Also, the snowflakes would be awesome as a blue or white glass to reflect and refract the candle light all over the room. However, I would have liked the whole thing to be white without any light blue in it at all, thus I decided to most likely drop all of the light blue. That decision was not actually finalized until a few weeks later, but the seed was planted in my head during the prototyping phase. Although this prototype was not dynamic, it was obvious that weight would matter, thus the materials and methods would as well. Last, I decided on using some sort of mirror or something for the pond to make it seem more like a frozen pond.
Building Process:
Following the determination of project scope were approximately as follows. I started by drawing a first sketch of the product. To do this, I researched “Rotary Candle Holders” on Google and determined what aspects I really like and dislike about ones on the market. By spring break, this project was looking to be in a pretty good place. I worked on it quite a bit before break because I knew the following few weeks would be hectic in all my other classes as well. After I finalized my sketch and prototype, I started ordering parts. In fact, my first wave of parts arrived just before break. This was the first (and only) scope-check for this project. There were pros and cons about where I was for my scope-check right around Spring Break.
The pros:
- I knew what I wanted to build. I had a vision of what my final project will be.
- I finalized my sketch.
- I already purchased the candle (for dimension basis), candle holder, arm, fan, pads, and white or blue paper for under the base.
- I have a list of what needs to still be purchased (see cons list).
The cons:
- I still had to purchase some items:
- Frosted Glass for Pond Base (got from McGuckins after break)
- Aluminum for Skater Silhouette (directly from the waterjet company)
- Snowflake Ornaments (Purchased from Amazon but not in the final product)
- Fishing Line (for Ornaments, didn’t end up purchasing)
- I still had to decide what to do with the glass. Cut it? Also, finish the glass base once it arrived.
- Once the aluminum is purchased, must get it cut (Water jet due to reflectivity).
For the remainder of the semester, it was time to go purchase the final parts and assemble the product. I placed the order for J&L Innovations to waterjet the “Layback Spin” silhouette from above. After a few backs-and-forths for about a week, they came back to me saying the image was not good enough. I tried making the part on Solidworks, but the resolution was still poor and the skater looked too hairy. I ended up having to purchase the rights to a similar image, shown here:
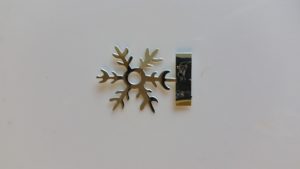
This image is courtesy (well, for $12) of Can Stock Photo. All that had to be added at this point was a bar on the bottom skate, 1″ long by 1/4″ tall. This is shown on the snowflake that came with the rotary candle holder here:

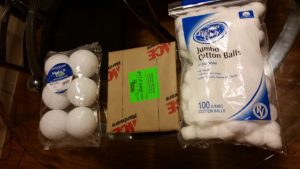
While that part was being cut, I went to McGuckins and gathered all the parts to make the base. They cut me a 7″ x 8″ piece of textured glass out of the scrap pile, then i purchased Styrofoam balls and cotton, as shown here:
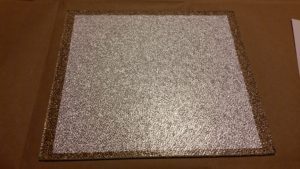
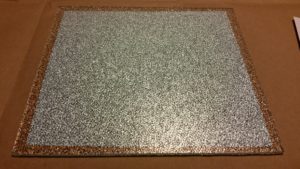
The glass could not be cut any more than the rectangle, so the kidney-shape would have to be achieved using the craft supplies. I started by checking one more time if the white or blue paper would look best under the textured glass:
White vs. Blue
Again, I decided to stick with the white to go with the cotton and white skater on top of the turbine (which was determined later). The paper was attached to the bottom of the glass using double-sided sticky tape, then the cotton and a section of one of the balls was added to the top, also using tape. The original kidney shape design was inspired by Emerald Lake, in the valley of a mountain in Rocky Mountain National Park. As shown in the feature image, the final product has a lot of depth to it and the cotton lends a fantastic snow-impersonator.
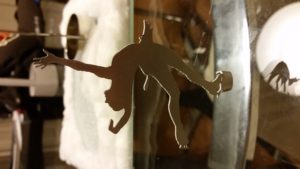
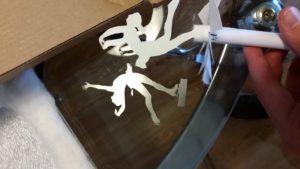
Lastly, the figure skater was picked up from J&L Innovations. The product looks as follows:
Which, in contrast to the prototype:
Side-by-side, the differences are noticeable. The waterjet part had to be cut at 3.5″ tall rather than the desired 2.5″ to keep the details in the skates. Since figure skating was the theme of the whole project, I deemed it worthwhile. As you’ll find out in the coming section, this was not the case.
Constraints:
Initially, I determined that the top 5 constraints to building such a project would be as follows:
- The Aesthetic: I was going for a winter aesthetic. More specifically, I wanted the candle holder to instill feelings of skating on a frozen pond in the snow. I imagine this candle holder will be more of a winter/Christmas decoration than a year-round piece.
- Physical Constraint of Rotation: The fan above the candle must rotate from just the fluid flow of the heated air. Since I want to place a figure skater on the top and possibly stained glass snowflakes hanging down, the fan must be as friction-free as possible. This resulted as the main constraint that lead the final design of the Rotary Candle Holder.
- Availability of Parts: Going off of constraint #2, I originally thought the most likely way to create the rotational fan on top would be to use a bearing. The size of that bearing would have to be perfectly precise, which is why this I never got a bearing to work. This remains one of my main constraints of the project nevertheless, however, because a bearing might have allowed the waterjet figure skater silhouette to work.
- Materials: Since there is fire involved, the materials should not be flammable. This means I should not use wood or paper in any part of the design, just to be safe. This is also not obeyed in my current final product since the waterjet part did not fit correctly. It would also be a good idea not to use plastic as it might melt. Instead, I planned to use light metals for the frame and structure and possibly some stained glass on the hanging pieces.
- Skills and Ability: I do not have any glass blowing or welding skills. I do have skills in 3D modeling on a computer (Solidworks) though, so I used those skills to make a model of the first layback spin silhouette. I was originally thinking of making the snowflakes out of stained glass, but I ended up purchasing ones instead. They were not balanced and I really didn’t like the look of them, however, so they do not appear in the final product.
As it turned out, these held very true to form! The entire process of waterjetting the project ended up being the main constrain to the dynamics, cost, and time. It had to be done since the project had to be made out of aluminum (for safety and the aesthetic), thus it could not be laser cut due to high reflective properties. Originally, to waterjet the whole project would have cost well upward of $100. Instead, Aaron and I worked out a deal to cut just the figure skater for $50 (both Aluminum and stainless steel) and I would buy the rotary candle holder off Amazon for $14, saving a lot of money and countless hours.
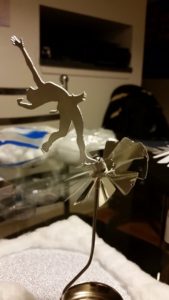
When I picked up the part, she looked perfect! But the balance seemed off just slightly. As it turns out, that’s way too much. The result was continuously this:
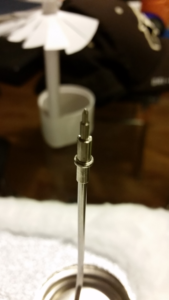
The point on top of the turbine, contacting the turbine looks like:
It is so small and delicate, the slightest misses in balance by the waterjet part would throw the whole turbine off. Thus, the part did not work to it’s intended potential.
Adaptions into the Final Form:
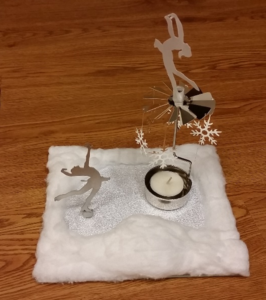
Adaptions were made to produce the final product. The waterjet skater is placed on the pond next to the rotary candle holder, while a white card-stock layback spin silhouette was placed on top of the rotary candle holder. Lamination was added to the parts in contact with the metal to insulate the paper, so it won’t watch fire. The full intention of the dynamic aspects still work with the cardstock skater being surrounded by six thin aluminum snowflakes on the turbine. Here’s how it ended up:
Accounting:
The cost of each component of the project (and where they were purchased) is shown in the following image.

This comes to a total of $86. It came in under budget since the goal was to pay less than a textbook would cost for both this project and the upcycle (the upcycle project cost only about $20). In fact, it could have been far worse it the entire part was waterjet. In that aspect, this was a bit of a bargain!
Final Touches:
That just about wraps up the mechanics and fine details of this project. See “Rotary Candle Holder: Final Report Part 2” for more details on the artistic sides of the project and my future plans for it. Until then, take it easy. Thank you for reading about my main Aesthetics of Design project…


2 Comments. Leave new
It’s a bummer that the piece you worked so hard on does not fit on the top of your project. However, I think that having the ice skater on the ice brings out your aesthetic even better. I think you did a great job with the project as it really does evoke emotions of a winter scene. I hope your mom likes this as a gift, I am definitely considering making something like this as a gift for my moms upcoming birthday. Great work!
Really like how this turned out. It definitely looks like something you could buy from a little shop somewhere up in the mountains. The base elevates the project to another level aesthetically. You put a lot of effort into this and it shows. The only real problem I see is the balance of the skater. One way to remedy this would be to slot the metal piece into the top circular part in order to keep it centered an thus fix the balance. Great job!