Introduction
Overall Description & photos described in detail
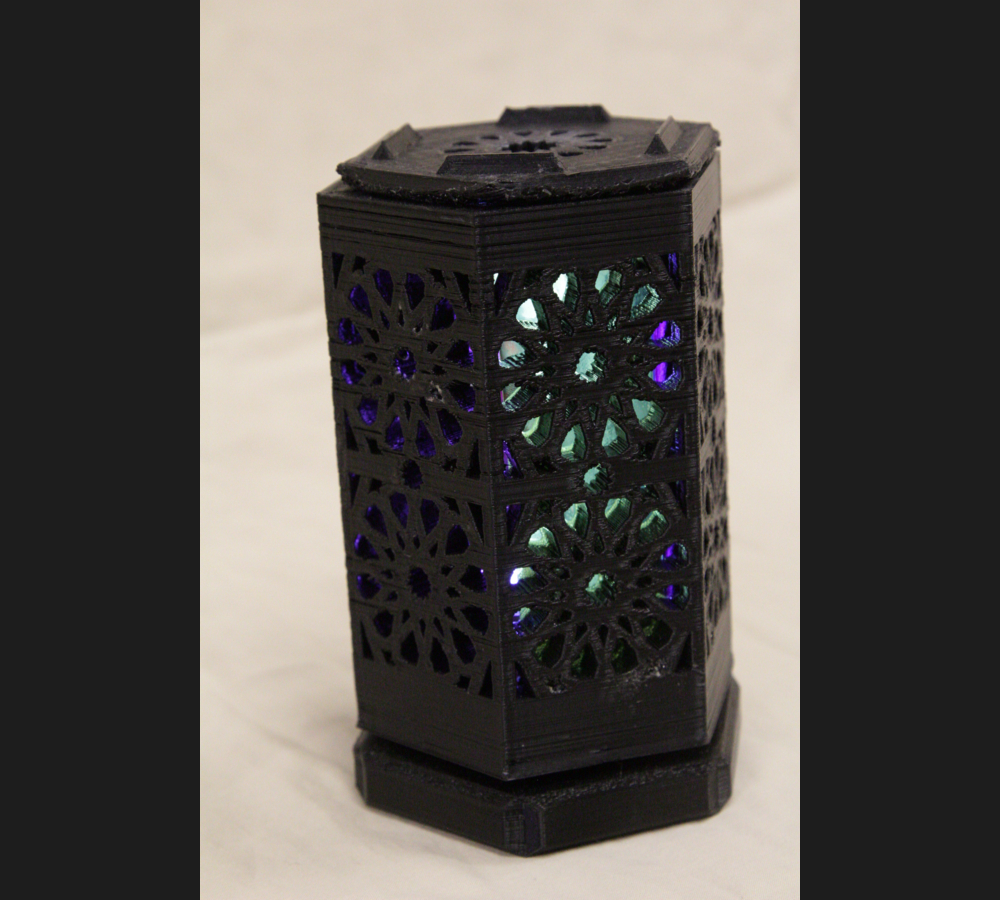
For this project I decided to make a rotating candle holder, inspired by a traditional incense burner called the Majmar. In my country, the Sultanate of Oman the Majmar has been used for thousands of years to burn incenses in a protective and stylish way, like a candle holder. It is made of clay and comes in different sizes and shapes. Here I get the inspiration to combine the Arabic unique design(Arabesque) and the Majmar to make a candle holder with a special touch. The candle holder consists of three parts which are the base, the body and the lid.

Shown above is the candle holder where you can see the lid, body and base(top to bottom).
Aesthetic
The aesthetic demonstrated in the project is the patterned design influenced by old traditional Arabic architecture, and sometimes shown in furniture and paintings. its called arabesque aesthetic and how I see it is that its a very detailed patterned or repeated design that takes simple shapes and repeats them to come up with complicated shapes. I have talked about my aesthetic in previous posts in more detail, click here to read more
Design Description
The design started off simply by sketching the base and the body, at first I had them with a square cross section but to emphasize the aesthetic more I moved to a hexagonal shape.
Sketches & CAD drawings
The following is the final sketch I ended up with after a series of iteration. The designs on it were a draft just to show the idea behind it

As I mentioned before, the candle holder consists of three main parts. I’ll start off by the body, here is where the aesthetic is designed and presented. The way I made the pattern is by designing a single shape and the making it a circular pattern. This includes the diamond shape(repeated 6 times), small flipped diamonds(12), four big triangles on the corners, four kite like shapes and a gear shape in the middle. These shapes are demonstrated below, repeated twice above each other on each face. All six faces have the same patterns. At the bottom, the Body has a 1/4″ hole to be fastened with the base.

To clarify, 0.5″ from the bottom of the body is a solid where the candle sits. The rest of it is 3.5″ tall with the design on.
The second part is the lid, here I got the inspiration of the design from the same aesthetic of the body, it is patterned stripes all around that expose thelighting from the inside. It has an extruded hexagonal shape that is open from the middle.

The next part is the Base, it is hexagonally shaped with frame like design on the six sides. In addition, the base has a hexagonal groove/cut on the bottom in order for me to be able to have a nut secured underneath. Also the base has a 1/4″ hole in the middle for the base to be fastened to the body.


Another part is the colored film sheets attached to the interior of the candle holder. Note that the figure 7 below of the expanded view shows colored film in red and blue since those are the colors in SolidWorks. Regardless, I will have 6 different colors which are red, blue, gree,, yellow, purple and pink, and the reason behind this is that I would like to expose the aesthetic colorfully. Lastly, Assembly view. The following figures show the whole product assembled and expanded.


Fabrication
Note that I did not produce any technical drawing as I 3d printed all the parts except the colored film. Using polylactic plastic(PLA) which is the material used by the printers to produce 3d printed objects, its a type of thermoplastic polyester.
Procedure
- Body, lid and Base were made in the 3d printer. first I had to obtain a CAD and use it to produce those in the printer.
- The colored film came in big sheets(originally 0.05″ thick) which I had to cut to the size 3.5″x1.2″ using a sharpie and an engineering square .

Figure 8: transparent colored film - After that, I glued the colored film to the interior of the candle holder to each side.
- I fastened the base with the body using a nut & bolt fastener. Between them, I have placed a spacer that helps with the rotation mechanism.
- Next, I have manufactured a seat for a candle to be put inside, this is for it to keep the wax from spreading in the bottom surface. I made it out of aluminum metal sheet since it can be a good thermal insulator the thinner it gets. Note that this piece is not very necessary in this case, since I am going to use light candles and not real candles. Shown in the following figure.

Figure 9: Candle Seat - I am waiting on light candles to arrives so I can put one or two inside for demonstration. This is because the material inside(film) cannot handle heat from a candle unless it is protected by a layer of a good insulator.
Costs vs Budget
The budget I was expecting to use was ~$100 maximum as I was planning to implement a motor mechanism in the base that rotates it, as I saw that wasn’t very necessary I did not spend that much. Spent $12 on the PLA, $11 on the colored film and $9 on the light candles since I had to buy a bunch of them, which totals to $32. I am fairly happy with the price since it didn’t cost a lot to produce the candle holder.
Acknowledgement of assistance
I would like to thank my instructor for her advice and for giving us this opportunity, the pod members I have on their critique and the ITLL staff for the help and support.

