Click here for a video of the presentation. Most of the slides can be found below.

I originally considered a very different project… I am a fan of the Metal Earth series of miniature models laser-cut from thin sheets of steel, so I had planned to design and cut my own out of aluminum beverage cans.
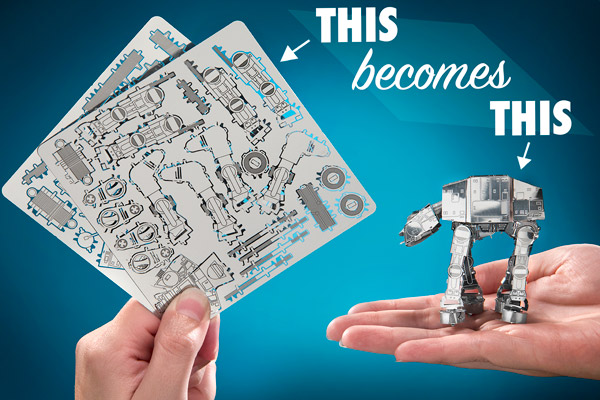
That turned out to be rather untenable: trying to decide between cumbersome hand-cutting and expensive laser-cutting with lots of SolidWorks design hours. You can see below the loop back in my design process from having to rethink this one.
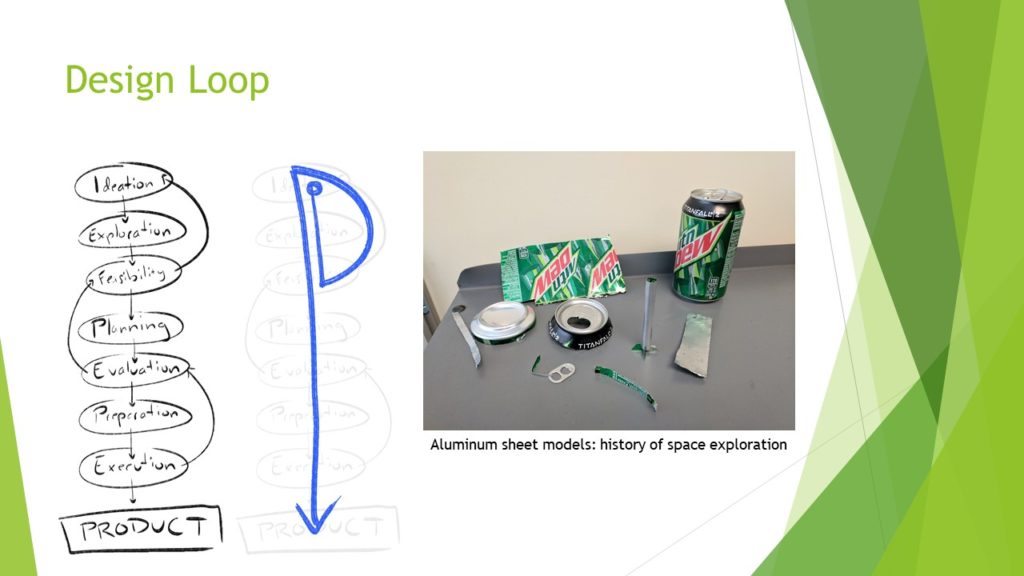
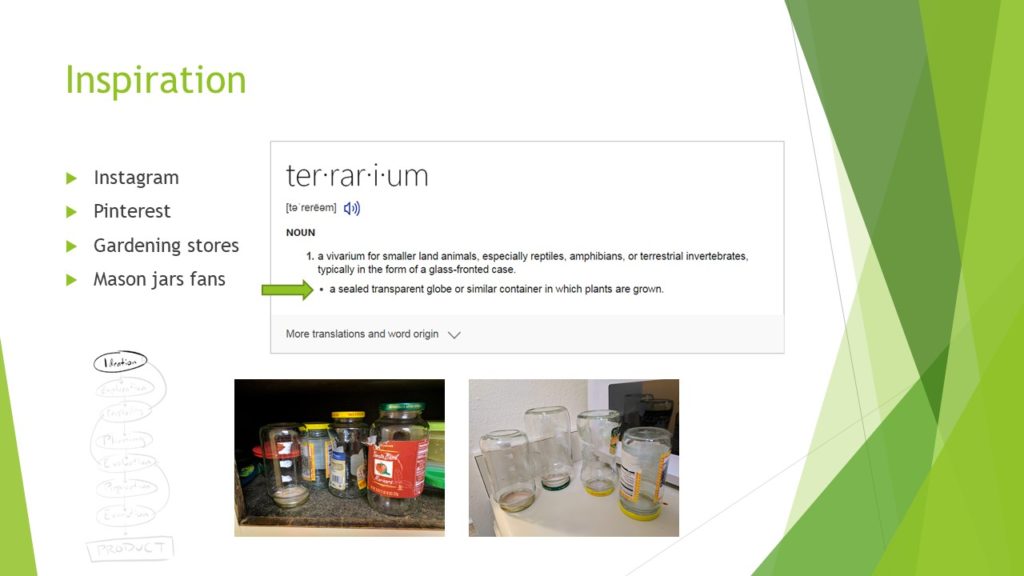
So I scrapped that and kept my mind open for another subject. The idea of terrariums came to me when I was going through my tupperware—I have a lot of empty jars. I’ve always wanted to make a terrarium. OMG LET’S MAKE A JAR TERRARIUM! And since I have several unique sizes and shapes, let’s make a cute little batch of them.
This is what I call Ideation in my Design Flow Chart: the selection of a concept. This is sometimes broken down into brainstorming, ranking, decision matrices, etc. For me it was rather simple, as the first idea of scrap aluminum came quickly and seemed reasonable. When I returned to this stage later, the idea for terrariums was a realization while looking through my cupboard that my jars could be cleaned and used as containers to make the terrariums I’ve wanted to build for a few years now.
Most green plants create oxygen by taking in carbon dioxide during the day under the process of photosynthesis. However, at night photosynthesis is impossible and they switch to a respiration-dominated cycle, breathing in oxygen in the absence of light. This means they can breathe in at night what they breathed out during the day and don’t necessarily need to be open to fresh air. Ferns and ivy especially are great at surviving in an enclosed environment… moisture is recycled, air is reused, and they require very little nutrients from the soil. The only energy being added to the system is sunlight.
This means that small ecosystems can be created in sealed jars, never opened. The oldest terrarium in the world was last opened for watering in 1972! This realization spurred me on my design journey to make terrariums from my old sauce and salsa jars in the cupboard.
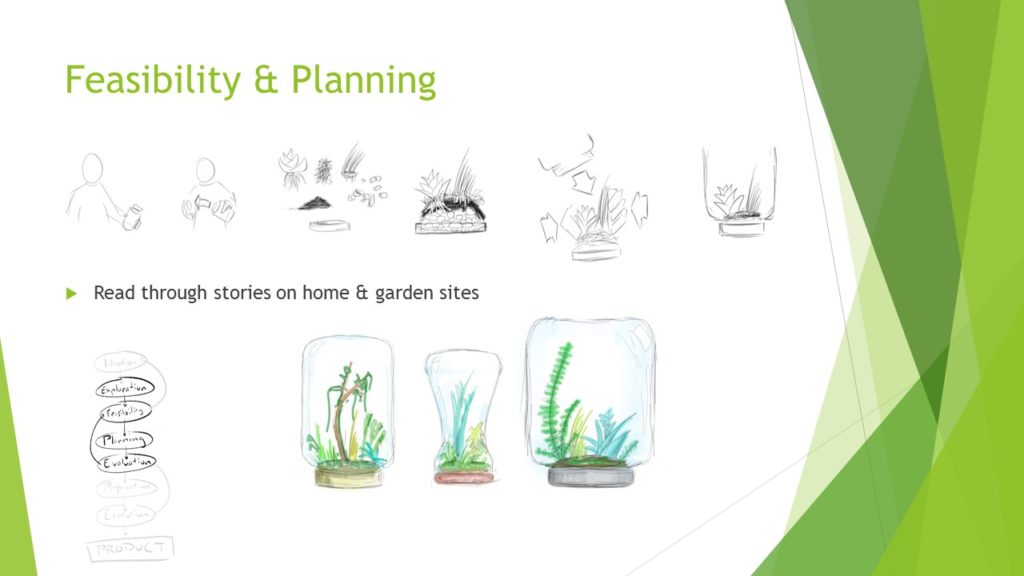
I was pretty intrigued by the use-case sketches we went over in class, so while we were talking about that I decided to try my hand at those sorts of illustrations. Above you can see a person taking the jar apart, gathering ingredients including soil and rocks (so that the water can drain down below the roots without drowning the plant), then arranging them and inserting them into the jar.
Exploration was the stage where I looked at these processes involved from a very rough perspective. When I was considering sheet aluminum models, I took cans and cut them into sheets, trimming shapes from those sheets. For terrariums, I took what I had and researched similar projects online.
Feasibility was the critique stage of Exploration, where I reviewed what I had learned. Aluminum sheet modeling was discarded at this stage because of the difficulty of cutting the aluminum by hand (accurately) and the cost and design effort required to use a laser or water cutter. Terrariums passed this stage because of the accessibility of the materials and stories of similar projects online.
Planning is the stage of taking stock of my equipment, finding resources for the missing ingredients, budgeting the purchases, and finalizing layout sketches and diagrams of the project and the creation process. This was my stage as of the progress report blog post, Upcycle Progress: Jar Terrariums.
Evaluation is my name for the critique stage of Planning, where I consider the work to be done to ensure the tasks are realistic and achievable, and that the project has had limited scope creep. Problems at this stage may mean a loop back to Feasibility is required. But I didn’t see any issues at this point, which means onto the next step!
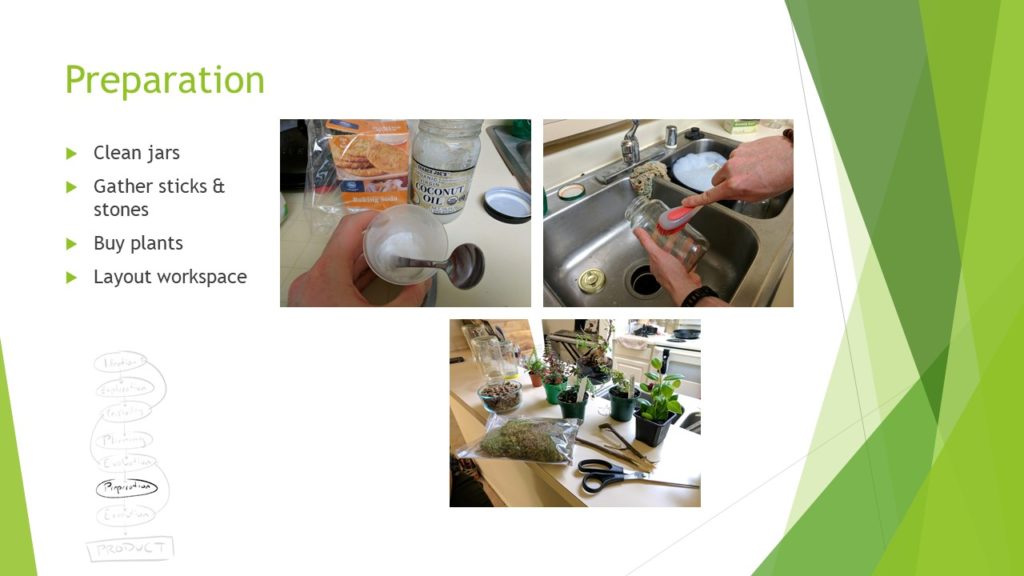
Preparation was the stage of gathering scrap ingredients (dirt, rocks, sticks), discussing with the experts at Sturtz & Copeland in Boulder, buying anything living (so, all the plants and moss), and setting up my workspace. I also had to make my own “Goo Gone” because I got home without any and the jars had sticky ick on them from the adhesive labels. Who knew baking soda and coconut oil was all you needed! Anyway, at the end of this stage I was all set to create.
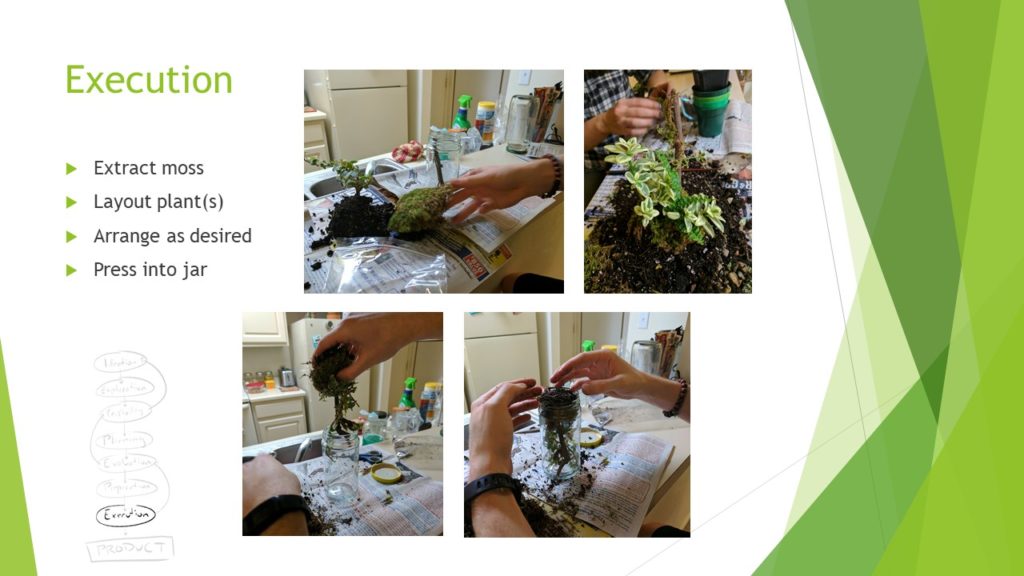
In Execution I had four jars to work with, plus a few more in the cupboard still with labels in case something went wrong. That meant I could experiment a bit and not have the exact process totally defined. I started with the smallest jar because the mouth was about the same size as the rest of the container—I figured this would be the easiest one to learn on because I wouldn’t be trying to stuff a large amount of moss and sediment through a small opening into a larger space.
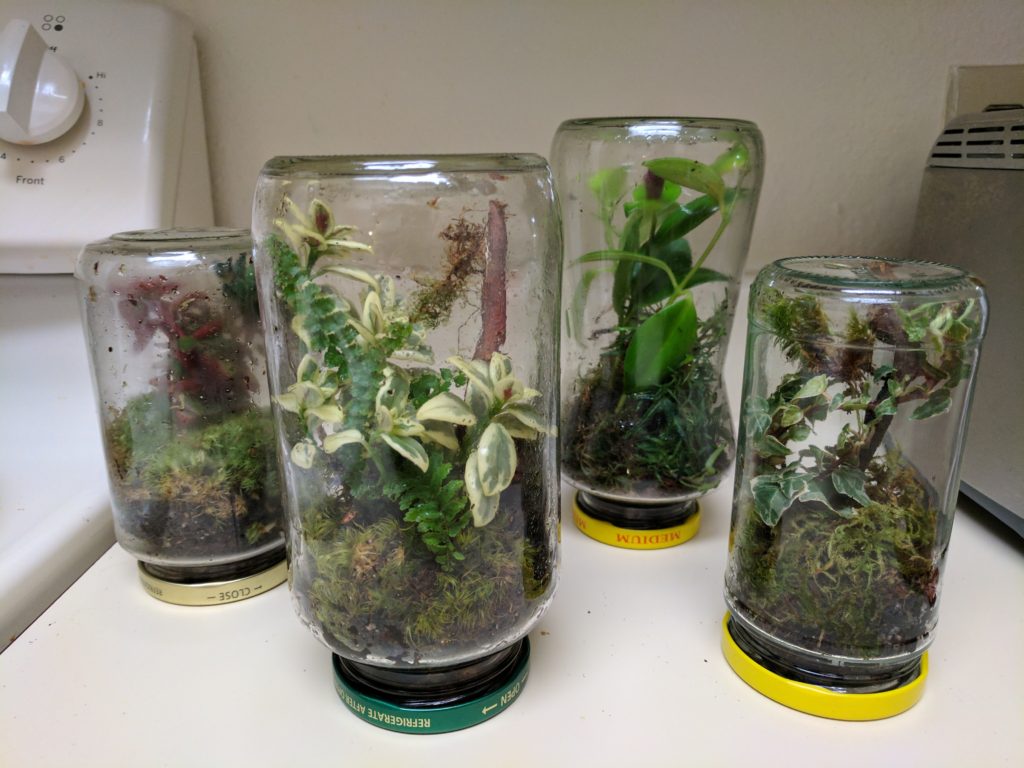
I was right. This was a simple terrarium to create. I arranged the pieces how I wanted, pressed the layers of moss and soil close together (that’s the only way the moss will survive), and lowered it into the jar upside-down. Then there’s the layer of rocks for drainage, and finally about a shot-glass of water (not too much so that the roots don’t drown). Everything went smoothly and I was pretty excited! You can see the first one in the slide below.
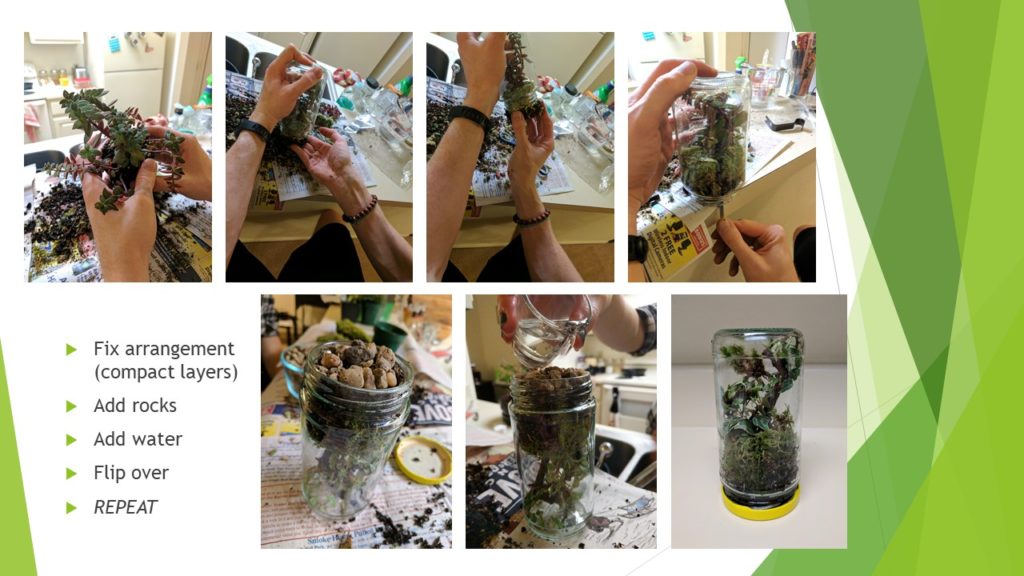
The next two were rather difficult… the small mouths of the jars were difficult to get the dirt and moss (good lord, why was the coolest-looking moss the hardest, thickest, firmest??) and there wasn’t quite enough room in the jars for the foundation and the plants. But I got them, and even though they’re not my favorite they still look pretty good. I especially like the thick moss that resembles a small grassy hill—extremely cute little snapshot of a tree in a park.
The last one was the best, though. The jar was the biggest and I had already learned some tricks on the other three, especially with the help of my girlfriend, Isabel. It was her idea to use an Allen wrench to reach in and pull down on the moss to keep it pressed neat and level against the soil. So on the last jar (green lid in the picture below) we took moss, two different plants (one fern, one ivy), and a stick and arranged them in a pile of dirt on the newspapers. Then I lowered the jar down over the plants as in my original sketches, just without the lid. Stuffing it up into the jar kept everything level and interwove the branches of the fern and ivy in a beautifully intricate manner. I had stuck some moss on the stick so although it will likely turn brown without being in contact with the soil, it gives it the look of a tree or a jungle fine. It’s a beautiful little ecosystem.
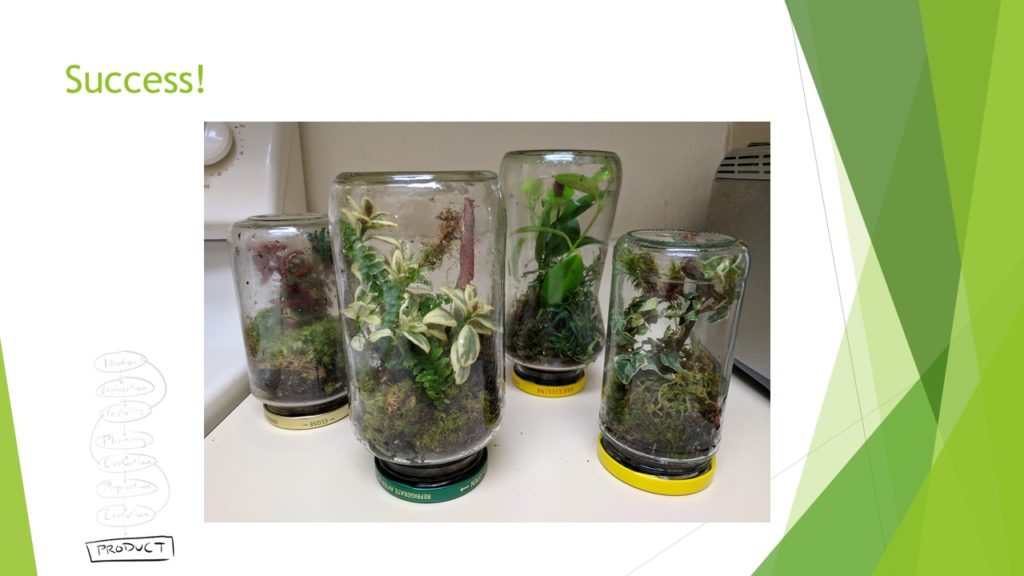
I hope these will last quite a while. I doubt I’ll get years, but although the flowers have already fallen down from the only plant that had flowers, the plants themselves still look strong. It will be interesting to see how large they grow considering they’re restricted by limited air, space, and water. I’m sure it will regulate itself… as soon as it starts to get unhealthy, it will be unable to grow and so scale back naturally to fit the environment it’s in. That seems to be the way with these.
Hurray for ecosystems in jars!
P.S. One of my favorite things about this project is that not only were the inorganic materials for this project recycled, but the plants themselves are participating in recycling… taking in only sunlight, they recycle water and air to survive! Meta upcyclery.

13 Comments. Leave new
This is really creative and a great idea for an upcycle project. It would be cool to use some colorful flowers so that they are a bit more aesthetically pleasing but it is still very cool. I also like your original idea of the mini laser cutter statue and i understand well picking a project with an un realistic scope.
Great idea! I like that your project is ‘alive’. I appreciate the skill involved to make this project!
Props for having multiple versions and variations of the terrainums
This project is really cool! I didn’t realize that plants could survive in such an enclosed environment. It’s fascinating that your terrariums recycle nutrients entirely within those environments. I’d love to try and make terrariums myself after seeing yours.
Using different jar types and shapes is a challenge that you overcame beautifully. I like how you discussed how your process differed from jar to jar. The aesthetics for this project are very organic and well thought out. Given the opportunity would you try to incorporate more color into this project? Was the amount of dirt and rock an esthetic choice or a necessity? I like how you chose an idea and stuck with it from the beginning — it gave you the opportunity to create your terrariums and fix them up exactly how you wanted them.
Different colors are difficult—partly because pigments require additional nutrients and this is a closed habitat, and also because the plants that are able to breathe and recycle water in this environment are not usually very colorful. I tried to get light and dark greens, large and small leaves, and the one flower plant I picked did have the flower fall off after a few days 🙁
The amount of dirt was a necessity for the roots and water.
Your ideation sketches are very lively and clean. I made one of these back in high school, but mine did not turn out as beautiful as yours did! They remind me of Jurassic Park. Your presentation was very clear about the design process and building them. It would have been nice to learn more about the research you did for deciding the plants and materials you used.
Your sketches are great! I really like your walk-through of each phase of this project. This is a creative modification to other terrariums I’ve seen out there and really like the miniature aesthetic. It’s really interesting that these enclosed terrariums create their own water cycle and am curious how long the plants live.
Even though looks like a lot work, seems like you had fun working on your project which is great. The moss really looks beautiful inside the jars. Awesome work.
Thanks dude, I was happy with it!
I really like your project and would be interested in making my own terrarium. I have glass bowl terrariums hanging in my room, and I really enjoy them. The organic aesthetic brings mother nature into my room, without taking up too much space. Nevertheless, your original idea of ‘steel earth’ would be really interesting for your final project. The time commitment for a sheet metal figure would be more appropriate for that project.
I like the illustrations to show how you created the terrarium. Your documentation is also very thorough and well detailed. Love the final product!
Love love love! If you couldn’t tell from my nail and thread art, I enjoy nature and floral things, so your project really appeals to me!
Your illustrations were very nice, too. Using color in them really made a difference.
Thanks for the inspiration; I might try this. They would look great next to some succulents, if you want to made a bigger indoor garden.
Yeah I highly recommend giving it a whirl, or even a “fairy garden” without the enclosure—it lets you use a greater variety of plants but then you have to tend to it and water it and whatnot. Either way it was a lot of fun. Miniatures are my favorite, and these are kind of miniature ecosystems.