PROJECT INSPIRATION
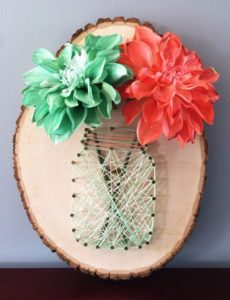
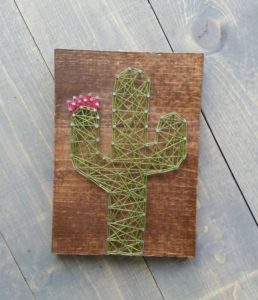
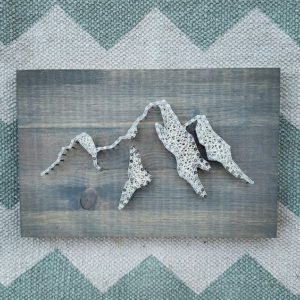
Photo sources:
pinterest.com/pin/470344754815433809/
pinterest.com/pin/237635317816986795/
pinterest.com/pin/305822630929377089/
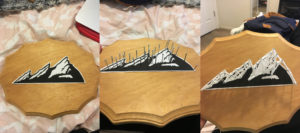
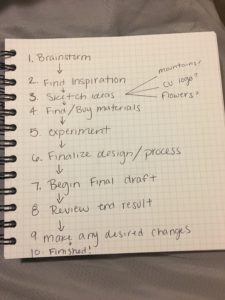
I do not come from an engineering background or area of study, so a design loop is kind of new to me. I do almost all of my creative work digitally through programs like Photoshop and Illustrator. So when I envision something I want to create, I kind of just jump in after some brainstorming. Doing digital work makes it really easy to just experiment and then undo anything I don’t like, so I’ve never had a process like this before because I never felt like there was really a need for it. Doing work with real objects though, is not as forgiving as the Adobe Illustrator eraser button.
For my up cycling project, the biggest area that needs planning is just the actual design that I will choose to create. I needed to decide how elaborate of a design I wanted to try to make. After that, the hammering of the nails into the wood and the threading around the nails is pretty straight forward. Therefore, my design loop process is also pretty straight forward and easy to follow.
Luckily, I went home to visit my family this weekend, and my mom (a big fan of arts and crafts) had all the materials I needed, except for the wood. I was planning on using recycled wood, thinking the distressed wood could give it some personality, but in the end I decided to buy the wood so I knew what quality I was working with.
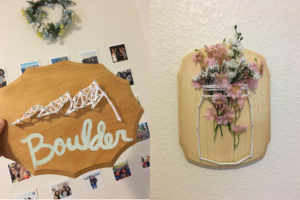
I don’t think my neighbors were very happy during the creation phase. The hammering of the nails was very loud. I also only had access to nails that were all different sizes. It was difficult to get them to sit at the same height. After that, I went about the threading without any sort of strategy. The end result is still pretty good, but I could have found a more structured or patterned way to finish the designs. Some threading techniques are more visually pleasing than others, and mine was very random.

12 Comments. Leave new
This is an awesome project. It came out really well and is very aesthetically pleasing. I like how you used the printed out image of the flatirons to assist in the placing of the nails. That is not something i would have thought of and is something i will definitely use in the future.
This is awesome! It came out very well! It was very smart of you to print out the picture of the flat irons to assist you in your design, that is not something that I would have thought of that and definitely learned from you. Your project is very aesthetically pleasing and is way better than something I feel I could do so you have inspired me!
Looks awesome! I’ve tried those myself, not as easy as you made it look. My string selection was bad (too big) and the nails weren’t right (too small) so I couldn’t get the profile I wanted. I would be really interested to see more colors of thread used, so don’t let this stop you from doing more!
Beautiful art! The use of thread in your nail art was visually compelling
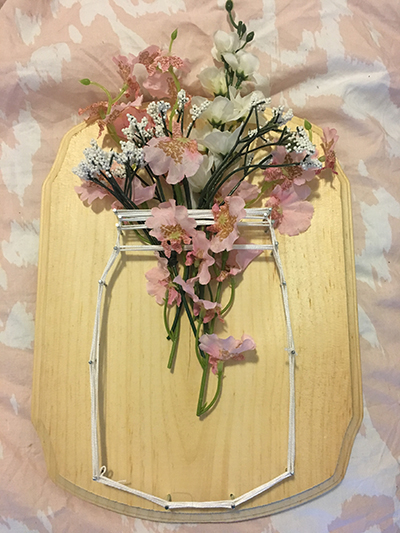
I really like how you took what elements you had around to start formulating your design. You said you didn’t have much of a strategy or pattern for stringing the nails, which makes it clear that there isn’t only one way to do or interpret this project. Putting the flowers in the stringed “flower pot” is a really creative idea and I actually think the lack of density is what makes it aesthetically pleasing. Since the mountains have such distinct features, do you think having a pattern for stringing would drastically change the aesthetics of that piece? Would it change your design loop? Overall this is a really cool idea and your enthusiasm to jump into the design process is definitely shown in your final product.
I have seen these before and own one that is the shape of the Minnesota outline. The flatiron one is my favorite of the two, because its almost an abstract for of them. I think it would be really cool to add the shading of the flatirons to give it more contrast. For the presentation, I liked that you used mostly images to describe the design process. They turned out great!
Its interesting how you talked about the deisgn loop, and having never planned out a project before. A design loop can be any combination of steps, redos, ideation phases, prototyping, testings, etc. All of the stages mentioned can be attributed to your design loop. Old wood, drift wood perhaps, would have been a nice choice for the background. It is more worn and interesting than purchased wood.
I should say I really didn’t know threads could be used to produce wonderful pieces of art. Did you consider using different color threads to bring out the aspects like shadow? Nice work.
I like how you worked with the supplies you had in your home, which is the true nature of an up-cycle project. Since you’re new to the design loop, I thought it was cool that you addressed how you improve it and the material choice. Great finals products and impressive that you completed two!
Great walk-through on your design process and the actual physical process of making the nail art. I haven’t seen too much of this style of art but it is very interesting! I think you did a great job with your pieces and it was an awesome idea to create two of these. Sounds like you have a few good ideas for future pieces and I hope you get to make them soon!
I really like the integration of the flowers with your nail art. The contrast of your 2-D pattern with the flowers is an interesting aesthetic. I really like the color scheme and it very pleasing to the eye. The idea of hanging it is cool and it would make a great decorative piece.
Humor was a good tool in your presentation. I loved that even though you’re not from an engineering background, your process was similar to mine!