Inspirations:
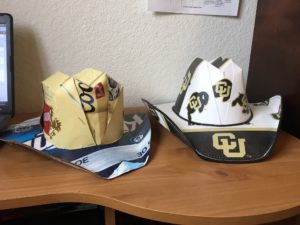
I had a very clear inspiration for this project. I got the idea from a cowboy hat I already own, shown below. I love this hat, and I knew I could make my own. I decided this would be a great venture for me to try for this project. I also poked around online and found that other people have made hats out of beer boxes just like me. I saw a lot that I liked and a lot that just looked like a heap of cardboard badly taped together. I wanted to add new flare and style to the hat I was making.
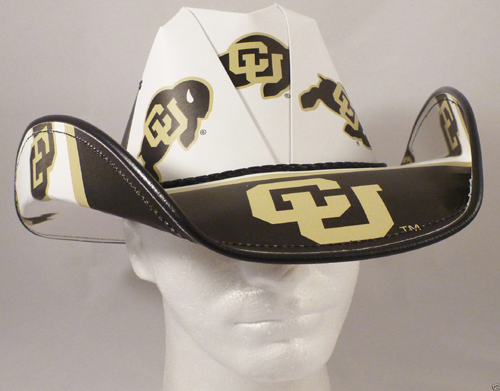

The majority of hats I saw were a lot like this one. I wanted to make mine more of an authentic cowboy hat, and not just random beer boxes put together.
Vision:
My biggest artistic goal in this project was to not make this look like an elementary school craft. I really didn’t want exposed brown cardboard, glue dripping, tape all over, and ripped, torn cardboard. I wanted this to be something I would actually want to wear, and not something a kindergartner brings home to show mom. I wanted a clean hat with crisp colors and new looking cardboard.
The aesthetic I decided to go for was a redneck, country, tailgate, Toby Kieth feel. I wanted to do something that is more lighthearted and fun.
Design Process:
I knew I had to be very careful with my design process. I had one box that was pristine and perfect. I knew it was the box I wanted to use, so I had to be very careful not to cut it or fold it in the wrong spot to where it would become no longer usable. I was overly cautious when creating, and followed the old rule of “Measure twice, cut once.”
I used to love origami, so I knew I would have some familiarity when it came to folding, but I have never folded anything out of cardboard before. It was a new challenge for me. I used the hat I already have and kind of “reverse-engineered” the top part of the hat. I looked at where the cardboard was folded and the way it lined up. I used a box knife to cut away some of the box and make appropriate slits so that I could overlap the cardboard in the right spots.
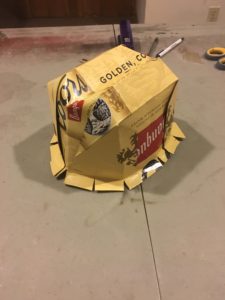
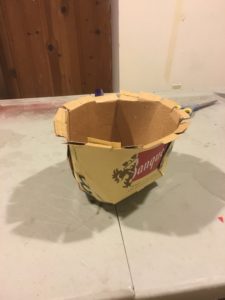
It was hard to take pictures before this point. The way this was made was through one big fold. I was trying to hold it together and take pictures at the same time, but it didn’t really work well. I needed two hands to hold it together and staple it down so that it wouldn’t fall apart. This is the point where it really went from just a piece of cardboard to a hat shape.
One road bump I hit at this point was keeping the hat together. My original plan was to use glue. But as I was holding it all together and waiting for the first joint I had glued together to dry, I realized it wasn’t going to work. I would have had to find a way to glue all the joints and then hold the hat together while it dried. I also found that regular glue does not work well with the glossy finish on the box. I decided to abandon glue and go to staples. I had wanted to use glue because I figured that once it dried it would be invisible, and I was worried that the staples would stick out and be visually distracting. Luckily, it turned out that the staples blend in pretty well. I think it actually made the project better. Now none of the cardboard got soggy from the glue, and the staples will do a better job keeping it together in the long run.
The next step was making a brim. I didn’t have another box of the same brand or color, so I decided I would have to mix designs. Initially, I was worried that colors would clash, but they actually turned out to match about as well as I could hope for. The brim was also a challenge for me. A big concern for me was not having any exposed brown cardboard, and I didn’t know how I could do that with a brim. Then I had an idea to create two identical ovals and put their brown faces together, so that colorful sides of both were exposed.
This was the part where I had my biggest setback. The first box I cut for the brim was nowhere near the right size. Luckily, I had another thirty-rack sized box.
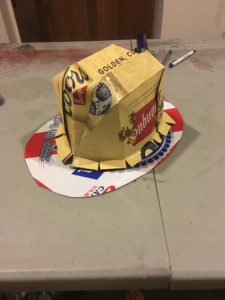
With my next box, I knew I would need to cut it a lot bigger to make a real looking cowboy hat. I’m actually a little glad that I messed up this first box and hat to use another, because I think the color scheme benefited.
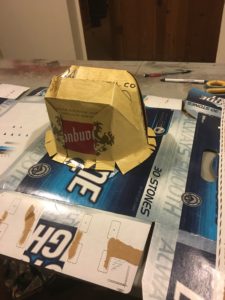
I used this box to implement my double-sided brim plan. I cut out two near-identical pieces to match up. On the top one, I had to cut out a whole the size of the hat frame so that I could slide it over. For the bottom one, I left it fully intact and just matched it up with the one on top.
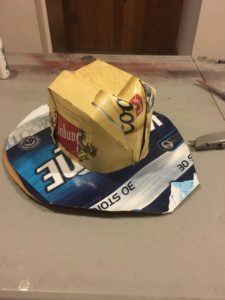
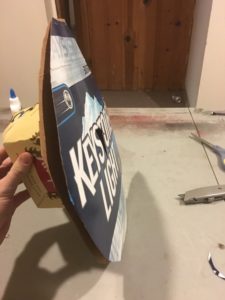
After I had these lined up, I had almost completed the hat. I just had to staple them together, and then cut a whole out of the bottom for a place to put my head.
I also went around the brim and cut off any spots where the two ovals didn’t line up exactly and there was cardboard exposed. I think this was a big component in making it look less like a craft.
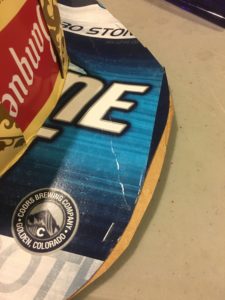
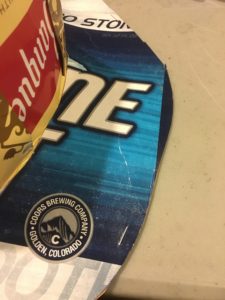
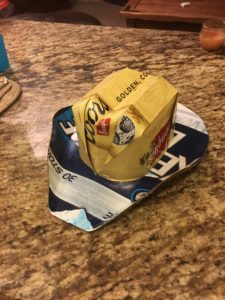
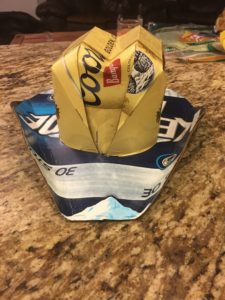
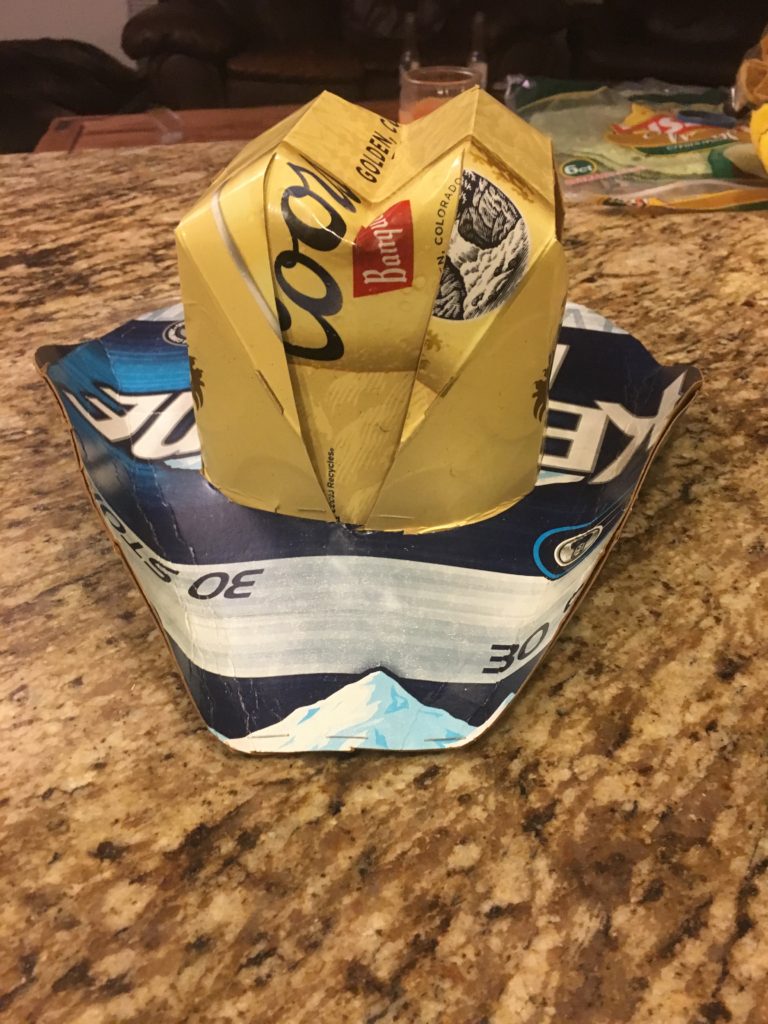
Finally, I just stapled everything together to make sure it would stay. This is the final piece.
Functional Goals:
I fell short in one aspect of my functional goals. Unfortunately, I made the hat too small and it doesn’t fit my head well. However, this was a design choice I made. When I originally folded it together, the folds were a little loose and sloppy. When I tightened them up to make it look better and stay together more, I unknowingly made it too small for my head. I’m really not too upset about it though. This was my first time making a hat like this, and I knew I would make some mistakes.
I am very pleased that it stays together. I intended this to be more of a display piece than an actual hat I would be wearing often, and it is sturdy enough that I don’t think it will be falling apart anytime soon.
Artistic Goals:
I am very happy that it didn’t come out looking like it was whipped together for a craft fair. There is minimal exposed cardboard, no glue spots, no visible random tape, and no loose cardboard.
I am also very happy with some of the finer points of the aesthetic. Right along the top of the hat it says “Golden, Colorado.” There is also a logo on the brim that says Golden. There is a can right up front, and matching logos on the side of the hat. The way that the designs and colors line up worked out really well. It is a fun, party-themed hat that in an interesting relic. I think I achieved the aesthetic I was going for.
Next Step:
I will probably display this hat somewhere in my house. This was kind of like a practice run for making these. It turned out great, but not perfect. Maybe I can try again and make one that will fit my head and I can wear at parties. One of my roommates saw me making this and mentioned that he wants one. It was fun to make, and I can easily get more materials and make more of these hats if I want to.
Video Link:
References:
[1]. http://www.redneckbeerhats.com/shop/page/3/ [2]. http://www.thegreenhead.com/2007/03/recycled-beer-box-cowboy-hats.php
6 Comments. Leave new
This is sick! You should see if they will let you run with Ralphie with this on; maybe if you make a bigger one it would work. This type of hat would lose its structure/shape/color if it got wet, is there some kind of spray or coating that you could use to waterproof the hat?
What an amazing formation you have created! Working with cardboard to create such organic shapes with such natural curve is no easy task. I think it’s cool that you played off of your childhood origami making skills.
Like I mentioned in class, I believe this to be a fascinating opportunity to look into partnerships with various beer brands. There might also be room to branch out into creating other shapes with their beer boxes.
Also, wanted to mention that I love the intentional placement of Golden, CO and the mountain at the front. Awesome job!
Most people, including me, probably don’t even consider clothing when thinking about this project, so this is a really cool idea. You could start your own hat store if you continued with this. Great job.
Hat came out great! Even though it’s a little small I think it’s still a great piece for what you were going for. I have no idea how you were able to manipulate the cardboard into the shape it is and I think a howto video would be awesome.
Wow! Amazing upcycle project, and I like the country beer aesthetics. The folds and construction are fantastic, and very well planned to not be craft like, but professional looking. Great job!!
Great Idea making the hat. It’s a shame that it’s a bit small for your head but its still a great project. I’m still interested to see how the folds were made in the upper part of the hat. Seems like it would take a lot of trial and error.