I have made a lot of progress this week by building the wind up toy’s skeleton, but there is still a lot more to do before the ITLL Design Expo (4/23/2016)! First I began the week by going to the ITLL machine shop to start the fabrication process of my wind up spider toy and putt together the system’s drive train mechanism to get it functioning.

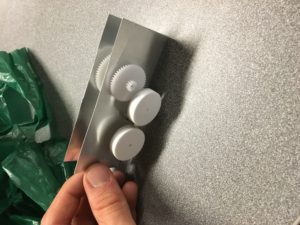
I drilled out the holes in the aluminum sheet using a CNC mill for accuracy and tolerance, then used the sheet metal bender to get decent 90 degree angles. Here I used again 22 Ga aluminum sheets. The sheet metal was bent into a U-shape, so I wouldn’t have to use fasteners. But this became a major issue when I tried to put the gears on.

This is a photo of my first design iteration. The gear on the side is what I used to make the wheels turn. (Yay! My project kind of works!) There is a lot of friction in the drive train, so I need to do some trouble shooting.

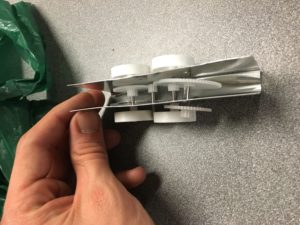
A photo to give you a visual of the inside. The spring hasn’t been added yet, so its a manual turn system at the moment. The aluminum sheet was causing me a lot of tension, so I need to move up to a thick gauge of aluminum sheet.
~CAD design of wind up toy coming soon~

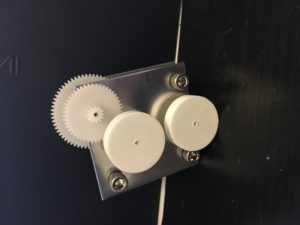
Here is the second iteration of my design, and these holes needed to be CAD so the tiny tolerances of the plastic gear teeth can mesh up properly. The square blanks are still made out 16 Ga aluminum sheet metal, and they were cut to size by the sheet metal bender.

Here the second wind up toy design assembled. I used fasteners to have it easier to disassemble the plates for trouble shooting and this better captures the industrial aesthetic that I trying to mimic. There is still no spring mechanism inside, but the machine’s gears ran a lot better. Although, the wheels cause interference with each other and the device is a little too small.
Last week, I tried to destroy some old toys from goodwill, and reuse the aesthetics part of my project. I thought this method would be faster and cheaper than both 3-D printing and casting, but it turned into being too tedious, took a lot of time, and ended up not being aesthetically pleasing to view. My orginal intention was to make the spider toy look scary, instead the end product looked like something a toddler would make so this approach had to be scrapped. This meant that I needed to think of a new method to constructing my spider shell aesthetic piece. I decided to go with the alternative method of casting with rubbers and plastics, because of a previous guests on clay sculpting made the process seem relatively straight forward and I managed to purchase all my aesthetics supplies by going to the local art store on the university hill (MEININGER).

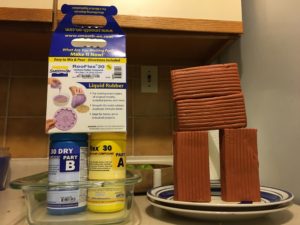
To the left is the silicon casting chemicals, (not recommended to do indoors) I am going to use to make my spider shell aesthetic. The red clay to the right, is my molding material to pour the silicon material over. It will take 16 hours to set and it must be in a well ventilated area, so that is going to be problem in my apartment because the ventilation is horrible.

2 Comments. Leave new
Definitely don’t want to poison yourself! It’s sweet that gears work, looks like the functional part is done for the most part. How exactly will the spring change the manual turn system?
Wind up Spider Toy is such an interesting name… I don’t think many people would put spider and toy together and talk about the same thing! I’m excited to see how you tackle this juxtaposition of the two.
Keeping with the Spider and Upcycled toy theme, I wonder if painting your finished product black would add to the scary factor. You said it came out too friendly… maybe it just needs a coat of mysterious black!