Introduction
This will be the first installment of a two-part report, chronicling the design and production of my final project for Aesthetics of Design, the Personal Tattoo Machine. Within this post, you can expect to find detailed explanations of the decisions I made over the course of this project, in addition to how I produced several of the project’s components, and finally, any changes I would like to make to this design for subsequent iterations.
Inspirations
To begin, I drew the majority of my inspiration from the final project of a graduate student at the prestigious Royal College of Art in London. The student, Jakub Pollág, spoke about his own inspirations for the project; he recognized how personal and intimate a tattoo can be for an individual, and so he wanted to put the power of creation into the hands of the consumers: to democratize the art of tattooing. To do so, he designed and built a beautiful, personal device; one which was designed from the ground up for people without any experience with tattooing to learn with. Being a person who has professionally administered tattoos, as well as ones that were either inked on my skin through the hands of amateur loved ones or from my own trembling fingers, the idea of a personal tattoo machine, which would take the art of DIY tattooing to a whole new level, was something that I was, needless to say, very intrigued by.
And so, I decided to make my own. But I wanted the device that I created to be not only a solidly functioning piece of hardware, but also one that would be so compelling, it would be demanded to be picked up. To do so, I turned my attention to another major form of inspiration: the products of electronic musical instrument company, Teenage Engineering. I’ve been admiring Teenage Engineering’s products for several years now (and hope to someday own one of their magnificent OP-1s), but additionally, I’ve been admiring their approach to design and their corporate persona. Teenage Engineering accomplishes something with their products that many other companies of varying disciplines fail to achieve time and time again: they make a product that looks fun to use. And what a revolutionary concept in regards to a musical instrument? In my humble opinion, instruments are notorious for being very intimidating, and what I mean is that I would never describe an oboe as being particularly inviting. But Teenage Engineering use design cues which allow their products to achieve a level of unparalleled quality, while also having the playful wonder of something like a children’s toy: and I think it’s fantastic. This is the type of design that I wanted to channel into my own project.
Overall Design
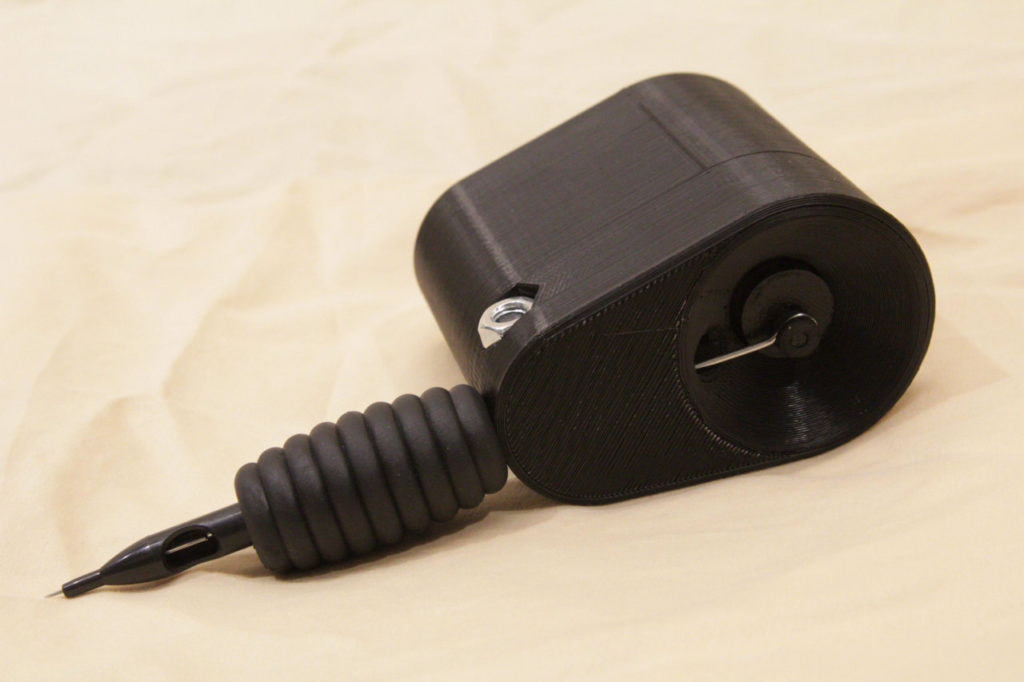
The design of my tattoo machine was formulated around the off-the-shelf parts that went in to make up the electrical and mechanical components of the system, and the vast majority of the design work went into creating an enclosure for the components, and into crafting the cam-piece which allowed the tattoo machine to perform its most basic function: moving the needle up and down.
Autodesk Inventor was used to design both of these components, as well as to model the entire system. Computer-Aided Design was an integral part to the project overall, being that it allowed me to design how the entire system would fit together before doing any physical craftsmanship on the project. One problem I ran into in doing this was that, for many of my components, there wasn’t significant or readily available dimensions online, which meant that I had to purchase many of my components on a whim in order to model them in Inventor and build the system model before performing any fabrication. Furthermore, this meant that if any of my components did not provide the requirements necessary for my system to function adequately, I would have to purchase a new component, and redesign my entire system in order to get everything to work properly.
Figure 1: CAD rendering of the Personal Tattoo Machine Assembly
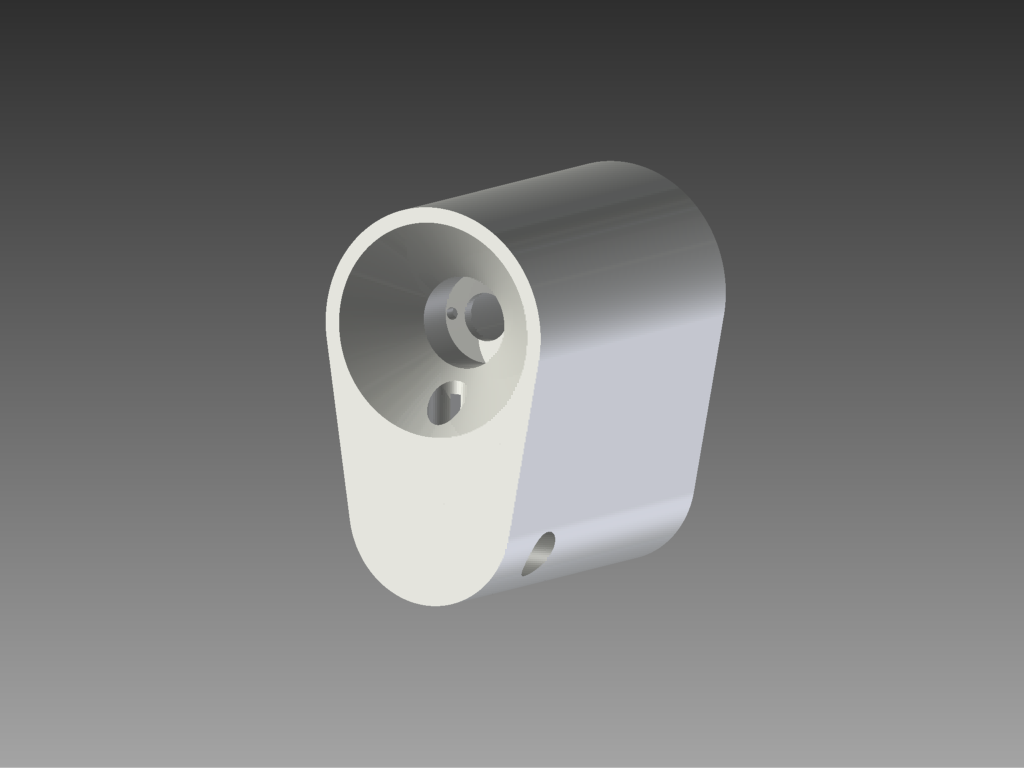
The enclosure itself was designed to contain the entire system, but was not intended to create a “black box” effect. By the “black box” effect, I mean creating a physical barrier between the device and the user, which creates a sense of ambiguity in the functionality of the device. I still wanted users to understand the goings-on of my project, regardless of their technical background or experience. A rendering of the enclosure can be viewed below:

Figure 2: CAD rendering of the Personal Tattoo Machine Enclosure
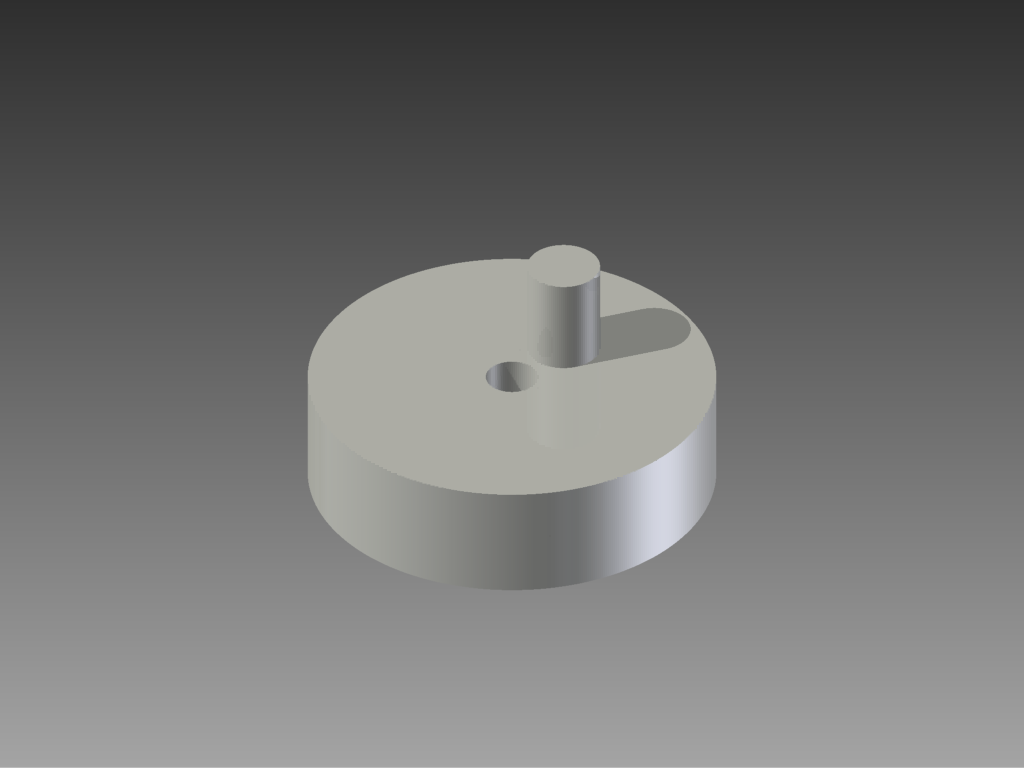
The cam, which was my critical component of the project, was designed under similar circumstances to the enclosure. By attaching the cam to the motor spindle, and as the motor rotates, the needle, which is attached to a peg offset from the center hole, moves up and down as the cam turns. This is the component which either leads to the success or failure of my system, and the component with which I will likely alter in future iterations of the project.

Figure 3: CAD rendering of the Personal Tattoo Machine’s Cam
The basic function of the tattoo machine is controlled by the electrical system implemented into the design. The electrical system used in this project was fairly primitive, consisting of only a 9V battery, a DC motor, and a switch to control the on-off functionality of the system. A system schematic of the design used in this project can be viewed below.

Figure 4: Schematic of the Personal Tattoo Machine’s Basic Electrical System
Possible Improvements for Future Iterations
While I did produce a functioning prototype of my Personal Tattoo Machine, there are several changes I would like to make to improve the design and functionality of my system. First and foremost, I need to redesign and remanufacture the system’s critical component, the cam which controls the actuation of the needle. I need to redesign the component to include a set screw on the side of the component, in order to account for any possible slipping of the cam on the spindle. I would also like to remanufacture this component out of 6061 aluminum, as the ABS used to manufacture the first component’s iteration lacked structural integrity.
Budget
I came in under budget of my initial estimate, and a full breakdown of the budget can be viewed below:
- 9V DC Motor – $6.48
- 2x 9V Battery – $8.70
- Electronics – $1.57
- 3D Printer Filament – $24.09
- Needles and Tubes – $12.99
- Rubber Grommets – $6.29
- Fittings and Fasteners – $0.85
- Total Cost – $60.87


