Introduction:
This is a proposal for custom glass writing boards to be installed on the walls in Andrews Hall on the University of Colorado Boulder’s campus. These unique writing boards are student designed and will be student made under the guidance of campus machine shop supervisors, Housing and Dining Facilities employees, and upper-class engineering students.
Inspiration:
The inspiration for this project is the goal of giving future students in Andrews Hall an introductory engineering project to work on with their peers. This overarching goal has several sub-goals for future first year engineering students living in Andrews Hall:
- Provide an avenue for them to take ownership of their community
- Provide an avenue for them to practice and foster an engineering education.
- Build community between them by working together, learning from peers, interfacing with upperclassmen, and creating something unique to show off personal stories.
Justification:
The cost of these custom writing boards will obviously be higher than that of an off-the-shelf solution; wall mounted whiteboards can be easily purchased online. This type of standard part will not meet the goals of this project laid out above. The purpose of these writing boards is to help future residents of Andrews Hall build community and practice engineering by doing a hands-on project. If these boards are not made by the students, and they do not look like they are custom made, then they will lose their effect of building community and encouraging interest in engineering activities outside of the classroom. I believe that many students can benefit from a project like this because of the opportunities to learn and gain skills outside of the classroom. Specifically, I think that it is important to give them the chance to learn that we, as students, do not learn everything in the classroom; outside learning, curiosity, and experimenting must compliment classes.
I believe that this impact on the students justifies a higher cost. Using a wide range of materials causes this project to require more learning on the part of future student builders. This will occur because a larger assortment of tools will need to be used in order to complete each board.
Requirements:
Several requirements for these boards have been defined by myself and Facilities.
- Low-Profile
- My desire for these boards is that they will protrude from the walls as short a distance as possible. This will help increase the functionality of each board because they will not be a hindrance to residents/guests or subtract from the quality of the building.
- Boards hung on walls also pose a blocking or snagging hazard to people carrying bags or items being moved through hallways. A low profile board will reduce these instances.
- Durable
- The boards installed in Andrews Hall must survive impacts and pressure from passer-bys and users. This includes the bumping or snagging that may happen as a natural result of residents moving supplies through the hallways.
- Functionality
- These writing boards must adequately function as writing surfaces under the use of dry-erase markers. Therefore, the boards need to remain securely fastened to the walls and follow these other requirements.
- Safe
- The boards created for Andrews hall need to be completely safe.
- This will primarily be addressed by using tempered glass for the writing surface. Tempered glass is also known as safety glass and must be used in the event that a board breaks. Glass “pebbles” are produced instead of dangerous shards when this happens to safety glass.
- Additionally, no sharp corners or loose components will exist.
Wall Attachment
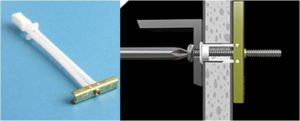
The functionality and durability of these glass writing boards is reliant on their wall connection. Andrews hall has metal wall studs which are spaced 16” apart and each stud has a width of 1.25”. My chosen wall anchor/toggle for this project is the Snaptoggle heavy duty toggle bolt by Toggler, as seen in Figure 1. This toggle bolt is easy to use, strong, and highly recommended online, in hardware stores, and by personal friends. Here are additional details for the BA Snaptoggle which uses 3/16″-24 screws:
- They can hold up to 247lbs in shear.
- They require a ½” wall hole to be drilled.
- The minimum clearance behind wall is: 1-⅞”.
- The cap flange is nearly flush with the wall after snapping off the excess plastic, and the toggle can be reused if the screw is taken out (this is a feature that does not exist for many other wall anchors).
Final Design
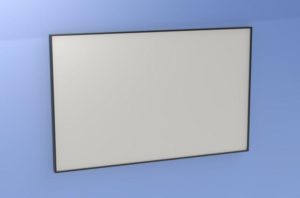
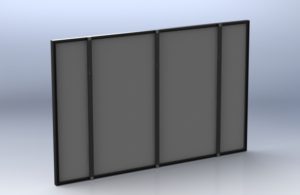
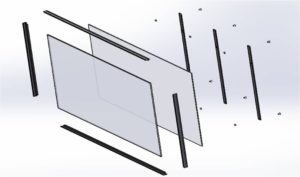
The final design for these glass writing boards is based on a metal frame. An initial prototype with a wooden frame was designed and built, but it was later decided that a metal frame would be superior due to fire resistance and the ability to ensure a lower profile to the wall. A front, rear and exploded view of the board design is shown below.
Glass & Backing
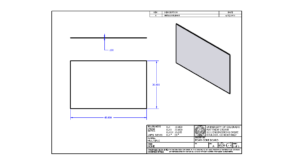
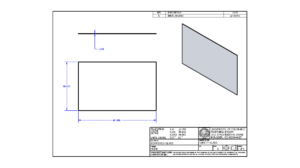
The glass pane used in the design of these boards is the central component. Specifically, chosen is a glass pane which is 2.5′ x 4′. Talking with the owner of Boulder Glass helped to determine additional parameters of this component.
- The glass will be a ¼” thick tempered pane. This thickness and composition makes the glass extremely strong in the middle, and the only concern is the sensitivity of the edges. They will be protected by the enclosing frame, which eliminates this weakness of the glass.
- The weight of tempered glass is very close to 3lb/sft. Here are various weights for initially possible sizes:
- 3′ x 6′ = 18sft = 54lbs
- 3′ x 5′ = 15sft = 45lbs
- 5′ x 4′ = 10sft = 30lbs
- For this application of the glass, there should be no concerns about distortion of images behind the glass. This would only be a problem from extreme viewing angles which isn’t a problem for boards on the wall.
- I initially asked for a price estimate on a 3’ x 6’ x ¼” pane. The quote from Boulder glass was around $210 for this size. Using a linear scale, this price becomes around $116 for a 2.5′ x 4′ x ¼” pane.
It is desirable for a clean backing to exist behind the glass so that these boards look as professional as possible, and to eliminate the chance of any marker lines being lost. This will be accomplished by using white acid-free foam core board as a backing directly behind the glass.
Frame
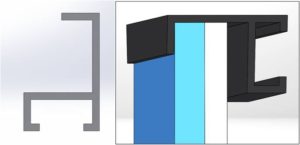
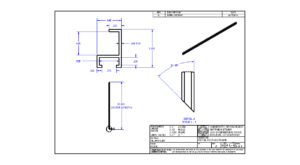
The specifics for the framing in this design are that commercially available metal picture frames have been chosen and there are essentially endless numbers of colors and profiles for these frames. Figure 4 and Figure 5 show some examples of these options. The design of my final board assembly is based on only one certain frame design, and as this project dynamically changes future boards will use different profiles. Figure 6 shows my current frame profile along with a view of the inserted glass pane and foam core panel.
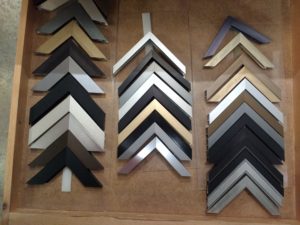
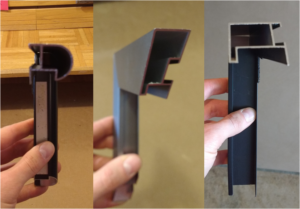
Choosing this metal frame has also had an impact on the size of these boards. At a local store that I visited in Boulder, The Great Frame Up, each of the double-wall frames pictured above cost at least $15 per linear foot and many were more than $17/ft. This caused me to decrease the planned glass size from 3′ x 5′ to 2.5′ x 4′, which results in a decrease in the total required length of frame by 3′. A reduction of this amount automatically saves at least $45.
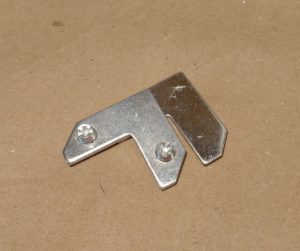
The last major note about the metal picture frame material is that it does come with corner fastening hardware, as seen in Figure 7. However, I have included other mounting/fastening hardware in this design in the form of the back support ribs.
Back Support Ribs
In order to communicate the idea of these support ribs on the back of the metal frame, Figure 8 shows views of the initial support ribs on the smaller prototype model of a board.
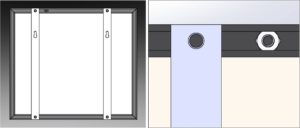
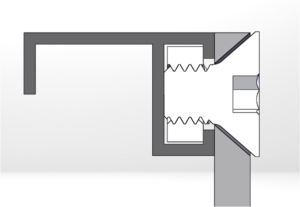
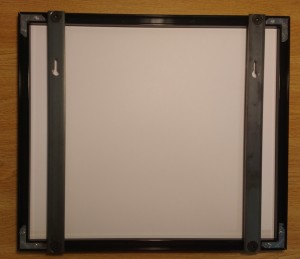
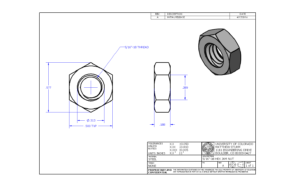
Each rib contains two countersunk holes to allow the board assembly to rest flush against the wall, along with a keyhole slot for the Snaptoggles. Once the steel bars are machined, they attach to the frame by sliding a hex jam nut into the rear part of the frame profile. The specific fastening hardware used for the ribs in the metal prototype are 5/16″-18 hex jam nuts and 5/16″-18, ½” flat head socket cap screws. Figure 9 features a cross section view of these components fastened together, and Figure 10 shows the support ribs attached to the completed metal prototype.
Assembly Details
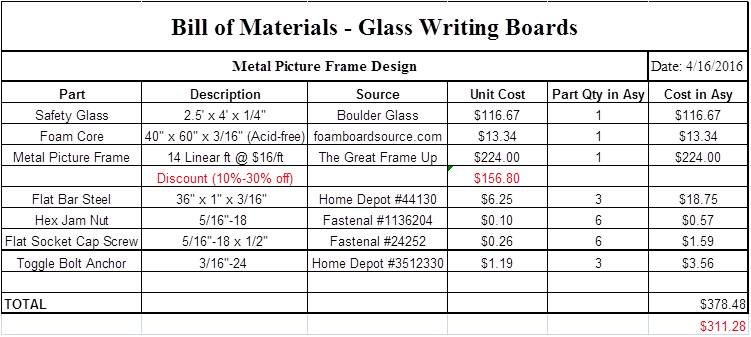
The components described above compose the entirety of the design of my proposed glass writing boards. Table 1 and Table 2 below show are the final Bill of Materials (BOM) and Mass Equipment List (MEL).
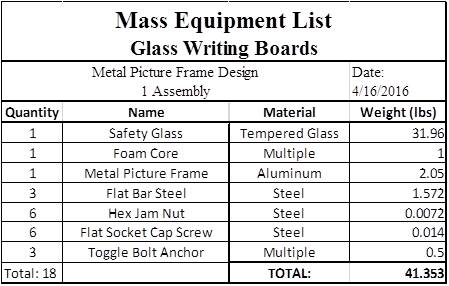
Here is a link to see my post of the drawing package for this project (not attaching to this post with the backend editor for some reason). UPDATE – still not working, hoping to give the website time to refresh.
Below is my drawing package for this project (unfortunately the website has not been cooperating and I was unable to organize them neatly with a better editor…).
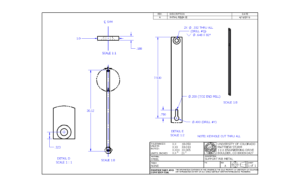
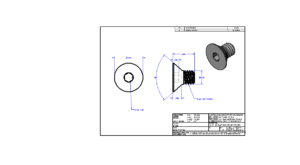
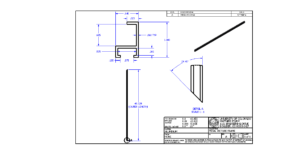

1 Comment. Leave new
I can tell that a lot of thought and care went into this project from your report and presentation. I like that you want to build something that focuses on its lasting effect in a community that you care about. Great job.