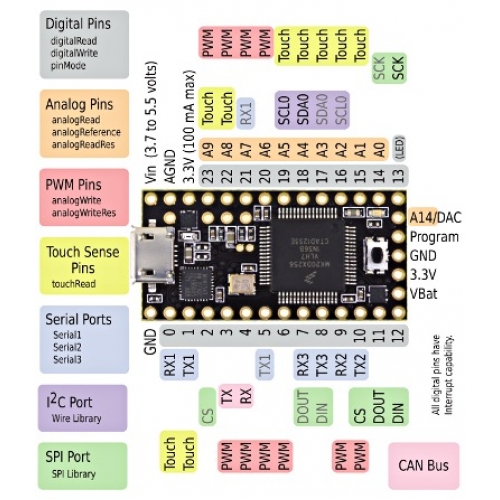
I spent most of week trying to figure out what was wrong with my original code. Like I was talking about in my last post, whenever I strike one of the drum pads, the light will either stay on, or flash on and off at the rate that my void loop() takes to cycle. What the heck!
So, I busted out the old oscilloscope. To read the piezoelectric sensors, one lead is connected to a Teensy pin, and the other lead is connected to ground. The two leads are then connected with a 1M resistor which serves as a pull-down resistor. If you’re not familiar, a pull-down resistor just makes sure that after the piezoelectric sensor generates a voltage, the signal returns to low (it pulls the signal “down”).
This makes the issue even more confusing! If each sensor has a pull-down resistor, how is it that the pins are getting stuck HIGH? In the code, each pin is also set as an AnalogRead, which means that they should be low no matter what. Hmm……
I’ve checked some instructables posts about some similar projects, and no such issues seems to exist, however none of these projects are using a Teensy. I could use the RedBoard, but the Teensy is so compact!!
After a couple of hours of tinkering, I was finally turned on to a possible solution. The piezoelectric sensors that I’m using could be outputting too much voltage for the Teensy to handle, and causing the pins I’m using to flip (thanks Tom!).
So, to solve this issue, I’ve built a voltage divider for each of the sensors that cuts voltage out of each sensor in half. And……it works! I no longer get any weird pin flipping, and the signal is pretty steady.
I finally learned how to use the serial monitor in Arduino (thought I had to use TeraTerm) so that I can monitor the sensor reading, and set a threshold for sending a signal after reading a sensor. This threshold is going to end up being pretty important since there’s a high possibility of noise from different drum pads being struck (I don’t want the vibrations from one pad being hit to set off another sensor).
After I got this working (took way too long) I figured out how to use Teensy’s midi library to send signals to Ableton. Teensy has native midi support (link here: https://www.pjrc.com/teensy/td_midi.html) which opens up a lot of possibilities for using weird sensors and interfaces as midi controllers. I’m going to have to come up with a less conventional project after this!
After a while tinkering, I got the Teensy to communicate directly with Ableton using two of the drum pads. the next step will be to hook up each of the sensor (I think I’m going to do 4-6 in total) and design a better enclosure. I’m also not sure what material I want to use for the top of the drum pads, so I’m going to have to do some searching at McGuckins for something appropriate.


1 Comment. Leave new
Barring any crazy aesthetic problems it sounds like you got past the tough part of the project. Electronics can be a pain since you cant see what is going wrong without equipment. The Teensy having MIDI support is also huge. One possibility for drum pads, although likely an expensive one, would be to look into what is used for drumming practice pads. There are definitely a few different styles out there you could check out.