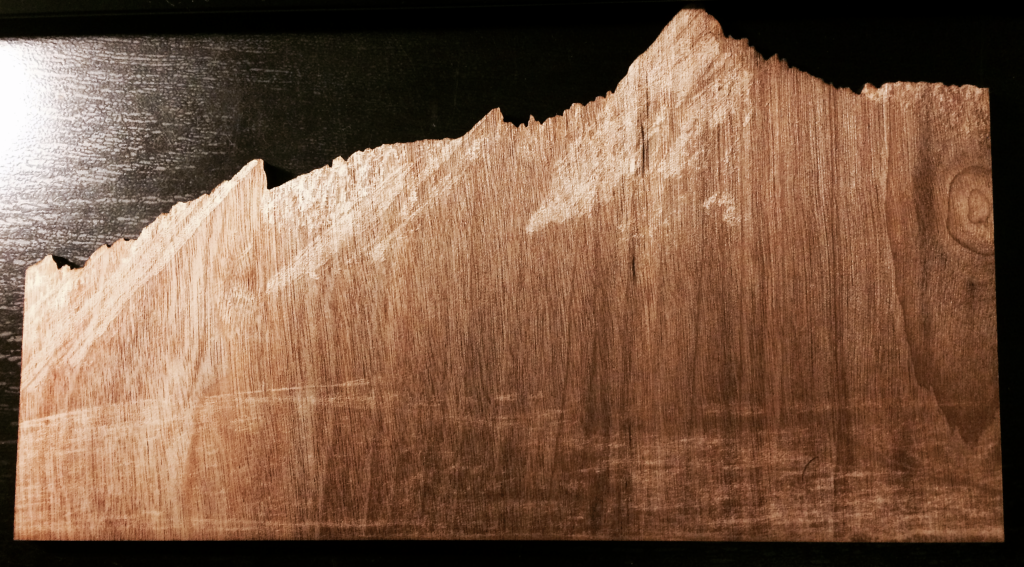
After the last few weeks of not being able to set aside time to make progress on this project, I was finally able to begin moving forward with things. I purchased some wood from Home Depot, mostly due to budget and time constraints and began laser-cutting my image. After several failed attempts at getting the settings on the laser cutter right, as well as positioning the wood so that it was flat, I finally ended up with a product which I was happy with for the panorama portion of my project.

Wood Flatiron Panorama
I’ve been hard at work trying to get the code running optimally for the LED panel. I finally am to the point where I am able to program in the colors as I would like to and can get the panel to refresh and fade in colors to simulate things like the sunrise and sunset. I wish I had a video to show this, but that’ll have to wait till next week since my phone is full today. Over the next week or so, I plan on really nailing down the colors and transitions. I’ve been taking pictures of the sunset everyday at different times so that I could get an idea of how best to recreate them using this LED panel.
I’ve also been working towards integrating this as a final product. After a lot of waffling between options, I’ve opted for a 3D printed enclosure to hold the electronics and mount the LED panel as well as the panorama too. This allows me full control over the shape and placement of all of the components, as well as allowing for easy and rapid changes to be made if issues arise.


5 Comments. Leave new
How large is the piece of wood? I wonder how it would look if you sanded it before laser cutting it. Perhaps it’d make some of the details in your raster stand out more. The way you did it makes it look like you might have picked it up in the forest looking like that though, which is really awesome. Totally legitimate aesthetic choice. I can’t wait to see it with the LED panel!
I haven’t been following from the beginning, but your featured image looked fantastic so I got curious! The flatirons design you have etched into the wood looks amazing. The LEDs sound like they will look amazing. I am wondering how you are planning on embedding the LEDs i.e. are you punching holes in the wood in a grid format or in the etches of the flat irons or are they lining the perimeter?
This is the first time I’ve happened upon your project on this website, and I have to say that this is going to look awesome! The flatirons can look dramatically different depending on the weather conditions, and it’d be really cool if you could pullit off in this project. My question is how are you going to figure out what you’re going to program the LEDs to do? If you use a lot of them inside the enclosure, it’s going to be very tough to decipher how different combinations of colors will look without actually viewing them. Unless you know something that I don’t, of course.
That wood looks amazing! I am curious to hear about the method you use to etch the wood so accurately. It looks like an actual picture of the flatirons. I think that the addition of the LED’s to this project will make it incredibly visually appealing. It is definitely going to draw quite the crowd at the expo.
I’m curious how you etched the Flat Irons image into the wood. Did you create a half-dot image in Corel to use dots are shading? I like that it has a hand crafted feel to it although you are using rapid prototyping technology. As for the lighting, I sounds like a subtle and natural appearance of sunlight will further add to the rustic look. Good work wrangling in LED and laser etching into something that can be a living room mainstay. I’m also working with LED and the laser cutter, but my object has a more typical cheap bar sign feeling about it. Stay on the high road Roshan!