Introduction
The sharing of ideas between individuals is a beautiful thing, but it has the potential to be rather difficult. Taking the idea in your head and adequately expressing it in words is the most direct and accessible means of expressing one’s own ideas, but the complexities and finer details of the idea can often be lost or misinterpreted, and an instance where this phenomena can be of serious detriment to the individual is during the interaction between tattoo artist and client. The client has an idea for their ideal tattoo, and tries their absolute best to express their concept to the artist: meanwhile, the artist will attempt to interpret the ideas of the client into a graphical representation, which will eventually become the product to be inked permanently onto the client’s skin. During this interaction, there is nothing more unfortunate and disheartening than when the artist gets it wrong. And this is no fault to the artist. In spite of their experience, talent, and expertise, an artist can never expect to recreate the concept of the client perfectly; they can only hope to take in the ideas of their client, and recreate them in a manner that is hopefully as close to the original idea as possible.
Thankfully, the ever-persistent nature of DIY has made it possible to mitigate this disconnect between artist and client, in the form of homemade tattoos. Known as “stick-n-poking”, it is the act of using household items to tattoo yourself, or your friends, in the comfort of your home. But even this isn’t a perfect solution. There are the individuals who are interested in getting a tattooed, but are entirely uninterested in doing so by means of their own. And this is the true crux of DIY tattooing, the bane of its being. The DIY-nature of stick-n-poke tattoos is incredibly divisive, and it creates a strong dichotomy between individuals who embrace DIY tattooing wholeheartedly, and those who are rather repulsed by the idea of tattooing themselves or others.
The aforementioned reasons are the influences for my project. I want to put tattooing into the hands of the people. This is not a project to remove the artistry from tattooing, or an act against the system. I only strive to give people a new way to express themselves; one that they always had, but maybe never felt comfortable enough with to try. I plan to achieve this through a combination of exceptional design and high-quality construction.
Inspiration
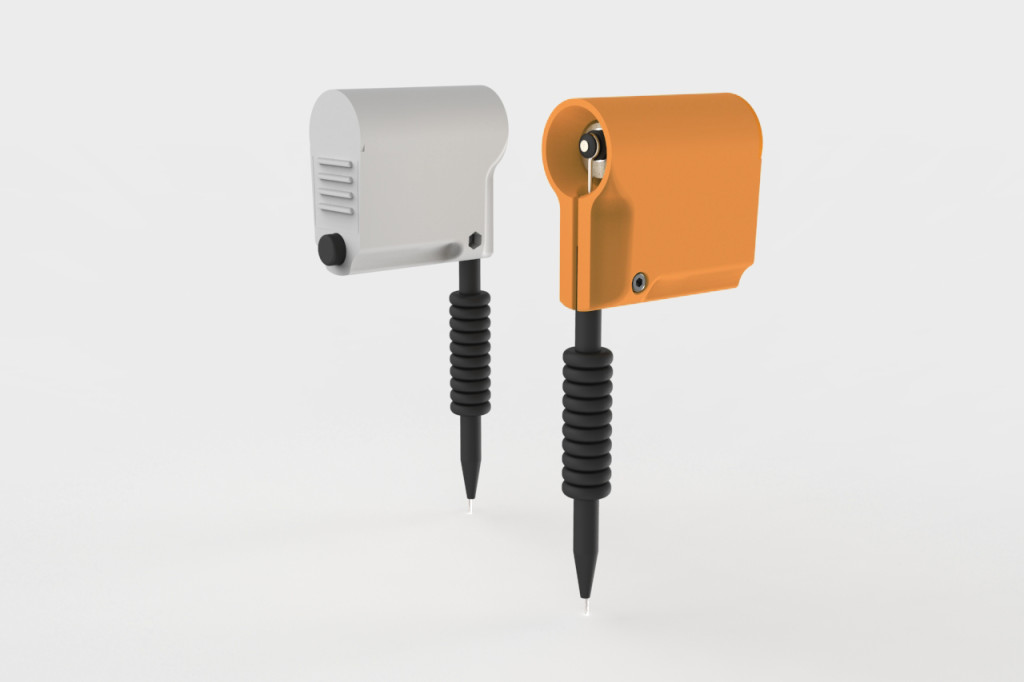
The inspiration for my project comes in two forms: a graduate project by a student at the Royal College of Art in London, and a Swedish electronic musical instrument company who have a permanent residency in the Museum of Modern Art in New York City and San Francisco. Jakub Pollág, the aforementioned student, built a personal tattoo machine for his final graduate project as a student at the RCA, and is now planning to release his project to the public in an effort to democratize tattooing. The design of his project is nothing short of stellar: the use of bright colors and rounded corners on the machine’s enclosure makes an otherwise unapproachable and intimidating product much more inviting. Traditional tattoo machines are infamous for the starkness and bare-bones nature of their design and aesthetic, but Pollág challenges this concept by creating a product which goes against these traditional aesthetic choices entirely, and introduces a clean, polished, professional aesthetic to the tattoo machine.

Figure 1: A 3D Rendering of Jakob Pollág’s Design for the Personal Tattoo Machine
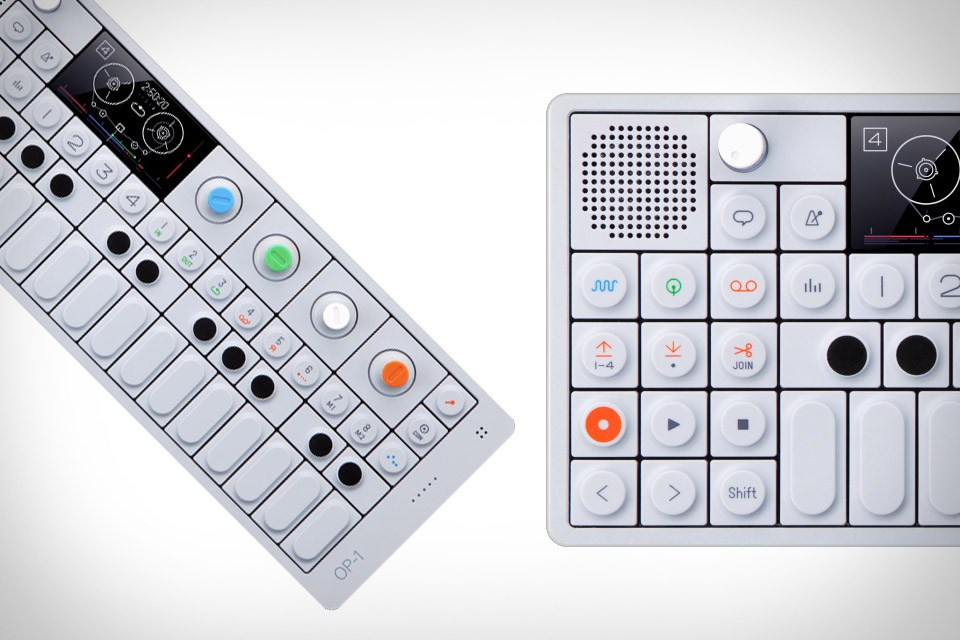
Teenage Engineering, the previously mentioned Swedish electronic musical instrument company, has been turning out some of the most beautiful and imaginative products to come to market for years; they are renowned for their ability to combine design and engineering in a way so organic, their products would not be the same if either the functionality or the aesthetic were altered. From the OP-1, an incredibly capable and powerful portable synthesizer, to the OD-11, a cloud-based wireless speaker, the company seems incapable of making a product that is undesirable.

Figure 2: Teenage Engineering’s Flagship Synthesizer, the OP-1
The element of Teenage Engineering’s design which I will channeling into my own project will be their remarkable amalgamation of playfulness with modernity and quality. Their ability to produce a beautiful and striking product, which simultaneously screams quality with the urgent necessity to pick up the device, and figure out exactly how it works. It is this cross between alluring, enticing, almost playful design with undeniable quality that I hope to achieve with my own project.
Concept
The concept of my project, on the surface, is to build a functioning tattoo machine. One that I could use at home, and that my friends could use as well. But more than that, I hope to provide the tattoo machine with a new, modern aesthetic, one that mitigates the possibility of an individual feeling unsettled by the idea of a homemade tattoo.
First Impressions
The first impression I want to achieve with my project is hopefully something similar to the effect that Teenage Engineering has achieved with their products: an ambiance of undeniable quality and an insatiable desire to pick up the object and figure out how it works.
Critical Component
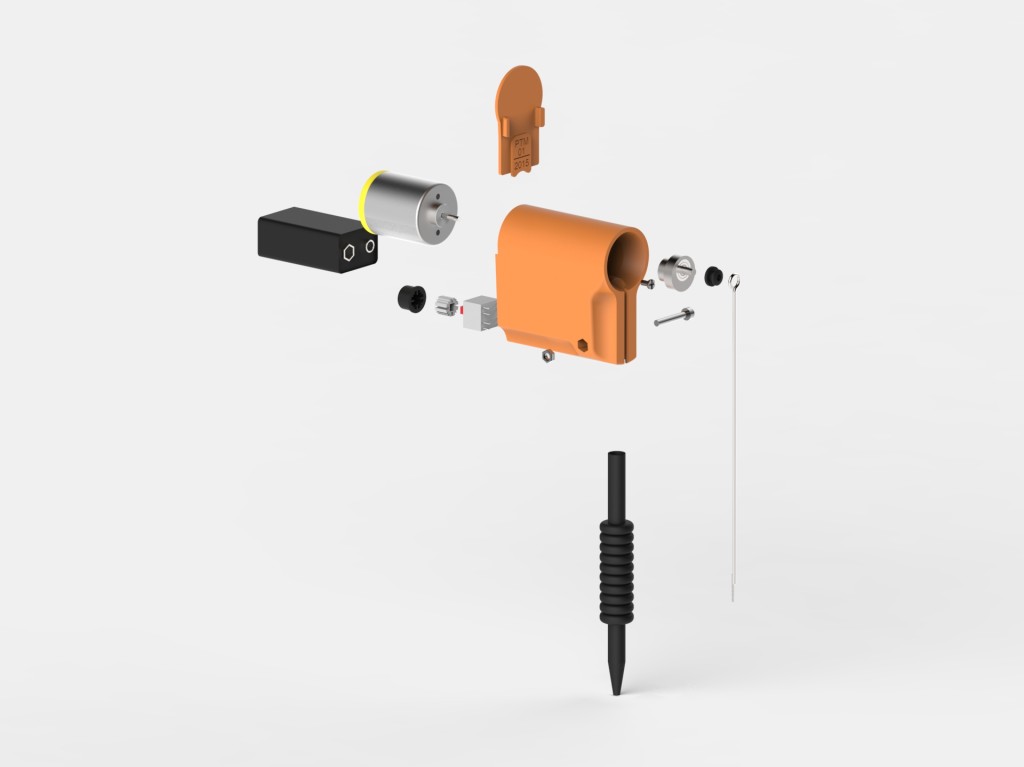
The critical component of my project is actually a rather small component within my project. A tattoo machine works a lot like a simple piston: the DC motor is powered by a battery, which spins the rotary, which in turn spins a cam that the needle is attached to. The spinning of the cam causes the needle to ascend and descend rapidly, which is what allows the tattoo machine to fulfill it’s most rudimentary function. The cam is the component of my project which will either allow it to function as it is intended, or will keep my project from fulfilling the vision that I have for it.
Timeline
- 7 March – Preliminary Design Finalized
- 9 March – Parts Acquired for Preliminary Prototype
- 11 March – Preliminary Prototype Built
- 11 — 14 March – Testing and Analysis of Preliminary Design
- 20 March – Iterate on Preliminary Design (CAD)
- 22 March – Perform Test Prints of Component Enclosure
- 25 March – Finalize Component Layout and CAD
- 26 — 30 March – Testing and Analysis of Iterated Design
- 5 April – Finalize Design
- 10 April – Final Project Built
Budget
- 9V DC Motor – $5
- 9V Battery – $1.25
- Electronics – $15
- 3D Printer Filament – $20
- Needles and Tubes – $20
- Rubber Needle Ends – $4
- Fittings and Fasteners – $5
- Ink – $5
- Total Cost – ~$75


2 Comments. Leave new
Wow this looks like a very well thought out design. I have a brief understanding of tattoo machines and know they can be pretty complex but I love the idea of how simplified you have made the design. I especially like the module that encloses the entire device and holds it all together. I think it would be awesome to mass produce these and even make a few for yourself and friends to practice tattooing (not on people hopefully). This is one of those devices that hasn’t been advanced or simplified in a long time so this design could be groundbreaking
Whoa, the aesthetic on Teenage Engineering’s products is very appealing. Awesome find. I do not have tattoos, but have considered the thought of getting one. While I do not have a larger design in mind, I would be interested in a product like this for very minimal inking. For a product like this, I think it would be cool if you developed stencils to hypothetically sell with it. That way people could give themselves some decent markings. Great idea