Inspiration
(Taken from previous post)
For my final project I knew that I wanted to do something with arrows. I learned how to shoot a bow with my grandfather when I was a child, and since then archery has become a favorite pastime of mine. For the upcycling project I considered using some old broken arrows as a material, but decided the end product wouldn’t fit with the aesthetic I was looking for in the project. The problem was that I still had a pile of old arrows sitting around with no purpose.
A couple weeks later I was making arrows over the weekend which required cutting arrows to length as seen in the picture below.
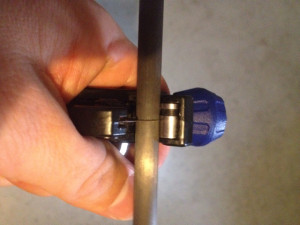
http://discussions.texasbowhunter.com/forums/showthread.php?t=449403
After finishing the arrows I had a pile of ends sitting on the table and suddenly saw the arrows in a new light. When looking down the end of the arrows I discovered that the open ended tubes had a cool visual effect.
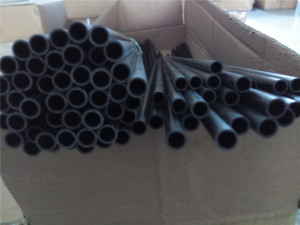
http://www.aliexpress.com/store/product/Wholesale-aluminum-arrow-shafts-for-hunting-12piece-lot/1517101_32266809754.html
Now that I had a way to use the arrows, I had to figure out how to use the material. For that I started to look up different pipe art work on the internet and came up with some cool projects.
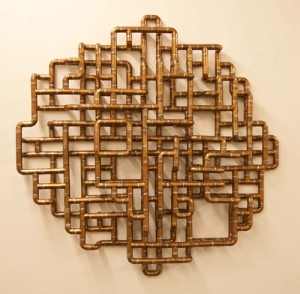
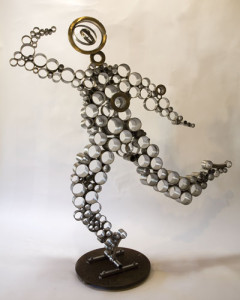
http://www.motherearthliving.com/green-homes/heavy-metal.aspx
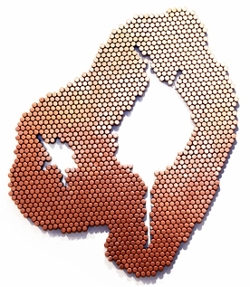
http://www.copper.org/consumers/arts/2014/august/tj-volonis.html
The last picture showed above was the one that finally caught my eye. I thought that I could do a similar design with the arrow shafts as well as cut the shafts to different lengths to get more of a 3D effect.
As for the dynamic component, I discovered that an LED fits perfectly within the arrow shaft. Thus for the dynamic feature I think I can mount some RGB LEDs within the shafts and create different light patterns with a switch panel.
Design Progression:
From my inspiration I then needed to take a step back and look at the project from a practical point of view. I started to do some research into how I would light up the piece of art. After explore a couple different avenues and looking at a number of data sheet I decided to use the RGB LED strand seen below.
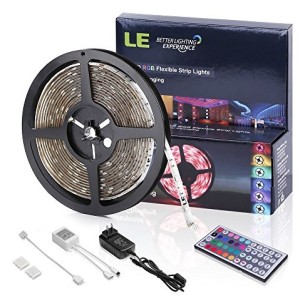
http://www.amazon.com/gp/product/B00CE580B0?psc=1&redirect=true&ref_=oh_aui_detailpage_o00_s00
An advantage to using this lighting system is that the product comes with a power supply, control panel, and the connections needed to light up the strip. I will still need to cut and re-solder the strips to create the desired pattern, but it is a good place to start from. The control panel can then be mounted to the base of the art piece allowing the user to change the color of the lights.
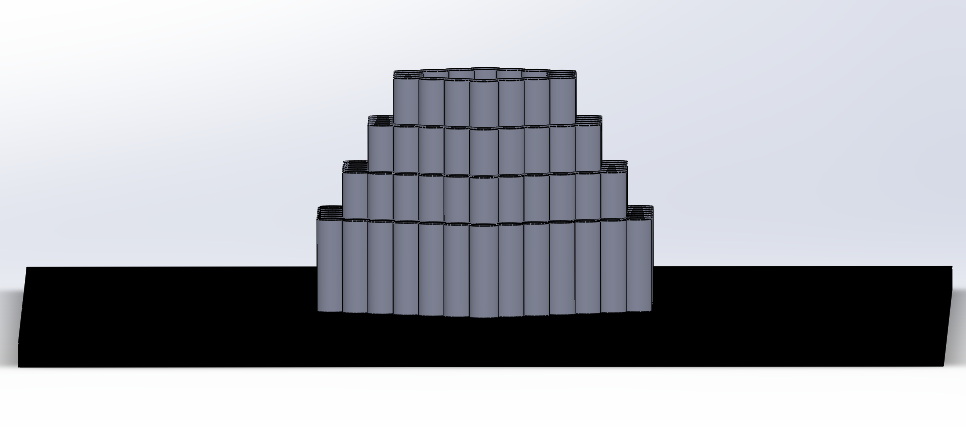
Once I had a general idea of how the light would work I turned to the arrows and how to group them together. I ended up coming up with a honeycomb pattern with arrows cut to different heights to create a wave pattern when seen from an angle. A rough CAD model can be seen below.
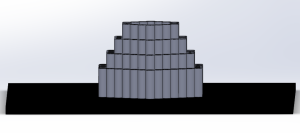
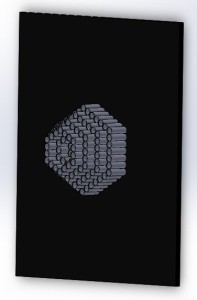
CAD Rough Draft
There is still some fine tuning to be done on the spacing of everything, but I am waiting for the LED strand to come in before I dive too much further in the design.
First Impression
My biggest goal when developing this project was to create a piece that could not only change with time, but would look different depending on what angle you were observing it from. For example, when viewed straight on, the LEDs are the main component that are seen, but when looking at the piece from the side a wave-like shape can be seen.
Additionally, I want the piece to be able to grab someone’s attention. I want the end user to come over to the piece and play with the control panel and watch how the part changes with changing color patterns.
Function
Similar to the first impression section, the function of this project is to be able to create a piece that people go up to and play with. I envision that the piece will be mounted to a wall, similar to a traditional piece of artwork. However, depending on what the end product looks like, I might turn the project into a lamp with light reflection off the ceiling.
Aesthetic:
The design aesthetic of the piece is up for debate still. I know I want a clean black piece of acrylic as the backdrop in order to keep the focus on the LEDs, but was playing around with engraving the acrylic or somehow decorating it to flow with the light pattern. Depending on how the lights look, this portion is still TBD.
Critical Component
The critical component for this project is the light strand (getting it to work as well as having it interface well with the arrows). I am still waiting for this part to get here and so have yet to test it, but stay tuned to hear an update once the system arrives.
Bill of Materials/Cost Estimate*
Arrows: Free
Lighting System: $18.99
Acrylic Base: ~$20
Epoxy: ~$10
Misc. Electronics: ~$5
TOTAL: ~$55
*Costs will be updated once the components are purchased
Milestones
Preliminary Design Review: 3/2/16
Critical Part Arrives: 3/8/2016
Critical Part Tested: 3/14/16
CAD Design Finished: 3/18/16
Purchase Acrylic (from CO Plastics): 3/25/16
Assembly: 3/25/16 – 4/11/16
Final Presentation: 4/18/16
Presentation Video

8 Comments. Leave new
I think your design is super awesome Sami and I think it is neat you are taking from the idea of using arrow shafts since that is of interest to you. I always think designs are stronger when they are tied personally to you in some way. I think your design inspiration and ideas are really awesome as well. I want to know more about the construction of the project and how you decided to make the pattern for the shafts. do the LED’s make pinpoints of light on the ceiling and I too am curious as to where the project will be going next. It would make for a really great art exhibit in a dark room as well as a unique nightlight. Great work and I think the project turned out really successful!
I like the idea of different layers and patterns. Good to see you are ahead on the CAD modelling. How will you mount it on the wall? You can get small pieces of acrylic for a lot cheaper in Mcguckins. Good luck!
I really like the idea, and I’ve worked with those same LED strips before, and despite the fact that you can’t address each one separately it is useful to use the remote and be able to change the colors with that, if that appeals to you. But I think your honeycomb pattern has a lot of potential to play around with the light, and I think the final result will definitely be really cool.
You have a solid idea. Anything with a bunch of LED’s is bound to look flashy and bedazzling. Just make sure you find an aesthetic to stick with, and you should be good!
Hey are you planning on laser cutting the holes out, or gluing them to the board? I think laser cutting them out will look cleaner.
I like the project inspiration and aesthetic. Have you thought about trying to use the arrows to shape an arrowhead, instead of just a hexagon? It might also be cool to have the design be one where when you look at it from different angles it will be a different design.
Is there an intended angle, from which the viewer should look at your project? Any idea how bright the LEDs will be? The color playing is a great idea.
I like the design! You definitely have put a lot of thought into the design and functionality of the piece. I believe you should really consider what aesthetic you are trying to capture, before diving back into the design aspect. Just to get you thinking: When someone views your piece do you want them to feel an emotion (Anger, Sad, Happy, Neutral, Scared, Joyful)? Where will its final resting place be (Hallway, kitchen, bedroom)? Could the aesthetic come alive with the lights (kind of like light bright)?