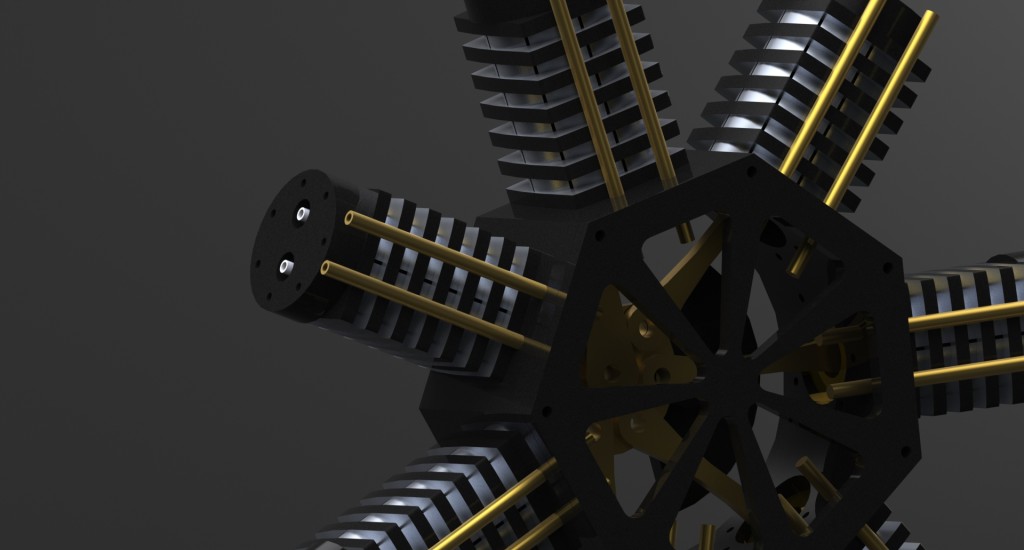
As I begin to finalize my design for the final project, the excitement is building. On first impression I hope for people to want to understand how such intricate relationships between parts work together to generate a seemingly simple operation, a spinning shaft. I have been designing my engine in a way to show off all of the components that would normally be hidden, allowing viewers to marvel at these mechanical devices. Ultimately the engine will serve as a dynamic desk ornament. While running the engine will be reserved for special occasions, when running it will spin a shaft with fully functioning internal components.
The motor will run on a 2-stroke cycle. As the piston come up the cylinder it will expel the exhaust and then, at the top, be pushed back down by new compressed CO2 from a canister located in the base. With simplicity as a personal design favorite, I hope to make the motor seem simple until the user looks closely and sees all of the individual parts moving so precisely. I have begun the computer modelling (see the featured image) of my design in order to refine the aesthetic before I begin manufacturing.
I was inspired by a model engine maker, Patelo. I find his attention to detail and machining on such a precise scale absolutely beautiful and definitely an aesthetic by my definition. So I set out to see what I could do.
As someone graduating very shortly I liked the irony of going back to the roots. Most of us are soon to be full fledged mechanical engineers, so I thought to the origins of some of the best moments in engineering. The dawn of aviation. It seemed so fitting for a final semester project for my undergrad as I was inspired to go to engineering school from the age of 4 due to my passion for airplanes. So I set out to build a memento to the past and meld it with my simplistic style with high tech influences. My project will be a desktop radial engine.
I drew inspiration from this era in aviation, precision machining, examples of radial engines, and current high tech standards such as the apple aesthetic and carbon fiber. Following these inspirations, I did extensive research into radial engines, specifically how they function and how to machine them on a small scale.
The motor has many critical components. Almost every part must be strong enough to withstand high forces and RPM’s. With little time to run full a analysis, I’m relying a little bit on intuition. The actual operation of the motor is being modeled in CAD so I can make sure it works before investing in the materials. The only part I can’t visualize or accurately model is the counterweight. Radial engines need a counterweight to balance the main piston rod, but I’m not sure how to calculate the size it must be. Currently I plan on making it oversized and then cutting holes in it to balance it. This process will likely be tedious, but will save me time in the initial CAD stages. Ultimately if the motor fails to run, I plan on attaching a simple electric motor to it. This motor will run the motor manually at a low speed and will still show the same operation albeit a little “faked.”
I’m trying to keep the cost under $100, simply for the sake of my personal finances. I’ve been specing it out using McMaster Carr, but will be visiting a local aluminum distributor next week to see if I can get a better price.
-6 Shoulder Screws ($9.48)
-6in 11/16in 544 Bearing Bronze ($13.82)
-2ft 1/8in 6061 rod ($1.60)
-3in 6061 Aluminum Bar ($36.04)
-2ft 6061 Aluminum Sheet ($6.31)
-2 1/8in Ball Bearing ($11.88)
-1ft 1.125square 6061 Bar ($10.46)
-Tubing ($5)
-Paint (~$10)
Right now I’m coming in just over my budget before shipping, but I feel I can definitely reduce it by buying locally and/or shopping around. These figures don’t include the stand either, which I plan to make out of remnant material/wood as the material properties aren’t as crucial.
My rough timeline is as follows:
-Final Design Done (3/7)
-Parts Acquired (3/9)
-Begin Machining (3/11)
-Finish Machining (4/8)
-Finishing Done (4/11)
-Fine Tuning Done (4/15)
I’m excited to get building on this project. It will be a good test of everything I’ve learned over the past 4 years and a nice desk ornament to keep for my career.


4 Comments. Leave new
I really like the idea, it seems like you’ll have a lot of parts to keep track of. I do think it’s very ambitious and you might need to simplify some aspects. The inlet and exhaust valves might be really difficult to time correctly, but I suppose it’s not too bad if it’s not perfect because your not burning fuel!
This is a really neat idea. I’m really looking forward to actually making it work with air. Good luck!
I like the old mechanical aesthetic you are going for and that you are going to use the CO2 cartridges you already have to run the system. I can tell you are a cyclist Maybe using an air compressor is a good idea to keep it going continuously
This is gonna be cool! Is the featured image your CAD model? It looks really intricate. Will you be able to see all the parts moving when it’s running, or will it be more enclosed, like the silver one you have pictured?