Introduction
For my project, I’ve decided to do what I call, a Sunrise/Sunset Backlit Panorama. Upon first impression, the piece would simply look like a static piece of backlit wall art, but over time, the lighting would change to mimic the lighting outside. The most drastic changes would occur during sunrise and sunset. I really wanted to create a piece of art which could send a message of technology and nature living in harmony. So much of what we do with technology now tends to damage or degrade our natural surroundings, and while someday I hope that we will be able to colonize another planet, for now, we cannot, so we need to preserve what we can and figure out a way to strike a balance between the environment and machinery.
Basic Design and Function
The panorama consists of two distinct parts, the panorama itself, and the backlight. I’m still debating how to implement the panorama exactly but know that it will be made out of wood and likely involve some sort of woodburning to accentuate features. I wanted the panorama to bear resemblance to something that I hold dear to my heart and I’ve settled on an image of the Flatirons here in Boulder, CO.

Example of Wood Burning Artwork
(Source: https://s-media-cache-ak0.pinimg.com/236x/33/11/cd/3311cdddb3dcabafc00b38e9de785145.jpg)
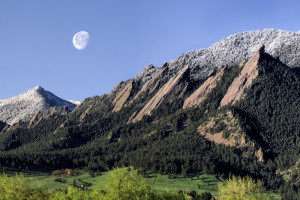
The Flatirons in Boulder, CO
(Source:http://www.arrowphotos.com/Colorado/Boulder/i-Tjn992j/1/L/Colorado-Spring-Flatirons-Moonset-0870-L.jpg)
One method to make this panorama could be to burn the image into one solid piece of wood, as seen above. Another method, which one of my classmates pointed out to me in my previous blog post, would be to layer pieces of wood together with different parts of the image cut into each piece. I have not yet decided which method to try, but plan on finding some scrap wood to test both methods out with to see which one I like best.
As far as the backlight goes, in order to mimic the sunrise and sunset effect as closely as possible, I am planning on using an RGB LED panel from SparkFun which can be used with an Arduino UNO microcontroller. This will allow me to have control over each individual pixel on an array of 1024 individual RGB LED’s. The LEDs are actually quite bright and should diffuse fairly well if implemented correctly. I plan on creating a diffusion panel using either frosted acrylic or several sheets of wax paper. There are several tutorials of how to implement the panel and I should be able to modify these guidelines to do what I want to do fairly easily.The effect I want to create will be similar to the ceiling of the Gothic Theatre in Denver, CO, which is pictured below.
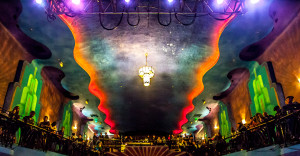
The Gothic Theatre in Denver, CO (Source: http://jmimna.com/wp-content/uploads/2012/11/The-Bad-Plus-2012-10-13-03-73611.jpg)
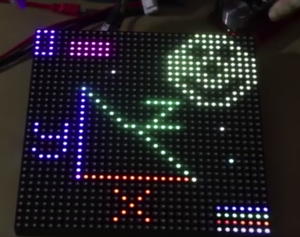
32×32 RGB LED Panel from SparkFun Electronics (Source: https://www.sparkfun.com/videos#all/2KZR3rwEHg8/131)
I’ve begun making a SolidWorks model just to wrap my head around the sizing of the different pieces and to visualize how the whole project will fit together:
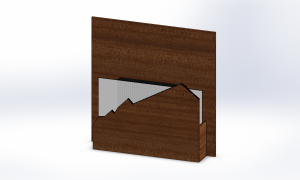
SolidWorks Model of the Preliminary Design
In the end, I plan on mounting this on a wall and hanging it up like a painting. As a mechanical engineering student, so much of what I’ve learned and done in school is focused on functional design, so for this project, I’ve opted to create something that is purely art, and does not serve a useful function (other than providing a small amount of light). As far as aesthetic goals, I really want this to evoke the emotions that come with being out in nature and seeing the Flatirons. As a soon-to-be graduate of the University of Colorado, I’m going to miss seeing the Flatirons walking to class everyday, especially if I end up not living in Colorado. The LED backlight adds a new dimension to me, especially compared to a simple image of the Flatirons, since my favorite part of seeing them is watching the sunset over them.
Inspirations
The inspirations for this project come from a variety of different places, but more than anything, it comes from views like this:


Sunset over the Flatirons (Sources: https://c2.staticflickr.com/6/5208/5353225690_49c167529e_b.jpg, https://s-media-cache-ak0.pinimg.com/736x/fb/80/c9/fb80c97d6efd0ad170423ad15eec1819.jpg)
Additionally, I discuss a few more of my inspirations for this project in this blog post (https://www.aesdes.org/2016/02/24/roshans-main-project-inspirations/). Most of my inspirations comes from wanting to mimic nature using technology in some way. This isn’t biomimicry so much as showing how difficult it is to truly recreate the Earth’s natural beauty.
Critical Design Component
The most critical part of this project will the backlight and the overall implementation of it. While I have no doubt that I will run into bugs while coding the actual lighting pattern changes, the hardest part of the backlight will be getting the light to diffuse properly. I have already ordered the LED panel I’m planning on using, and using tutorials online and the Arduino UNO I already own, I should be able to get it up and running with minimal effort. From there, I plan on prototyping and testing various sizes, shapes, and methods of light diffusion to ensure that I can create the kind of effect I want to get.
Cost and Schedule
The total cost of the project is currently unknown as I haven’t selected all of my components yet, but I’m aiming to keep the final cost below $100. Below is a table outlining the components I will need and estimated costs for them:
- RGB LED Panel – SparkFun Electronics – $41.94
- Wood – Ocooch Hardwoods – ~$20.00
- Wires, Breadboard, and Other Circuit Components – SparkFun, RadioShack – ~$25.00
- Acrylic – McGuckin’s Hardware – ~$5.00
- Arduino UNO – SparkFun Electronics – $24.95
For a schedule for the project, I’m planning aggressively to minimize the risk of going over schedule:
- March 2nd – Design Review Report
- March 3rd – Pick-up RGB LED Panel from SparkFun
- March 5th – Begin Wiring and Programming for LED Panel
- March 7th – Design Review Presentation
- March 12th – Begin Prototyping Panorama
- March 19th – Begin Assembly of Electronics Box
- March 26th – Make Final Panorama
- April 2nd – Final Assembly of Panorama
- April 4th – Begin Writing Report and Making Final Presentation
- April 9th – Testing and Improvements
- April 16th – Continuing Improvements
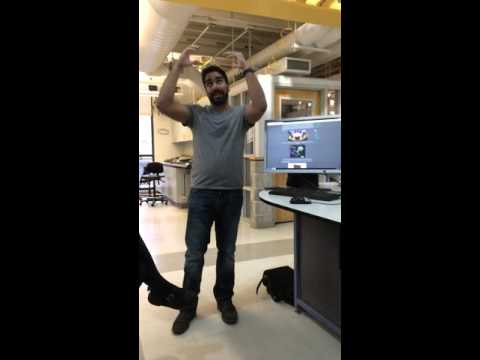
Presentation – In Class on March 7th

3 Comments. Leave new
[…] Below is what ended up being my actual schedule. Please compare this to my very optimistic version from my initial blog post (https://www.aesdes.org/2016/03/01/design-review-backlit-panorama/). […]
Wow! That seems like it will look really cool. I like the aesthetic you have chosen with the burnt wood, and the sunset/sunrise colors. I think its great that you want to create a piece of art that will mimic the environment. How do you plan to program the lights to mimic the lighting outside? I was thinking you could just set an internal clock and have a day, night, transition setting for the colors. Another Idea is to use a light sensor to gauge the brightness outside. This allows for more accurate depictions of the outside for days when it may be more cloudy. I think it may also be cool to have stars in the night time phase. Anyways, looks like your project will turn out great and I can’t wait to see it develop. Good luck!
Roshan, I am so glad that you chose this product. It sounds like such a creative and potentially beautiful product. My favorite aspect of it is that you plan on reflecting Colorado to remind you of your history here. Also, it looks like you are pretty ahead of the game and are already multiple steps into the process. I know that you are planning on using woodburning to make the image, but I was curious as to how your planned on implementing the color. Is it solely from the LED’s or do you plan on painting or staining the wood as well? I’m sure it will come out amazing, based on the work of yours I have already seen thus far.