I’m still juggling between a few different ideas, but the two top ideas I am debating between are a light-up fan bed canopy and Neo’s parasol from the show RWBY. I will write my blog post mapping out both of these ideas.
Light-Up Bed Canopy
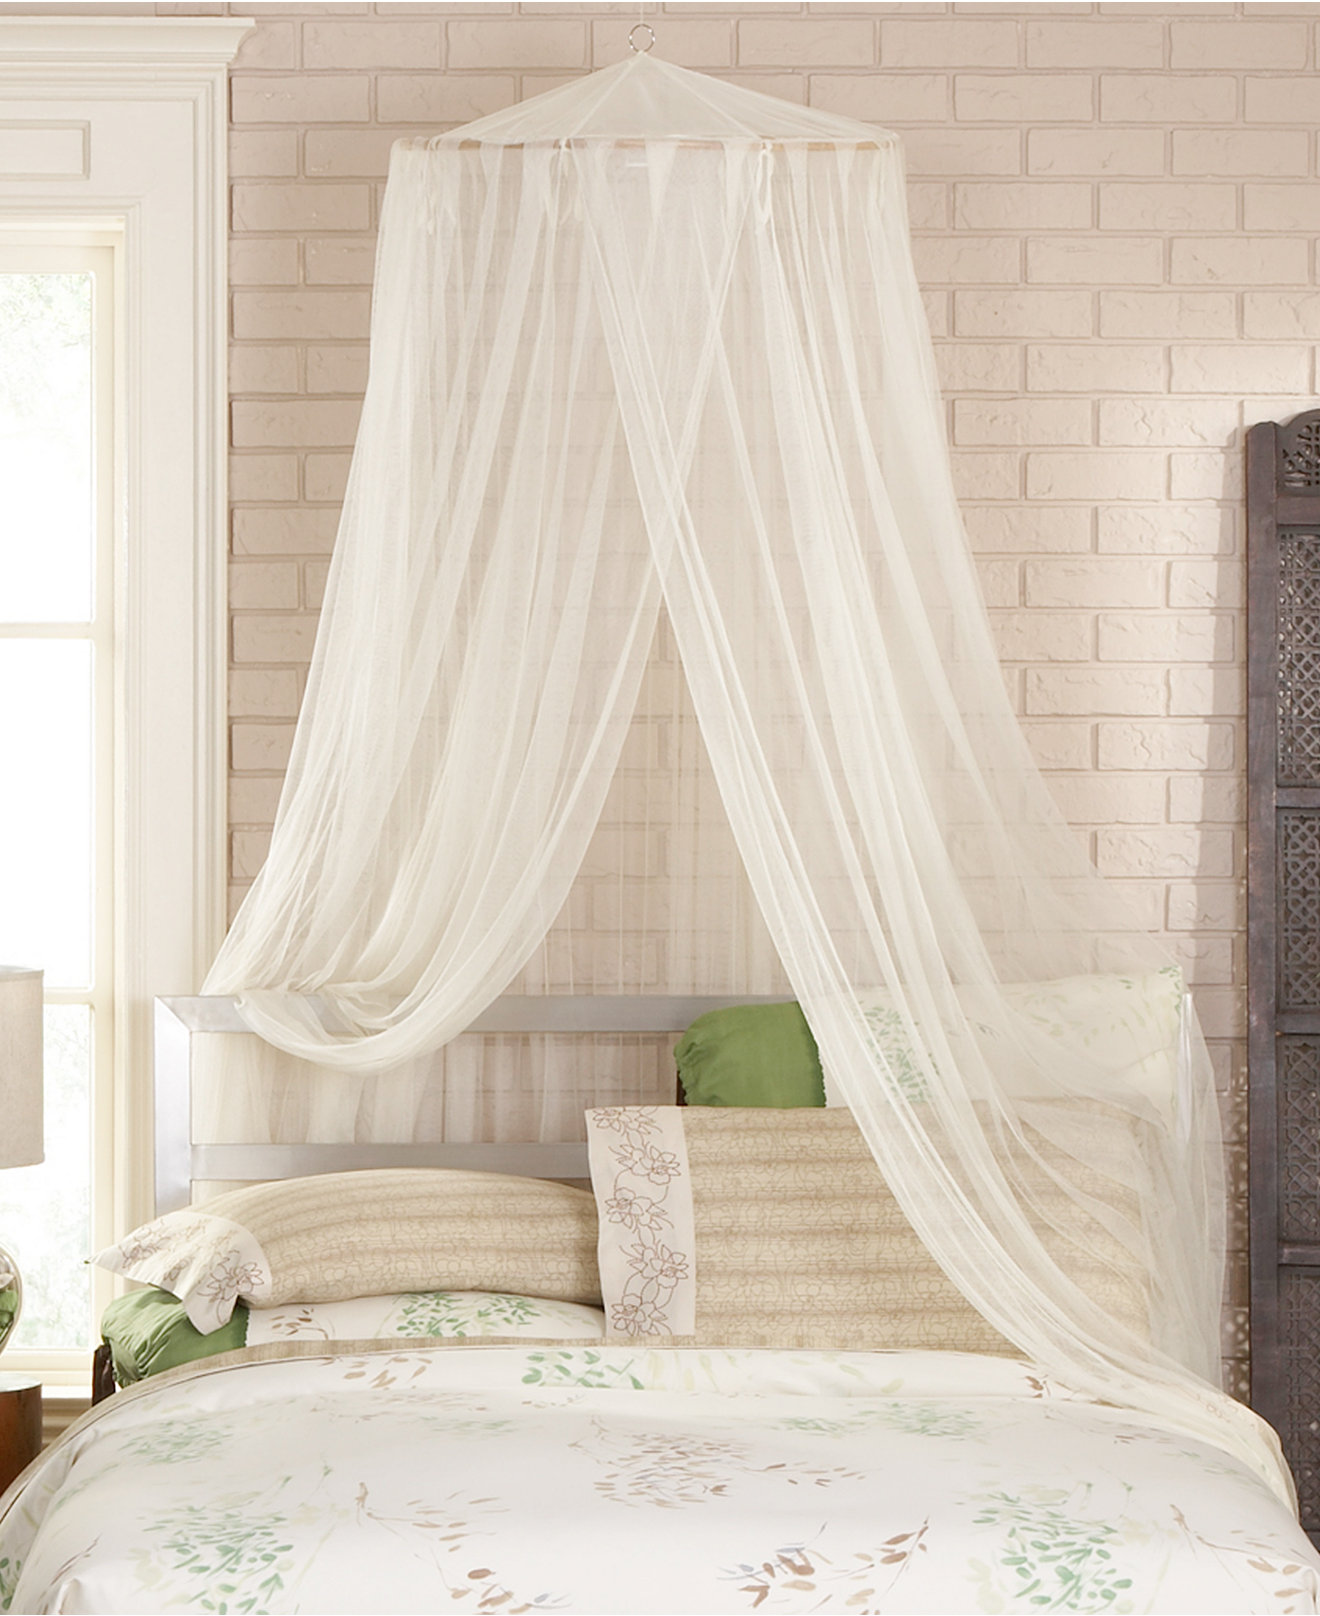
This idea is inspired by my team member Brittany Warly who discussed with me her ideas to make a mobile, and the shape reminded me of a net bed canopy. I personally have always loved the look of the sheer draping net and have always coveted the idea of having one for myself. The aesthetic impression I want to go for is dreamy – airy colors, soft lighting, romantic warmth. White and cream as a fundamental color has always struck me as a sort of dreamy color, especially with pinks and reds and golds. These will be the colors that I focus on using. Sheer curtains like those used in mosquito nets The bed canopy in mind would be a tent-like canopy as pictured in the first three with some kind of decoration on the curtains (like the second image), but I wish to have lighting around the ring (like the third image) and have lights drape down (like the fourth image). An addition that I would like to add, which would add considerably more effort and planning, is a fan in the ring area. This could be potentially hazardous as the drapes could get caught in the fan if I don’t properly design the canopy in a way to prevent it from happening. Secondly, the fan may cause a lot of wobbling from its constant rotation, so I will probably have to test out low power hanging fans and find ways to reduce wobble. As it might not be possible to even have a fan that doesn’t cause the canopy to wobble and be hazardous/unstable, I may need to not include this feature.


Trickiest Component: Obviously, the fan would be the trickiest part to this project. However, this is not a critical component as the canopy will still possess the aesthetic I want. The trickiest critical component will likely be hoop/hanger portion and ensuring that the canopy so that it is balanced in the center.
Cost Estimate:
- Net/sheer curtains: $10-$30, depending on if cutting fabric by the yard at Joann’s is cheaper or purchasing sheer curtains from Walmart
- Lights: Free, as I own several different LED light strings of different lengths that I could use
- Hula hoop: $5-$10 depending if I buy from Goodwill or Walmart, potentially free if I still have my childhood hoops
- Flower/butterflies/beads/curtain decorations that are TBD: probably between $10-$20 from Walmart/Joann’s
- Sewing thread/Fishing line: I own a ton of thread, but I may end up needing to purchase fishing line or another very tough string. $5
- Ribbon: about $5 a spool
- Fan: my maximum price is $20 with a goal price of $10
- TOTAL = $40-$90
Timeline: (Critical Latest Due-by Dates)
None of the parts require online ordering as they all can be purchased in store or picked up from home. Everything has a full week in case of need for revision.
3/4/16 – Sketch and calculate dimensions of fabric I would need for it to adequately drape over my bed
3/12/16 – Purchase cut fabric or curtains (from in-store), purchase ribbon, obtain hula hoop (either store or from home), obtain sewing thread/fishing line
3/19/16 – Put together hula hoop and be able to hang this portion using fishing line.
3/26/16 – Sew together all fabric to match previously determined dimensions. Drape around the top frame and ensure fit. Purchase/make decorations. Sew these decorations to the fabric.
4/2/16 – String lights around hoop and determine how to make lights hang down drapes in a pleasing way. Sew lights to fabric. Ensure everything looks right. Essentially it should be done, minus the fan.
4/9/16 – Purchase a small, lightweight fan by this day. Test the fan copious amount to determine how strong it is – if it is too strong, purchase a light dimmer. See how much I can take apart. Test how much wobble there is when hung straight down. Do a lot of testing
4/14/16 – Fix up the current canopy and ensure that the drapes are stringed in a way that they will not be sucked into the fan.
4/15/16 – Attempt attaching the fan in a non-permanent/sewing manner and test that it is okay. If I am satisfied, attach the fan.
4/22/16 – Small touch ups, including sewing the power cables for the lights and fans in a place that is satisfactory. Should be complete!
Sources for Photos
[1] http://www1.macys.com/shop/product/mombasa-bedding-siam-canopy?ID=550255[2] http://www.amazon.ca/Mosquito-Nets-White-Canopy-Butterflies/dp/B002YK9DI4
[3] http://adventuresinpinteresting2012.blogspot.com/2012/01/little-girls-bed-canopy-with-lights.html
[4] Pininterest – which won’t let me get the url unless I make an account
Neo’s Parasol


The inspiration behind this idea is that I am planning on making this character’s entire outfit anyways. The parasol will be the most difficult part of the entire costume.
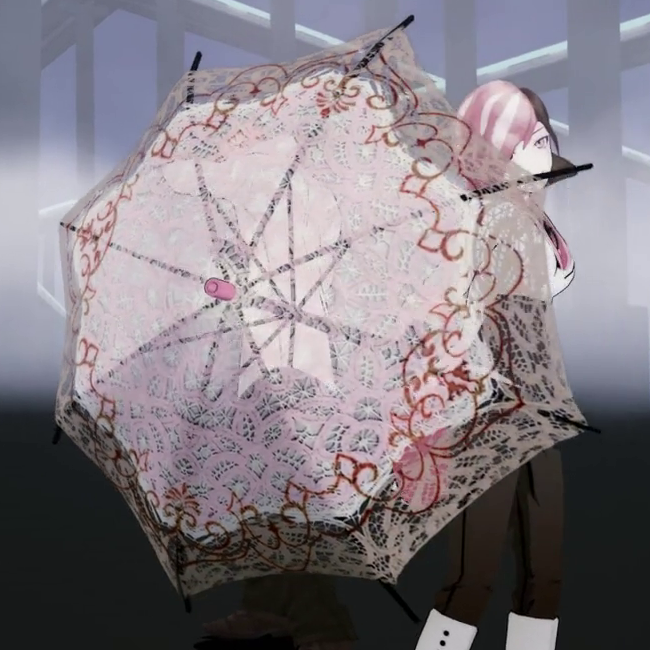
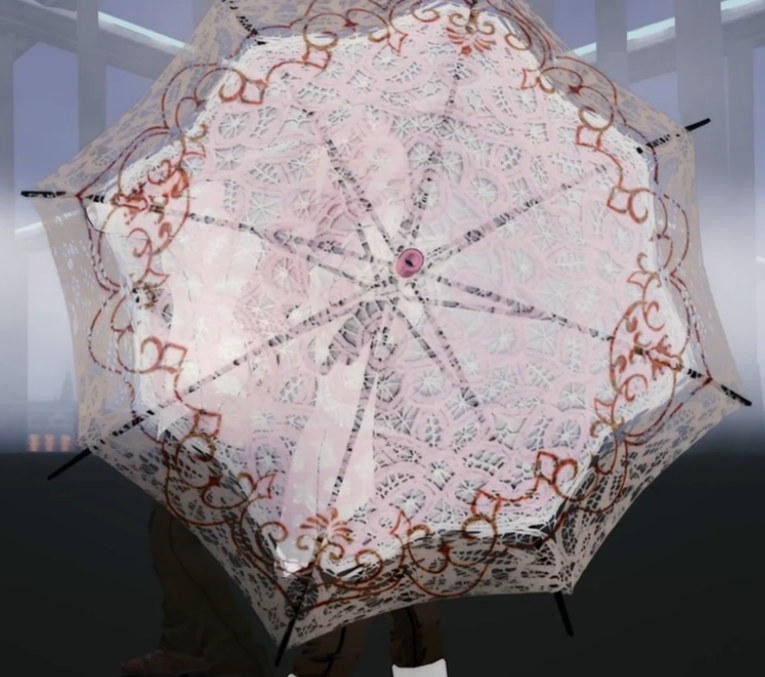
The aesthetic of this parasol is, like the bed canopy, very romantic, feminine, and a bit Victorian. The colors on the parasol are white, pink, brown, and maroon. The lace design is also very Victorian in nature as it contains several Fleur de Lis shapes, not to mention lace itself is very romantic in nature.
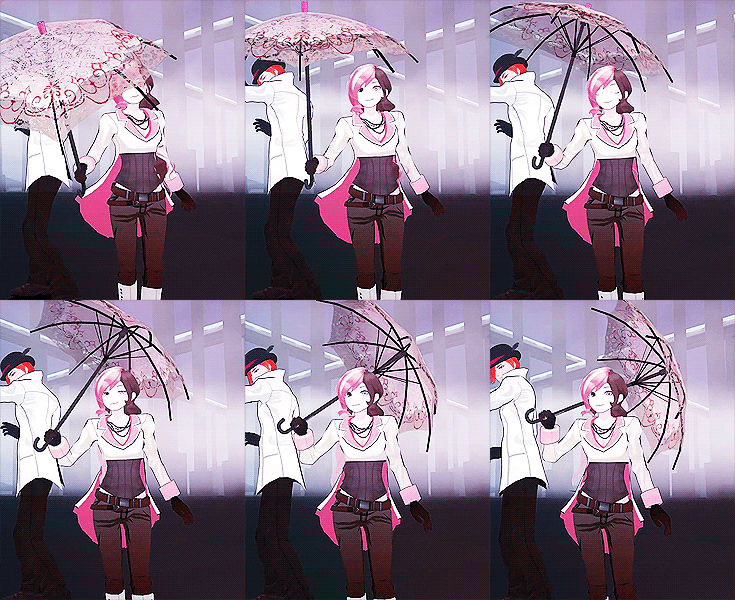
As background, this character is called Neopolitan (yes, like the ice cream) or Neo for short and she carries a lacy parasol. There is a button on the that makes the parasol automatically open and close, and if I can find a way to include this, I will. The parasol has a hidden sharp spear-like weapon that can protrude from the top of the parasol in the show, but I obviously will not be modeling this. This parasol gives the impression that it is delicate, vintage, and very feminine.

Trickiest Component: The trickiest part of the parasol is frame. I will likely be purchasing an umbrella and then remove its fabric and replace it with the lace. However, making the parasol close properly after this fabric change will be difficult. Additionally, most parasols – especially as cane umbrellas/parasols – tend to not be automatic. It will be difficult to modify a non-automatic parasol have this automatic open feature.
Cost Estimate:
- A cane parasol: non-auto is about $15, with auto is about $25 according to Amazon
- Lace fabric: probably about $8/yd at Joanns and I’ll probably need two yards of it maximum (there are two layers of lace), so about $15
- Brown fabric dye/paint: about $5
- Red/maroon paint: $5
- Paintbrush: I have several
- Black spray paint for the cane: $3
- Fabric glue: $3
- E6000 glue: I have some
- Sewing thread (optional): I own plenty
- TOTAL = $46-$56 depending on the cane parasol frame
Timeline (Critical Due-by Dates):
Only the parasol will need to be ordered online, unless I get lucky at Goodwill. Everything has a full week in case of need for revision.
3/1/16 – Order the parasol (with Prime shipping)
3/4/16 – Remove the existing fabric from parasol. Examine the fabric dimensions and determine what the lace dimensions need to be to fit this umbrella. Figure out all dimensions for color. Draw out the red pattern and make a sheet to basically overlay what it will need to be on the parasol.
3/12/16 – Purchase cut lace from Joanns, purchase all paint. Using the dimensions from last week, cut the two lace pieces. Paint the brown section of the larger lacy piece and let dry.
3/19/16 – Attach the small all-white lace to the bigger lace with the brown outline and let dry. Spray paint the umbrella frame with black coats of paint without damaging the auto-close button.
3/26/16 – Attach the lace to the cane parasol frame. This will need to be a mix of glue and sewing to ensure that the lace stays in place. This will need to be while the parasol is open. Let dry.
4/2/16 – First using thin marker, carefully trace the red/maroon pattern onto the parasol. When it looks good, brush on red paint over design. May need a few layers.
4/9/16 – Now that the umbrella is dry, use this time for any touch ups on red paint or troubleshoot if any of the top steps went wrong. Let dry.
4/15/16 – Everything should be complete!!
Source of Photos: They are all directly from the show RWBY created by Monty Oum and from Rooster Teeth.


4 Comments. Leave new
[…] Inspirations (2/24) […]
[…] Inspirations (2/24) […]
I like both ideas, and thanks for the mention :)! I really like the look of the last canopy you posted. What would be cool is if you weave in some flowers into the canopy; it’ll be so dreamy with the lights. In so far as the fan, you could go for a simple, natural fan that is more for aesthetic than function; the spinning of a fan can be relaxing and help you sleep at night, so maybe if you went for a low powered one that moved relatively slowly, the netting wouldn’t get caught in it. The parasol is also a great idea, though the fabric and patterning may be difficult.
Ooooooh, I like the parasol. That would be so pretty! I think it would be neat (if you decide to go with it), to add lights to the ends of the parasol frame. Although that might not be true to the character… There are definitely ‘automatic’ umbrellas out there, at least for the opening part. I’ve used a couple. You could find one and remove the mechanism so you could put it in a more ornamental frame. I’m not sure about modifying it to get the button that opens it on top, though.