Inspiration
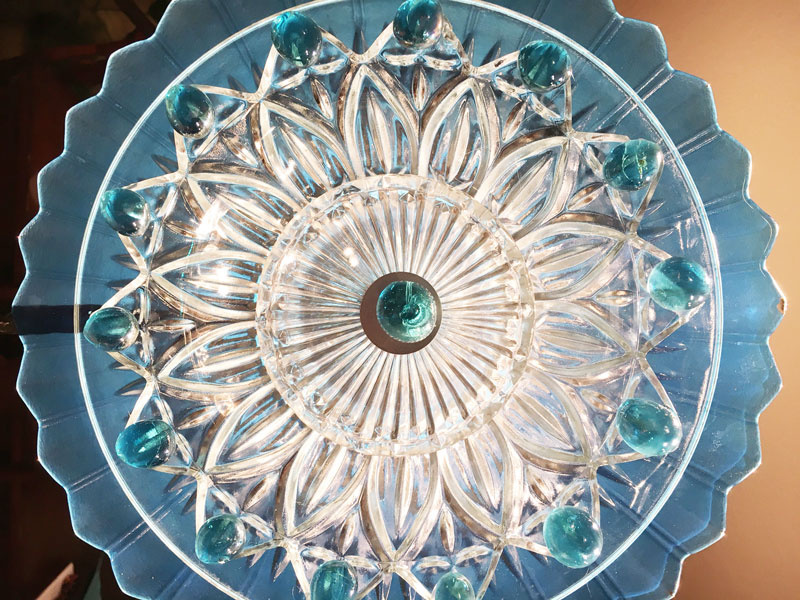
The inspiration for glass flowers came when I was shopping with my family one weekend and saw some in a store window. It was some time ago and I really don’t recall where I saw them but remember thinking that it was a clever use of old glass. I inherited some beautiful vintage glassware from my grandmother, but unfortunately it is boxed away where no one can see it because I have no where to put it on display. These glass flowers seem like a nice solution that enables me to display these heirlooms and add to the visual interest of my garden, which happens to be one of my favorite places to spend time.
Design Process
The process began by searching for examples online and digging into exactly how other people have made these in the past and any lessons learned. Some people chose to use silicone adhesive to glue the plates together while others drilled through the center of the glass then anchored them together on a bolt or rod. I liked the idea of the dishes being able to move and spin independently of each other so chose to try drilling a hole in each then anchoring them to something for a stem. I wanted to make the first flowers with glass dishes that don’t have any real sentimental value just in case they cracked and broke or some other mishap occurred, so I stopped by the Goodwill on Broadway in Denver to find some to use for this project. I hit the jackpot and found several glass dishes that would likely work well. Unfortunately, most were clear glass but I remembered that I had some glass vase beads at home that I could attach for some added color and visual interest. I was also fortunate enough to stumble across a tall, sturdy candle holder with a slightly curving stand. It seemed perfect for the stem to the flowers and that it would likely provide enough stability for the heavy dishes.
After purchasing a few supplies at Home Depot – diamond drill bit for ceramics and glass, eye bolt to attach the glass to the rod stem, and washers to place between the plates – the real fun began. To drill holes in the glass I filled my kitchen sink with enough water to submerge a single dish, then I placed large pieces of torn up cardboard in the bottom to cushion the plate and act as a backstop for the drill. Using the diamond drill bit I slowly and gently drilled a hole through the center of each of the dishes. Patience was important in this step. Luckily, my concerns about shattering the glass did not come to fruition!
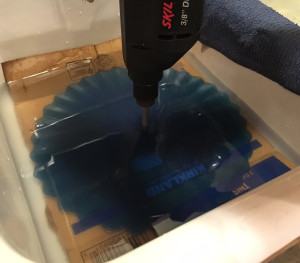
Drilling hole in glass
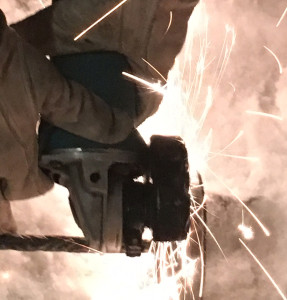
The next step was to remove the top of the candle holder using a grinder with a cut off wheel. Using gloves and safety glasses was particularly important during this process as sparks went everywhere.
I then used a hot glue gun to attach colored beads to one of the dishes. Admittedly, the hot glue will not be as durable as silicone adhesive but that takes a long time to dry and I was afraid the beads would not stay in place. Before putting the flower outside in the elements I will likely add the silicone around the beads to help them last a bit longer.
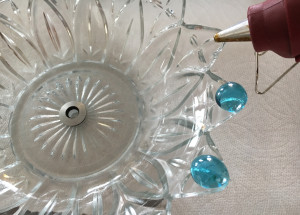
Gluing glass beads
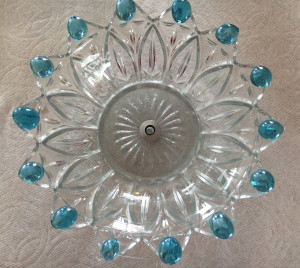
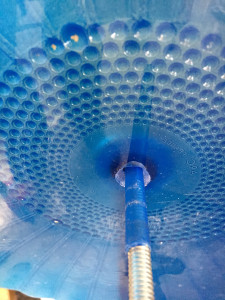
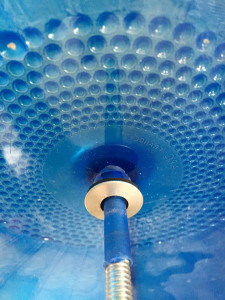
The eye bolt I purchased at Home Depot was too loose to reliably support the glass dishes on the metal rod I was using for the stem. I rigged it to work temporarily by wedging some small screws between the gap and the stem. This provided enough tension to support the weight of the plates reliably so that I could test out the rest of the assembly. After placing the largest of the plates onto the bolt it was apparent that the friction of the glass on the threads of the bolt could cause some damage to the glass. I dug around in drawers around the house for something that may solve the problem and was fortunate to find a blue plastic straw. Not only did it fit over the bolt perfectly and created a smooth surface for the plate to spin on, but the color matched the theme as well. Once that was in place I added the biggest plate again, a galvanized washer, the next smaller dish, another washer, the next smaller dish, another washer and then the smallest dish.
Conclusion
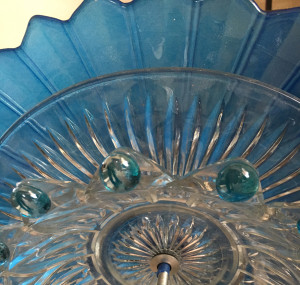
The flower turned out pretty much as I had in mind. I tried a few different combinations and orders of dishes before deciding on a look that I really liked. The dishes that are chosen, and the order that they are put in, make a significant impact of the final look of the flower. I wanted them to spin independently and was able to figure out a way to make that happen. It may not have been the most efficient or elegant solution, but it works. Design is problem solving, and taking something from an idea or concept to reality often involves a great deal of creativity. My design process was fairly straightforward, aside from some rigging and an additional shopping run to Home Depot. I tried things and they didn’t look quite right or work the way intended so I had to find a solution and try again. After a few iterations things worked out as I wanted them to.
Next Steps
Now that I know how to make these and have some confidence that I won’t shatter the glass in the process, I plan to make more of these for my garden. I will need to figure out how to make a stem out of rebar or something similar as stumbling across the perfect candle holder won’t likely happen again. I still feel that these flowers are a fun way to display vintage glass and may even create a flower or two for my family members.
Resources
- How to drill glass or ceramic dishes for garden art flowers, Melissa J. Will
- How to drill glass, Ultimate Handyman
- Garden Art Step #1 – Upcycle/Recycle Colored Glass Flower, Lighten Up
- Dish it up garden art, WLUK-TV FOX 11 newscast
- How to Make Inexpensive Flower Plate Garden Art, Joan Stewart, Travel & Leisure July 11, 2012
- Robert Allen, The worlds most fabulous husband with an awesome set of tools!

50 Comments. Leave new
This is an excellent looking piece! I really think that with some sealed bearings, and either a pulley or a turbine, this can be an awesome kinetic sculpture.
It turned out great! It’s a shame the blue one broke! Great idea attaching plate holders to a fence, it would add some cool art to a garden.
Beautiful sculpture. It would look awesome as a bouquet.
Its so pretty! One thing that might speed up the cutting through glass is to use a Dremel tool. I used that for my glass drilling adventures and it works pretty quick and helps to minimize the potential for cracks.
Thank you for the suggestion. I haven’t seen anything about using a Dremel but I’ll try it out.
This came out really nicely. I can definitely see this being used in a garden or kitchen, almost gives off sort of a southwestern feel to it.
I love how you decided to use a screw instead of hot glue, so that the plates can spin. The flowers look super cool. They would look awesome in a flower patch or garden.
Wow this looks great. So sorry to hear about the blue one.. also the stem made from the candle holder is a great touch
The result looks really pretty. The stand goes really well with the overall aesthetic. It might be cool if the glass were somehow backlit or something. However, it’s not very necessary with some natural light. The layout was clearly well thought out. At first and second glance, it looks like you bought it at a garden store or something. Very well done!
Thank you for the idea of back lighting it. I have lights in the yard so if I place the flower in front of one it could look good at night too.
Great idea and perfect for a garden. I like how light reflects off the project and how you were able to make the project dynamic. Great job!
It was really unfortunate to hear that part of your project broke. When drilling glass, it’s best to have a decent amount of lubricant on the surface/drill bit. It might help with your project. I really love the curves in your project. I agree that making more could really help accent a garden or other patio area. Would you add something so that a breeze might help it spin?
I was hoping to have them spin but the weight of the plates seemed too much. Someone else suggested using a bearing to help them spin, which I might try.
Your flower looks really nice. Glass is difficult to work with but I think it payed off. I love the way it interacts with light. Know your not alone with trials and tribulations to drill glass. (I had many difficulties and wasted effort doing something similar on another project)
Pretty! These would make a perfect yard decoration during the summer. It would be neat if you could incorporate lights to make the back plate glow a bit. It seems like it would be very difficult to drill through the glass. I like the frame you used.
I really like the idea of the different components spinning independently of the others; have you considered adding a mechanical component to this project? Maybe that would be an interesting concept to explore for the dynamic project? You could program an Arduino to actuate gears when the weather is windy, that way the piece wouldn’t be directly interacting with the wind, but there would be some relative motion when there is wind. (Did any of that make sense?)
Nice idea., now I just need to learn Arduino!
The finished product looks great, good enough to keep for many years.
It is a very creative use of dishware and I love the idea of making leaves and branches with silverware. I love that it spins but it might be cool to make it so that it spins freely without you having to move it. Not sure exactly how to do that.
“Your art is the prettiest art of all the art” – Roy Anderson (from the office). But no really this is an absolutely beautiful piece of art and it’s great how well it turned out despite any doubts that you had. I wonder if it would be possible to get it to rotate on its own, that would be even more beautiful.
These would make great garden decorations. Where did you get the stand from? The exaggerated curves work perfectly for the funky colorful style of the plates. If you were able to embed a bearing onto the main plate, you may have more luck with it being able to spin in the wind if you pursue the pin wheel blades.
Thank you for the bearing idea, I may try that. I was thinking that a yo-yo bearing might work? Thanks again.
Looks very nice, I like the use of the candle holder as a base.
I very much liked the use of glass in your project. Glass is really great since it can interact with the lighting in a room or outdoors. Kudos on working with such a challenging material!
I really like the the final product look of this project. I am sorry that the blue plate broke. One thing that you could put it in some sort of a fountain and the water could potentially make it spin! I really like the thought of the table coming to life and growing.
Clever idea to use water to make them spin. My husband has been wanting a water feature so this may very well be his excuse :-).
your project id beautiful, I am sorry to hear that the blue set broke but still it looks cool. The spinning idea and drilling through class is really cool. Having it in the fence where wind can spin it is an amazing, maybe having a long moment arm like the professor suggested or having the flower made of plastic plat or light class.
Looks awesome–this would be a great addition to any yard or garden.. I think the addition of glass or beads or other materials that would catch the sunlight aesthetically would look cool. Also, if it spun (perhaps from a mechanism placed out of sight behind the largest plate) it would create a great dynamic effect.
The flower looks beautiful! I read your upscale progress, so I was very interested in how the project would come together.
My mom would love this, consider using rubber/ urethane spacers to give some tension allowing you to tighten the main pivot. Great use of old flatware, like the bends on the stem as well.
Thank you for the ideas!
Great aesthetic. Good job on drilling in glass. Good description on the process. Do you want to add LEDs for it to change colors. I like your idea about including silverware to your aesthetic. Sorry about the broken blue one. I looks awesome on the blog. I love that it spins. Good job.
great job! So sorry to hear about what happened to the blue design, but to be honest I like the pink one better Way to problem solve after the frustration of what happened and I really like the clean cut, modern look you went for and the curvature of the rod you used.
Great garden ornament!
This looks like something you could sell in a craft fair! Did it turn out how you wanted to, or did you have to make any design changes after starting?
Love how it turned out! An awesome piece for a front door or garden. Can’t believe you were able to make another on short notice! Awesome end result
Really fascinating drilling process, I had never heard of something like that before. The end result would make for an excellent garden ornament. Great!
this will hold up really well in a backyard. Has a very summer warm feel to it. Great craftsmanship. Maybe add something would help it spin with the wind.
I really love the colors you used with the glass! The stand is also amazing and works perfectly with your flower and overall design! This could be an amazing addition to a flower garden! So much potential for this project!
That is quite pretty. Would you plan on making this with plastic in the future? I am impressed that you even considered drilling into glass. It would be nice if you painted the pole.
Great project, the red beads add a nice touch of symmetry to it.
Yeah, drilling into glass would be scary. Under water is a good idea- yours turned out really well. The glass beads are a great touch!
This is a beautiful design project. I really like that you decided to drill through glass. That is very ambitious and I love how it turned out and I think it worked really well. They have a beautiful aesthetic and like where you got your inspiration and think they would look beautiful in a garden! Wonderful job!
These are very beautiful and would look great in any garden or front yard. Great idea and use of the glass plates.
The use of colored plates is perfect for this application. I like how you used not only the plates but beads as well to create a truly colorful flower.
I hope your husband is sorry, and that he survives.
Great Job! I am excited to see them in person. I like that you added colored beads as decoration. Also, I really like that you were able to make them dynamic by having them spin independently. Making smaller versions of these would be great gifts for people.
Great idea. I have it fairly dialed in now so I may make a few for family and friends.
This is a great garden decoration idea! I think adding the colored beads will really help to accentuate the different plates when spun. How do the plates attach to the candle holder you found? This is a really cool way to use dishes after they’ve stopped being eaten off of.