I wanted to design and create something useful for my upcycle project. I have wanted a nightstand for a while, so I decided to make my own. The desk in my bedroom is covered with stacks of homework assignments and exams from last semester, and I wondered if there was some way to incorporate old papers into my design. Origami was brought up in class once, and brought back childhood memories of folding paper cranes and boxes. So, I decided to figure out if there was a way to make a nightstand out of origami using homework assignments.
My first idea was to make a large origami box by gluing lots of paper together to form a giant sheet large enough to fold into an open box. The box would then fit over a cardboard box to form the nightstand. The first thing I did to pursue this idea was fold different paper boxes of designs that I liked from Origami-Instructions.com. I used 8.5” x 11” paper that I cut into 8.5” x 8.5” squares, folded them into the boxes, and then measured the resulting dimensions of the boxes.
![IMG_0797[1]](https://www.aesdes.org/wp-content/uploads/2016/01/IMG_07971-e1454566407986-300x225.jpg)
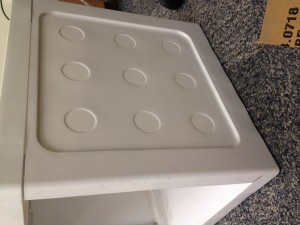
The new idea I came up with was to paste origami shapes into a pattern on a cardboard box. I went to Goodwill and found a plastic box that was about the right size for a nightstand.

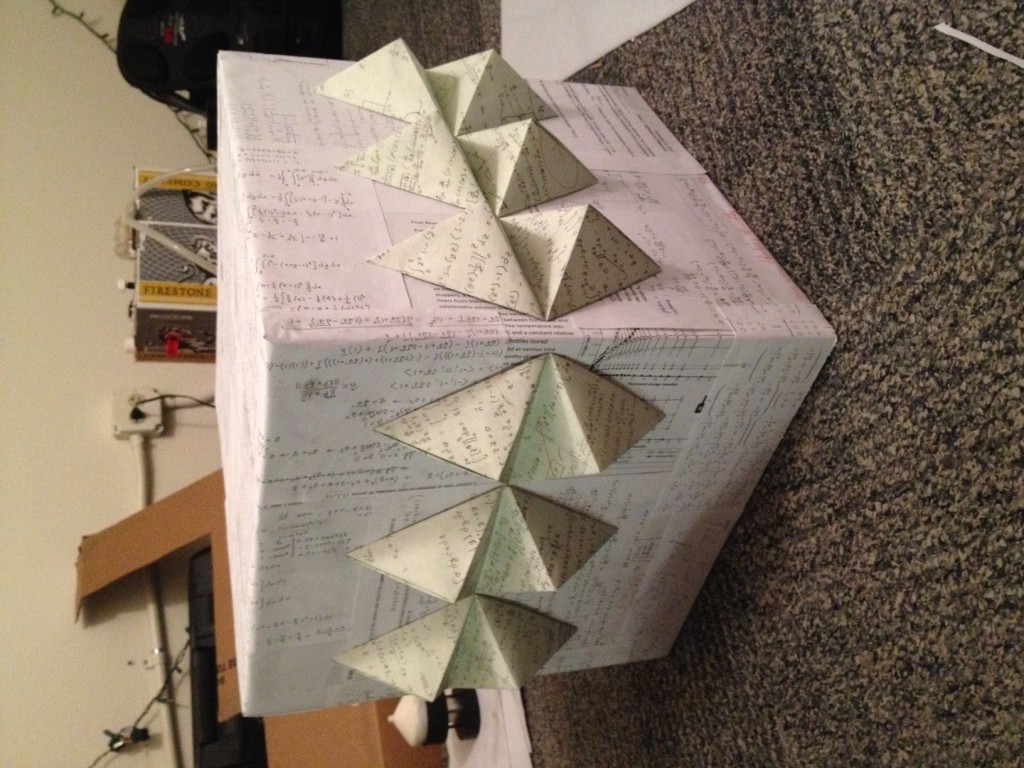
The walls were not completely flat, so I cut pieces of cardboard to cover the walls and glued them using hot glue. For the origami pattern, I looked at different shapes for one that I liked, then I made a few out of sheets of homework. I found out that the shapes were not the proper size to cover the sides of the box. However, after messing with the shapes’ orientation on the walls, I came across a pattern that I liked.
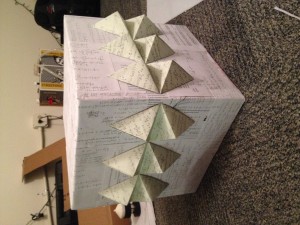
To cover up the cardboard, I decided to glue pages from exams to the box. The white paper provides some contrast to the color of the engineering paper used for the homework. Three origami shapes were glued to each side of the box side by side using hot glue.

The design process was somewhat linear. It began with defining the problem, then ideation, researching, planning, prototyping, experimenting, and building. The iterative loop occurred from experimenting back to ideation before finishing the final product. This occurred when I realized that the original design would be too difficult to create.
Overall, the nightstand turned out better than I had imagined. The origami shapes are fragile and could easily be crushed. One solution might be to fill the underside with foam to add rigidity. The paper is also prone to getting wet, which could ruin the aesthetic of the nightstand. This could be solved by covering the top with a sheet of acrylic.


41 Comments. Leave new
I agree with adding a clear top to it. Not only will it provide a smooth finish, but will add an element of style. Love how you combined the nightmares of all your classes into a night stand.. such irony
I like your overall design. Origami can be challenging and it is impressive to see that you were able to get each piece really clean and uniform. I like your ideas for adding some amount of plastic to help increase the water resistance of your stand. Great project, hope it serves you well in your daily needs.
I like how your project turned, the engineering paper and method’s solution all gave it special touch. Nice way of adapting to make a use of it ( the acrylic to make it waterproof idea)
I love the unique shape and use of simple colors. I would maybe try and seal the whole stand rather than just the top.
Your use of white paper for the desk and green/yellow engineering paper for the accents is genius. I know it’d be hard due to strength issues, but maybe you could experiment with creating storage under the table top next time?
Nice Nick. I like the contrast in color of the engineering paper and the exam paper. You also did really nicely in making all of the extrusions uniform, it looks pretty high quality, not an easy thing to do with just paper.
Like the minimalist approach, simple cubic shape and black and white base with simple geometric additions. Consider finishing off the inside for a more complete look.
Love he use of old hw and assignments very clever
Cool! I like using old homework assignments for stuff! It makes for a good method of recycling. It reminds me of a Thwomp. Would you consider adding any other origami structures to it? Like a statue or something? I
I like how you used both white and green engineering paper. Also the plastic or glass top would be a great addition.
Great work on this project. The geometric shapes with the engineering notes are a nice pairing. I also really like the contrast that the green paper brings. You should definitely look into some way to protect the table from water damage but overall looks great.
This turned out really neat! I love how uniform you were able to get your polygons. The technical work on the paper adds a nice touch as well. Reminds me of brutalist architecture.
http://brutalism.online/brutalist-buildings/14-usa/393-pirelli-building-new-haven-connecticut-usa
I like that you used both white and green paper, the green shapes stand out nicely. It would be cool if you added a light inside the box.
This is a fun and college oriented aesthetic. I hope your methods tests and homework don’t induce any nightmares.
Looks like it could be a soda/beer cooler if you put the open side upward, lined the inside with foam and made it flat on the bottom! That’d be pretty awesome, haha
I like how you used old homework for this project. Using origami was a interesting twist. I wish you had added more or more complex shapes to the box. You may want to see if you can add a waterproof layer to the box.
The origami shapes remind me of spike studs on leather. I like that you used engineering paper to contrast the white exam papers. Maybe you could spray it with a clear coat to protect it from water and make it so that you could wipe it down? Nice work!
The origami shapes around the sides looks great.. I think more of these, perhaps with different geometries, would enhance the overall aesthetic.
I like how you turned old homework into this. I know that I have a lot of it. I wonder what other cool shapes that you could make with origami. Even if they don’t have a flat edge, you could fill it with an insulation foam and cut it on the band saw.
Can’t go wrong with triangular pyramids. They’re so interesting because the 4 sided form is the minimum geometry to create a volume.
Really great way to recycle your old homework/exams. Looks personalized and very special. I think some sort of waterproof protection on the top would be a good addition.
I like how you made use of the old exam papers instead of just throwing them in trash. The overall design looks great. Very simplistic feel. I think you could improve the design by adding some colors.
Having your writing all over the surface looks really interesting. Perhaps spray it with a waterproofing finish so you can put glasses of water on it.
I really like the shapes you created and added to the sides! It’s a great use for your old engineering papers! I would recommend “laminating” the surface so that the papers don’t get damaged or smudge.
This is a cool way to reuse old homework. You could wrap it in different styles of wrapping paper for each season and call it a seasonal decoration!
Nice Aesthetic, I like that you are leaving the writings on the paper. Great finish and nicely done. Where is this going to go next?
I like how you used your old homework assignments for inspiration in making this design. Your photos for the post are excellent too.
the white / engineering paper is a cool visual mix too! I wonder if some clear plastic sheets (binder covers?) could be your water resistant layer.
Are there additional origami shapes that you could integrate into this (beyond just the ones made out of engineering paper on the outside)?
Even though you wanted to make it true origami, I think you made the right decision to use an existing container as it will definitely be stronger and more practical. Maybe put a piece of scrap glass on the top to give it a nice shine, but protect the paper.
I’d suggest a piece of glass for the top of your table, which would still allow you to see the paper on top but would definitely protect it from harm.
I love how the paper has personal meaning for you. Yes, a plastic or glass top will be a big improvement.
This came out looking really good. It was a pleasure to see you working on this in the Forge.
Cool project, I like the side pieces, adds to the origami aesthetic.
This is pretty neat although did you think of any other ways you could make it more aesthetic? What was the purpose of having the shape that is attached to the side of your nightstand?
This looks great! I like how sturdy it is because of the interior plastic box, but with your own unique origami style with the old exams and shapes. I like the thought process that you had behind it, starting with an all natural origami to realizing it could be better with a stronger frame.
I like that you can see the actual engineering info on your papers and I like the origami shapes out of engineering paper. Turned out well!
I like your project, but I wonder if it’s traumatic for you to constantly look at your old exams when you roll out of bed.
Nice use of your old homework, I’ve got a ton of them lying around collecting dust.
I love the triangles coming off of the side of the box, looks like little mouthes. Great use of graded assignments.
I like the use of paper in your project – its very easy to work with, so I imagine you were able to try out a lot of ideas quickly. It would be interesting if you were able to make a dynamic paper project or incorporate origami into your final project in some way.