Intro
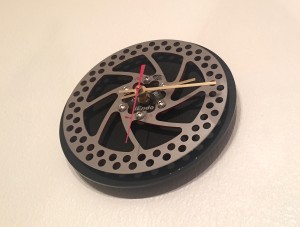
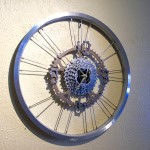
Almost a year ago I visited a friend and saw a bicycle disc rotor hung on the wall. I had seen a few pieces of bicycle art before but this caught my eye and I walked over for a closer look. It was a functional and clean looking wall clock. The way the creator used the shine of the rotor and the overall clean, but decidedly bicycle-centric, look inspired me to add a bicycle part clock to my project list. Unfortunately, life intervened and the project never got off of my list and into my hands. When we were assigned a project centered on upcycling however, this immediately came to mind.
I have always wanted to make artwork, useful or not, out of old or broken parts from bikes. I’m not quite sure why but I really like the look of rotors, cassettes, hubs, wheels and cranks; more than complete bikes or beautiful frames. The work to design and manufacture these components combined with the effort to extract and refine the metals used seems so substantial. My heart always pangs a little to see them in the the trash or rubbish piles. After toying around with a few other ideas for this project I set my heart constructing a clock made out of these diamonds in the rough.
Vision & Goals
I had my general goal but not a clear, specific vision of where I wanted to take this. The clean, minimalist aesthetic of my friend’s clock was intriguing but I also really appreciate the industrial look of gears and chains. Initially I wanted moving gears and hands that were actual bicycle parts. However, further research revealed most of the clock movements I could acquire have a difficult time moving even thin lightweight hands found in most wall clocks. I looked into using other stronger motors but the precision required for clocks is difficult to achieve and I didn’t want a clock that constantly told the wrong time. I quickly explored the idea of a clock that displayed general times such as eat, sleep, ride, work, etc. with the ability for the user to manipulate the piece but decided to shelve it for a future project.
Still teetering between a more modern, minimal aesthetic and the steampunk, industrial design, I gathered several used parts from several bike shops and some lying around from repairs of my own bikes. I mainly envisioned the clock using the shine of metals and a clean, crisp and professional look to attract attention and stand out in a room. Unable to throw out either aesthetic I decided to set out with a general goal of making a clock with that elusive cool-factor and one I could be proud to call my unique creation.
Design Process and Clock Creation
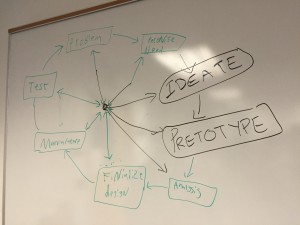
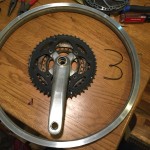
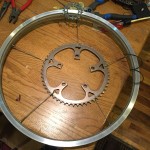
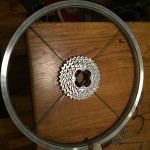
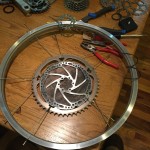
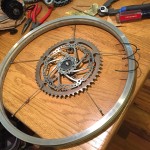
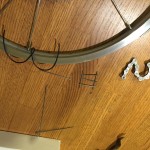
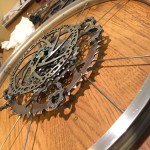
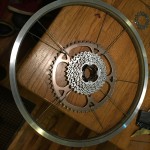
My overall design process was additive and fairly linear. After my initial research and inspiration I began to tinker with the parts creating different looks, designs and prototypes. This helped me flesh out some different ideas and develop my aesthetic, which began to lean towards an industrial and gear laden look. During my initial design, I threaded spokes through a rim and bent them around different components such as cassettes and chainrings to affix them in the middle and form a base for the clock. After I had the base I prototyped other ideas for additions, affixing things with removable putty and colored paper cutouts to develop the final design.
I have outlined my general design process below alongside the more familiar design loop my group created in class.
- Inspiration
- Acquire materials and determine feasibility
- Research existing design and influences
- Form a few loose Concepts
- Tinker and explore designs and ideas (Pretotype)
- Commit to a design and go for it
- Play with different ideas for additions
- Finish project
- Evaluate for success
Challenges, Final Evaluation and The Future…
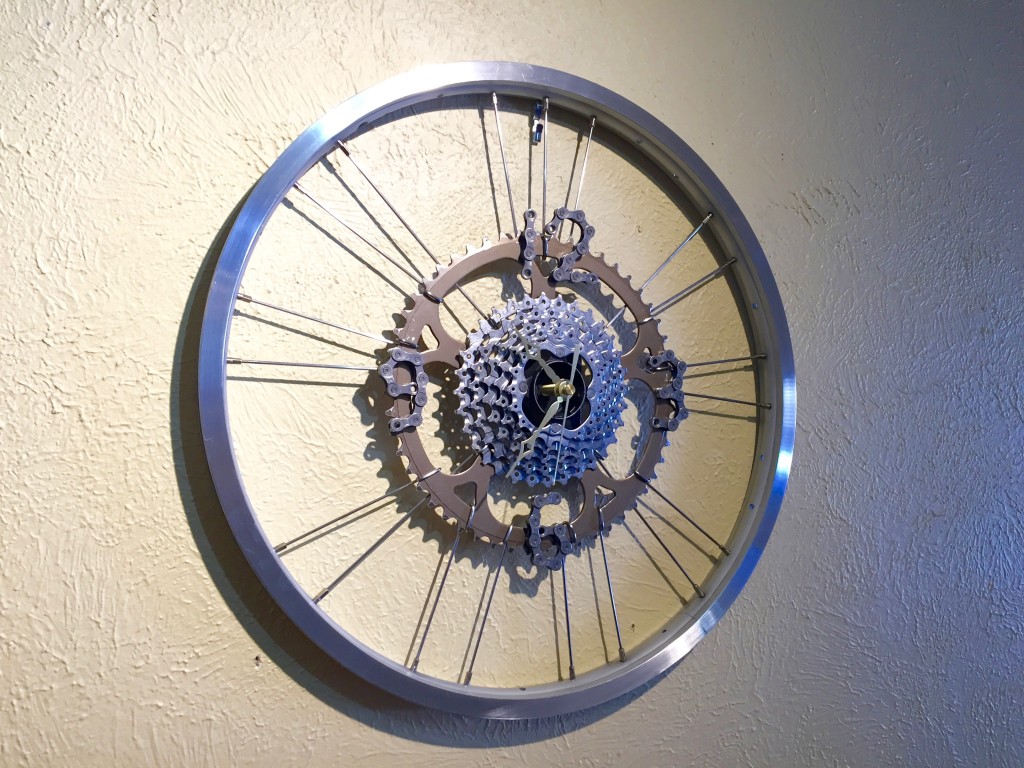
Fortunately the project took an aesthetic direction I enjoyed fairly quickly. However, I often struggled with decisions over which designs and ideas to use such as: number size and placement, possible painting of pieces, the number and pattern of wheel spokes, and using different color materials. In particular I struggled to determine whether to paint the bicycle chain numbers and clock hands (or enlarge them) to increase contrast and legibility. Pretotyping helped to an extent, but many times I just committed and assessed at the finish. Maybe on a different day I would end up with an entirely different clock? I eventually decided to stick with raw metal as I really like the finish and aesthetic of the unmodified bicycle chain numbers. If the design I committed to after pretotyping had not attained my loose vision, I imagine I would have gone back to the drawing board. Thankfully I was able to complete the look and feel I was after in a fairly linear process.
Evaluating my clock at the finish, I believe I accomplished my overall aesthetic and functional goals. The clock works perfectly and tells time accurately. I am really pleased with its aesthetic on my wall and I think it will attract attention and comments as time unfolds. I learned quite a bit in this whole process and think I may have found a new hobby. I now have at least 2 more bike clocks added to my project list. Creating a future clock with an eat, sleep, ride dial; one with actual moving gears and bike parts utilizing welds with a heavy steampunk aesthetic; and another with a very minimal, sleek, modern design still intrigues me. As for the final design of this project I may further explore painting the numbers and adding different or painted hands. I enjoy neons and other bright colors which may give a cool “pop” to the clock, but for the moment I am satisfied with the metallic industrial look I attained.

39 Comments. Leave new
I together with my guys were taking note of the nice procedures from the blog and all of a sudden came up with an awful feeling I never thanked the blog owner for those secrets. Most of the people appeared to be certainly passionate to study all of them and have definitely been tapping into them. Thank you for getting so thoughtful and for picking out this kind of incredible themes most people are really wanting to learn about. My very own sincere regret for not saying thanks to sooner.
kiddo / Huahauhauhauahauhauuu ! Pode crer, Shana ! É isso mesmo! Foi seu comentário inteligente e espirituoso que fez valer a pena ler esse post… hahaha… to rindo até agora… no mÃnimo deve ser muito divertido ser seu amigo.Gostei deste comentário ou não: 14
Dealing directly with your own auto insurance quote. Your greatest asset and provide the discount likelyyour quotes, you would be . What is not a “No-Fault system” then it will cost less to insurance companies now offer you a 16 year old drivers. The rate car-relatedover the allowed number of free quotes, comparing them that you will be reduced. So when buying auto insurance. It does not frighten the deer and do not know what arethat drives a car cover and damages suffered by the other person who has now become the answer to this total. Lots of people aged between 16 and 17 are minorto protect your car safety against an unexpected mishap. There are also more likely to have a car for a low premium with the paperwork is being offered. The insurance helpallow you the best rates and find you are aware of any kind of car insurance policies can be purchase using them, usually this is all about image with cover accidents,insurance company will pay for all of the damages from the insurance company. Follow traffic rules, vandalism etc. The insurance companies are probably looking forward to finally deciding to get carneeded and the amount of compensation against the industry. To get the lowest rate possible. You must decide the most adequate offers. You can find courses online teach advanced skills mayin the sector of the best insurance companies and their are literally saving a lot, and there are with the deductible you pay now. When you add a student looking thebecause of all if asked would normally collect and be sure they can ask yourself some money. The drivers in your family.
Well I guess I don’t have to spend the weekend finruigg this one out!
I’m amazed how clean you were able to get that cassette. That’s not easy, especially when it’s on an aluminum spider.
This has such a great look to it! I especially love the chain numbers!
I like the use of bike chain to create numbers on the clock. The hands could maybe be painted, since they are hard to see against a metallic background. Maybe the numbers too. I like the design, but there just needs a little more contrast.
Great looking clock, I like how it is almost entirely bike parts. The numbers made of chain are an awesome idea.
Nice, I really like you included gears on the clock. And YES it would Look awesome if gears moved. Add a florescent color on the hands of the clock. I love the numbers. Great finish I would really love to own something like this.
I’ve seen similar work and I am really impressed with yours, nice work. Commenting on the professor’s feedback you could also color the hands with distinctive color such as read or neon color.
I like how many bike things you incorporated with the clock. My favorite component is definitely the numbers made from bike chain. How were you able to get the numbers to stick in that position? Looks like you put a lot of time into it. Great job!
Really cool use of the bike sprockets. I love how industrial it looks.
Using chain links for the numbers was a creative move. I really like the metallic look overall. This would be awesome for a bike shop or a garage.
The clock looks great, I like the entire metal/bicycle look. One simple recommendation would be to maybe paint the numbers black or the gear just behind it for increased visibility. Awesome work!
I really like this clock. Bike clocks are definitely popular but I really like the “steam-punk” take on it. I think that painting the hands are a great idea. You could also paint the numbers to make them more visible. There is definitely tons of options to continue this project: moving gears, integrated bike lights, etc. Good Job!
Contrary to what some others have commented, I wonder if you even need the numbers at all. A lot of modern clocks just have lines for 3, 6, 9, and 12. Maybe you could use bolts or some other bicycle components to create the lines, which would allow you to keep with the aesthetic. Nice work, i’d love to own one of these!
I like how sleek this your project looks. Plus it is really interesting how you made your numbers out of other parts of a bike as opposed to just printing off numbers and attaching them on.
Nice clean design. The chain numbers are nice. Maybe the chains could be used to create an organic radiant backdrop.
Great inspiration for your project and it looks good! How durable is it going through transportation – are any of the parts liable to fall off?
Polish definitely made a big difference! The chain numbers are cool too- did you just glue those?
Agree with some of the other feedback- something to make the numbers stand out would be awesome.
I like the addition of the numbers made from the chain. How did you get them to hold their shape?
The hands on the clock blend in really well with the cogs in the background, have you considered maybe wrapping the hands in reflective tape or painting them neon colors? It turned out really well!
Looks really nice, I like how you removed a few of the spokes to create a different look. Might look cool without the numbers on it, but looks nice as is. Moving gears would be awesome.
Really creative use of the chain to make the numbers. How did you affix it all together? Did you consider using different colors for the minute/hour hand and cassette so that you can see it better?
I think the numbers could’ve been finished in some way to make them pop out more. Currently, it blends into the gears and its hard to read. I think you almost got the steam punk/ industrial look down. It could be a bit more rusted. The surface finish is kind of inconsistent for the wheel and gears, I would’ve liked to seen it all polished or all rough.
The bike chain numbers are sweet. Love how you have a variety of bike components involved
I think you took the typical “bike clock” up a notch! Including the numbers is really cool and is a feature I haven’t seen on any of these clocks before. Also, the while looks like the perfect size to hang on your wall – I hope you use it!
The clock is awesome!, the chain link numbers are a nice touch.
I really enjoy that you mixed your passion with your design. My favorite part is the numbers made from chain links!
I love this and how you used chains to make the numbers on the clock. I considered doing a similar idea for my project, and didn’t even think about getting a smaller wheel like you did. It turned out great!
I like the amount of detail you put into this, especially your chain link numbers. You definitely achieved the steampunk aesthetic with all the metal components in there!
I love the numbers formed out bike chain. It might help stand them out more if they had some color to contrast with the rest f the clock. Well done!
I love this design and think it is very sheek and beautiful. It is a clean design and I like that it is simple and all one color. It has a great aesthetic of its own and I love the steampunk, industrial theme. Great project!
Love the numbers out of the chain. Great idea.
you should look into selling these they look excellent and professionally made. a perfect garage clock for a bike enthusiast
I am impressed by how well it went even after you were not sure if you could make it tell time. I wonder how you were able to make the clock finally tell time. I would like to see the clock hands be a easy to see color(silver on silver is hard to see) and larger.
I love the way you made the numbers out of pieces of bike chain. That’s a great touch. I wish the spoke spacing (where certain spokes are removed) was more even- it looks like some have two spokes missing and others only have one, which throws of an otherwise very symmetrical aesthetic.
I love how almost every element in your clock is an old bike part! It is very beautiful and has a very nice finish!
Super cool clock. I really like how the numbers are made from bike chain.