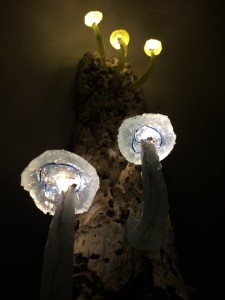
I was inspired by my friend Davis Thompson. Several months ago he started constructing mushroom lamps. From what I saw, he mainly was using thick bark. Additionally his mushrooms were dyed to look realistic. They were various shades of brown and were placed in natural forming patches together, sticking out of the bark. Granted the “realistic” nature aesthetic is beautiful, I started to imagine what the lamp might look like with more radical colors and strange styles of wood.
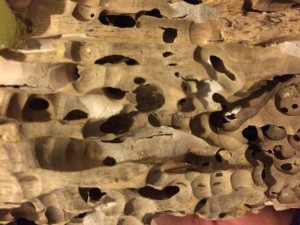
For Thanksgiving, I drove out to Filo, in Northern California to visit a friend on an Ashram. One night I ended up camping on the beach, the sound of waves violently crashing down on the rocks and sand left various wood scraps behind. While walking along the shore I stumbled across an incredible piece of driftwood. When I saw it, I knew it would be used for something cool. As you can see in the pictures, the wood has dozens of holes. I thought about Davis’ lamps and the idea struck that this could be the base of a very unique lamp.
The upcycling project became the perfect opportunity to utilize the wood. Also, I wanted to learn how to solder and relearn circuitry. I have never previously taken an engineering class, especially one where we design our own projects from start to finish. Honestly, I did not give too much thought about the process before I started working.
Based off Davis’ creations, I knew the materials I required; LEDs, wire, solder, resistors, silicone, wood, glue, a switch, a 3-AA battery pack (to add up to 4.5 volts), the batteries, and dye.
The ideal design process would have involved fully thinking through the idea before construction and perhaps a drawn out plan. I did not do these things, and so when things went wrong, I was unprepared and had to wing it.
With some advice from Davis, and the donation of extra materials he had, I was off building.
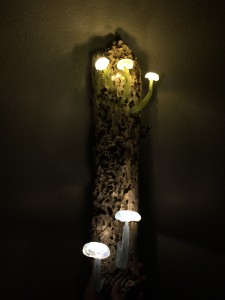
The wood has a pale tint to it. I figured it would look cool with light/see-through-ish blue and green. I also ended up adding some white dye to make the mushrooms a little more cloudy, because the silicone is completely see-through.
The Building Process:
Since the wood was found on a beach, the first objective was to get the copious amounts of sand and pebbles out of the holes. I used compressed (moisture-free) gas to blow out the sand.
Second, I soldered wire and a resistor to each LED. I stripped paperclips and used that metal as one of the wires in each light, since they are more durable and I could manipulate their form (used to bend the mushrooms).
The third thing I did was form the mushrooms. There are two parts. the stems, and the caps. The mushrooms are formed out of silicone. The silicone starts as a gooey substance. I added the dyes I wanted and mixed it up. To form the stems I placed the wires and LED in saran wrap and then covered the wire/resistor with the dyed silicone and folded the plastic wrap all the way around. With my fingers I pinched the silicone into place (to form the stems) surrounding the wires. To form the caps I took a blob of the dyed silicone and put it into plastic wrap and formed a circle. Then I pressed the circle against small rounded objects, such as the backs of spoons to form the cap shape. I left the mushrooms to dry for 24-48 hours.
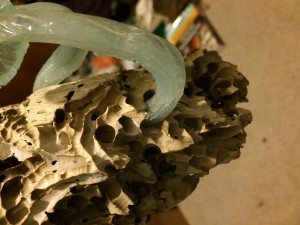
Next, I carefully drilled 5 holes through the wood, specifically using already existing holes to make the mushrooms coming out look more organic. I figured it would look cool to have two groups of mushrooms, the blue at the bottom and the green closer to the top of the wood. Because the wood was rather fragile, I first used a small drill bit and then used one of the necessary size to fit the wires through.
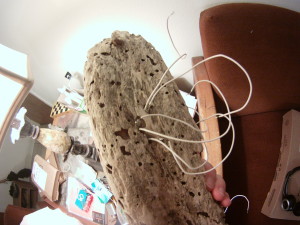
Note: After I drilled the holes, I realized some of the wires were not long enough to reach the battery pack, so I had to solder on extensions. If I had designed it better, I would have measured out how much wire was necessary from the beginning and not have to deal with such issues.
Once the wires were through to the back of the wood, I soldered them all together to the battery pack (polar circuit). To make sure I was soldering the correct wire to the corresponding battery wire, I had to test the lights first and marking which wires attached to which side to make the LED function (since the circuit only works in one direction). I also had to attach the switch, which I almost forgot about.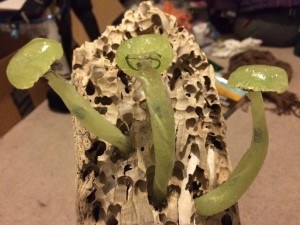
I then used a hot glue gun to fix the battery pack and switch to the wood. I also had too much wire reaching in various directions on the back so I glued them down.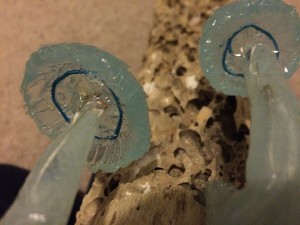
The final step of the main construction was attaching the mushroom caps. I had made sure to leave some of the metal from the resistors sticking up, above the LEDs so I could attach the caps. I formed rings of appropriate size and color, from paperclips and soldered them to the sticking out resistor metal bits. The last thing to do was place the caps on their respective paperclip supports and add some silicone to the insides in order to glue the caps to the paperclip bases.
The day before projects were due, I realized I did not design a way mounting it to a wall. The back of the wood is a thin layer and is mostly hollow past that. I very carefully screwed in some metal enclosed screws I found and tied some twine through. You can hang the lamp on practically anything.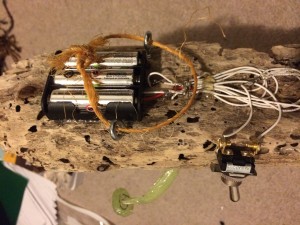
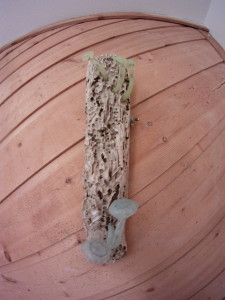
I plan to hang the lamp in my room. I could use some ambient light. It’s not super bright, but I like to hang out in bark space with dim colorful lights, so this lamp will perfectly suit my needs.
The Aesthetic:
If I had to categorize the aesthetic, I would place it in some subcategory of psychedelic. The colorful mushrooms are the main reason for this. I was going for a playful, light psychedelic feel. I think I more or less achieved my aim. The holes in the wood add a uniqueness to the creation.

3 Comments. Leave new
The lamp looks fantastic! I like the natural aesthetic created in the drift wood; fun fact those were probably created by sea worms. The molding of the silicon was a cool way to use bio inspiration in your Upcycle project. My only small suggestion is that you could put some moss around the perimeter of the wood to hide the wiring a little bit. The psychedelic feel does come up when the lamp is on, but looks very natural when the lamp is off.
The end product looks great! I like the attention to detail that you put into it but attaching the mushrooms through already existing holes and wiring the LED’s through the inside. It makes the piece stand out as a composed end product, but also adds that dynamics component of having lights that can turn on (very similar application to things I have been thinking about for my final project). The only thing I was wondering, are you worried about heat dissipation at all from the LED when it is on and how that will effect the silicon? I have no idea if it is enough heat to damage the piece but definitely something to think about!
I really like the look of this, and as I guy with a terrarium in his room I’d totally use this lamp. See if you can scrounge up a wall wart adapter. They’re pretty much free. Just be sure to test the voltage because it’s often higher than what’s on the label.