Overall I am extremely happy with the way my project bike turned out. I started this project with zero experience with bikes but a burning passion to learn the in’s and out’s and fulfill my dream of redesigning my own 80’s sportster into a cafe racer/brat bike. Although the bike is not 100% completed, and realistically won’t be until the end of summer, my progress is heading in the right direction and I have created the perfect base for a cafe racer. I have accomplished so much over these two months: learning to disassemble the bike down to the basics, refurbishing and tuning parts in order to bring life back to the bike, modifying the frame and overall look of the bike, bargain shopping, reusing, and scavenging parts to complete the build, and rebuilding it all from the ground up using intuition and the help of the friendly internet. I plan to continue working on this bike this summer, upgrading performance parts and perfecting designs until my final vision is completed, and am happy to join the cafe culture that values hard work and creativity to turn dreams and ideas into reality. #builtnotbought
The build:
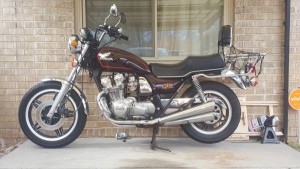
Above is the original bike I found for $1000 on craigslist. A 1980 Honda cb750 Custom. The bike was running, but definitely needed a tune up and makeover before it would fulfill it’s full potential.
The first step was to strip the bike of everything that wouldn’t make it start, go, and stop. This involved removing all the fancy luggage carriers, an enormous wind screen (not pictured), the side panels, the over-sized speedometer and tachometer, the retro handlebars, along with the gas tank, battery, and seat.
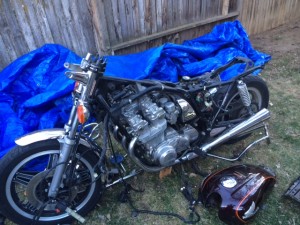
This left the bike in the nude but would let me start from scratch in order to redesign and visualize the look I wanted to obtain. Since the bike was stripped, I figured this would be the best time get rid of the electrical system. I first disconnected and stripped the entire wiring harness. Due to the old age of the bike, many of the wires were started to corrode and lose there tubing protection so I decided I would need to re-wire it from scratch. Unfortunately, I ended up not having enough time to finish this and but will most likely finish it within the first weeks of summer. The original harness was overly complex so I plan to re build it with only the essentials such as ignition, brake lights, headlights, and turn signals.
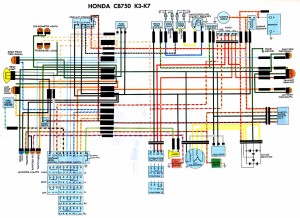
Above is the original wiring diagram… unnecessary chaos and extremely confusing especially for a mechanical engineer who runs as the first sight of circuits or chemistry. Below is an updated diagram I plan on following come summer.
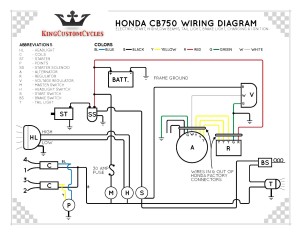
This new wiring harness will be capable of “hiding” a lot better. Along with this, I purchased a modern battery that is extremely small compared to the original. This new battery will easily be hidden and gives the bike a lighter look by opening up the triangular frame towards the rear.
Next was to strip the paint off the tank, and start working the seat. The paint took a few hours. Thanks to some airplane paint stripper from McGukins I was able to peel most of the paint off the tank after two or three coats. The rest was removed by hand through meticulous scrapping with a sharp edge. After stripping the tank down to bare metal I turned my focus towards perhaps the most important look of a cafe racer: the seat. I first had to hand saw the back of the frame off using a hacksaw. This helped give the bike a smaller, and lighter feel along with provided the right structure for a custom seat. I initially thought of making my own seat from scrap but after some research, I found it was cheaper to just buy one already made online. I was able to get a seat from Dime City Cycles for about $100. The flat tan leather seat gives the bike an excellent look while the upkick at the ends helps frame the tail and blend the rider into the natural shape of the bike. The cafe style comes from the straight and flat look of the bike. The seat helped achieve this look but due to a larger front wheel than the rear, I decided to drop the front forks about an inch. This helped level off the entire bike. I plan purchase a new set of equally sized wheels this summer once I have a job to afford them.
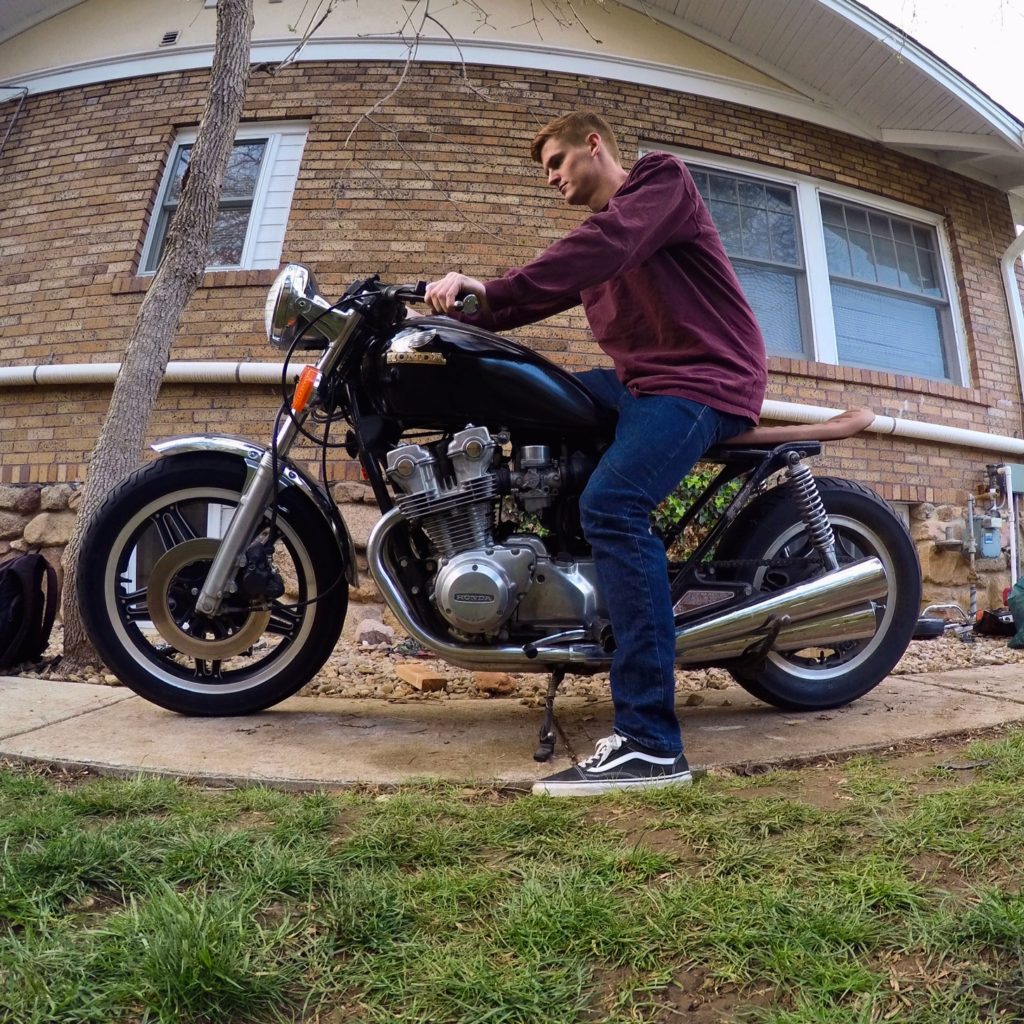
To top it all off, I found some Renthal ultra-low handlebars. Many cafe racers either turn their original bars upside down or buy clip on’s which attach to the front forks below the triple tree, but I personally preferred the low rise dirt bike bars. This helped give the cafe racer more of a brat bike look which I absolutely loved. The positioning and wide stance of the bars almost helped create a perfect riding stance for optimal handling ability. Below is a picture of the bike after the new modifications.
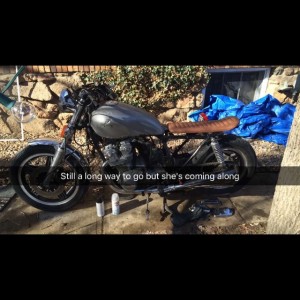
Next, I focused on getting the tank painted. Originally I wanted to keep the bare metal look but due to some rust patches I had to fix I figured a black coat would look best. I threw a few layers of high quality spray paint on it over the course of a few days. During the drying time I working on tuning up the carbs and fixing the filter system. The carbs needed a minimal clean but I think I was able to get them tuned to altitude while also adjusting the air filtering system back up to par. I was able to connect the battery briefly to test it and the beast sounded brand new again.
Before finishing the painting I was able to restore the original Honda wing decals from the tank. After stripped the paint and polishing them up, I was happy to find the wings and Honda logo were a nice shiny silver, outlined by a gold border. I loved the accent it gave the bike and thought it went extremely well with the tan leather seat as well as helping to contribute to the classic simple color scheme. Instead of buying new grips, I reused the original ones and stripped away the bulky foam padding. This helped keep the thin low profile look of the bike and the silver accents helped contribute to the overall color scheme of the bike. I plan to replace these with some hand wrapped leather strips eventually this summer. Below are some detailed pictures of the final look!
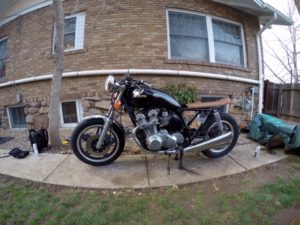


Budget & Cost:
Since this was a project I wanted to do regardless of this class of not I didn’t really have a strict budget. Below was my original plan
Bike $2000
Extra parts $500
In the end I got a deal on the bike for only $1000 and spent less than$200 on extra parts by bargain shopping and reusing original parts.
Moving forward:
Overall I am extremely pleased with my final design for this class. Building a bike is extremely time consuming though, especially without the proper tools and garage, so I wasn’t able to finish it to my final desire. This was expected though and I believe I did enough to change the overall aesthetic of the bike for this class. Below are some of the builds I based my project off of.
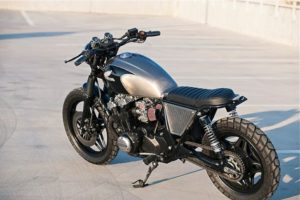

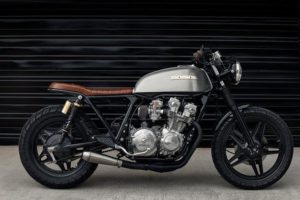
I plan to customize the seat I bought a bit in order to get it to fit more flush with the curves of the frame. I also need to weld a loop on the back of the bike in order to match the shaped of the rounded seat. Additionally, I plan to upgrade some parts for performance. I want to buy sliding carbs and attach pod filters in order to make the bike look even slimmer while increasing it’s horse power immensely. Along the lines of performance, I will also be replacing the rear suspension with some modern adjustable shocks, and throw on a pair of fresh new tires on some blacked out wheels. I plan on getting some “knobby” or deep tread tires in order to help further the brat bike look. The original exhaust system is a 4 to 4 ,old school cone design but I plan to replace it with a 4 into 1 assembly further helping the performance and simplistic look of the bike as well as giving the beast a new roar. I’m debating looking for a sharper, more angular tank from a similar model and again stripping it down to bare metal but this time keeping the raw metal look or painting it a flat white. Finally I will top it off with some modern lights, low profile turn signals, and some sleek and small speedometers and tachometers.
Most of the hard work is behind me, the rest will be tedious but more costly. Thanks to this class and my passion to start this project though, I am well in the right direction and off on a running start to complete a dream of mine. If you’ve read up to this point thanks for following my project and please leave me any feedback and suggestions! I’m all open ears to improving my design in anyway I can.

4 Comments. Leave new
It’s impressive just to see how far you’ve come already from the original photo. I definitely would go with the straight exhaust and keep working on the paint job- it looks like there are some scratches below the seat. Really nice project, though- awesome that you could pretty much use class as an excuse to pursue your passion!
Wow, this looks like such an incredible project! I know that there are a number of steps that you still have left, but because you have so much passion for this project, since it is a dream you’ve always had, I’m sure it will end up looking even better than it did before. Maybe the weather will improve so you can consistently work on it. I love the simplicity of the design!
This has been an ambitious project and it sounds like you still have a lot that you would like to do to truly customize the bike to meet your design ideas. I agree with that the exhaust and tIre modifications you have in mind will really bring the bike fully into the racer aesthetic. It is difficult to appreciate the quality of work you have put into this project from photos, but it appears that you have done a great paint job and been attentive to details. I enjoyed your comment about a “mechanical engineer who runs at the first sight of circuits or chemistry.” It seems to me that you have done a nice job simplifying the overly complex wiring and created a design that is more maintainable. Above you stated that the hard work was behind you, but I’m not really sure that is true. As I said, this is an ambitious project and there is still a lot you want to do with the bike. I wish you the best of luck with all of it! And please wear a helmet!!
I am really impressed that you don’t have experience with bikes, but your passion drove you to learn during the process of this project! Also, it’s great you chose something to work on that you enjoy and that you would like to continue this project after the school year. You’ve already spent $1000 on the bike itself? How much more do you think you are going to end up spending on it? Also, I can’t imagine how long it would take to remove all the paint! That takes patience my friend! You said that you are going to get new wheels for the bike. Are there specific wheels this bike needs and is a certain tread better than another? Are you hoping to road trip with this bike or just use it locally. ? Overall awesome work, and keep it up!